จัดทุกอย่างให้เป็นระเบียบอยู่เสมอด้วยคอลเล็กชัน
บันทึกและจัดหมวดหมู่เนื้อหาตามค่ากำหนดของคุณ
เลือกขั้นตอนการลงชื่อสมัครใช้
การตัดสินใจที่สําคัญเกี่ยวกับ AFP คือการเลือกขั้นตอนการลงชื่อสมัครใช้เพื่อเริ่มต้นใช้งานของผู้ใช้ การลงชื่อสมัครใช้มีไว้เพื่อให้ผู้ใช้สร้างบัญชี AdSense ใหม่ (หรือลงชื่อเข้าใช้บัญชี AdSense ที่มีอยู่) และลิงก์บัญชีกับแพลตฟอร์มของคุณ ตัวเลือกที่คุณเลือกจะขึ้นอยู่กับทรัพยากรทางเทคนิคที่คุณต้องการลงทุนในการพัฒนาและประสบการณ์การเริ่มต้นใช้งานที่คุณต้องการมอบให้แก่ผู้ใช้
ตัวเลือกที่ 1: ขั้นตอนแบบไม่มี API
ตัวเลือกที่ 1 ใช้ทรัพยากรทางเทคนิคน้อยที่สุดเนื่องจากไม่ได้ใช้ API คุณจะต้องมีเพียงนักพัฒนาเว็บเพื่อสร้างอินเทอร์เฟซผู้ใช้ภายในแพลตฟอร์มเท่านั้น อย่างไรก็ตาม ข้อเสียคือตัวเลือกนี้กำหนดให้ผู้ใช้ต้องดำเนินการตามขั้นตอนเพิ่มเติมเพื่อลงชื่อสมัครใช้ให้เสร็จสมบูรณ์
ภาพรวมของขั้นตอนการลงชื่อสมัครใช้แบบไม่มี API

การใช้งาน
หากต้องการใช้ขั้นตอนการลงชื่อสมัครใช้แบบไม่มี API คุณจะต้องระบุคอมโพเนนต์ UI เพื่อสร้างรายได้จาก AdSense เช่น ในหน้าเว็บที่ผู้ใช้เข้าถึง "โปรไฟล์ผู้ใช้" หรือ "การตั้งค่าบัญชี" ให้เพิ่มหน้าการสร้างรายได้ที่มีข้อมูลต่อไปนี้
- คำอธิบายสั้นๆ เกี่ยวกับ AdSense และวิธีที่ AdSense โต้ตอบกับแพลตฟอร์มของคุณ ผู้ใช้ควรทราบว่าตนกําลังลงชื่อสมัครใช้บัญชี AdSense ใหม่หรือใช้บัญชี AdSense ที่มีอยู่
- ข้อมูลเกี่ยวกับนโยบายโปรแกรม AdSense ผู้ใช้ทุกคนที่ลงชื่อสมัครใช้ควรทราบเกี่ยวกับโปรแกรม AdSense และนโยบายของโปรแกรม
- ส่วนแบ่งรายได้ที่ผู้ใช้จะได้รับ คุณควรแสดงให้ผู้ใช้ทราบอย่างชัดเจนว่าเปอร์เซ็นต์รายได้จาก AdSense ที่คุณเก็บไว้และเปอร์เซ็นต์ที่ผู้เผยแพร่โฆษณาเก็บไว้ นอกจากนี้ AdSense จะแสดงข้อมูลนี้ในระหว่างขั้นตอนการเริ่มต้นใช้งานด้วย
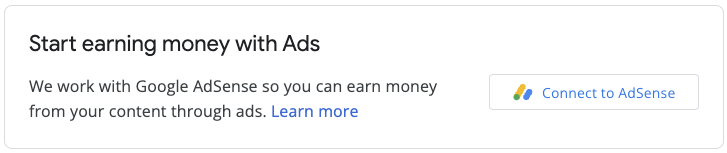
- ปุ่ม "เชื่อมต่อ AdSense" ปุ่มนี้จะเปิดแท็บใหม่และนําผู้ใช้ไปยังหน้าที่เหมาะสมใน AdSense โดยขึ้นอยู่กับว่าผู้ใช้มีบัญชี AdSense อยู่แล้วหรือไม่
ตัวอย่าง URL ที่กําหนดเอง
https://adsense.google.com/adsense/signup?url={platform-site-url}
หมายเหตุ: Google จะระบุ URL ของหน้าลงชื่อสมัครใช้ที่กําหนดเองและช่วยคุณกําหนดเนื้อหาของตัวแปร URL
- กล่องป้อนข้อมูลเพื่อรวบรวมและจัดเก็บรหัสผู้เผยแพร่โฆษณา AdSense ของผู้ใช้ หลังจากผู้ใช้ไปที่ลิงก์ด้านบนแล้ว จะต้องคัดลอกและวางรหัสผู้เผยแพร่โฆษณาลงในกล่องป้อนข้อมูลนี้
สำคัญ: คุณจำเป็นต้องจัดเก็บรหัสผู้เผยแพร่โฆษณาของผู้ใช้เพื่อให้ติดแท็กหน้าเนื้อหาของผู้ใช้ด้วยข้อมูลผู้เผยแพร่โฆษณาที่ถูกต้องได้ ดูข้อมูลเพิ่มเติมที่หัวข้อเพิ่มแท็กโฆษณาลงในหน้าเว็บ
ตรวจสอบว่าสตริงที่ป้อนนั้นถูกต้อง รูปแบบของรหัสผู้เผยแพร่โฆษณาคือ pub-1234567890987654
หรือในรูปแบบนิพจน์ทั่วไปคือ pub\-\d{16}
สำคัญ: ผู้ใช้ AdSense บางรายอาจวางรหัสผู้เผยแพร่โฆษณาโดยไม่คลิกปุ่ม "เชื่อมต่อ AdSense" โปรดแจ้งให้ผู้ใช้ทราบว่าหน้าเว็บไซต์ในบัญชี AdSense ต้องมีโดเมนแพลตฟอร์มที่แสดงอยู่ก่อนจึงจะแสดงโฆษณาได้ ซึ่งเป็นวัตถุประสงค์หลักของปุ่มนี้
- สถานะการติดแท็กของผู้ใช้ ผู้ใช้ต้องการทราบว่ามีการวางโค้ดโฆษณาในหน้าเว็บของตนหรือไม่ แจ้งให้ผู้ใช้ทราบเมื่อคุณติดแท็กหน้าเว็บด้วยรหัสผู้เผยแพร่โฆษณา AdSense ของผู้ใช้ เพื่อเป็นส่วนหนึ่งของประสบการณ์ของผู้ใช้ นอกจากนี้ คุณยังป้อนเมตาแท็กบัญชีย่อยได้ ซึ่งจะช่วย AdSense ในขั้นตอนการยืนยันเว็บไซต์ ซึ่งทำให้ไม่จําเป็นต้องเผยแพร่แท็กโฆษณาในหน้าเว็บในนามของผู้ใช้
ตัวเลือกที่ 2: ขั้นตอนการเรียกใช้ API แบบช่วยบางส่วน
ตัวเลือกที่ 2 ใช้ AdSense Management API เพื่อลดความซับซ้อนของขั้นตอนการลงชื่อสมัครใช้ ซึ่งต้องใช้ทรัพยากรทางเทคนิคมากขึ้น แต่ลดจำนวนขั้นตอนที่ผู้ใช้ต้องดำเนินการเพื่อลงชื่อสมัครใช้ AdSense
ภาพรวมของขั้นตอน API แบบช่วยบางส่วน

การใช้งาน
หากต้องการใช้ขั้นตอนการลงชื่อสมัครใช้แบบให้ความช่วยเหลือบางส่วนด้วย API คุณจะต้องระบุคอมโพเนนต์ UI เพื่อสร้างรายได้จาก AdSense เช่น ในหน้าเว็บที่ผู้ใช้เข้าถึง "โปรไฟล์ผู้ใช้" หรือ "การตั้งค่าบัญชี" ให้เพิ่มหน้าการสร้างรายได้ที่มีข้อมูลต่อไปนี้
- คำอธิบายสั้นๆ เกี่ยวกับ AdSense และวิธีที่ AdSense โต้ตอบกับแพลตฟอร์มของคุณ ผู้ใช้ควรตระหนักดีว่ากําลังลงชื่อสมัครใช้บัญชี Google AdSense หรือใช้บัญชี AdSense ที่มีอยู่
- ข้อมูลเกี่ยวกับนโยบายโปรแกรม AdSense ผู้ใช้ทุกคนที่ลงชื่อสมัครใช้ควรทราบเกี่ยวกับโปรแกรม AdSense และนโยบายของโปรแกรม
- ส่วนแบ่งรายได้ที่ผู้ใช้จะได้รับ คุณควรแสดงให้ผู้ใช้ทราบอย่างชัดเจนว่าเปอร์เซ็นต์รายได้จาก AdSense ที่คุณเก็บไว้และเปอร์เซ็นต์ที่ผู้เผยแพร่โฆษณาเก็บไว้ นอกจากนี้ AdSense จะแสดงข้อมูลนี้ในระหว่างขั้นตอนการเริ่มต้นใช้งานด้วย
- ปุ่ม "เชื่อมต่อ AdSense" ปุ่มนี้จะให้สิทธิ์คุณในฐานะแพลตฟอร์มในการเข้าถึงข้อมูลบัญชีของลูกค้า AdSense โดยใช้ AdSense Management API โปรดทําตามวิธีการในเอกสารประกอบสําหรับนักพัฒนาซอฟต์แวร์เพื่อตั้งค่านี้ เมื่อใช้ API นี้ คุณจะทําขั้นตอนถัดไป 2 ขั้นตอนได้
- ใช้ AdSense Management API เพื่อรวบรวมรหัสผู้เผยแพร่โฆษณา AdSense ของผู้ใช้ ตรวจสอบว่าคุณตรวจสอบสตริงที่ป้อนแล้ว
รูปแบบของรหัสผู้เผยแพร่โฆษณาคือ pub-1234567890987654
หรือในรูปแบบนิพจน์ทั่วไปคือ pub\-\d{16}
สำคัญ: คุณจำเป็นต้องจัดเก็บรหัสผู้เผยแพร่โฆษณาของผู้ใช้เพื่อให้ติดแท็กหน้าเนื้อหาของผู้ใช้ด้วยข้อมูลผู้เผยแพร่โฆษณาที่ถูกต้องได้ ดูข้อมูลเพิ่มเติมที่เพิ่มแท็กโฆษณาลงในหน้าเว็บ
- ใช้ AdSense Management API เพื่อตรวจสอบว่าผู้ใช้ได้เพิ่มเว็บไซต์แพลตฟอร์มลงในบัญชี AdSense หรือไม่ หากยังไม่ได้ตั้งค่า ให้ขอให้ผู้ใช้ไปที่ลิงก์ด้านล่างเพื่อตั้งค่าให้เสร็จสมบูรณ์ ชื่อเว็บไซต์ที่คุณควรตรวจสอบใน API คือตัวแปร
{platform-site-url}
ในลิงก์ด้านล่าง
https://adsense.google.com/adsense/signup?url={platform-site-url}
หมายเหตุ: Google จะระบุ URL ของหน้าลงชื่อสมัครใช้ที่กำหนดเองให้คุณและช่วยคุณกำหนดเนื้อหาของตัวแปร URL
- - สถานะการติดแท็กของผู้ใช้ ผู้ใช้ต้องการทราบว่ามีการวางโค้ดโฆษณาในหน้าเว็บของตนหรือไม่ แจ้งให้ผู้ใช้ทราบเมื่อคุณติดแท็กหน้าเว็บด้วยรหัสผู้เผยแพร่โฆษณา AdSense ของผู้ใช้ เพื่อเป็นส่วนหนึ่งของประสบการณ์ของผู้ใช้ นอกจากนี้ คุณยังป้อนเมตาแท็กบัญชีย่อยได้ ซึ่งจะช่วย AdSense ในขั้นตอนการยืนยันเว็บไซต์ ซึ่งทำให้ไม่จําเป็นต้องเผยแพร่แท็กโฆษณาในหน้าเว็บในนามของผู้ใช้
ตัวเลือกที่ 3: การเชื่อมต่อแบบฝัง
การรวม Connect จะช่วยลดความซับซ้อนทั้งหมดในการจัดการบัญชี AdSense ในสภาวะต่างๆ ขั้นตอนการเชื่อมต่อแบบฝังจะแสดงประสบการณ์การเริ่มต้นใช้งานที่ปรับแต่งให้เหมาะกับผู้ใช้แต่ละรายโดยขึ้นอยู่กับบัญชี ลูกค้าโฆษณา และสถานะเว็บไซต์ของบัญชี AdSense ของผู้ใช้รายนั้นๆ คุณจึงไม่ต้องดำเนินการใดๆ

การติดตั้งใช้งานเกี่ยวข้องกับไลบรารี JavaScript, div ว่างที่ AdSense จะแสดงผลวิดเจ็ตการลงชื่อสมัครใช้ และฟังก์ชัน Callback บางรายการ ซึ่งจะช่วยให้คุณบันทึกรหัสผู้เผยแพร่โฆษณาได้เมื่อผู้ใช้ทำตามขั้นตอนการลงชื่อสมัครใช้จนเสร็จสมบูรณ์ คุณสามารถใช้ AdSense Management API เพิ่มเติมเพื่อเพิ่มประสบการณ์การใช้งาน เช่น ดึงข้อมูลหน่วยโฆษณาหรือสถานะของโฆษณาอัตโนมัติ
ดูข้อมูลเพิ่มเติมเกี่ยวกับ Embedded Connect
เนื้อหาของหน้าเว็บนี้ได้รับอนุญาตภายใต้ใบอนุญาตที่ต้องระบุที่มาของครีเอทีฟคอมมอนส์ 4.0 และตัวอย่างโค้ดได้รับอนุญาตภายใต้ใบอนุญาต Apache 2.0 เว้นแต่จะระบุไว้เป็นอย่างอื่น โปรดดูรายละเอียดที่นโยบายเว็บไซต์ Google Developers Java เป็นเครื่องหมายการค้าจดทะเบียนของ Oracle และ/หรือบริษัทในเครือ
[null,null,[],[[["\u003cp\u003eAdSense for Platforms (AFP) offers three signup flow options to onboard users, each with varying technical requirements and user experiences.\u003c/p\u003e\n"],["\u003cp\u003eThe API-less flow is the simplest to implement but requires more user steps; the Semi-assisted API flow utilizes the AdSense Management API for a smoother experience; and Embedded Connect provides a fully customized and automated signup process.\u003c/p\u003e\n"],["\u003cp\u003eAll signup flows necessitate clear communication with users about AdSense policies, revenue share, and tagging status, ensuring transparency and understanding.\u003c/p\u003e\n"],["\u003cp\u003eRegardless of the chosen flow, securely storing the user's AdSense Publisher ID is crucial for proper ad serving and revenue tracking.\u003c/p\u003e\n"],["\u003cp\u003eAFP provides flexibility for platforms to tailor the signup experience to their specific needs and technical capabilities while adhering to AdSense guidelines.\u003c/p\u003e\n"]]],["The document outlines three signup flows for integrating AdSense into a platform. The API-less flow requires users to manually connect their AdSense account via a link and input their publisher ID. The semi-assisted API flow utilizes the AdSense Management API to retrieve the user's publisher ID and check their site status, reducing user steps. Embedded Connect, a third option, uses a JavaScript library for a streamlined experience and handles complex account states automatically. All options involve displaying AdSense policies and revenue sharing information.\n"],null,["Choose a sign up flow\n---------------------\n\nAn important decision with AFP is to choose a sign up flow to onboard your users. The purpose of the sign up is to allow your users to create a new AdSense account (or sign in to an existing AdSense account) and link it to your platform. The option you choose will depend on the technical resources you want to invest in development and the onboarding experience you want to provide for your users.\n\n### Option 1: API-less flow\n\nOption 1 requires the fewest technical resources as it doesn't use an API. You will only need a web developer to build the user interface within your platform. However, the trade-off is that this option requires your users to take more steps to complete the signup flow.\n\n#### Overview of the API-less signup flow\n\n#### Implementation\n\nTo implement an API-less signup flow, you need to provide a UI component for AdSense monetization. For example, on the page where your users access their \"user profile\" or \"account settings\", add a monetization page that includes the following:\n\n- A short description of AdSense and how it interacts with your platform. Users should be completely aware that they're either signing up for a new AdSense account or using their existing AdSense account.\n- Information about the [AdSense Program policies](https://support.google.com/adsense/answer/48182). All users who sign up should be aware of the AdSense Program and its policies.\n- The revenue share that your users will receive. It's important to explicitly show users what percentage of the AdSense revenue you will keep and what percentage the publisher will keep. AdSense will additionally show this information during the onboarding flow.\n- A \"Connect AdSense\" button. This button will open a new tab and take the user to the correct page in AdSense depending on whether or not they have an existing AdSense account. \n Example custom URL: \n `https://adsense.google.com/adsense/signup?url={platform-site-url}` \n **Note:** Google will provide you with the URL of the custom signup page, and help you define the contents of the URL variable.\n- An input box to collect and store the user's AdSense publisher ID. After a user visits the link above, they will need to copy and paste their publisher ID into this input box. \n **Important:** It's critical that you store the user's publisher ID so that you can tag the user's content pages with the correct publisher information. See the [Add the ad tag to your pages](/adsense/platforms/transparent/ad-tags) for more information. \n Make sure you validate the inputted string. The format of a publisher ID is: `pub-1234567890987654` \n Or in regex terms: `pub\\-\\d{16}` \n **Important:** Some AdSense users may paste their publisher ID without clicking on the \"Connect AdSense\" button. It's important to let users know that the **Sites** page in their AdSense account needs to have the platform domain listed before ads can be served. This is the primary purpose of this button.\n- The user's tagging status. Users will want to know whether their ad code has been placed on their pages or not. As part of the user experience, let your users know when you've tagged their pages with their AdSense publisher ID. You can additionally populate the [child account meta tag](/adsense/platforms/transparent/meta-tags#child_account) which will assist AdSense during the site verification steps. This also removes the need to publish ad tags on their pages on the user's behalf.\n\n### Option 2: Semi-assisted API flow\n\nOption 2 uses the [AdSense Management API](https://developers.google.com/adsense/management) to slightly simplify the signup flow. It requires more technical resources but reduces the number of steps your users need to take to sign up for AdSense.\n\n#### Overview of the semi-assisted API flow\n\n#### Implementation\n\nTo implement a semi-assisted signup flow with an API, you need to provide a UI component for AdSense monetization. For example, on the page where your users access their \"user profile\" or \"account settings\", add a monetization page that includes the following:\n\n- A short description of AdSense and how it interacts with your platform. Users should be completely aware that they are signing up for a Google AdSense account, or using their existing AdSense account.\n- Information about the [AdSense Program policies](https://support.google.com/adsense/answer/48182). All users who sign up should be aware of the AdSense Program and its policies.\n- The revenue share that your users will receive. It's important to explicitly show users what percentage of the AdSense revenue you will keep and what percentage the publisher will keep. AdSense will additionally show this information during the onboarding flow.\n- A \"Connect AdSense\" button. This button will authorize you as the platform to access an AdSense customer's account information using the [AdSense Management API](https://developers.google.com/adsense/management). Please follow the instructions on our developer documentation to set this up. Using this API you can perform the next two steps.\n- Use the AdSense Management API to collect the user's AdSense publisher ID. Make sure you validate the inputted string. \n The format of a publisher ID is: `pub-1234567890987654` \n Or in regex terms: `pub\\-\\d{16}` \n **Important:** It's critical that you store the user's publisher ID so that you can tag the user's content pages with the correct publisher information. See the See the [Add the ad tag to your pages](/adsense/platforms/transparent/ad-tags) for more information.\n- Use the AdSense Management API to check if the user has added the platform site to their AdSense account. If not, ask the user to follow the link below to complete the set up. The name of the site you should check for in the API is the `{platform-site-url}` variable in the link below. \n `https://adsense.google.com/adsense/signup?url={platform-site-url}` \n **Note:** Google will provide you with the URL of the custom signup page, and help you define the contents of the url variable.\n- - The user's tagging status. Users will want to know whether their ad code has been placed on their pages or not. As part of the user experience, let your users know when you've tagged their pages with their AdSense publisher ID. You can additionally populate the [child account meta tag](/adsense/platforms/transparent/meta-tags#child_account) which will assist AdSense during the site verification steps. This also removes the need to publish ad tags on their pages on the user's behalf.\n\n### Option 3: Embedded Connect\n\nEmbedded Connect removes all the complexity of dealing with AdSense accounts in different states. Depending on the account, ad client and site statuses for a given user's AdSense account, the Embedded Connect flow will present a customized onboarding experience for each user so that you don't have to.\n\nThe implementation involves a JavaScript library, an empty div where AdSense will render a sign-up widget, and some callback functions which will allow you to save the publisher ID once the user has completed the sign-up flow. You can supplementally use the [AdSense Management API](/adsense/management) to augment the experience, for example by retrieving ad units or the state of Auto ads.\n\n[Learn more about Embedded Connect](/adsense/platforms/transparent/embedded-connect)"]]