1. Overview
This codelab will teach you how to modify an existing web video app to cast content on a Google Cast-enabled device.
What is Google Cast?
Google Cast allows users to cast content from a mobile device to a TV. Users can then use their mobile device as a remote control for media playback on the TV.
The Google Cast SDK lets you extend your app to control a TV or sound system. The Cast SDK allows you to add the necessary UI components based on the Google Cast Design Checklist.
The Google Cast Design Checklist is provided to make the Cast user experience simple and predictable across all supported platforms.
What are we going to be building?
When you have completed this codelab, you will have a Chrome web video app that will be able to Cast videos to a Google Cast device.
What you'll learn
- How to add the Google Cast SDK to a sample video app.
- How to add the Cast button for selecting a Google Cast device.
- How to connect to a Cast device and launch a media receiver.
- How to cast a video.
- How to integrate Cast Connect
What you'll need
- The latest Google Chrome browser.
- HTTPS hosting service such as Firebase Hosting or ngrok.
- A Google Cast device such as a Chromecast or Android TV configured with internet access.
- A TV or monitor with HDMI input.
- A Chromecast with Google TV is required to test Cast Connect integration but is optional for the rest of the Codelab. If you do not have one, feel free to skip the Add Cast Connect Support step, towards the end of this tutorial.
Experience
- You will need to have previous web development knowledge.
- You will also need previous knowledge of watching TV :)
How will you use this tutorial?
How would you rate your experience with building web apps?
How would you rate your experience with watching TV?
2. Get the sample code
You can download all the sample code to your computer...
and unpack the downloaded zip file.
3. Run the sample app
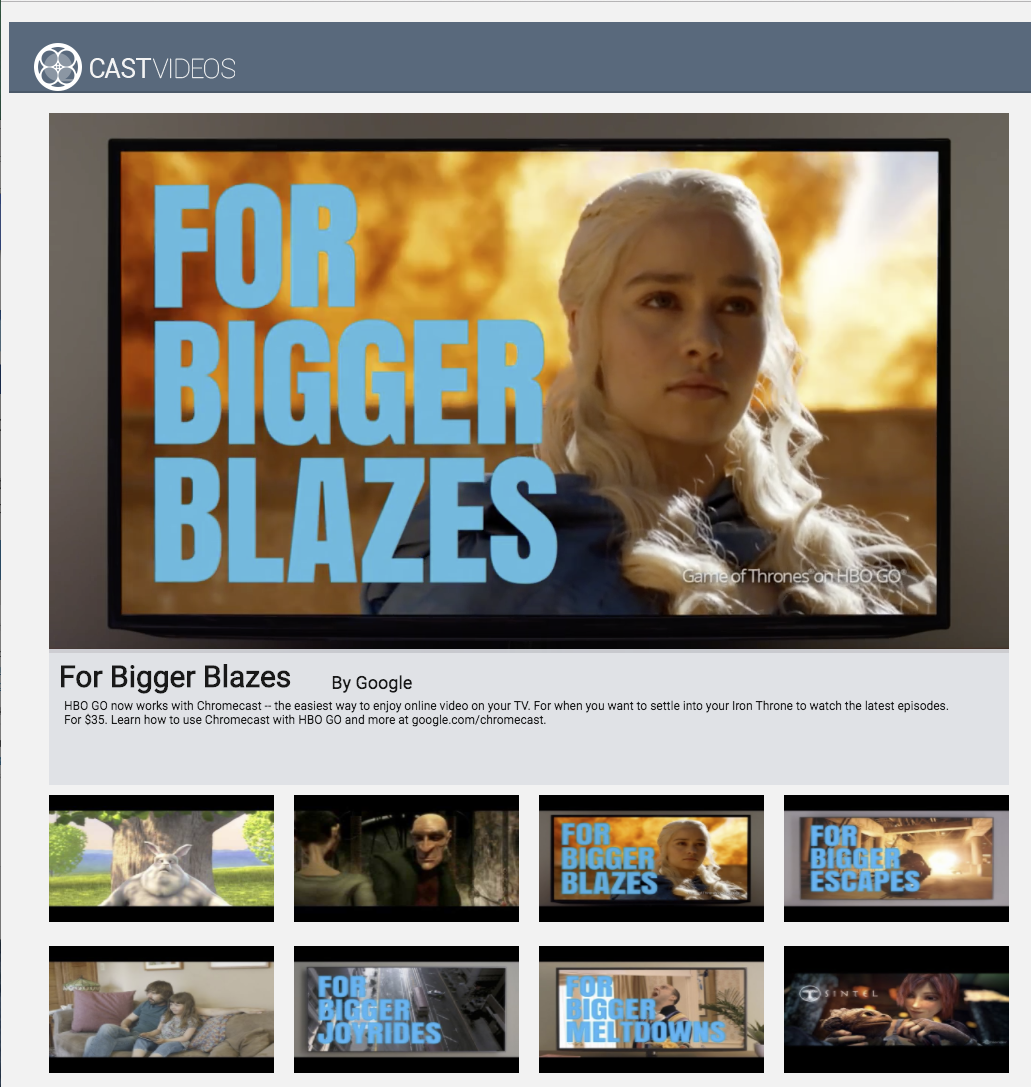
First, let's see what the completed sample app looks like. The app is a basic video player. The user can select a video from a list and can then play the video locally on the device or Cast it to a Google Cast device.
To be able to use the completed, it needs to be hosted.
If you don't have a server available to use, you can use Firebase Hosting or ngrok.
Run the server
Once you have the service of your choice set up, navigate to app-done and start your server.
In your browser, visit the https URL for the sample you hosted.
- You should see the video app appear.
- Click the Cast button and select your Google Cast device.
- Select a video, click on the play button.
- The video will start playing on your Google Cast device.
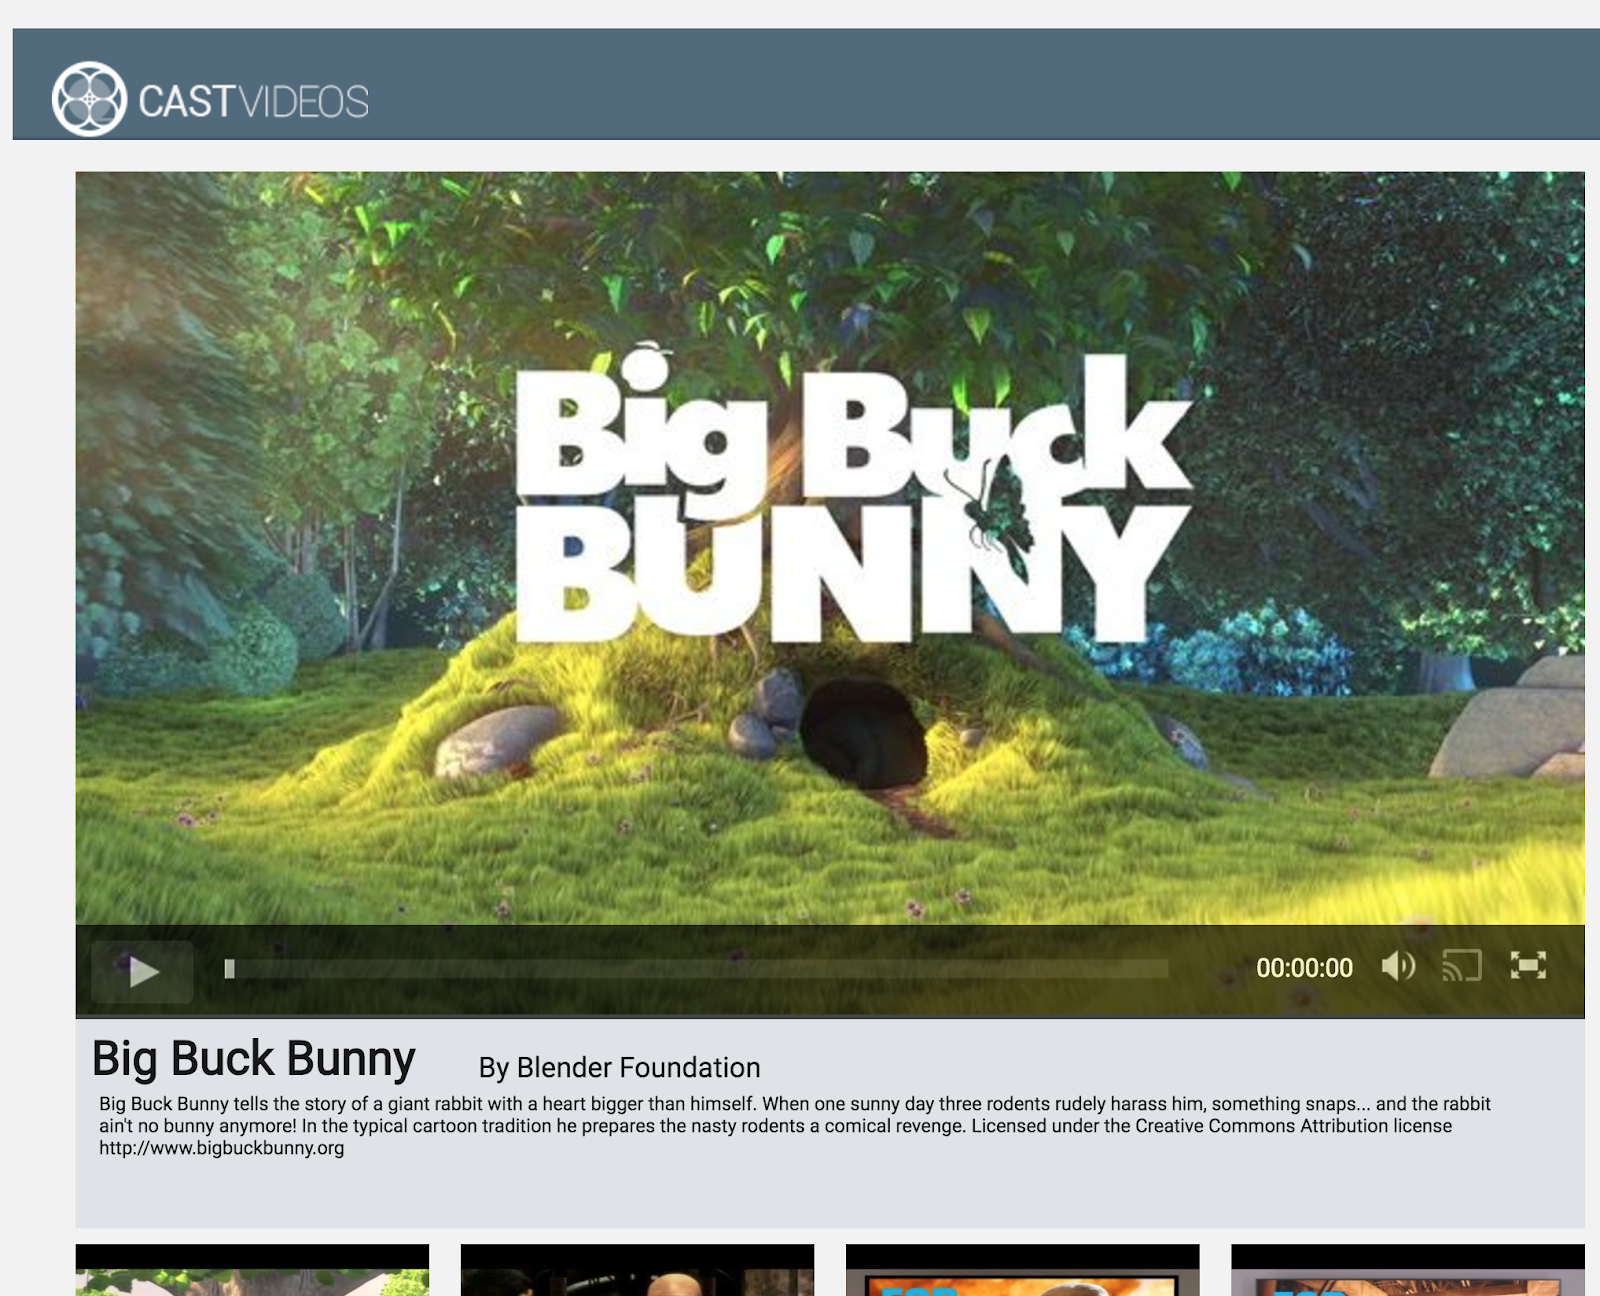
Click on the pause button in the video element to pause the video on the receiver. Click on the play button in the video element to continue playing the video again.
Click on the Cast button to stop casting to the Google Cast device.
Before we move on, stop the server.
4. Prepare the start project
We need to add support for Google Cast to the start app you downloaded. Here are some Google Cast terminology that we will be using in this codelab:
- a sender app runs on a mobile device or laptop,
- a receiver app runs on the Google Cast device.
Now you're ready to build on top of the starter project using your favorite text editor:
- Select the

app-startdirectory from your sample code download. - Run the app using your server and explore the UI.
Note, as you're working through this codelab, you will need to rehost the sample on your server depending on the service.
App design
The app fetches a list of videos from a remote web server and provides a list for the user to browse. Users can select a video to see the details or play the video locally on the mobile device.
The app consists of one main view, defined in index.html and the main controller, CastVideos.js.
index.html
This html file declares nearly all of the UI for the web app.
There are a few sections of views, we have our div#main_video, which contains the video element. Related to our video div, we have div#media_control, which defines all of the controls for the video element. Below that, is media_info, which displays the details of the video in view. Finally, the carousel div displays a list of videos in a div.
The index.html file also bootstraps the Cast SDK, and tells the CastVideos function to load.
Most of the content that will populate these elements is defined, injected, and controlled in CastVideos.js. So, let's take a look at that.
CastVideos.js
This script manages all of the logic for the Cast Videos web app. The list of videos and their associated metadata defined in CastVideos.js is contained in an object named mediaJSON.
There are a few major sections that together are responsible for managing and playing the video both locally and remotely. Overall, this is a fairly straight-forward web application.
CastPlayer is the main class that manages the entire app, setting up the player, selecting media, and binding events to PlayerHandler for playing media. CastPlayer.prototype.initializeCastPlayer is the method that sets up all of the Cast functionality. CastPlayer.prototype.switchPlayer switches the state between local and remote players. CastPlayer.prototype.setupLocalPlayer and CastPlayer.prototype.setupRemotePlayer initializes local and remote players.
PlayerHandler is the class responsible for managing the media playback. There are a number of other methods that are responsible for the details of managing media and playback.
Frequently asked questions
5. Adding the Cast button

A Cast-enabled application displays the Cast button in the video element. Clicking on the Cast button displays a list of Cast devices which a user can select. If the user was playing content locally on the sender device, selecting a Cast device starts or resumes playback on that Cast device. At any time during a Cast session, the user can click on the Cast button and stop casting your application to the Cast device. The user must be able to connect to or disconnect from the Cast device while in any screen of your application, as described in the Google Cast Design Checklist.
Configuration
The start project requires the same dependencies and setup as you did for the completed sample app, but this time host the contents of app-start.
In your browser, visit the https URL for the sample you hosted.
Remember, as you make changes, you will need to rehost the sample on your server depending on the service.
Initialization
The Cast framework has a global singleton object, the CastContext, which coordinates all of the framework's activities. This object must be initialized early in the application's lifecycle, typically called from a callback assigned to window['__onGCastApiAvailable'], which is called after the Cast SDK has been loaded, and is available for use. In this case, the CastContext is called in CastPlayer.prototype.initializeCastPlayer, which is called from the aforementioned callback.
An options JSON object must be supplied when initializing the CastContext. This class contains options that affect the behavior of the framework. The most important of these is the receiver application ID, which is used to filter the list of available Cast devices to only show devices capable of running the specified app and to launch the receiver application when a Cast session is started.
When you develop your own Cast-enabled app, you have to register as a Cast developer and then obtain an application ID for your app. For this codelab, we will be using a sample app ID.
Add the following code to index.html at the very end of the body section:
<script type="text/javascript" src="https://www.gstatic.com/cv/js/sender/v1/cast_sender.js?loadCastFramework=1"></script>
Add the following code to index.html to initialize CastVideos app, as well as to initialize the CastContext:
<script src="CastVideos.js"></script>
<script type="text/javascript">
var castPlayer = new CastPlayer();
window['__onGCastApiAvailable'] = function(isAvailable) {
  if (isAvailable) {
    castPlayer.initializeCastPlayer();
  }
};
</script>
Now, we need to add a new method in CastVideos.js, that corresponds to the method that we just called in index.html. Let's add a new method, called initializeCastPlayer, which sets options on CastContext, and initializes new RemotePlayer and RemotePlayerControllers:
/**
 * This method sets up the CastContext, and a few other members
 * that are necessary to play and control videos on a Cast
 * device.
 */
CastPlayer.prototype.initializeCastPlayer = function() {

    var options = {};

    // Set the receiver application ID to your own (created in
    // the Google Cast Developer Console), or optionally
    // use the chrome.cast.media.DEFAULT_MEDIA_RECEIVER_APP_ID
    options.receiverApplicationId = 'C0868879';

    // Auto join policy can be one of the following three:
    // ORIGIN_SCOPED - Auto connect from same appId and page origin
    // TAB_AND_ORIGIN_SCOPED - Auto connect from same appId, page origin, and tab
    // PAGE_SCOPED - No auto connect
    options.autoJoinPolicy = chrome.cast.AutoJoinPolicy.ORIGIN_SCOPED;

    cast.framework.CastContext.getInstance().setOptions(options);

    this.remotePlayer = new cast.framework.RemotePlayer();
    this.remotePlayerController = new cast.framework.RemotePlayerController(this.remotePlayer);
    this.remotePlayerController.addEventListener(
        cast.framework.RemotePlayerEventType.IS_CONNECTED_CHANGED,
        this.switchPlayer.bind(this)
    );
};
Finally, we need to create the variables for the RemotePlayer and RemotePlayerController:
var CastPlayer = function() {
  //...
  /* Cast player variables */
  /** @type {cast.framework.RemotePlayer} */
  this.remotePlayer = null;
  /** @type {cast.framework.RemotePlayerController} */
  this.remotePlayerController = null;
  //...
};
Cast button
Now that the CastContext is initialized, we need to add the Cast button to allow the user to select a Cast device. The Cast SDK provides a Cast button component called google-cast-launcher with an id of "castbutton". It can be added to the application's video element by simply adding a button in the media_control section.
This is what the button element will look like:
<google-cast-launcher id="castbutton"></google-cast-launcher>
Add the following code to index.html in the media_control section:
<div id="media_control">
  <div id="play"></div>
  <div id="pause"></div>
  <div id="progress_bg"></div>
  <div id="progress"></div>
  <div id="progress_indicator"></div>
  <div id="fullscreen_expand"></div>
  <div id="fullscreen_collapse"></div>
  <google-cast-launcher id="castbutton"></google-cast-launcher>
  <div id="audio_bg"></div>
  <div id="audio_bg_track"></div>
  <div id="audio_indicator"></div>
  <div id="audio_bg_level"></div>
  <div id="audio_on"></div>
  <div id="audio_off"></div>
  <div id="duration">00:00:00</div>
</div>
Now refresh the page in your Chrome browser. You should see a Cast button in the video element and when you click on it, it will list the Cast devices on your local network. Device discovery is managed automatically by the Chrome browser. Select your Cast device and the sample receiver app will load on the Cast device.
We haven't hooked up any support for media playback, so you can't play videos on the Cast device just yet. Click on the Cast button to stop casting.
6. Casting video content
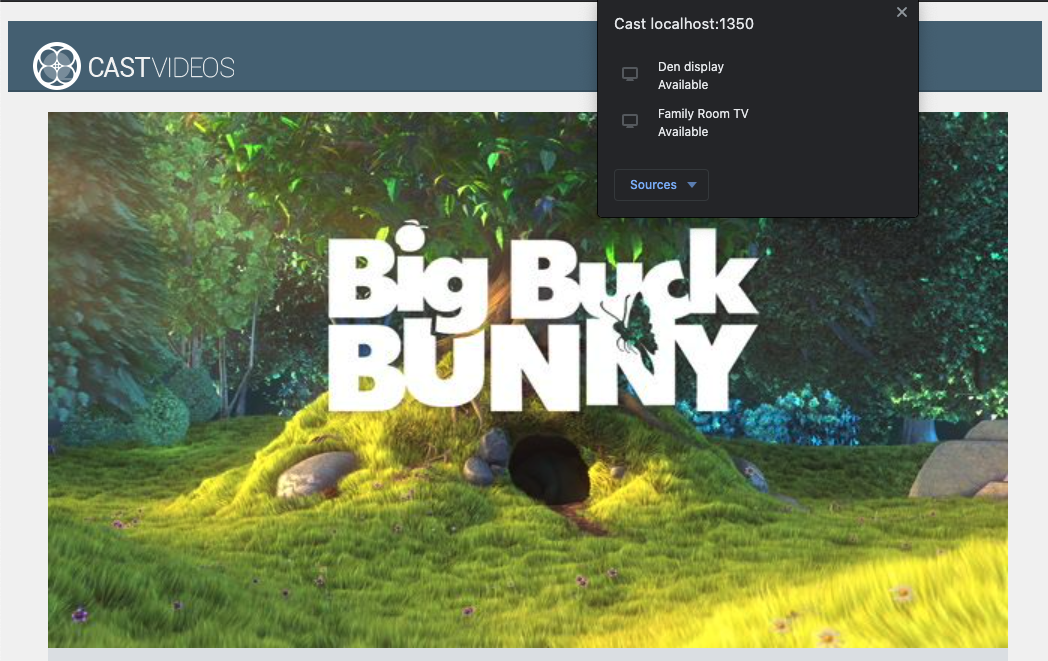
We will extend the sample app to also play videos remotely on a Cast device. To do that we need to listen to the various events generated by the Cast framework.
Casting media
At a high level, if you want to play a media on a Cast device, the following needs to happen:
- Create a
MediaInfoJSONobject from the Cast SDK that models a media item. - The user connects to the Cast device to launch your receiver application.
- Load the
MediaInfoobject into your receiver and play the content. - Track the media status.
- Send playback commands to the receiver based on user interactions.
Step 1 amounts to mapping one object to another; MediaInfo is something that the Cast SDK understands and mediaJSON is our app's encapsulation for a media item; we can easily map a mediaJSON to a MediaInfo. We have already done the Step 2 in the previous section. Step 3 is easy to do with the Cast SDK.
The sample app CastPlayer already distinguishes between local vs remote playback in the switchPlayer method:
if (cast && cast.framework) {
  if (this.remotePlayer.isConnected) {
    //...
It's not important in this codelab for you to understand exactly how all the sample player logic works. It is, however, important to understand that your app's media player will have to be modified to be aware of both local and remote playback.
At the moment the local player is always in the local playback state since it doesn't know anything about the Casting states yet. We need to update the UI based on state transitions that happen in the Cast framework. For example, if we start casting, we need to stop the local playback and disable some controls. Similarly, if we stop casting when we are in this view controller, we need to transition to local playback. To handle that we need to listen to the various events generated by the Cast framework.
Cast session management
For the Cast framework a Cast session combines the steps of connecting to a device, launching (or joining an existing session), connecting to a receiver application, and initializing a media control channel if appropriate. The media control channel is how the Cast framework sends and receives media playback related messages from the receiver.
The Cast session will be started automatically when the user selects a device from the Cast button, and will be stopped automatically when the user disconnects. Reconnecting to a receiver session due to networking issues is also automatically handled by the Cast framework.
Cast sessions are managed by the CastSession, which can be accessed via cast.framework.CastContext.getInstance().getCurrentSession(). The EventListener callbacks can be used to monitor session events, such as creation, suspension, resumption, and termination.
In our current application, all of the session and state management is handled for us in the setupRemotePlayer method. Let's start configuring that in your app by adding the following code to your CastVideos.js:
/**
 * Set the PlayerHandler target to use the remote player
 */
CastPlayer.prototype.setupRemotePlayer = function () {
    var castSession = cast.framework.CastContext.getInstance().getCurrentSession();

    this.playerHandler.setTarget(playerTarget);

    // Setup remote player volume right on setup
    // The remote player may have had a volume set from previous playback
    if (this.remotePlayer.isMuted) {
        this.playerHandler.mute();
    }
    var currentVolume = this.remotePlayer.volumeLevel * FULL_VOLUME_HEIGHT;
    var p = document.getElementById('audio_bg_level');
    p.style.height = currentVolume + 'px';
    p.style.marginTop = -currentVolume + 'px';

    this.hideFullscreenButton();

    this.playerHandler.play();
};
We still need to bind all of the events from callbacks, and to handle all the events that come in. This is a fairly straightforward thing to do, so let's take care of that now:
/**
 * Set the PlayerHandler target to use the remote player
 */
CastPlayer.prototype.setupRemotePlayer = function () {
    var castSession = cast.framework.CastContext.getInstance().getCurrentSession();

    // Add event listeners for player changes which may occur outside sender app
    this.remotePlayerController.addEventListener(
        cast.framework.RemotePlayerEventType.IS_PAUSED_CHANGED,
        function() {
            if (this.remotePlayer.isPaused) {
                this.playerHandler.pause();
            } else {
                this.playerHandler.play();
            }
        }.bind(this)
    );

    this.remotePlayerController.addEventListener(
        cast.framework.RemotePlayerEventType.IS_MUTED_CHANGED,
        function() {
            if (this.remotePlayer.isMuted) {
                this.playerHandler.mute();
            } else {
                this.playerHandler.unMute();
            }
        }.bind(this)
    );

    this.remotePlayerController.addEventListener(
        cast.framework.RemotePlayerEventType.VOLUME_LEVEL_CHANGED,
        function() {
            var newVolume = this.remotePlayer.volumeLevel * FULL_VOLUME_HEIGHT;
            var p = document.getElementById('audio_bg_level');
            p.style.height = newVolume + 'px';
            p.style.marginTop = -newVolume + 'px';
        }.bind(this)
    );

    // This object will implement PlayerHandler callbacks with
    // remotePlayerController, and makes necessary UI updates specific
    // to remote playback
    var playerTarget = {};

    playerTarget.play = function () {
        if (this.remotePlayer.isPaused) {
            this.remotePlayerController.playOrPause();
        }

        var vi = document.getElementById('video_image');
        vi.style.display = 'block';
        var localPlayer = document.getElementById('video_element');
        localPlayer.style.display = 'none';
    }.bind(this);

    playerTarget.pause = function () {
        if (!this.remotePlayer.isPaused) {
            this.remotePlayerController.playOrPause();
        }
    }.bind(this);

    playerTarget.stop = function () {
         this.remotePlayerController.stop();
    }.bind(this);

    playerTarget.getCurrentMediaTime = function() {
        return this.remotePlayer.currentTime;
    }.bind(this);

    playerTarget.getMediaDuration = function() {
        return this.remotePlayer.duration;
    }.bind(this);

    playerTarget.updateDisplayMessage = function () {
        document.getElementById('playerstate').style.display = 'block';
        document.getElementById('playerstatebg').style.display = 'block';
        document.getElementById('video_image_overlay').style.display = 'block';
        document.getElementById('playerstate').innerHTML =
            this.mediaContents[ this.currentMediaIndex]['title'] + ' ' +
            this.playerState + ' on ' + castSession.getCastDevice().friendlyName;
    }.bind(this);

    playerTarget.setVolume = function (volumeSliderPosition) {
        // Add resistance to avoid loud volume
        var currentVolume = this.remotePlayer.volumeLevel;
        var p = document.getElementById('audio_bg_level');
        if (volumeSliderPosition < FULL_VOLUME_HEIGHT) {
            var vScale =  this.currentVolume * FULL_VOLUME_HEIGHT;
            if (volumeSliderPosition > vScale) {
                volumeSliderPosition = vScale + (pos - vScale) / 2;
            }
            p.style.height = volumeSliderPosition + 'px';
            p.style.marginTop = -volumeSliderPosition + 'px';
            currentVolume = volumeSliderPosition / FULL_VOLUME_HEIGHT;
        } else {
            currentVolume = 1;
        }
        this.remotePlayer.volumeLevel = currentVolume;
        this.remotePlayerController.setVolumeLevel();
    }.bind(this);

    playerTarget.mute = function () {
        if (!this.remotePlayer.isMuted) {
            this.remotePlayerController.muteOrUnmute();
        }
    }.bind(this);

    playerTarget.unMute = function () {
        if (this.remotePlayer.isMuted) {
            this.remotePlayerController.muteOrUnmute();
        }
    }.bind(this);

    playerTarget.isMuted = function() {
        return this.remotePlayer.isMuted;
    }.bind(this);

    playerTarget.seekTo = function (time) {
        this.remotePlayer.currentTime = time;
        this.remotePlayerController.seek();
    }.bind(this);

    this.playerHandler.setTarget(playerTarget);

    // Setup remote player volume right on setup
    // The remote player may have had a volume set from previous playback
    if (this.remotePlayer.isMuted) {
        this.playerHandler.mute();
    }
    var currentVolume = this.remotePlayer.volumeLevel * FULL_VOLUME_HEIGHT;
    var p = document.getElementById('audio_bg_level');
    p.style.height = currentVolume + 'px';
    p.style.marginTop = -currentVolume + 'px';

    this.hideFullscreenButton();

    this.playerHandler.play();
};
Loading media
In the Cast SDK, the RemotePlayer and RemotePlayerController provide a set of convenient APIs for managing the remote media playback on the receiver. For a CastSession that supports media playback, instances of RemotePlayer and RemotePlayerController will be created automatically by the SDK. They can be accessed by creating instances of cast.framework.RemotePlayer and cast.framework.RemotePlayerController respectively, as shown earlier in the codelab.
Next, we need to load the currently selected video on the receiver by building a MediaInfo object for the SDK to process and pass in the request. Add the following code to setupRemotePlayer to do so:
/**
 * Set the PlayerHandler target to use the remote player
 */
CastPlayer.prototype.setupRemotePlayer = function () {
    //...

    playerTarget.load = function (mediaIndex) {
        console.log('Loading...' + this.mediaContents[mediaIndex]['title']);
        var mediaInfo = new chrome.cast.media.MediaInfo(
            this.mediaContents[mediaIndex]['sources'][0], 'video/mp4');

        mediaInfo.metadata = new chrome.cast.media.GenericMediaMetadata();
        mediaInfo.metadata.metadataType = chrome.cast.media.MetadataType.GENERIC;
        mediaInfo.metadata.title = this.mediaContents[mediaIndex]['title'];
        mediaInfo.metadata.images = [
            {'url': MEDIA_SOURCE_ROOT + this.mediaContents[mediaIndex]['thumb']}];

        var request = new chrome.cast.media.LoadRequest(mediaInfo);
        castSession.loadMedia(request).then(
            this.playerHandler.loaded.bind(this.playerHandler),
            function (errorCode) {
                this.playerState = PLAYER_STATE.ERROR;
                console.log('Remote media load error: ' +
                    CastPlayer.getErrorMessage(errorCode));
            }.bind(this));
    }.bind(this);

    //...
};
Now add a method to switch between local and remote playback:
/**
 * This is a method for switching between the local and remote
 * players. If the local player is selected, setupLocalPlayer()
 * is run. If there is a cast device connected we run
 * setupRemotePlayer().
 */
CastPlayer.prototype.switchPlayer = function() {
    this.stopProgressTimer();
    this.resetVolumeSlider();
    this.playerHandler.stop();
    this.playerState = PLAYER_STATE.IDLE;
    if (cast && cast.framework) {
        if (this.remotePlayer.isConnected) {
            this.setupRemotePlayer();
            return;
        }
    }
    this.setupLocalPlayer();
};
Finally, add a method to handle any Cast error messages:
/**
 * Makes human-readable message from chrome.cast.Error
 * @param {chrome.cast.Error} error
 * @return {string} error message
 */
CastPlayer.getErrorMessage = function(error) {
  switch (error.code) {
    case chrome.cast.ErrorCode.API_NOT_INITIALIZED:
      return 'The API is not initialized.' +
        (error.description ? ' :' + error.description : '');
    case chrome.cast.ErrorCode.CANCEL:
      return 'The operation was canceled by the user' +
        (error.description ? ' :' + error.description : '');
    case chrome.cast.ErrorCode.CHANNEL_ERROR:
      return 'A channel to the receiver is not available.' +
        (error.description ? ' :' + error.description : '');
    case chrome.cast.ErrorCode.EXTENSION_MISSING:
      return 'The Cast extension is not available.' +
        (error.description ? ' :' + error.description : '');
    case chrome.cast.ErrorCode.INVALID_PARAMETER:
      return 'The parameters to the operation were not valid.' +
        (error.description ? ' :' + error.description : '');
    case chrome.cast.ErrorCode.RECEIVER_UNAVAILABLE:
      return 'No receiver was compatible with the session request.' +
        (error.description ? ' :' + error.description : '');
    case chrome.cast.ErrorCode.SESSION_ERROR:
      return 'A session could not be created, or a session was invalid.' +
        (error.description ? ' :' + error.description : '');
    case chrome.cast.ErrorCode.TIMEOUT:
      return 'The operation timed out.' +
        (error.description ? ' :' + error.description : '');
  }
};
Now, run the app. Connect to your Cast device and start playing a video. You should see the video playing on the receiver.
7. Add Cast Connect Support
Cast Connect library allows existing sender applications to communicate with Android TV applications via the Cast protocol. Cast Connect builds on top of the Cast infrastructure, with your Android TV app acting as a receiver.
Dependencies
- Chrome browser version M87 or higher
Set Android Receiver Compatible
In order to launch the Android TV application, also referred to as the Android Receiver, we need to set the androidReceiverCompatible flag to true in the CastOptions object.
Add the following code to your CastVideos.js in the initializeCastPlayer function:
var options = {};
...
options.androidReceiverCompatible = true;

cast.framework.CastContext.getInstance().setOptions(options);
Set Launch Credentials
On the sender side, you can specify CredentialsData to represent who is joining the session. The credentials is a string which can be user-defined, as long as your ATV app can understand it. The CredentialsData is only passed to your Android TV app during launch or join time. If you set it again while you are connected, it won't be passed to your Android TV app.
In order to set Launch Credentials CredentialsData needs to be defined anytime after the launch options are set.
Add the following code to your CastVideos.js class under initializeCastPlayer function:
cast.framework.CastContext.getInstance().setOptions(options);
...
let credentialsData = new chrome.cast.CredentialsData("{\"userId\": \"abc\"}");
cast.framework.CastContext.getInstance().setLaunchCredentialsData(credentialsData);
...
Set Credentials on Load Request
In case your Web Receiver app and your Android TV app handle credentials differently, you might need to define separate credentials for each. In order to take care of that, add the following code in your CastVideos.js under playerTarget.load in setupRemotePlayer function:
...
var request = new chrome.cast.media.LoadRequest(mediaInfo);
request.credentials = 'user-credentials';
request.atvCredentials = 'atv-user-credentials';
...
Depending on the receiver app your sender is casting to, the SDK would now automatically handle which credentials to use for the current session.
Testing Cast Connect
Steps to install the Android TV APK on Chromecast with Google TV:
- Find the IP Address of your Android TV device. Usually, it's available under Settings > Network & Internet > (Network name your device is connected to). On the right hand it will show the details and your device's IP on the network.
- Use the IP address for your device to connect to it via ADB using the terminal:
$ adb connect <device_ip_address>:5555
- From your terminal window, navigate into the top level folder for the codelab samples that you downloaded at the start of this codelab. For example:
$ cd Desktop/chrome_codelab_src
- Install the .apk file in this folder to your Android TV by running:
$ adb -s <device_ip_address>:5555 install android-tv-app.apk
- You should now be able to see an app by the name of Cast Videos in the Your Apps menu on your Android TV device.
- Run the updated web sender code and establish a cast session with your Android TV device using the cast icon or selecting
Cast..from the drop-down menu in your Chrome browser. This should now launch the Android TV app on your Android Receiver and allow you to control the playback using your Android TV remote.
8. Congratulations
You now know how to Cast-enable a video app using the Cast SDK widgets on a Chrome web app.
For more details, see the Web Sender developer guide.