AMP 可讓您更輕鬆地建構可靠、回應迅速且效能優異的網頁。AMP 可讓您建立常見的網站互動,不必編寫 JavaScript。amp.dev 網站提供預先設計的快速入門範本。
建構項目
在本程式碼研究室中,您將建構美觀的互動式 AMP 網頁,並整合多項 AMP 功能和擴充元件,打造完全符合回應式設計的網頁:
|
|
|
軟硬體需求
- 新式網路瀏覽器
- Node.js 和文字編輯器,或 CodePen 或類似線上遊樂區的存取權
- 具備 HTML、CSS、JavaScript 和 Google Chrome 開發人員工具的基本知識
提供內容的工具
我們會使用 Node.js 執行本機 HTTP 伺服器,提供 AMP 網頁。請前往 Node.js 網站瞭解如何安裝。
我們選擇使用 serve 這個以 Node.js 為基礎的靜態內容伺服器,在本機提供內容。如要安裝,請執行下列指令:
npm install -g serve
從 amp.dev 下載範本
AMP 範本是快速入門 AMP 範本和元件的存放區,可協助您快速建立現代化的回應式 AMP 網頁。
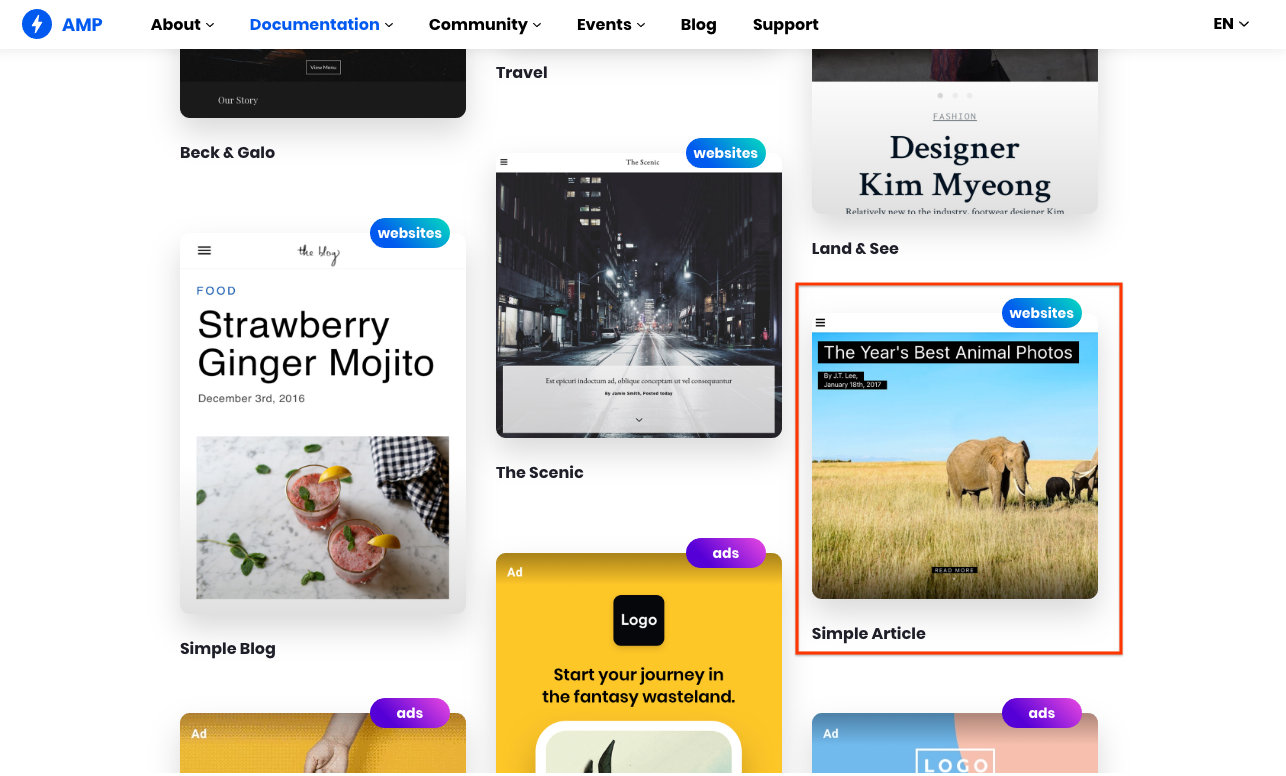
前往 AMP 範本,下載「年度最佳動物相片」範本的「簡單文章」程式碼。
執行範本程式碼
解壓縮 ZIP 檔案的內容。
在 article 資料夾中執行 serve 指令,在本機提供檔案。

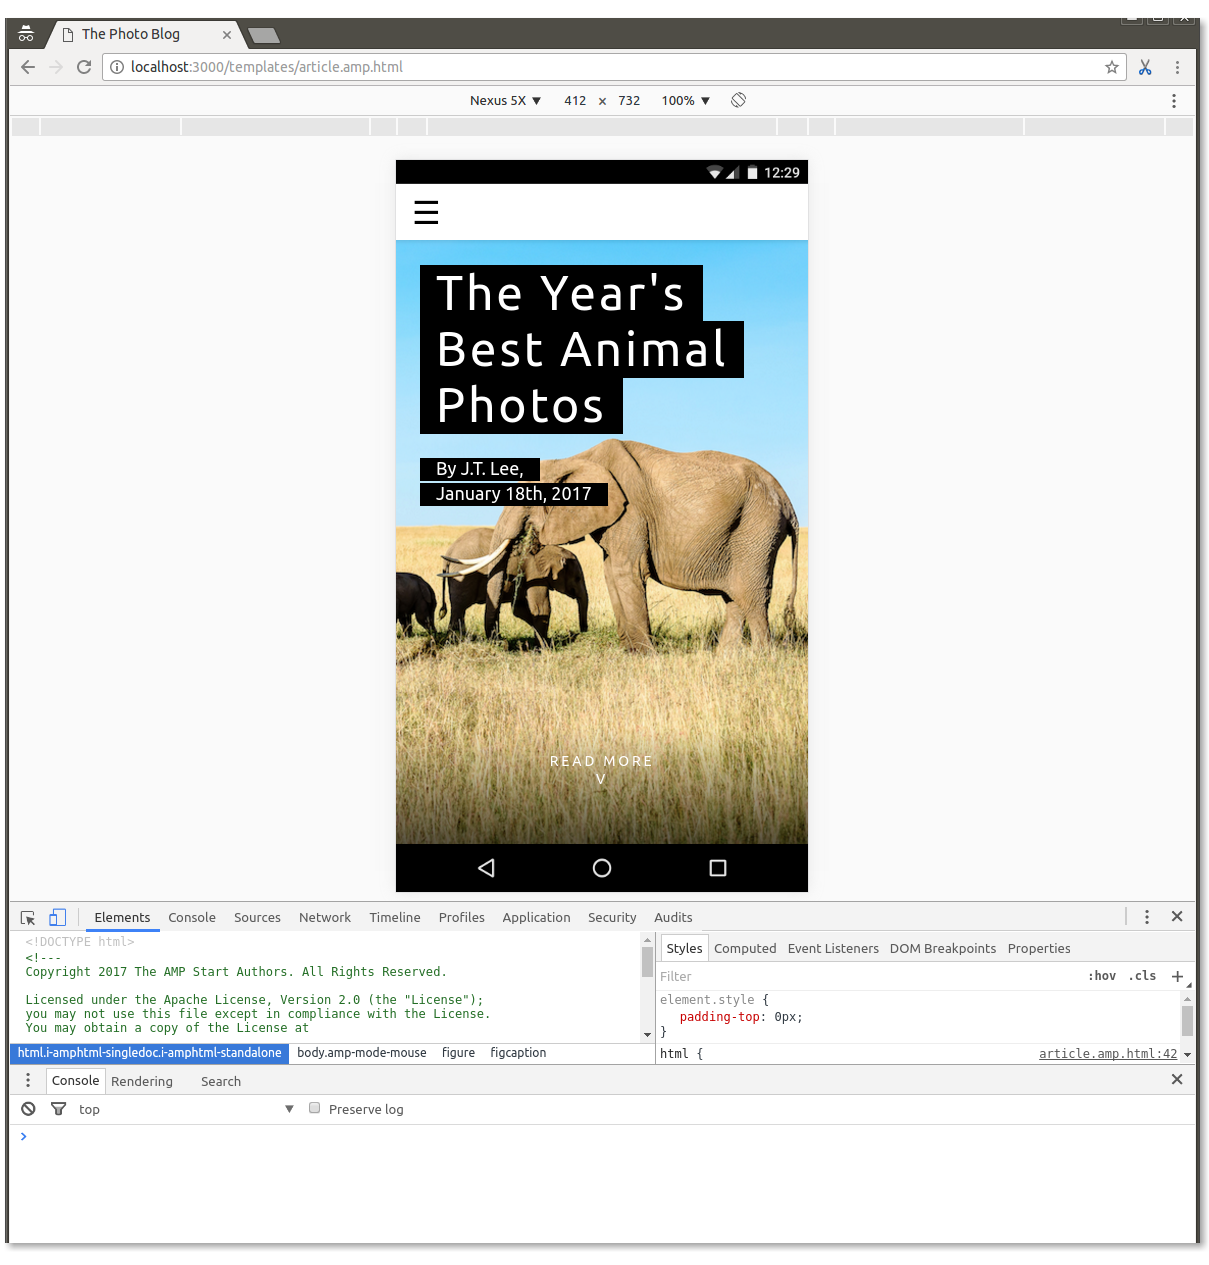
在瀏覽器中前往 http://localhost:5000/templates/article.amp.html。(視 serve 版本而定,通訊埠可能是 3000 或其他數字。請查看控制台中的確切地址)。
我們也來開啟 Chrome 開發人員工具,並切換裝置模式。
修剪範本程式碼
此時,我們已搭建出大致可運作的 AMP 網頁,但本程式碼研究室的目的是讓您學習和練習,因此...
刪除 <body></body> 內的所有內容。
現在我們只剩下一個空白頁面,其中只包含一些樣板程式碼:
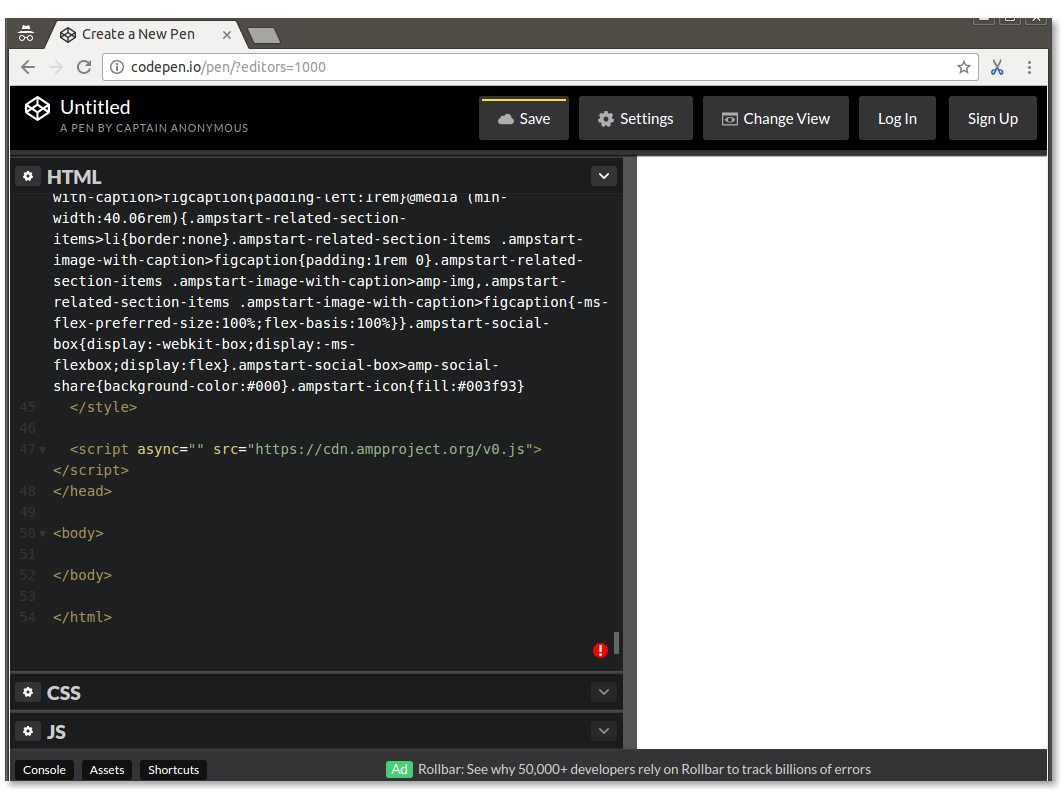
在本程式碼研究室中,您會在空白頁面中新增許多元件,部分重新建立範本,並加入更多功能。
AMP 網頁是 HTML 網頁,但含有額外標記,且為確保效能穩定,設有一些限制。
雖然 AMP 網頁中的大多數標記都是一般 HTML 標記,但部分 HTML 標記會替換為 AMP 專屬標記。這些自訂元素稱為 AMP HTML 元件,可讓您輕鬆以高效能方式導入常見模式。
最簡單的 AMP HTML 檔案如下 (有時稱為 AMP 樣板):
<!doctype html>
<html ⚡>
 <head>
   <meta charset="utf-8">
   <link rel="canonical" href="hello-world.html">
   <meta name="viewport" content="width=device-width,minimum-scale=1,initial-scale=1">
   <style amp-boilerplate>body{-webkit-animation:-amp-start 8s steps(1,end) 0s 1 normal both;-moz-animation:-amp-start 8s steps(1,end) 0s 1 normal both;-ms-animation:-amp-start 8s steps(1,end) 0s 1 normal both;animation:-amp-start 8s steps(1,end) 0s 1 normal both}@-webkit-keyframes -amp-start{from{visibility:hidden}to{visibility:visible}}@-moz-keyframes -amp-start{from{visibility:hidden}to{visibility:visible}}@-ms-keyframes -amp-start{from{visibility:hidden}to{visibility:visible}}@-o-keyframes -amp-start{from{visibility:hidden}to{visibility:visible}}@keyframes -amp-start{from{visibility:hidden}to{visibility:visible}}</style><noscript><style amp-boilerplate>body{-webkit-animation:none;-moz-animation:none;-ms-animation:none;animation:none}</style></noscript>
   <script async src="https://cdn.ampproject.org/v0.js"></script>
 </head>
 <body>Hello World!</body>
</html>
請查看您在設定期間建立的空白網頁程式碼,其中包含這個樣板,並新增了幾項內容,包括含有大量縮小 CSS 的 <style amp-custom> 標記。
AMP 對設計沒有任何意見,也不會強制使用特定樣式。大多數 AMP 元件的樣式都非常基本。頁面作者必須提供自訂 CSS。這時 <style amp-custom> 就能派上用場。
不過,AMP 範本提供自己的 CSS 樣式,這些樣式設計精美、可跨瀏覽器使用,且具備回應性,有助於您快速建構美觀的 AMP 網頁。您下載的範本程式碼會在 <style amp-custom>. 中包含這些武斷的 CSS 樣式
首先,我們會將從範本中移除的部分元件加回,為網頁建立外殼,包括導覽選單、網頁標題圖片和標題。
我們會從 AMP Start UI 元件頁面取得協助,但不會深入探討實作詳細資料。程式碼研究室的後續步驟會提供許多機會。
新增回應式導覽
前往 https://ampstart.com/components#navigation,然後將「RESPONSIVE MENUBAR」提供的 HTML 程式碼複製並貼到網頁的 body 中。
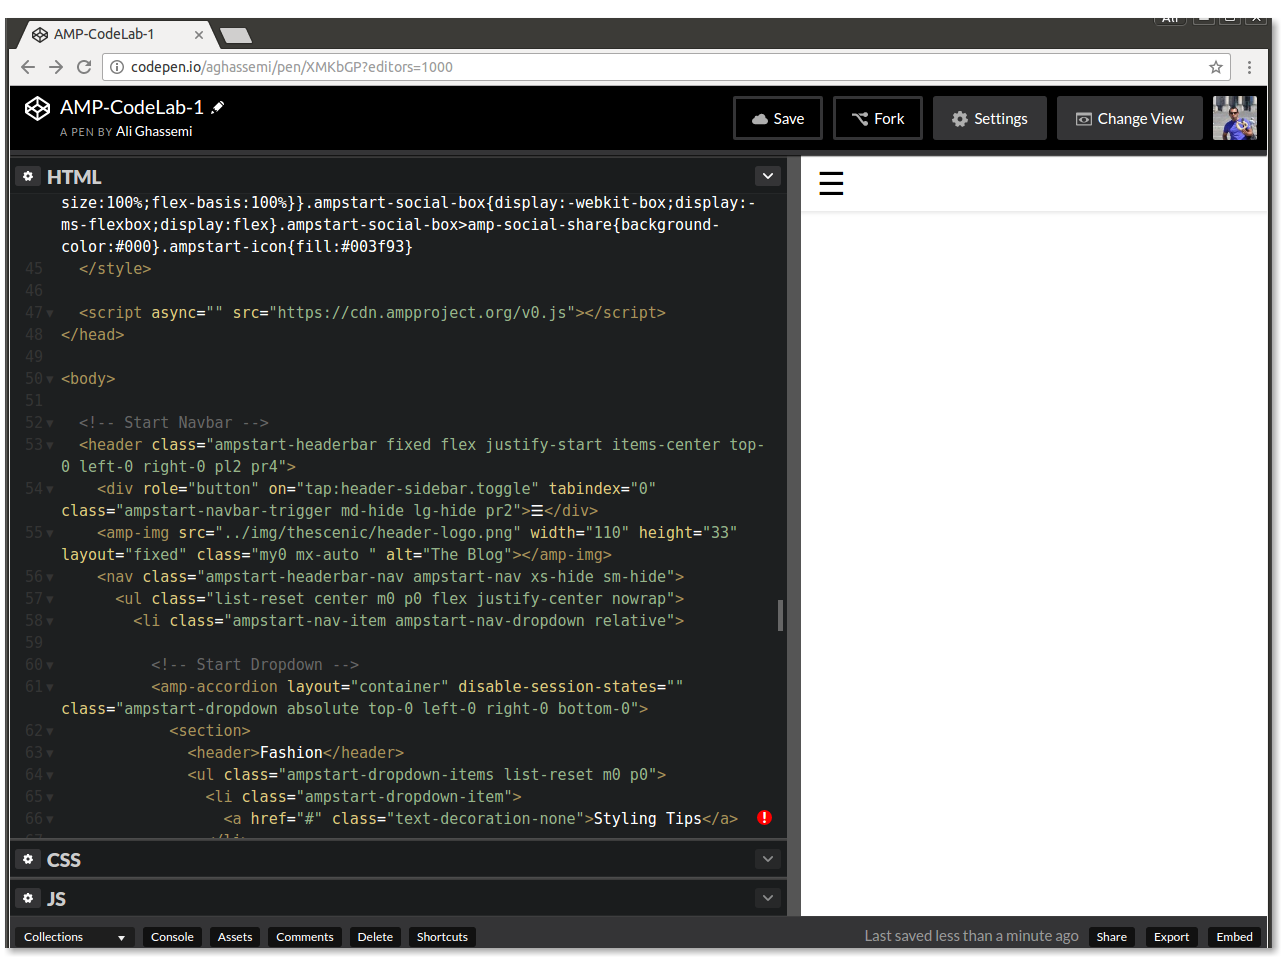
AMP Start 提供的程式碼包含必要的 HTML 和 CSS 類別結構,可為網頁導入回應式導覽列。
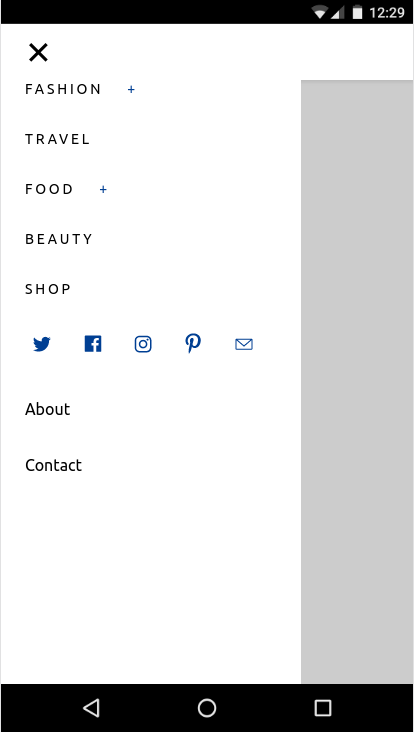
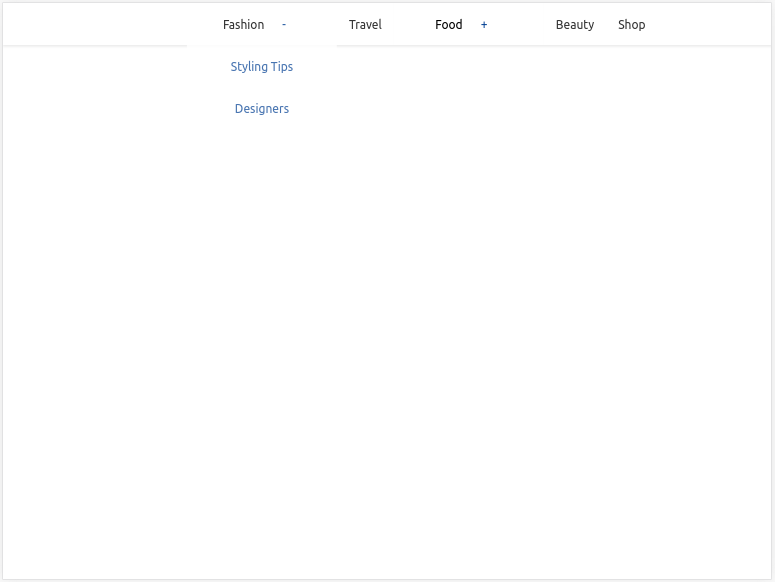
實際操作: 調整視窗大小,看看視窗如何因應不同螢幕大小。
|
|
這段程式碼使用 CSS 媒體查詢,以及 amp-sidebar 和 amp-accordion AMP 元件。
新增主頁橫幅和標題
AMP Start 也提供可立即使用的程式碼片段,方便您製作精美且具備回應性的主頁橫幅圖片和標題。
前往 https://ampstart.com/components#media,然後複製「全螢幕英雄」提供的 HTML 程式碼,並貼到程式碼的 body. 中,緊接在 <!-- End Navbar --> comment 後方。
現在更新圖片和標題。
如您所見,程式碼片段中有兩個不同的 amp-img 標記。一個用於較小的寬度,應指向低解析度圖片,另一個則用於較大的螢幕。系統會根據 media 屬性自動切換,AMP 在所有 AMP 元素上都支援這項屬性。
將 src、width 和 height 更新為不同圖片,並將標題更新為「太平洋西北地區最美的健行路線」,方法是將現有的 <figure>...</figure> 替換為:
<figure class="ampstart-image-fullpage-hero m0 relative mb4">
    <amp-img width="600" height="900" layout="responsive" src="https://unsplash.it/600/900?image=1003" media="(max-width: 415px)"></amp-img>
    <amp-img height="1800" layout="fixed-height" src="https://unsplash.it/1200/1800?image=1003" media="(min-width: 416px)"></amp-img>
    <figcaption class="absolute top-0 right-0 bottom-0 left-0">
      <header class="p3">
        <h1 class="ampstart-fullpage-hero-heading mb3">
        <span class="ampstart-fullpage-hero-heading-text">
          Most Beautiful Hikes in the Pacific Northwest
        </span>
      </h1>
        <span class="ampstart-image-credit h4">
        By <a href="#" role="author" class="text-decoration-none">D.F. Roy</a>,<br> January 14, 2017
      </span>
      </header>
      <footer class="absolute left-0 right-0 bottom-0">
        <a class="ampstart-readmore py3 caps line-height-2 text-decoration-none center block h5" href="#content">Read more</a>
      </footer>
    </figcaption>
</figure>
現在來看看這個頁面:

摘要
- 您已建立網頁的殼層,包括回應式導覽、主要圖片和標題。
- 您進一步瞭解了 AMP 範本,並使用 AMP Start UI 元件快速組合網頁外殼。
本節的完整程式碼位於:http://codepen.io/aghassemi/pen/RpRdzV
在本節中,我們將在網頁中加入回應式圖片、影片、嵌入內容和一些文字。
讓我們新增 main 元素,用於代管網頁內容。我們會將其新增至 body: 的結尾
<main id="content">

</main>
新增標題和段落
在 main 中新增以下內容:
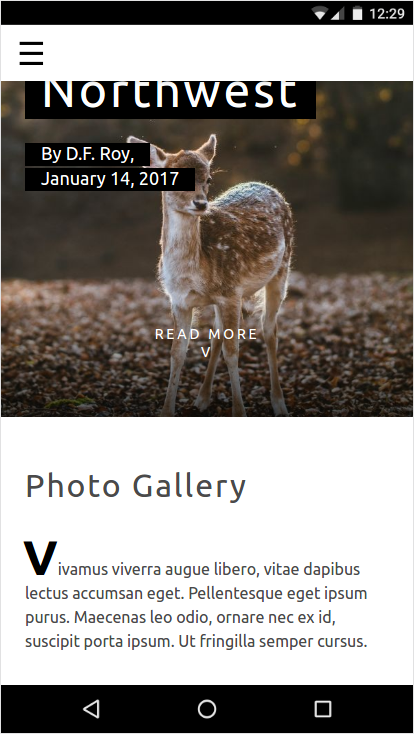
<h2 class="px3 pt2 mb2">Photo Gallery</h2>
<p class="ampstart-dropcap mb4 px3">Vivamus viverra augue libero, vitae dapibus lectus accumsan eget. Pellentesque eget ipsum purus. Maecenas leo odio, ornare nec ex id, suscipit porta ipsum. Ut fringilla semper cursus.</p>
由於 AMP 只是 HTML,因此除了這些 CSS 類別名稱之外,這段程式碼沒有什麼特別之處。什麼是 px3、mb2 和 ampstart-dropcap?這些流量來自何處?
這些類別不屬於 AMP HTML。AMP Start 範本使用 Basscss 提供低階 CSS 工具包,並新增 AMP Start 專屬類別。
在這個程式碼片段中,px3 和 mb2 由 Basscss 定義,分別會轉譯為 padding-left-right 和 margin-bottom。ampstart-dropcap 由 AMP Start 提供,可將段落的第一個字母放大。
如要查看這些預先定義的 CSS 類別說明文件,請前往 http://basscss.com/ 和 https://ampstart.com/components。
現在網頁看起來會像這樣:
新增圖片
在 AMP 中,您可以輕鬆製作回應式網頁。在許多情況下,只要加入 layout="responsive" 屬性,就能讓 AMP 元件具備回應式功能。與 HTML img 標記類似,amp-img 也支援 srcset,可為不同可視區域寬度和像素密度指定不同圖片。
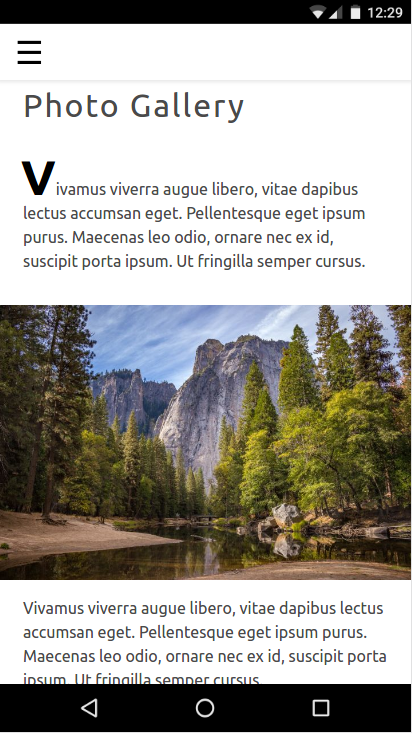
在 main 中新增 amp-img:
<amp-img
  layout="responsive" width="1080" height="720"
  srcset="https://unsplash.it/1080/720?image=1043 1080w, https://unsplash.it/720/480?image=1043 720w"
  alt="Photo of mountains and trees landscape">
</amp-img>
使用這段程式碼,指定 layout="responsive" 並提供 width 和 height.,即可建立回應式圖片
使用回應式版面配置時,為什麼必須指定寬度和高度?
原因有二:
- AMP 會使用寬度和高度計算顯示比例 ,並在寬度變更以配合父項容器時,維持正確的高度。
- AMP 會對所有元素強制執行靜態大小設定,確保使用者體驗良好 (網頁不會跳動),並在下載資源前判斷每個元素的大小和位置,以便配置網頁。
現在來看看這個頁面:
新增自動播放的影片
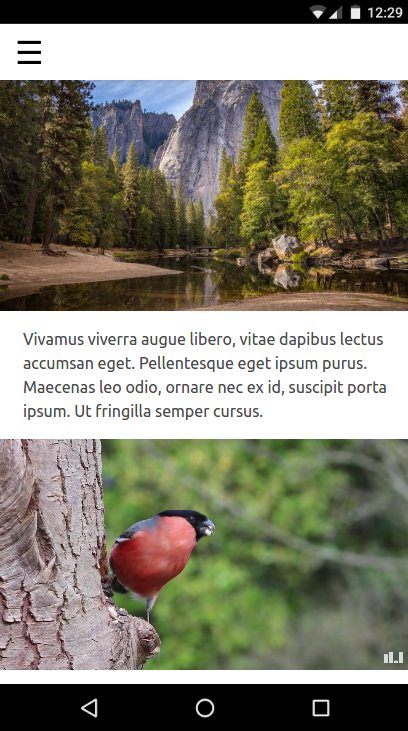
AMP 支援許多影片播放器,例如 YouTube 和 Vimeo。AMP 在amp-video 擴充元件下,有自己的 HTML5 video 元素版本。部分影片播放器 (包括 amp-video 和 amp-youtube) 也支援在行動裝置上自動播放影片 (靜音)。
與 amp-img 類似,amp-video 只要加入 layout="responsive",就能變成回應式
讓我們在網頁中加入自動播放的影片。
在 main: 中新增另一個段落和下列 amp-video 元素
<p class="my2 px3">Vivamus viverra augue libero, vitae dapibus lectus accumsan eget. Pellentesque eget ipsum purus. Maecenas leo odio, ornare nec ex id, suscipit porta ipsum. Ut fringilla semper cursus.</p>

<amp-video
  layout="responsive" width="1280" height="720"
  autoplay controls loop
  src="https://storage.googleapis.com/ampconf-76504.appspot.com/Bullfinch%20-%202797.mp4">
</amp-video>請參閱以下說明:
新增嵌入內容
AMP 針對許多第三方嵌入內容 (例如 Twitter 和 Instagram) 提供擴充元件。如果嵌入內容缺少 AMP 元件,一律會使用 amp-iframe。
讓我們在網頁中加入 Instagram 嵌入內容。
與 amp-img 和 amp-video 不同,amp-instagram 不是內建元件。如要使用元件,請務必在 AMP 網頁的 head 中明確加入匯入指令碼標記。
我們使用的 AMP Start 樣板包含數個匯入指令碼標記。請在 head 代碼開頭尋找這些屬性,並確認包含下列匯入指令碼行:
<script custom-element="amp-instagram" src="https://cdn.ampproject.org/v0/amp-instagram-0.1.js" async></script>在 main: 中新增另一個段落和下列 amp-instagram 元素
<p class="my2 px3">Vivamus viverra augue libero, vitae dapibus lectus accumsan eget. Pellentesque eget ipsum purus. Maecenas leo odio, ornare nec ex id, suscipit porta ipsum. Ut fringilla semper cursus.</p>

<amp-instagram
   layout="responsive" width="566" height="708"
   data-shortcode="BJ_sPxzAGyg">
</amp-instagram>
請參閱以下說明:

目前應該有足夠的內容了。
摘要
- 您已瞭解 AMP 中的回應式元件。
- 您新增了不同類型的媒體和文字內容。
如要查看本節的完整程式碼,請前往:http://codepen.io/aghassemi/pen/OpXGoa
目前為止,我們只為網頁建立了靜態內容。在本節中,我們會使用輪轉介面、燈箱和 AMP 動作等元件,建立互動式相片庫。
雖然 AMP 不支援自訂 JavaScript,但仍會公開多個建構區塊,用於接收及處理使用者動作。
新增圖片輪轉介面
如果相片導向的 AMP 網頁上顯示所有圖片,使用者體驗不會太好。幸好,我們可以使用 amp-carousel 建立可水平滑動的相片投影片。
首先,請確認 head 中包含 amp-carousel 的指令碼標記:
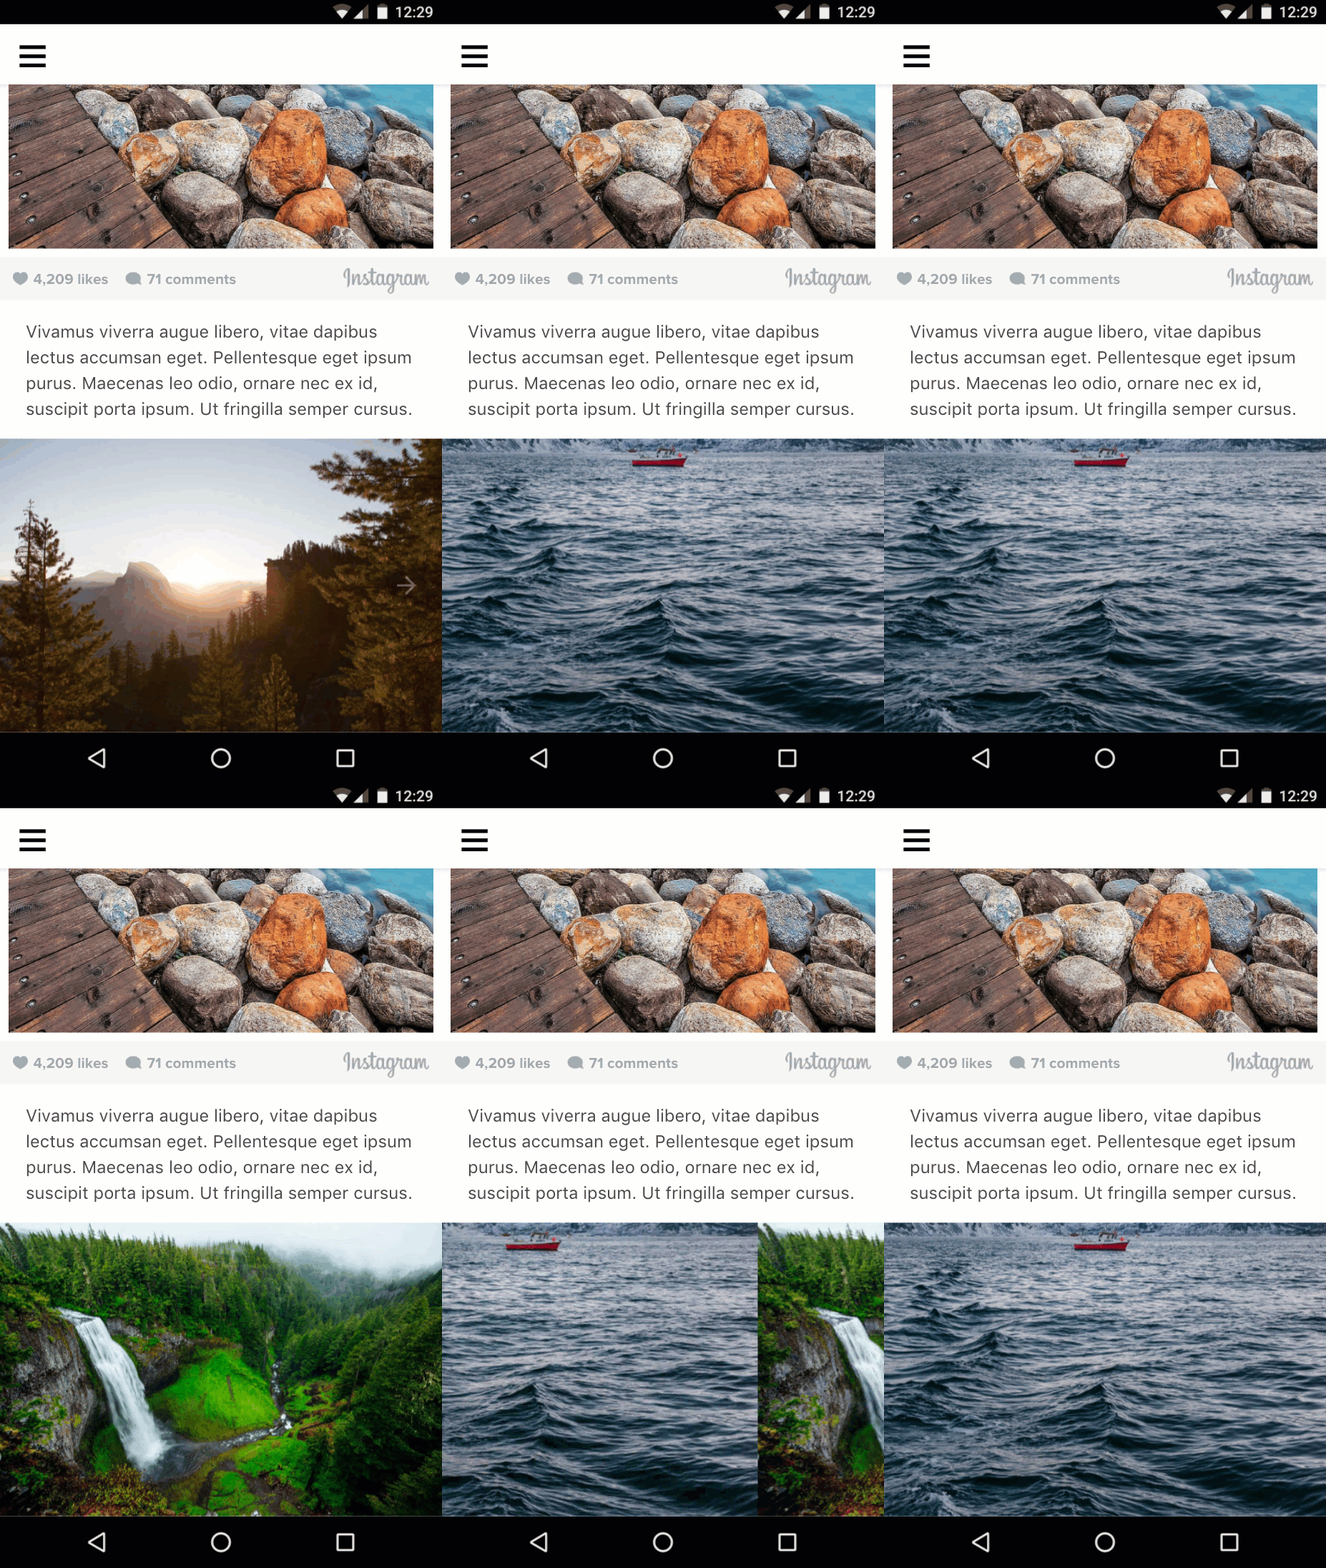
<script custom-element="amp-carousel" src="https://cdn.ampproject.org/v0/amp-carousel-0.1.js" async></script>現在,讓我們在 main: 中新增含有多張圖片的amp-carousel回應式 slides
<p class="my2 px3">Vivamus viverra augue libero, vitae dapibus lectus accumsan eget. Pellentesque eget ipsum purus. Maecenas leo odio, ornare nec ex id, suscipit porta ipsum. Ut fringilla semper cursus.</p>

<amp-carousel
  layout="responsive" width="1080" height="720"
  type="slides">

    <amp-img src="https://unsplash.it/1080/720?image=1037" layout="fill"></amp-img>
    <amp-img src="https://unsplash.it/1080/720?image=1038" layout="fill"></amp-img>
    <amp-img src="https://unsplash.it/1080/720?image=1039" layout="fill"></amp-img>
    <amp-img src="https://unsplash.it/1080/720?image=1040" layout="fill"></amp-img>
    <amp-img src="https://unsplash.it/1080/720?image=1041" layout="fill"></amp-img>
    <amp-img src="https://unsplash.it/1080/720?image=1042" layout="fill"></amp-img>
    <amp-img src="https://unsplash.it/1080/720?image=1043" layout="fill"></amp-img>
    <amp-img src="https://unsplash.it/1080/720?image=1044" layout="fill"></amp-img>
</amp-carousel>
type="slides" 可確保一次只顯示一張圖片,並允許使用者滑動瀏覽。
輪播中的圖片使用 layout="fill",因為輪播投影片一律會以子項元素填滿大小,因此不需要指定需要寬度和高度的不同版面配置。
試試看,看看效果如何:
新增縮圖輪轉介面
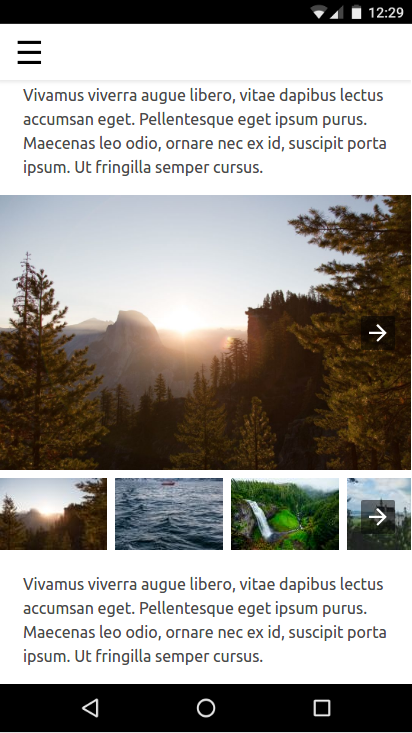
現在,我們來為這些圖片的縮圖新增可水平捲動的容器。我們會再次使用 <amp-carousel>,但這次不使用 type="slides",並採用固定高度的版面配置。
在前一個 amp-carousel 元素後方新增下列內容。
<amp-carousel layout="fixed-height" height="78" class="mt1">

    <amp-img src="https://unsplash.it/108/72?image=1037" layout="fixed" width="108" height="72"></amp-img>
    <amp-img src="https://unsplash.it/108/72?image=1038" layout="fixed" width="108" height="72"></amp-img>
    <amp-img src="https://unsplash.it/108/72?image=1039" layout="fixed" width="108" height="72"></amp-img>
    <amp-img src="https://unsplash.it/108/72?image=1040" layout="fixed" width="108" height="72"></amp-img>
    <amp-img src="https://unsplash.it/108/72?image=1041" layout="fixed" width="108" height="72"></amp-img>
    <amp-img src="https://unsplash.it/108/72?image=1042" layout="fixed" width="108" height="72"></amp-img>
    <amp-img src="https://unsplash.it/108/72?image=1043" layout="fixed" width="108" height="72"></amp-img>
    <amp-img src="https://unsplash.it/108/72?image=1044" layout="fixed" width="108" height="72"></amp-img>

</amp-carousel>
請注意,我們只是使用 layout="fixed" 和低解析度版本的相同相片做為縮圖。
請參閱以下說明:
使用者輕觸縮圖時變更圖片
為此,我們需要將事件 (例如 tap) 繫結至動作 (例如變更投影片)。
event: 我們可以使用 on 屬性在元素上安裝事件處理常式,所有元素都支援 tap 事件。
action: amp-carousel公開 goToSlide(index=INTEGER) 動作,我們可以從每個縮圖圖片的輕觸事件處理常式呼叫該動作。
瞭解事件和動作後,接著來將兩者繫結在一起。
首先,我們需要為投影片輪播提供 id,以便從縮圖的輕觸事件處理常式參照該輪播。
修改現有程式碼,在投影片輪播 (第一個) 中新增 id 屬性:
<amp-carousel
  id="imageSlides"
  type="slides"

  ....
現在,我們來安裝事件處理常式 (on="tap:imageSlides.goToSlide(index=<slideNumber>)")) 每個縮圖圖片:
<amp-img on="tap:imageSlides.goToSlide(index=0)" role="button" tabindex="1" layout="fixed" ...
<amp-img on="tap:imageSlides.goToSlide(index=1)" role="button" tabindex="1" layout="fixed" ...
<amp-img on="tap:imageSlides.goToSlide(index=2)" role="button" tabindex="1" layout="fixed" ...
...
請注意,我們也必須提供 tabindex,並設定 ARIA role 以利無障礙功能。
就是這麼簡單!現在輕觸每張縮圖,即可在投影片輪轉介面中查看對應圖片。

使用者輕觸縮圖時醒目顯示
我們可以這麼做嗎?似乎沒有任何動作可變更元素的 CSS 類別,以便從輕觸事件處理常式呼叫。那麼,如何醒目顯示所選縮圖?
<amp-selector>來救援!
amp-selector 與我們目前為止使用的元件不同。這不是簡報元件,因為不會影響網頁的版面配置,而是建構區塊,可讓 AMP 網頁瞭解使用者選取的選項。
amp-selector 的功能相當簡單,但卻很強大:
amp-selector可包含任意 HTML 元素或 AMP 元件。- 只要有
option=<value>屬性,amp-selector的任何子項元素都可以成為選項。 - 使用者輕觸選項元素時,
amp-selector只會將selected屬性新增至該元素 (並在單選模式中從其他選項元素移除)。 - 您可以透過 CSS 屬性選取器指定
selected屬性,在自訂 CSS 中設定所選元素的樣式。
讓我們看看這項功能如何協助我們完成手邊的工作。
將 amp-selector 的指令碼標記新增至 head:
<script custom-element="amp-selector" src="https://cdn.ampproject.org/v0/amp-selector-0.1.js" async></script>- 將縮圖輪轉介面包裝在
amp-selector - 新增
option=<value>屬性,將每個縮圖設為選項。 - 新增
selected屬性,將第一個縮圖設為預設選取項目。
<amp-selector>

  <amp-carousel layout="fixed-height" height="78" class="mt1">

    <amp-img option=0 selected on="tap:imageSlides.goToSlide(index=0)" ...

    <amp-img option=1 on="tap:imageSlides.goToSlide(index=1)" ...

    ...

  </amp-carousel>

</amp-selector>
現在我們需要新增樣式,醒目顯示所選縮圖。
在 <style amp-custom> 中,於 AMP Start 的 CSS 樣板縮減後,加入下列自訂 CSS:
<style amp-custom>
...

/* low opacity for non-selected thumbnails */
amp-selector amp-img[option] {
  opacity: 0.4;
}

/* normal opacity for the selected thumbnail */
amp-selector amp-img[option][selected] {
  opacity: 1;
}

</style>
請參閱以下說明:
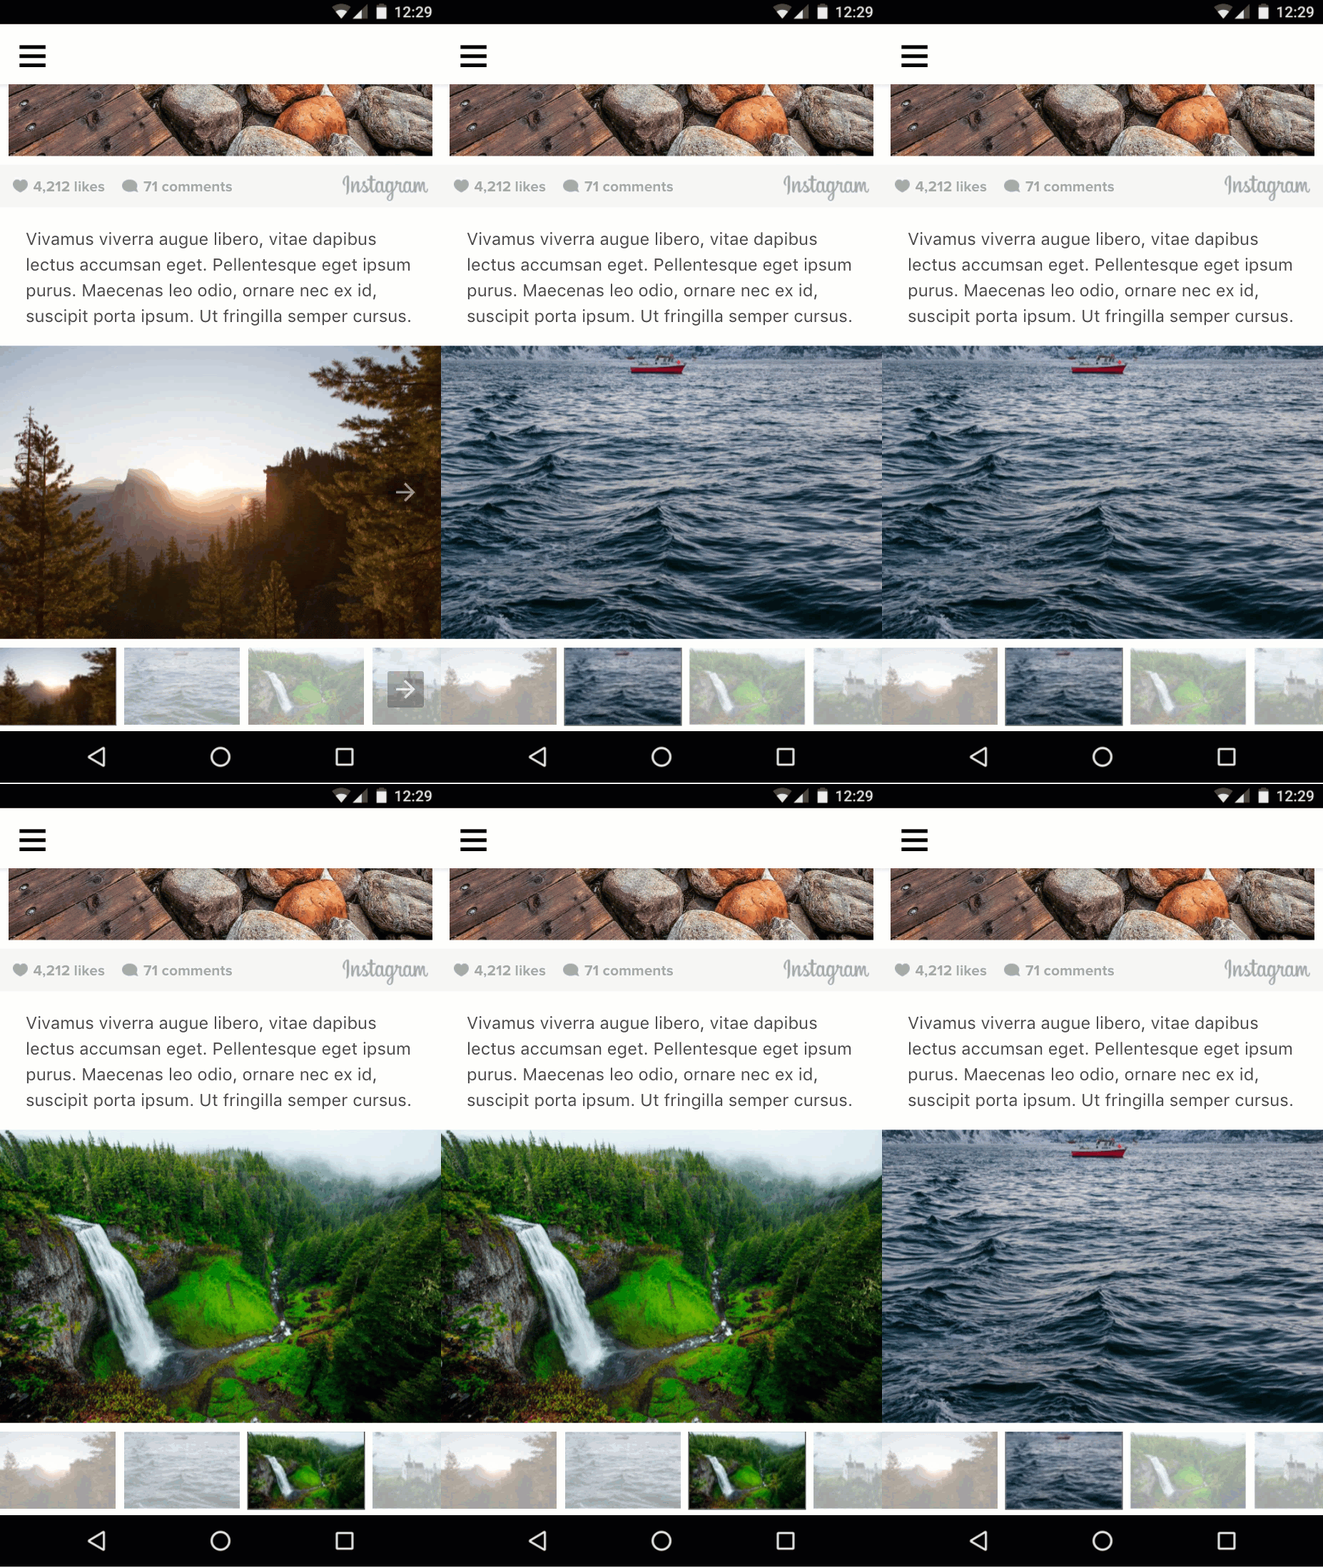
看起來不錯,但您是否發現錯誤?
如果使用者滑動投影片輪播介面,選取的縮圖不會更新。如何將輪播中的目前投影片與選取的縮圖繫結?
下一節將說明如何進行這項操作。
摘要
- 您已瞭解不同類型的輪播廣告,以及如何使用這些廣告。
- 您使用了 AMP 動作和事件,在使用者輕觸縮圖時變更圖片輪播中的可見幻燈片。
- 您已瞭解
amp-selector,以及如何將其做為建構區塊,實作有趣的用途。
本節的完整程式碼請見:http://codepen.io/aghassemi/pen/gmMJMy
在本節中,我們將使用 amp-bind 改善上一節圖片庫的互動性。
什麼是 amp-bind?
核心 AMP 元件 amp-bind 可讓您透過資料繫結和運算式建立自訂互動功能。
amp-bind 包含三個主要部分:
- 州
- 繫結
- 更改
狀態是應用程式狀態變數,可包含單一值到複雜的資料結構。所有元件都可以讀取及寫入這個共用變數。
繫結 是一種運算式,可將狀態繫結至 HTML 屬性或元素的內容。
異動 是指因應某些使用者動作或事件,變更狀態值的動作。
amp-bind 的強大功能會在發生突變時啟動:所有繫結至該狀態的元件都會收到通知,並自動更新以反映新狀態。
我們來看看實際的運作情形!
使用 amp-bind 重新實作圖片庫
先前,我們使用 AMP 動作 (例如 goToSlide()) 將全圖片幻燈片輪轉介面與縮圖圖片上的 tap 事件繫結,並使用 amp-selector 醒目顯示所選縮圖。
讓我們看看如何使用 amp-bind 資料繫結方法,完全重新實作這段程式碼。
不過在開始編寫程式碼之前,我們先設計方法:
1. 我們的狀態為何?
在本例中,我們只關心目前的投影片編號,因此 selectedSlide 就是我們的狀態。
2. 我們的約束條件為何?
selectedSlide 異動時,需要變更哪些內容?
- 全螢幕圖片輪轉介面中顯示的
slide:
<amp-carousel [slide]="selectedSlide" ...amp-selector中的selected項目也需要變更。這會修正上一節遇到的錯誤。
<amp-selector [selected]="selectedSlide" ...3. 我們的變動是什麼?
selectedSlide 何時需要變更?
- 使用者在全螢幕圖片輪轉介面中滑動切換至新投影片時:
<amp-carousel on="slideChange:AMP.setState({selectedSlide:event.index})" ...- 使用者選取縮圖時:
<amp-selector on="select:AMP.setState({selectedSlide:event.targetOption})" ...我們將使用 AMP.setState 觸發突變,這表示我們不再需要縮圖上的所有 on="tap:imageSlides.goToSlide(index=n)" 程式碼!
讓我們將所有內容整合在一起:
將 amp-bind 的指令碼標記新增至 head:
<script custom-element="amp-bind" src="https://cdn.ampproject.org/v0/amp-bind-0.1.js" async></script>使用新方法取代現有圖片庫程式碼:
<amp-carousel [slide]="selectedSlide" on="slideChange:AMP.setState({selectedSlide:event.index})" type="slides" id="imageSlides" layout="responsive" width="1080" height="720">

  <amp-img src="https://unsplash.it/1080/720?image=1037" layout="fill"></amp-img>
  <amp-img src="https://unsplash.it/1080/720?image=1038" layout="fill"></amp-img>
  <amp-img src="https://unsplash.it/1080/720?image=1039" layout="fill"></amp-img>
  <amp-img src="https://unsplash.it/1080/720?image=1040" layout="fill"></amp-img>
  <amp-img src="https://unsplash.it/1080/720?image=1041" layout="fill"></amp-img>
  <amp-img src="https://unsplash.it/1080/720?image=1042" layout="fill"></amp-img>
  <amp-img src="https://unsplash.it/1080/720?image=1043" layout="fill"></amp-img>
  <amp-img src="https://unsplash.it/1080/720?image=1044" layout="fill"></amp-img>

</amp-carousel>


<amp-selector [selected]="selectedSlide" on="select:AMP.setState({selectedSlide:event.targetOption})">

  <amp-carousel layout="fixed-height" height="78" class="mt1">

    <amp-img option=0 selected src="https://unsplash.it/108/72?image=1037" layout="fixed" width="108" height="72"></amp-img>
    <amp-img option=1 src="https://unsplash.it/108/72?image=1038" layout="fixed" width="108" height="72"></amp-img>
    <amp-img option=2 src="https://unsplash.it/108/72?image=1039" layout="fixed" width="108" height="72"></amp-img>
    <amp-img option=3 src="https://unsplash.it/108/72?image=1040" layout="fixed" width="108" height="72"></amp-img>
    <amp-img option=4 src="https://unsplash.it/108/72?image=1041" layout="fixed" width="108" height="72"></amp-img>
    <amp-img option=5 src="https://unsplash.it/108/72?image=1042" layout="fixed" width="108" height="72"></amp-img>
    <amp-img option=6 src="https://unsplash.it/108/72?image=1043" layout="fixed" width="108" height="72"></amp-img>
    <amp-img option=7 src="https://unsplash.it/108/72?image=1044" layout="fixed" width="108" height="72"></amp-img>

  </amp-carousel>

</amp-selector>
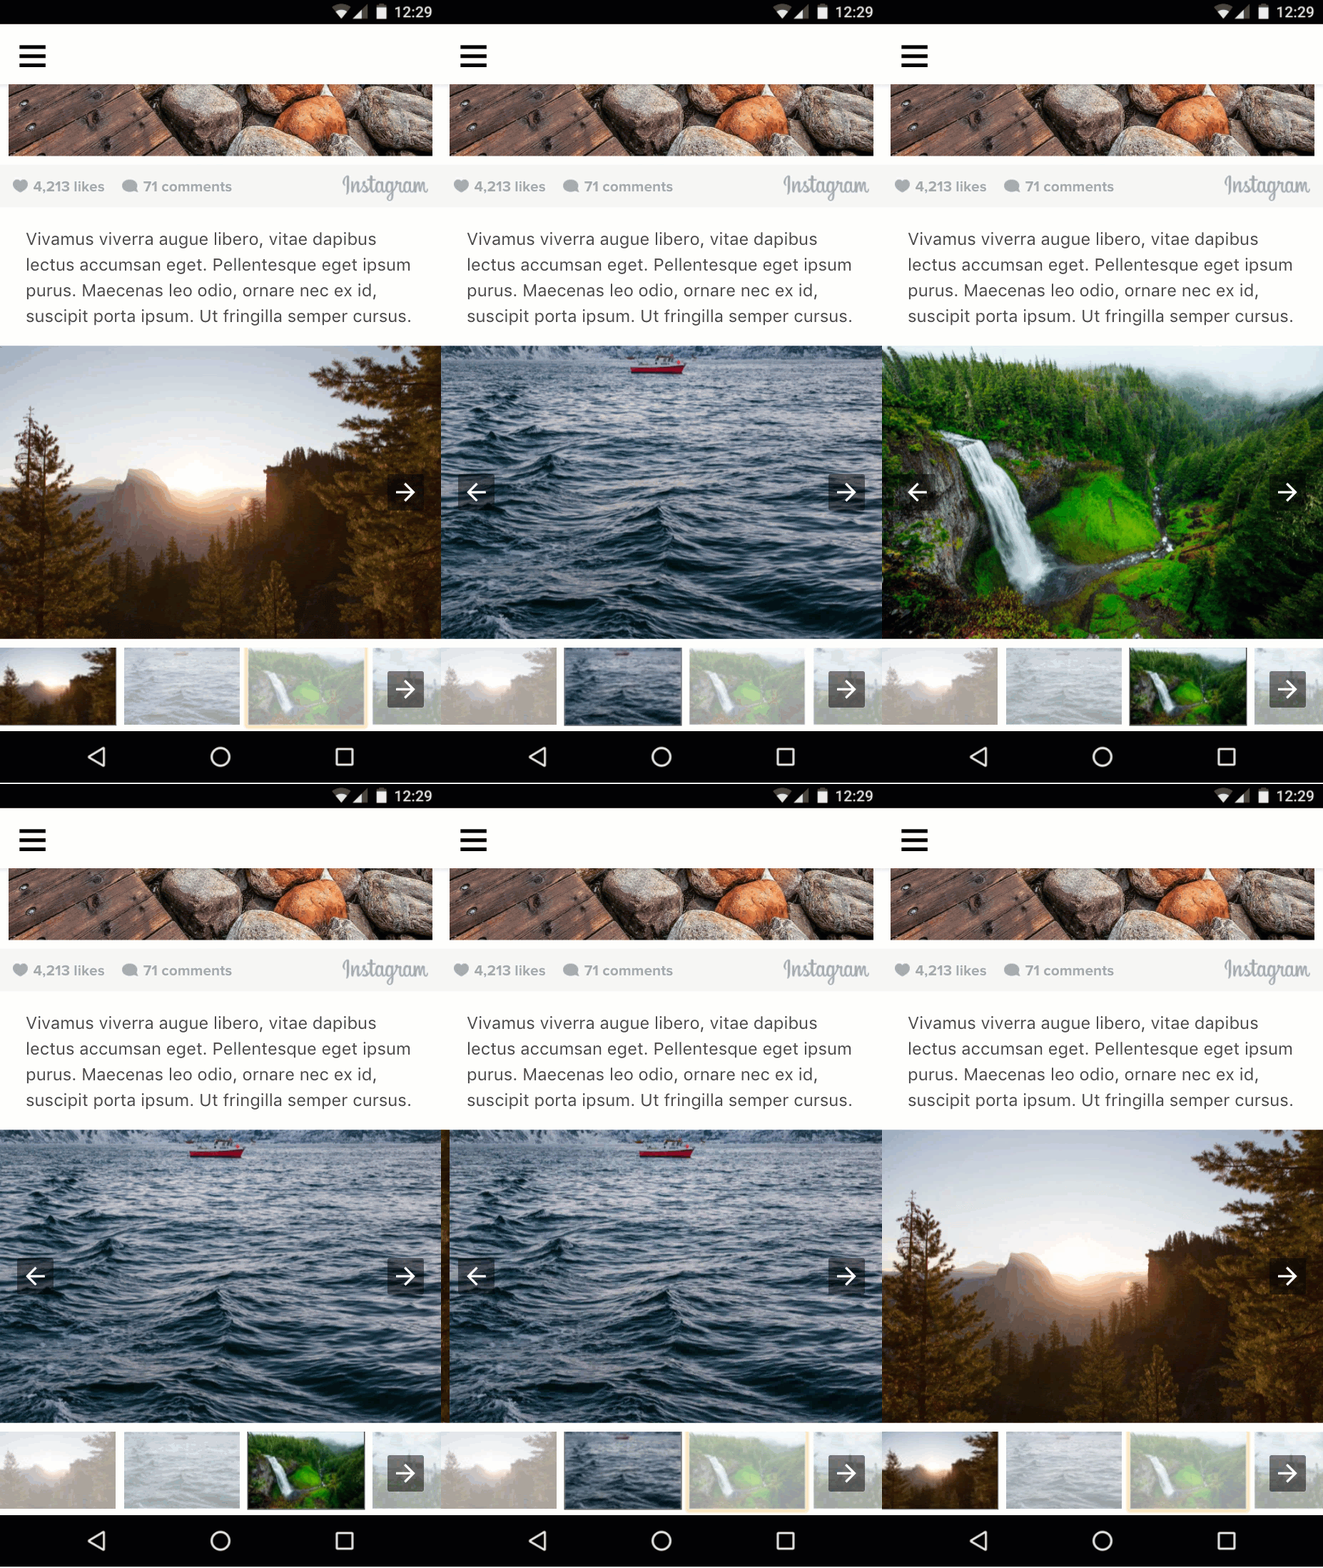
我們來測試看看。輕觸縮圖,圖片就會隨之變更。滑動圖片,醒目顯示的縮圖就會隨之變更。
在圖片庫中新增文字
我們已完成定義及變動目前投影片狀態的繁瑣作業。現在我們可以輕鬆提供額外繫結,根據目前的投影片編號更新其他資訊。
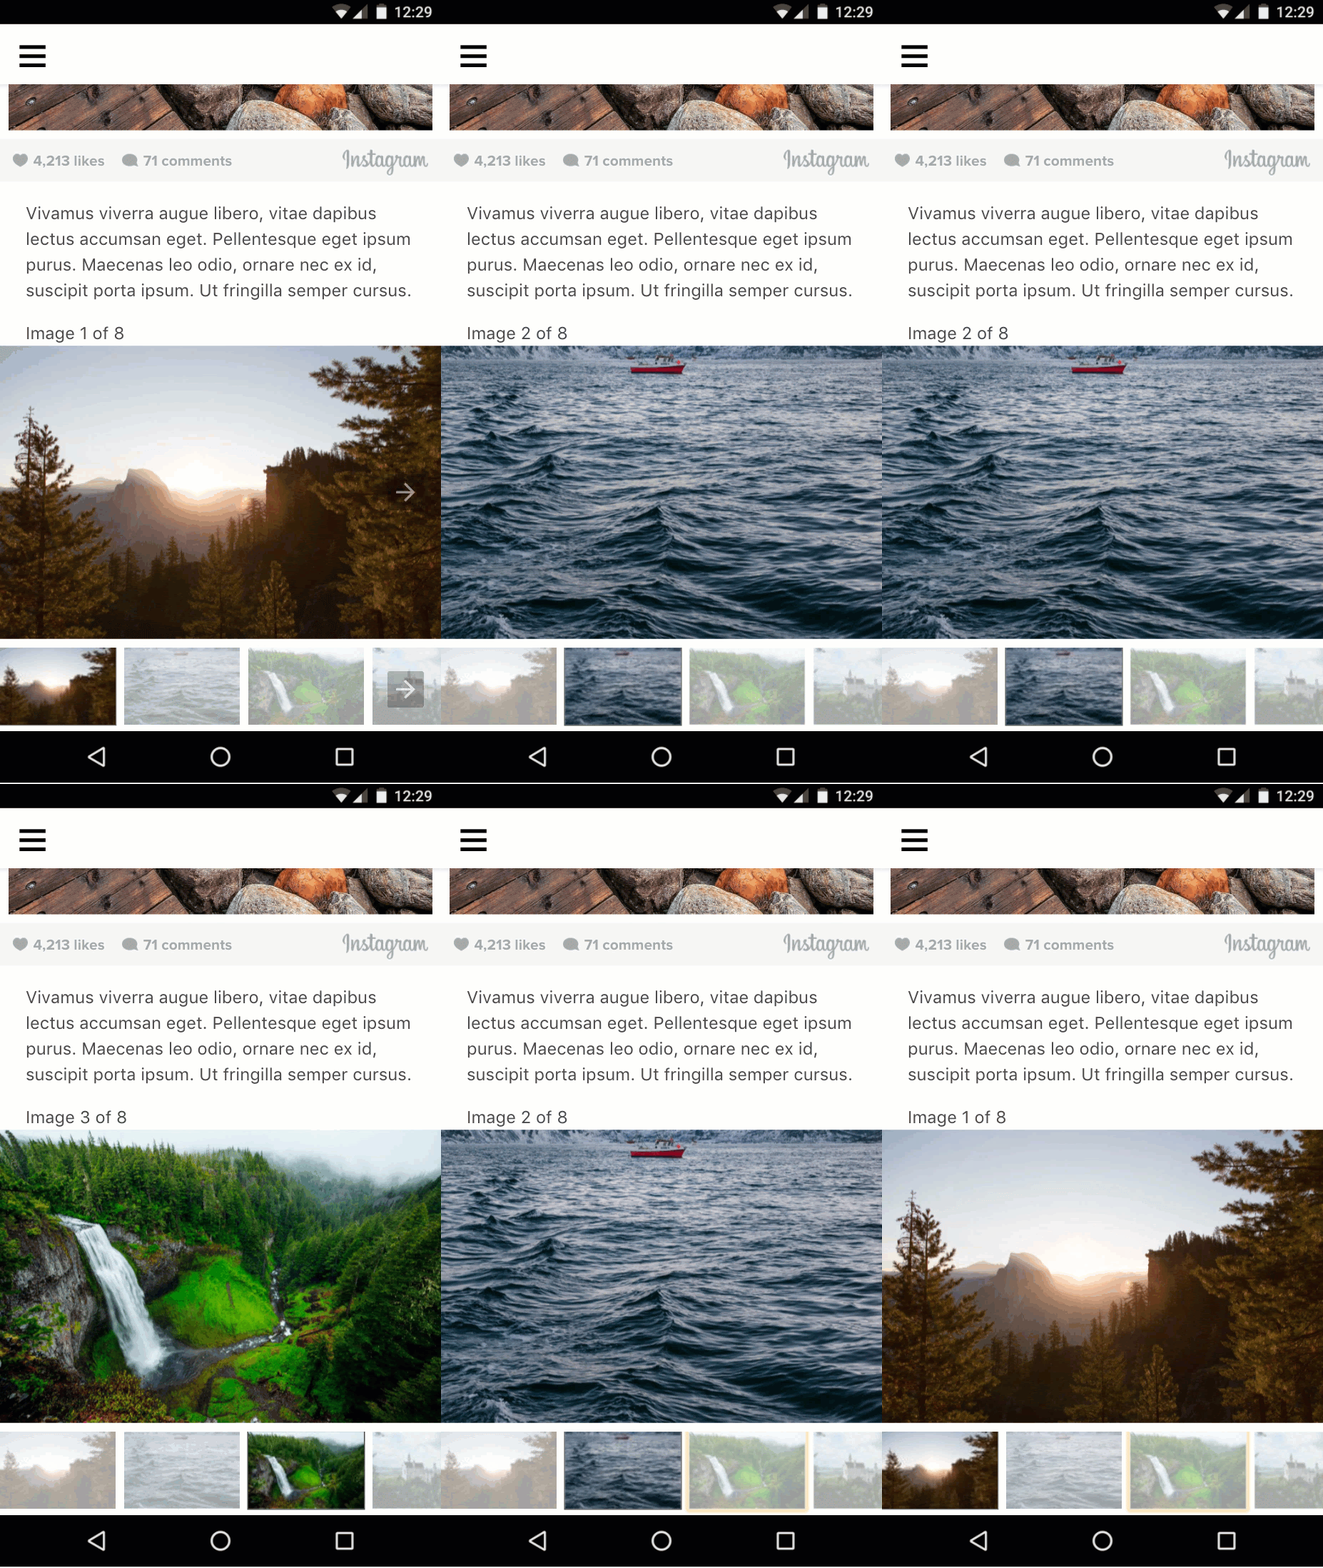
讓我們在圖庫中新增「圖片 x/y」文字:
在輪播投影片元素上方新增下列程式碼:
<div class="px3">Image <span [text]="1*selectedSlide + 1">1</span> of 8</div>這次我們使用 [text]= 繫結至元素的內部文字,而非繫結至 HTML 屬性。
試試看:
摘要
- 您也瞭解了
amp-bind。 - 您使用
amp-bind實作了改良版的圖片庫。
本節的完整程式碼請見:http://codepen.io/aghassemi/pen/MpeMdL
在本節中,我們將使用兩項新功能,為網頁新增動畫。
為標題新增視差效果
amp-fx-collection 擴充功能提供一系列預設視覺效果 (例如視差),只要使用屬性,就能在任何元素上輕鬆啟用。
使用視差效果時,使用者捲動網頁時,元素會根據指派給屬性的值,以較快或較慢的速度捲動。
如要啟用視差效果,請在任何 HTML 或 AMP 元素中加入 amp-fx="parallax" data-parallax-factor="<a decimal factor>" 屬性。
- 如果因子值大於 1,使用者向下捲動網頁時,元素捲動速度會更快。
- 如果因子值小於 1,使用者向下捲動網頁時,元素捲動速度會變慢。
讓我們在網頁標題中加入視差效果,並將係數設為 1.5,看看效果如何!
將 amp-fx-collection 的指令碼標記新增至 head:
<script custom-element="amp-fx-collection" src="https://cdn.ampproject.org/v0/amp-fx-collection-0.1.js" async></script>現在,請在程式碼中找出現有的標題元素,並為其新增 amp-fx="parallax" and data-parallax-factor="1.5" 屬性:
<header amp-fx="parallax" data-parallax-factor="1.5" class="p3">
  <h1 class="ampstart-fullpage-hero-heading mb3">
    <span class="ampstart-fullpage-hero-heading-text">
      Most Beautiful Hikes in the Pacific Northwest
    </span>
  </h1>
  <span class="ampstart-image-credit h4">
    By <a href="#" role="author" class="text-decoration-none">D.F. Roy</a>,<br> January 14, 2017
  </span>
</header>
結果如下:

現在標題的捲動速度比頁面其餘部分更快。太棒了!
在網頁中加入動畫
amp-animation 這項功能可將 Web Animations API 帶到 AMP 網頁。
在本節中,我們將使用 amp-animation 為封面圖片建立細微的放大效果。
將 amp-animation 的指令碼標記新增至 head:
<script custom-element="amp-animation" src="https://cdn.ampproject.org/v0/amp-animation-0.1.js" async></script>現在我們需要定義動畫,以及動畫套用的目標元素。
動畫定義為頂層 amp-animation 標記內的 JSON。
在網頁的開頭 body 標記下方,直接插入下列程式碼。
<amp-animation trigger="visibility" layout="nodisplay">
    <script type="application/json">
      {
        "target": "heroimage",
        "duration": 30000,
        "delay": 0,
        "fill": "forwards",
        "easing": "ease-out",
        "keyframes": {"transform":  "scale(1.3)"}
      }
      </script>
</amp-animation>
這段程式碼定義的動畫會執行 30 秒,不會延遲,並將圖片放大 30%。
我們定義了前進 fill,讓圖片在動畫結束後保持放大狀態。target 是動畫套用的元素 HTML id。
我們在網頁的主頁橫幅圖片元素中新增 id,讓 amp-animation 可以對其執行動作。
- 在程式碼中找出現有的主打圖片 (高解析度圖片,附有
layout="fixed-height"),然後將id="heroimage"新增至amp-img標記。 - 為求簡單,請一併刪除
media="(min-width: 416px)",並移除其他低解析度的amp-img,這樣我們暫時就不必在 amp-animation 中處理多個動畫和媒體查詢。
<figure class="ampstart-image-fullpage-hero m0 relative mb4">

    <amp-img id="heroimage" height="1800" layout="fixed-height" src="https://unsplash.it/1200/1800?image=1003"></amp-img>

    <figcaption class="absolute top-0 right-0 bottom-0 left-0">

...
如您所見,縮放圖片會導致圖片溢出父項,因此我們需要隱藏溢出部分來修正這個問題。
在現有 <style amp-custom> 的結尾加入下列 CSS 規則:
.ampstart-image-fullpage-hero {
  overflow: hidden;
}
試試看,看看效果如何:

就是這麼簡單!
但我本來就可以透過 CSS 做到這一點。 amp-animation有什麼意義?
這個案例確實如此,但 amp-animation 可啟用額外功能,這些功能無法單獨使用 CSS 達成。舉例來說,動畫可以根據顯示設定觸發 (也可以根據顯示設定暫停),或透過 AMP 動作觸發。amp-animation 也以 Web Animations API 為基礎,相較於 CSS 動畫,Web Animations API 具有更多功能,尤其是在可組合性方面。
摘要
- 您已瞭解如何使用
amp-fx-collection建立視差效果。 - 您也瞭解了
amp-animation。
本節的完整程式碼請見:http://codepen.io/aghassemi/pen/OpXKzo
您剛完成建立美觀的互動式 AMP 網頁。
讓我們再次回顧您今天的成就,一同慶祝。
這是完成的頁面連結:http://s.codepen.io/aghassemi/debug/OpXKzo
... and the final code: http://codepen.io/aghassemi/pen/OpXKzo

如要查看本程式碼研究室的 CodePen 項目集合,請前往:https://codepen.io/collection/XzKmNB/
喔,在繼續之前...
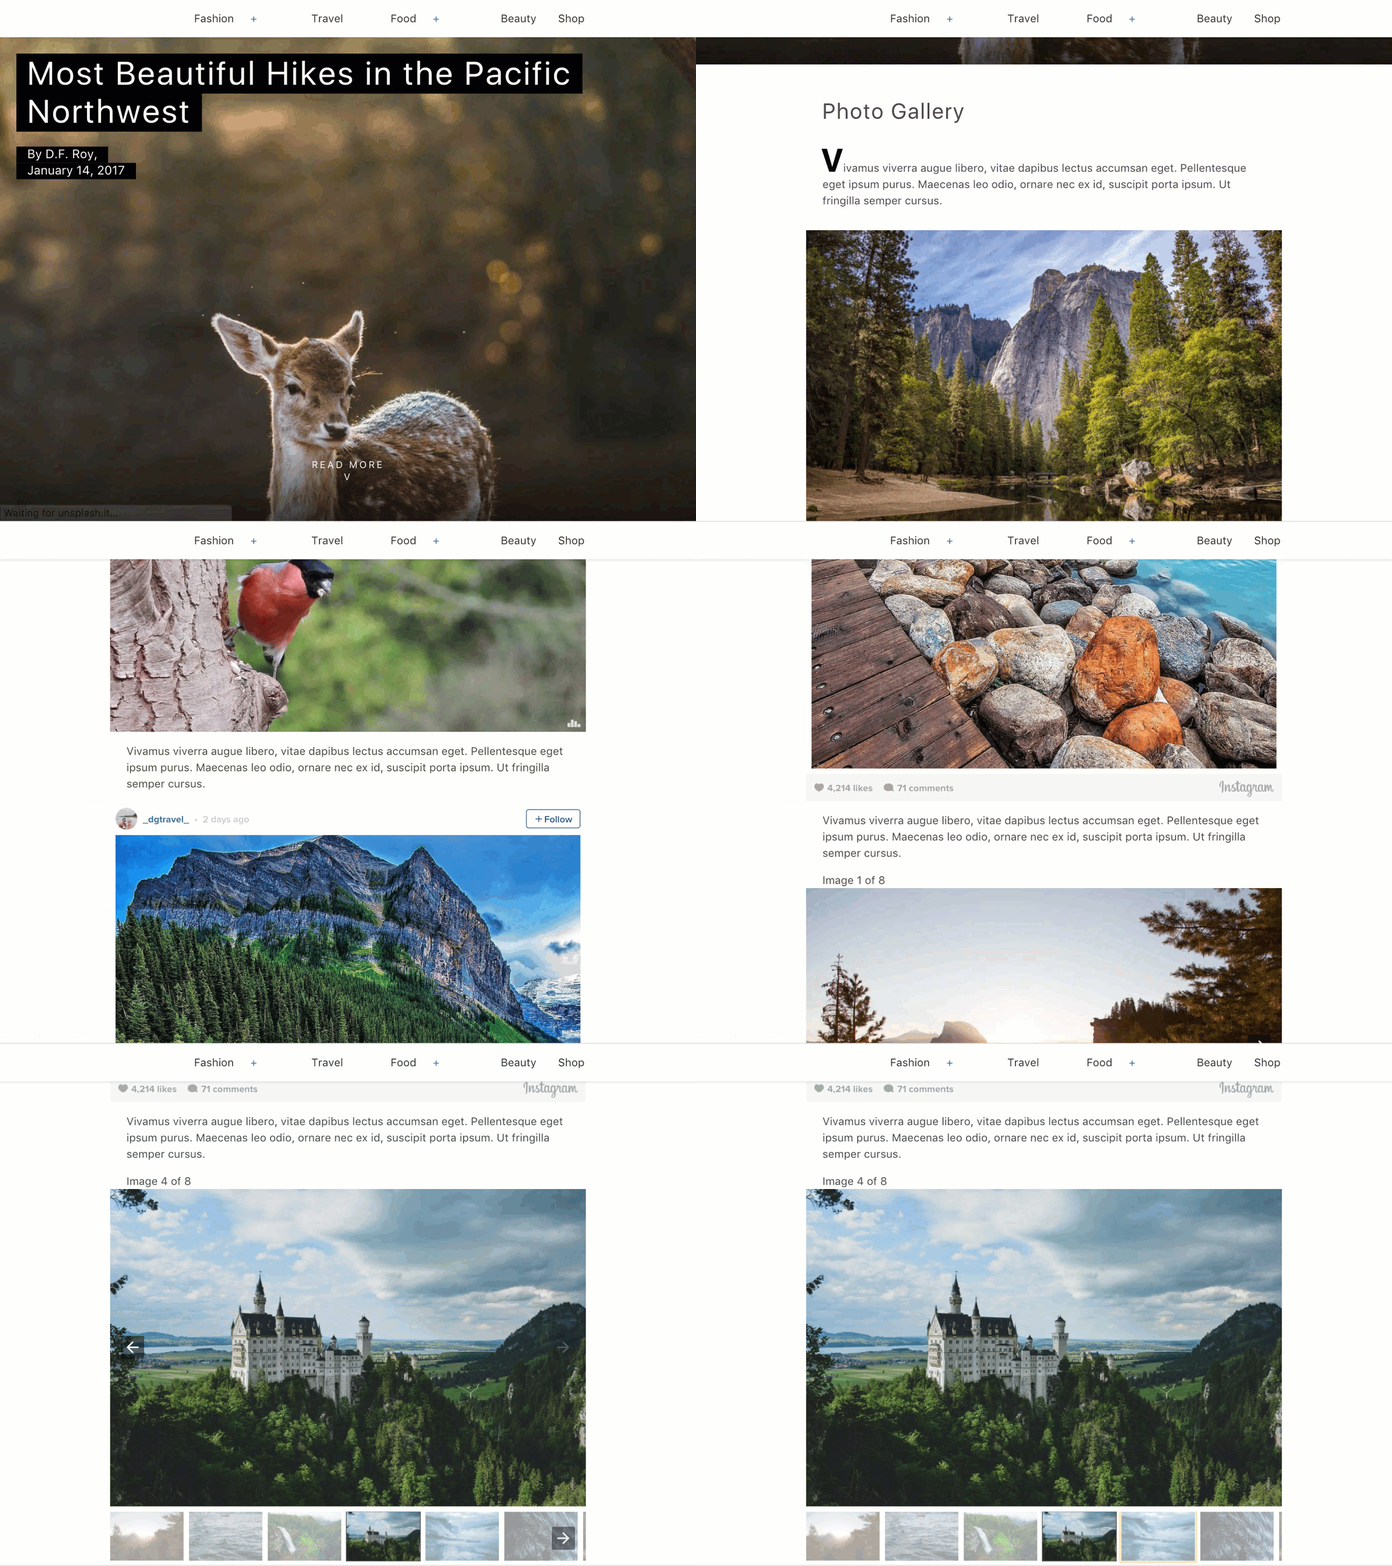
我們忘了檢查網頁在其他板型規格上的顯示方式,例如橫向模式的平板電腦。
請參閱以下範例:
太棒了!
祝你有美好的一天。
後續步驟
這個程式碼研究室僅初步介紹 AMP 的功能。我們提供許多資源和程式碼研究室,協助您建立出色的 AMP 網頁:
如有任何疑問或遇到問題,請前往 AMP Slack 頻道與我們聯絡,或在 GitHub 上建立討論、錯誤報告或功能要求。


