Interfejsy Google Fit API, w tym interfejs Google Fit API typu REST, zostaną wycofane w 2026 roku. Od 1 maja 2024 r. deweloperzy nie mogą rejestrować się w celu korzystania z tych interfejsów API.
Pierwsze kroki na Androidzie
Zadbaj o dobrą organizację dzięki kolekcji
Zapisuj i kategoryzuj treści zgodnie ze swoimi preferencjami.
Z tego przewodnika dowiesz się, jak rozpocząć programowanie z Google Fit na Androidzie.
Konfiguracja
Zanim zaczniesz tworzyć aplikację, wykonaj czynności opisane w tych sekcjach.
Załóż konto Google
Aby korzystać z interfejsów Google Fit API, musisz mieć konto Google. Możesz utworzyć nowe konto lub użyć istniejącego. Możesz utworzyć osobne konto, aby testować aplikację z perspektywy użytkownika.
Pobierz Usługi Google Play
Pobierz najnowszą bibliotekę klienta Usług Google Play na hosta deweloperskiego:
Dzięki temu Gradle automatycznie pobierze pakiet SDK do fitnessu podczas kompilowania aplikacji.
Tworzenie i testowanie aplikacji
Po wykonaniu czynności konfiguracyjnych możesz zacząć tworzyć aplikację. Na początek dowiedz się więcej o typach danych, które Twoja aplikacja może przechowywać i odczytywać. Dowiedz się więcej o pracy z danymi w Google Fit.
Utwórz klienta interfejsu API i dodaj typy danych, do których Twoja aplikacja musi mieć dostęp, aby zapisywać lub odczytywać dane. Dostępne są te punkty końcowe:
SensorsClient: dostęp do różnych źródeł danych o zdrowiu i samopoczuciu z czujników sprzętowych na urządzeniu lokalnym i urządzeniach towarzyszących.
RecordingClient: do ciągłego zbierania danych z czujników w tle przy niskim zużyciu energii.
HistoryClient: wstawianie, usuwanie i odczytywanie danych historycznych w Google Fit.
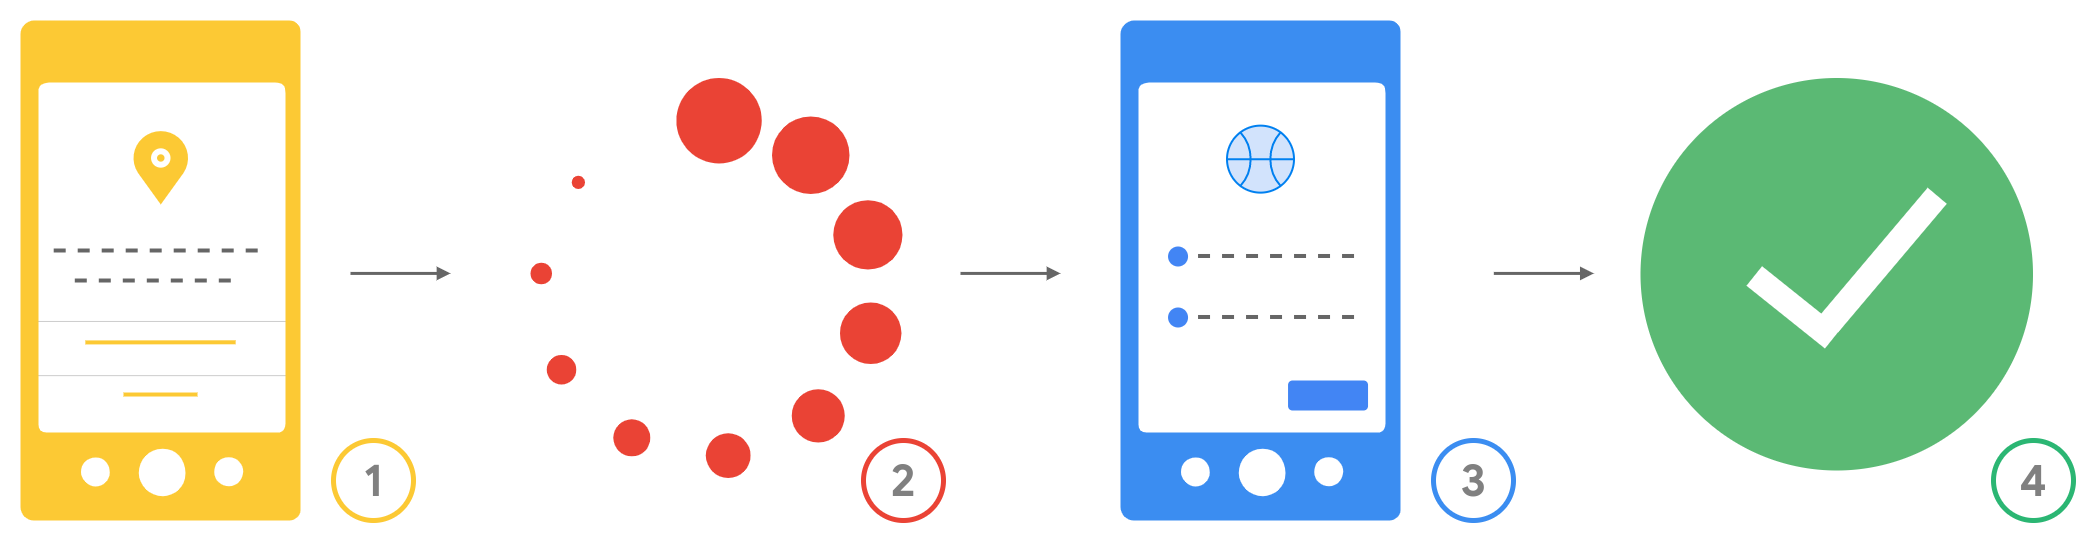
Poniżej przedstawiono wynikowy proces autoryzacji, z którym użytkownicy mają do czynienia, gdy są proszeni o uprawnienia:
Rysunek 1. Proces autoryzacji użytkowników.
Uprawnienia na Androidzie: przed pobraniem aplikacji użytkownicy widzą, o jakie uprawnienia na Androidzie prosi aplikacja. Po pobraniu aplikacja prosi o przyznanie uprawnień w czasie działania, a użytkownicy mogą je przyznać lub odrzucić.
Sprawdzanie i nawiązywanie połączenia: aplikacja sprawdza, czy przyznano uprawnienia, zanim poprosi o dostęp do innych typów danych.
Żądanie zakresów OAuth: Google prosi użytkownika o przyznanie aplikacji zakresów OAuth potrzebnych do uzyskania dostępu do typów danych, których aplikacja potrzebuje.
Dostęp zastosowany: po przyznaniu uprawnień przez użytkownika aplikacja może uzyskiwać dostęp do typów danych należących do zakresów, na które użytkownik wyraził zgodę.