API Google Fit, включая REST API Google Fit, прекратят поддержку в 2026 году . С 1 мая 2024 г. разработчики не смогут зарегистрироваться для использования этих API .
Начать работу на Android
Оптимизируйте свои подборки
Сохраняйте и классифицируйте контент в соответствии со своими настройками.
В этом руководстве объясняется, как начать разработку приложений с использованием Google Fit на Android.
Настраивать
Прежде чем приступить к разработке приложения, выполните шаги, описанные в следующих разделах.
Зарегистрируйте аккаунт Google
Для использования API Google Fit вам потребуется учетная запись Google. Вы можете создать новую учетную запись или использовать существующую. Возможно, вам стоит создать отдельный аккаунт, чтобы протестировать приложение с точки зрения пользователя.
Получите сервисы Google Play
Получите последнюю версию клиентской библиотеки для сервисов Google Play на своем хосте разработки:
Мы рекомендуем использовать среду разработки Android Studio для создания приложения с использованием Fitness API. Подробную информацию о создании нового проекта и его настройке в Android Studio см. в разделе «Создание проекта» .
Добавьте клиентскую библиотеку сервисов Google Play.
В Android Studio откройте файл build.gradle для вашего модуля и добавьте клиентскую библиотеку Google Play Services в качестве зависимости:
Это гарантирует, что Gradle автоматически загрузит SDK для фитнеса при сборке вашего приложения.
Создайте и протестируйте своё приложение.
После завершения этапов настройки вы можете приступить к созданию своего приложения. Для начала ознакомьтесь с типами данных, которые ваше приложение может хранить и считывать . Узнайте больше о работе с данными в Google Fit.
Создайте API-клиент и добавьте типы данных, к которым вашему приложению необходим доступ для записи или чтения данных. Доступны следующие конечные точки:
SensorsClient : Доступ к различным источникам данных о здоровье и самочувствии от аппаратных датчиков локального устройства и сопутствующих устройств.
RecordingClient : Для маломощного, постоянно работающего фонового сбора данных с датчиков.
HistoryClient : Вставка, удаление и чтение исторических данных в Google Fit.
В результате формируется процесс авторизации пользователя.
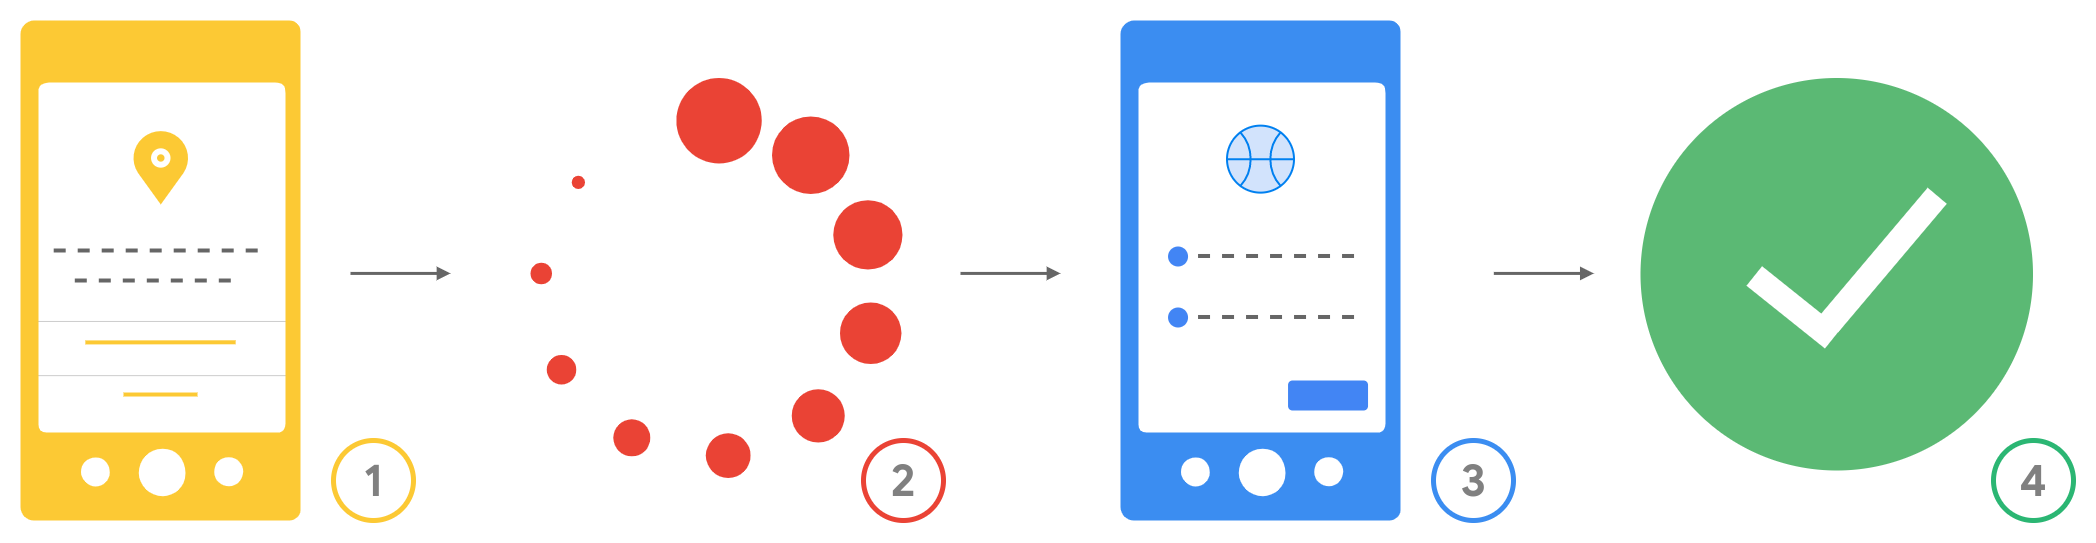
Ниже показана последовательность действий при авторизации, с которой сталкиваются пользователи при запросе разрешений:
Рисунок 1. Схема авторизации пользователей.
Разрешения Android : Пользователи видят, какие разрешения Android запросило ваше приложение перед его загрузкой. После загрузки приложение запрашивает необходимые разрешения во время выполнения, и пользователи предоставляют или отклоняют эти разрешения.
Проверка и подключение : Ваше приложение проверяет, были ли предоставлены разрешения, прежде чем запрашивать доступ к другим типам данных.
Запрос на предоставление OAuth-доменов : Google запрашивает у пользователя разрешение на предоставление вашему приложению необходимых OAuth-доменов для тех типов данных, к которым оно хочет получить доступ.
Применённый доступ : После того, как пользователь предоставит разрешения, ваше приложение сможет получить доступ к типам данных, которые относятся к областям действия, на которые пользователь предоставил разрешение.