بدء استخدام مكتبة برامج .NET
تنظيم صفحاتك في مجموعات
يمكنك حفظ المحتوى وتصنيفه حسب إعداداتك المفضّلة.
جيف فيشر، فريق Google Data APIs
أغسطس 2007
مقدمة
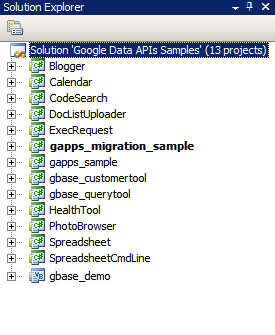
الشكل 1: حلّ Google Data API
بالنسبة إلى العديد من المطوّرين، فإنّ الجزء الأكثر صعوبة في أي مشروع جديد هو البدء فيه، أي تثبيت حِزم برامج جديدة وإعداد بيئة تطوير وتعلُّم مكتبات جديدة. في هذه المقالة، جمعتُ بعض التعليمات المفصّلة حول كيفية بدء استخدام مكتبة برامج .NET باستخدام Visual Studio 2005 لنظام التشغيل Windows أو Mono لنظام التشغيل Linux وأنظمة تشغيل Unix الأخرى. آمل أن يساعدك ذلك في توفير بعض الوقت عند البدء وأن يتيح لك البدء بسرعة في العمل باستخدام بعض الرموز البرمجية.
Visual Studio 2008
إذا لم يكن لديك Visual Studio 2008 مثبّتًا، يمكنك استخدام Visual C# 2008 Express Edition، وهو إصدار مجاني من Visual Studio يتيح لك استخدام مكتبة برامج العميل .NET.
إعداد البيئة
- نزِّل أحدث إصدار MSI من مكتبة البرامج من http://code.google.com/p/google-gdata/downloads/list.
- شغِّل ملف MSI الذي تم تنزيله لتثبيت الحزمة. سيتم تثبيته في "C:\Program Files\Google\Google Data API SDK\" تلقائيًا. ستفترض الأمثلة الإضافية في هذه المقالة أنّك ثبّت مكتبة البرامج في هذا الموقع.
- افتح ملف الحلّ الذي يُسمى "Google Data API SDK" في المجلد "Google Data API SDK" في "قائمة البدء".
تجميع العيّنات وتشغيلها
- تأكَّد من أنّ تنفيذ "إنشاء > إنشاء الحلّ" يكتمل بدون أي أخطاء.
- لإنشاء إصدار تصحيح الأخطاء، انتقِل إلى "إنشاء > مدير الإعداد" (Build > Configuration Manager) واختَر "تصحيح الأخطاء" (Debug) كإعداد الحل النشط. بعد ذلك، اختَر "إنشاء > إنشاء الحل".
- يمكن العثور على الملفات الثنائية وملفات DLL التي تم تجميعها للتو في
"C:\Program Files\Google\Google Data API SDK\Sources\Samples\"
على سبيل المثال، يمكنك تشغيل التطبيق النموذجي لـ "تقويم Google" من خلال تنفيذ "C:\Program Files\Google\Google Data API SDK\Sources\Samples\calendar\bin\Debug\Calendar.exe". تتوفّر أيضًا بعض اختصارات "قائمة البدء" لهذه العيّنات.
تطوير تطبيقك الخاص
إذا أردت التطوير في مشروع خارج ملف الحلّ الذي يوفّره ملف MSI، عليك إضافة ملفات DLL لمكتبة العميل كمسار مرجعي.
- أنشئ مشروعًا أو افتحه خارج حلّ Google API SDK.
- انقر على "إضافة مرجع" من قائمة "المشروع".
- انقر على علامة التبويب "تصفّح".
- انتقِل إلى دليل Redist في حزمة تطوير البرامج (SDK): "C:\Program Files\Google\Google Data API SDK\Redist".
- اختَر ملفات DLL التي سيستخدمها الرمز البرمجي. ستحتاج إلى Google.GData.Extensions.dll وGoogle.GData.Client.dll لمعظم المشاريع، بالإضافة إلى ملف DLL الخاص بخدمات Google التي تستخدمها في تطبيقك.
ملاحظة: يتوفّر أيضًا ملف حل لمكتبات البرامج على الأجهزة الجوّالة. يمكن العثور عليه في "C:\Program Files\Google\Google Data API SDK\Sources\Library\VS2005.mobile" تلقائيًا. سيؤدي هذا الحلّ إلى تجميع ملفات DLL لمكتبات البرامج فقط.
تشغيل اختبارات NUnit
يُعدّ التأكّد من اجتياز اختبارات NUnit المناسبة خطوة مهمة في حال إجراء أي تغييرات على مكتبات البرامج أو التخطيط للمساهمة فيها. إذا كنت تخطّط لاستخدام مكتبات البرامج بدون تعديلات، لن تحتاج عادةً إلى تشغيلها.
- نزِّل إصدار ملف MSI الخاص بـ .NET 2.0 من NUnit من http://www.nunit.org/index.php?p=download.
- ثبِّت NUnit من خلال تشغيل ملف MSI. يكون موقع التثبيت التلقائي مشابهًا للموقع "C:\Program Files\NUnit 2.4.8". يمكنك تغيير ذلك إلى مسار مثل "C:\Program Files\NUnit" لتتمكّن من ترقية NUnit في المستقبل بدون الحاجة إلى تغيير المسار في مشروع Visual Studio.
- انتقِل إلى الدليل "C:\Program Files\Google\Google Data API SDK\Sources\Library\VS2005" وافتح ملف الحلّ الذي يحمل الاسم "Google Data APIs".
سيظهر لك "معالج التحويل" لأنّ هذا الملف هو ملف مشروع Visual Studio 2005. يمكنك النقر على التعليمات أو النقر ببساطة على الزر "إنهاء". من المفترض أن يعرض سجلّ الإحالات الناجحة، ويمكن تجاهله.
- الآن يجب إضافة NUnit كمسار مرجعي. انقر بزر الماوس الأيمن على مشروع "unittests" في "مستكشف الحلول" (Solution Explorer) على اليسار، ثم اختَر "الخصائص" (Properties). انقر الآن على علامة التبويب "مسارات المراجع" (Reference Paths) في النافذة التي تفتح. أدخِل موقع الدليل الفرعي "bin" ضمن عملية تثبيت NUnit كمسار مرجعي، ثم انقر على "إضافة مجلد". على سبيل المثال، إذا تم تثبيت NUnit في "C:\Program Files\NUnit\"، يجب إدخال "C:\Program Files\NUnit\bin". احرص على حفظ هذا التغيير قبل المتابعة.
- اتّبِع الخطوات الواردة في تجميع النماذج وتشغيلها لإعادة إنشاء مكتبة البرامج والوحدات الاختبارية.
- انسخ الملف "unittests.dll.config" في "C:\Program Files\Google\Google Data API SDK\Sources\Library\unittests\" إلى دليل إصدار التصحيح "C:\Program Files\Google\Google Data API SDK\Source\Library\VS2005\unittests\bin\Debug\". تذكَّ تعديل الملف لتضمين المعلومات المناسبة للاختبارات التي تجريها. على سبيل المثال، يتطلّب Base مفتاح واجهة برمجة تطبيقات، بينما يتطلّب "تقويم Google" اسم مستخدم وكلمة مرور. ننصحك باستخدام حساب تجريبي بدون أي بيانات نشطة لتجنُّب حذف المعلومات من خلال اختبارات الوحدة.
- افتح NUnit من قائمة "ابدأ".
- انتقِل إلى "ملف > فتح مشروع" (File > Open Project) واختَر الملف "unittests.dll" من "C:\Program Files\Google\Google Data API SDK\Source\Library\VS2005\unittests\bin\Debug\".
- نفِّذ اختبارات الوحدات التي تهمّك. تذكَّر أنّ بعض الاختبارات تتطلّب ضبط المَعلمات في unittests.dll.config لكي تعمل. في حال إجراء اختبارات التحمّل لخدمات معيّنة، قد يتم الإبلاغ عن حسابك التجريبي على أنّه ينشئ محتوًى غير مرغوب فيه، وقد لا تتمكّن من إرسال المحتوى إلى خوادم Google آليًا بدون مواجهة تحديات CAPTCHA.
أحادي
Mono هو مشروع مفتوح المصدر يتيح لك تشغيل تطبيقات العميل والخادم .NET على أنظمة Linux وSolaris وMac OS X وWindows وUnix. نوفّر ملف ZIP منفصلاً لمكتبة برامج العميل للمطوّرين الذين يريدون العمل على إحدى هذه المنصات.
إعداد البيئة
- نزِّل أحدث إصدار من ملف ZIP لمكتبة البرامج من http://code.google.com/p/google-gdata/downloads/list
- استخرِج الملف إلى دليل محلي (مثل "/scratch/gdata.NET").
- استخدِم إدارة الحِزم في التوزيع لتثبيت Mono.
يمكنك بدلاً من ذلك تنزيله من http://www.mono-project.com.
- في بعض التوزيعات، عليك التأكّد من ربط ملف nunit.framework.dll بشكل صحيح بمكتبة mono. إذا تم تثبيت Mono في "/usr/lib/mono"، تأكَّد من توفّر روابط رمزية في "/usr/lib/mono/1.0" و "/usr/lib/mono/2.0" لملف nunit.framework.dll (الذي يجب تثبيته في "/usr/lib/mono/gac/nunit.framework/<someversionstring>/nunit.framework.dll").
تجميع العيّنات وتشغيلها
- بافتراض أنّك ثبّت مكتبة العميل في "/scratch/gdata.NET"، انتقِل إلى الدليل "/scratch/gdata.NET/clients/cs".
- عدِّل ملف Makefile استنادًا إلى إصدار .NET الذي تريد استخدامه. بالنسبة إلى الإصدار 1 .x من .NET، استخدِم
CSC=mcs
، وبالنسبة إلى الإصدار 2 .x من .NET، استخدِم CSC=gmcs
.
- نفِّذ الأمر
make
لتجميع المكتبات والتطبيقات النموذجية.
- نفِّذ
make install
إذا كنت تريد تثبيت مكتبات الربط الديناميكي لمكتبة البرامج في مكتبة Mono.
تطوير تطبيقك الخاص
إذا نفّذت make install
بعد تجميع مكتبة العميل، من المفترض أن تتمكّن من تضمين المكتبات في الرمز الخاص بك عن طريق تمرير -r:Google.GData.Extensions.dll -r:Google.GData.Client.dll
إلى برنامج تجميع Mono C# مع مراجع لملفات DLL الخاصة بأي إضافات خدمة محدّدة تريد استخدامها.
تشغيل اختبارات NUnit
- انسخ الملف unittests.dll.config من "/scratch/gdata.NET/clients/cs/src/unittests" إلى "/scratch/gdata.NET/clients/cs/".
- عدِّل الملف "/scratch/gdata.NET/clients/cs/unittests.dll.config" لتضمين المعلومات المناسبة للاختبارات التي تجريها. على سبيل المثال، يتطلّب Base مفتاح واجهة برمجة تطبيقات، بينما يتطلّب "تقويم Google" اسم مستخدم وكلمة مرور. أنصحك باستخدام حساب تجريبي بدون أي بيانات نشطة لتجنُّب حذف المعلومات من خلال اختبارات الوحدات.
- بعد تجميع المكتبة، سيظهر ملف unittests.dll في "/scratch/gdata.NET/clients/cs". استخدِم ملف DLL هذا مع مدير اختبار NUnit الذي تختاره (nunit-console أو gnunit أو غير ذلك).
الخاتمة
من المفترض أن تتمكّن الآن من تجميع المكتبات وتشغيل نموذج الرمز البرمجي. ومع ذلك، هذه ليست سوى البداية. أنصحك بقراءة المستندات المتوفّرة في الدليل ".../clients/cs/docs" الخاص بمكتبة البرامج.
يمكنك أيضًا الاطّلاع على دليل المطوّر لمكتبة برامج.NET وصفحة المشروع ودليل المراجع ومنتدى مكتبة برامج Google Data .NET.
الأدوات المُشار إليها في هذه المقالة:
نتمنى لك التوفيق في تطبيق .NET التالي.
إنّ محتوى هذه الصفحة مرخّص بموجب ترخيص Creative Commons Attribution 4.0 ما لم يُنصّ على خلاف ذلك، ونماذج الرموز مرخّصة بموجب ترخيص Apache 2.0. للاطّلاع على التفاصيل، يُرجى مراجعة سياسات موقع Google Developers. إنّ Java هي علامة تجارية مسجَّلة لشركة Oracle و/أو شركائها التابعين.
تاريخ التعديل الأخير: 2025-07-27 (حسب التوقيت العالمي المتفَّق عليه)
[null,null,["تاريخ التعديل الأخير: 2025-07-27 (حسب التوقيت العالمي المتفَّق عليه)"],[[["\u003cp\u003eThis guide provides step-by-step instructions for setting up and using the Google Data .NET client library with either Visual Studio 2008 or Mono.\u003c/p\u003e\n"],["\u003cp\u003eDevelopers can use this library to interact with various Google services like Calendar by compiling and running provided sample applications or by developing their own applications.\u003c/p\u003e\n"],["\u003cp\u003eThe guide includes details on compiling the library, running provided unit tests for verifying functionality, and configuring the development environment for both Windows and Unix-based systems.\u003c/p\u003e\n"],["\u003cp\u003eAdditional resources such as the .NET Client Library Developer's Guide and project forums are available for further assistance.\u003c/p\u003e\n"]]],[],null,["# Getting Started with the .NET Client Library\n\n*Jeff Fisher, Google Data APIs team\nAugust 2007*\n\n- [Introduction](#introduction)\n- [Visual Studio 2008](#vs2005)\n - [Setting up your environment](#vssetup)\n - [Compiling and running samples](#vscompile)\n - [Developing your own application](#vsdevelop)\n - [Running the NUnit tests](#vsnunit)\n- [Mono](#mono)\n - [Setting up your environment](#monosetup)\n - [Compiling and running samples](#monocompile)\n - [Developing your own application](#monodevelop)\n - [Running the NUnit tests](#mononunit)\n- [Conclusion](#conclusion)\n\n### Introduction\n\n\u003cbr /\u003e\n\n**Figure 1: The Google Data API solution**\n\nFor many developers, the most difficult part of a new project is getting the ball rolling-installing new software packages, configuring a development environment, and learning new libraries. In this article, I have pulled together some step-by-step instructions for how to begin with the .NET client library using either Visual Studio 2005 for Windows or Mono for Linux and other Unix operating systems. It is my hope that this will save you some time in getting started and let you quickly start working with some code.\n\nVisual Studio 2008\n------------------\n\nIf you do not already have Visual Studio 2008 installed, you may want to consider using [Visual C# 2008 Express Edition](http://msdn.microsoft.com/en-us/library/orm-9780596521066-01-02.aspx), a free version of Visual Studio that will allow you to work with the .NET client library.\n\n### Setting up your environment\n\n1. Download the latest MSI release of the client library from [http://code.google.com/p/google-gdata/downloads/list](//code.google.com/p/google-gdata/downloads/list).\n2. Run the downloaded MSI file to install the package. It will install to \"C:\\\\Program Files\\\\Google\\\\Google Data API SDK\\\\\" by default. Further examples in this article will assume you installed the client library to this location.\n3. Open the solution file called \"Google Data API SDK\" in the \"Google Data API SDK\" folder in the Start Menu.\n\n### Compiling and running samples\n\n1. Verify that running \"Build \\\u003e Build Solution\" completes without any errors.\n2. To create a Debug build go to \"Build \\\u003e Configuration Manager\" and select \"Debug\" as the active solution configuration. Then select \"Build \\\u003e Build Solution\".\n3. The binaries and DLL files you have just compiled can be found in \"C:\\\\Program Files\\\\Google\\\\Google Data API SDK\\\\Sources\\\\Samples\\\\\" For example, you can run the sample application for Calendar by executing \"C:\\\\Program Files\\\\Google\\\\Google Data API SDK\\\\Sources\\\\Samples\\\\calendar\\\\bin\\\\Debug\\\\Calendar.exe\". There are also some Start Menu shortcuts to these samples.\n\n### Developing your own application\n\nIf you want to develop in a project outside of the solution file provided by the MSI file, you need to add the client library DLL files as a reference path.\n\n1. Create or open a project outside of the Google API SDK solution.\n2. Select \"Add Reference\" from the Project menu.\n3. Click on the Browse tab.\n4. Navigate to the Redist directory in the SDK: \"C:\\\\Program Files\\\\Google\\\\Google Data API SDK\\\\Redist\".\n5. Select the DLL files that will be used by your code. Google.GData.Extensions.dll and Google.GData.Client.dll will be needed for most projects, along with the DLL file specific to the Google service(s) you are using in your application.\n\n**Note:** There is also a solution file for client libraries on Mobile devices. It is found in \"C:\\\\Program Files\\\\Google\\\\Google Data API SDK\\\\Sources\\\\Library\\\\VS2005.mobile\" by default. This solution will only compile the DLL files for the client libraries.\n\n### Running the NUnit tests\n\nMaking sure the appropriate NUnit tests pass is an important step if you make any changes to the client libraries or plan to contribute to them. If you plan to use the client libraries without modifications then there is normally no need to run them.\n\n1. Download the .NET 2.0 MSI file release of NUnit from \u003chttp://www.nunit.org/index.php?p=download\u003e.\n2. Install NUnit by running the MSI file. The default install location is similar to \"C:\\\\Program Files\\\\NUnit 2.4.8\". You may wish to change this to something like \"C:\\\\Program Files\\\\NUnit\" so you can upgrade NUnit in the future without having to change the path in your Visual Studio project.\n3. Go to the \"C:\\\\Program Files\\\\Google\\\\Google Data API SDK\\\\Sources\\\\Library\\\\VS2005\" directory and open the solution file named \"Google Data APIs\". You will see the Conversion Wizard since this is a Visual Studio 2005 project file. Either click through the prompts or simply click on the \"Finish\" button. It should display the conversion log, which can be ignored.\n4. Now NUnit must be added as a reference path. Right click on the \"unittests\" project in the Solution Explorer on the right and select \"Properties\". Now click on the \"Reference Paths\" tab within the window that opens. Enter in the location of the \"bin\" subdirectory of the NUnit installation as a reference path and click \"Add Folder\". For example, if NUnit is installed to \"C:\\\\Program Files\\\\NUnit\\\\\", one would enter \"C:\\\\Program Files\\\\NUnit\\\\bin\". Be sure to save this change before continuing.\n5. Follow the steps listed in [Compiling and running samples](#vscompile) to rebuild the client library and the unit tests.\n6. Copy the \"unittests.dll.config\" file in \"C:\\\\Program Files\\\\Google\\\\Google Data API SDK\\\\Sources\\\\Library\\\\unittests\\\\\" to your debug build directory \"C:\\\\Program Files\\\\Google\\\\Google Data API SDK\\\\Source\\\\Library\\\\VS2005\\\\unittests\\\\bin\\\\Debug\\\\\". Remember to edit the file to include the appropriate information for the tests you are running. For example, Base requires an API key and Calendar requires a username and password. It is recommended to use a test account without any live data to avoid having information deleted by the unit tests.\n7. Open NUnit from the Start Menu.\n8. Go to \"File \\\u003e Open Project\" and select the \"unittests.dll\" file from \"C:\\\\Program Files\\\\Google\\\\Google Data API SDK\\\\Source\\\\Library\\\\VS2005\\\\unittests\\\\bin\\\\Debug\\\\\".\n9. Run the unit tests you are interested in. Remember that certain tests require parameters be set in unittests.dll.config to work. If you run the stress tests for certain services you may have your test account flagged as generating spam and be unable to programmatically submit content to Google servers without encountering CAPTCHA challenges.\n\nMono\n----\n\nMono is an open source project that allows you to run .NET client and server applications on Linux, Solaris, Mac OS X, Windows, and Unix. We offer a separate ZIP file of our client library for developers who want to work on one of these platforms.\n\n### Setting up your environment\n\n1. Download the latest ZIP file release of the client library from [http://code.google.com/p/google-gdata/downloads/list](//code.google.com/p/google-gdata/downloads/list)\n2. Extract to a local directory (e.g. \"/scratch/gdata.NET\")\n3. Use your distribution's package management to install Mono. Alternatively, you can download it from \u003chttp://www.mono-project.com\u003e.\n4. In some distributions you have to make sure that the nunit.framework.dll file is properly linked into the mono library. If mono was installed to \"/usr/lib/mono\", then ensure that there are symbolic links in \"/usr/lib/mono/1.0\" and \"/usr/lib/mono/2.0\" for nunit.framework.dll (which should be installed in \"/usr/lib/mono/gac/nunit.framework/\\\u003csomeversionstring\\\u003e/nunit.framework.dll\").\n\n### Compiling and running samples\n\n1. Assuming you installed the client library to \"/scratch/gdata.NET\", change to the \"/scratch/gdata.NET/clients/cs\" directory.\n2. Edit the Makefile depending on what version of .NET you wish to use. For .NET 1.x, use `CSC=mcs` and for .NET 2.x, use `CSC=gmcs`.\n3. Run `make` to compile the libraries and sample applications.\n4. Execute `make install` if you want to install the client library DLLs into the Mono library.\n\n### Developing your own application\n\nIf you executed a `make install` after compiling the client library, you should be able to include the libraries in your own code by passing `-r:Google.GData.Extensions.dll -r:Google.GData.Client.dll` to the Mono C# compiler along with references to the DLL files of any specific service extensions you wish to use.\n\n### Running the NUnit tests\n\n1. Copy the unittests.dll.config file from \"/scratch/gdata.NET/clients/cs/src/unittests\" to \"/scratch/gdata.NET/clients/cs/\".\n2. Edit \"/scratch/gdata.NET/clients/cs/unittests.dll.config\" to include the appropriate information for the tests you are running. For example, Base requires an API key and Calendar requires a username and password. I recommend using a test account without any live data to avoid having information deleted by the unit tests.\n3. After compiling the library there will be a unittests.dll file in \"/scratch/gdata.NET/clients/cs\". Use this DLL with your NUnit test manager of choice (nunit-console, gnunit, etc.).\n\n### Conclusion\n\nNow you should be able to compile the libraries and run the sample code. This is only the beginning, however. I encourage you to read through the documentation found in the \".../clients/cs/docs\" directory of the client library.\nYou might also want to check out the [.NET Client Library Developer's Guide](/gdata/client-cs), the [project page](http://code.google.com/p/google-gdata/) and [reference guide](http://google-gdata.googlecode.com/svn/docs/Index.html), and the [Google Data .NET client library forum](http://groups.google.com/group/gdata-dotnet-client-library).\n\nTools referenced in this article:\n\n- [Mono Project](http://www.mono-project.com/Main_Page)\n- [Visual Studio](http://msdn2.microsoft.com/en-us/vstudio/default.aspx)\n- [Visual C# 2008 Express Edition](http://msdn.microsoft.com/en-us/library/orm-9780596521066-01-02.aspx)\n- [NUnit](http://www.nunit.org/)\n\nGood luck on your next .NET application!"]]