ملاحظة مُهمّة: اعتبارًا من 1 أيار (مايو) 2024، ستطلب شركة Apple بيانات الخصوصية والتوقيعات في تطبيقات iOS التي تستخدم حِزم SDK شائعة الاستخدام، بما في ذلك GoogleSignIn-iOS. يجب الترقية إلى الإصدار 7.1.0 من GoogleSignIn-iOS أو الإصدارات الأحدث قبل 1 أيار (مايو) 2024. اتّبِع دليل الترقية.
استخدام ميزة "فحص التطبيقات" مع موفِّر تصحيح الأخطاء
تنظيم صفحاتك في مجموعات
يمكنك حفظ المحتوى وتصنيفه حسب إعداداتك المفضّلة.
بعد تسجيل تطبيقك في ميزة "فحص التطبيقات"، إذا كنت تريد تشغيل
تطبيق في بيئة لا تصنفها أداة "فحص التطبيقات" عادةً على أنها صالحة،
مثل أداة المحاكي أثناء التطوير أو من خلال التكامل المستمر (CI)
يمكنك إنشاء إصدار لتصحيح أخطاء تطبيقك يستخدم
موفِّر خدمة تصحيح أخطاء فحص التطبيق بدلاً من App Attest.
استخدام موفر تصحيح الأخطاء في محاكي
لاستخدام موفِّر خدمة تصحيح الأخطاء أثناء تشغيل تطبيقك في محاكي بشكل تفاعلي
(أثناء التطوير، على سبيل المثال)، عليك إجراء ما يلي:
ابحث في صفحة Credentials عن مفتاح واجهة برمجة تطبيقات iOS الخاص بمشروعك.
صفحة واجهات برمجة التطبيقات قسم "الخدمات" في Google Cloud Console.
في إصدار تصحيح الأخطاء، اضبط ميزة "فحص التطبيقات" لاستخدام موفِّر تصحيح الأخطاء. وسوف
إلى تحديد مفتاح واجهة برمجة التطبيقات الذي حصلت عليه في الخطوة السابقة.
#iftargetEnvironment(simulator)GIDSignIn.sharedInstance.configureDebugProvider(withAPIKey:apiKey){errorinifleterror{print("Error configuring `GIDSignIn` for App Check: \(error)")}}#else// Configure App Check for production.#endif
افتح التطبيق. سيتم تسجيل رمز مميز لتصحيح الأخطاء على الجهاز في وحدة تحكُّم Xcode في حال
تحاول حزمة SDK إرسال طلب إلى الواجهة الخلفية. على سبيل المثال:
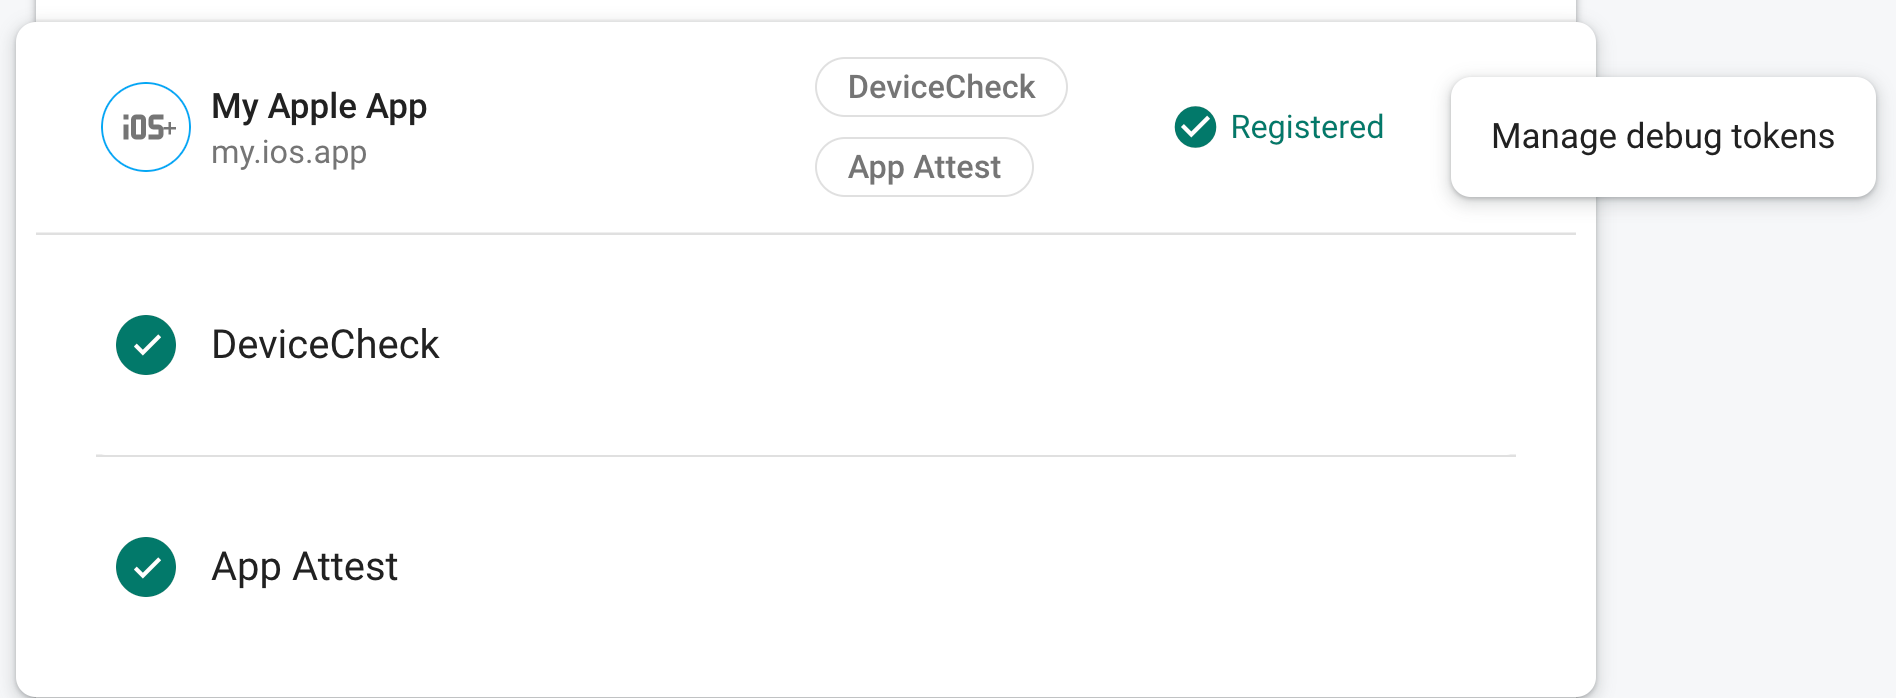
في قسم فحص التطبيقات
من وحدة تحكُّم Firebase، اختر إدارة الرموز المميزة لتصحيح الأخطاء من
القائمة الكاملة. ثم سجّل الرمز المميز لتصحيح الأخطاء الذي سجلته في المرة السابقة
.
بعد تسجيل الرمز المميّز، ستقبله نقاط نهاية OAuth 2.0 من Google على أنّه
صالحة لمشروعك.
ولأن هذا الرمز المميّز يتيح الوصول إلى نقاط نهاية المصادقة بدون
على جهاز صالح، إلا أنه من الضروري الاحتفاظ بسريته. لا تلتزم بـ
مستودع عام، وإذا تم اختراق الرمز المميز المسجَّل في أي وقت، يتم إبطاله
مباشرةً في "وحدة تحكُّم Firebase".
استخدام موفِّر تصحيح الأخطاء في بيئة CI
لاستخدام موفِّر خدمة تصحيح الأخطاء في بيئة تكامل مستمر (CI)، عليك إجراء
التالي:
في قسم فحص التطبيقات
من وحدة تحكُّم Firebase، اختر إدارة الرموز المميزة لتصحيح الأخطاء من
القائمة الكاملة. ثم أنشئ رمزًا مميزًا جديدًا لتصحيح الأخطاء. ستحتاج إلى الرمز المميّز في
الخطوة التالية.
لأنّ هذا الرمز المميّز يتيح الوصول إلى نقاط نهاية المصادقة بدون
كجهاز صالح، ينبغي أن تحافظ على خصوصيتها. لا تلتزم بـ
مستودع عام، وإذا تم اختراق الرمز المميز المسجَّل في أي وقت، يتم إبطاله
مباشرةً في "وحدة تحكُّم Firebase".
أضِف الرمز المميّز لتصحيح الأخطاء الذي أنشأته للتو إلى ملف تخزين المفاتيح الآمن لنظام CI
(على سبيل المثال، الأسرار المشفرة لـ GitHub Actions
أو المتغيّرات المشفرة في Travis CI).
إذا لزم الأمر، اضبط نظام CI لإتاحة الرمز المميّز لتصحيح الأخطاء.
داخل بيئة CI كمتغير بيئي. أدخِل اسمًا للمتغيّر.
شيء مثل APP_CHECK_DEBUG_TOKEN_FROM_CI.
في Xcode، أضف متغير بيئة إلى مخطط الاختبار باسم
FIRAAppCheckDebugToken وشيء مثل $(APP_CHECK_DEBUG_TOKEN) باسم
القيمة.
اضبط النص البرمجي لاختبار CI لتمرير الرمز المميّز لتصحيح الأخطاء كبيئة.
المتغير. على سبيل المثال:
xcodebuild test -scheme YourTestScheme -workspace YourProject.xcworkspace \
APP_CHECK_DEBUG_TOKEN=$(APP_CHECK_DEBUG_TOKEN_FROM_CI)
ابحث في صفحة Credentials عن مفتاح واجهة برمجة تطبيقات iOS الخاص بمشروعك.
صفحة واجهات برمجة التطبيقات قسم "الخدمات" في Google Cloud Console.
في إصدار تصحيح الأخطاء، اضبط ميزة "فحص التطبيقات" لاستخدام موفِّر تصحيح الأخطاء. وسوف
إلى تحديد مفتاح واجهة برمجة التطبيقات الذي حصلت عليه في الخطوة السابقة.
#iftargetEnvironment(simulator)GIDSignIn.sharedInstance.configureDebugProvider(withAPIKey:apiKey){errorinifleterror{print("Error configuring `GIDSignIn` for App Check: \(error)")}}#else// Configure App Check for production.#endif
عند تشغيل تطبيقك في بيئة CI، تقبل نقاط نهاية OAuth 2.0 من Google.
الرمز المميز الذي يرسله على أنه صالح لمشروعك.
تاريخ التعديل الأخير: 2025-07-25 (حسب التوقيت العالمي المتفَّق عليه)
[null,null,["تاريخ التعديل الأخير: 2025-07-25 (حسب التوقيت العالمي المتفَّق عليه)"],[[["\u003cp\u003eThe App Check debug provider enables app functionality in test environments like simulators and CI, bypassing the usual App Check verifications.\u003c/p\u003e\n"],["\u003cp\u003eFor simulator use, configure your debug build with the debug provider, obtain a debug token from the Xcode console, and register it in the Firebase console.\u003c/p\u003e\n"],["\u003cp\u003eWhen using the debug provider in a CI environment, create a debug token in the Firebase console, store it securely in your CI system, and configure your CI test script to use it.\u003c/p\u003e\n"],["\u003cp\u003e\u003cstrong\u003eImportant:\u003c/strong\u003e The debug provider bypasses security measures; therefore, debug tokens should be kept confidential and never used in production builds.\u003c/p\u003e\n"]]],[],null,["# Use App Check with the debug provider\n\nIf, after you have registered your app for App Check, you want to run your\napp in an environment that App Check would normally not classify as valid,\nsuch as a simulator during development, or from a continuous integration (CI)\nenvironment, you can create a debug build of your app that uses the\nApp Check debug provider instead of App Attest.\n\n\u003cbr /\u003e\n\n| **Firebase users**: You must follow the steps on this page to configure Google Sign-in to use the App Check debug provider, even if you've already configured Firebase services to use the App Check debug provider.\n\n\u003cbr /\u003e\n\n| **Warning:** The debug provider allows access to your project's auth endpoints from unverified devices. **Don't** use the debug provider in production builds of your app, and be careful not to leak your debug token.\n\nUse the debug provider in a simulator\n-------------------------------------\n\nTo use the debug provider while running your app in a simulator interactively\n(during development, for example), do the following:\n\n1. Look up the iOS API key for your project on the [Credentials](https://console.cloud.google.com/apis/credentials?project=_)\n page of the **APIs \\& Services** section of the Google Cloud console.\n\n2. In your debug build, configure App Check to use the debug provider. You'll\n need to specify the API key you got in the previous step.\n\n #if targetEnvironment(simulator)\n GIDSignIn.sharedInstance.configureDebugProvider(withAPIKey: apiKey) { error in\n if let error {\n print(\"Error configuring `GIDSignIn` for App Check: \\(error)\")\n }\n }\n #else\n // Configure App Check for production.\n #endif\n\n3. Launch the app. A local debug token will be logged to the Xcode console when\n the SDK tries to send a request to the backend. For example:\n\n \u003cWarning\u003e [AppCheckCore][I-GAC004001] App Check debug token:\n '123a4567-b89c-12d3-e456-789012345678'.\n\n4. In the [App Check](https://console.firebase.google.com/project/_/appcheck) section\n of the Firebase console, choose **Manage debug tokens** from your app's\n overflow menu. Then, register the debug token you logged in the previous\n step.\n\nAfter you register the token, Google's OAuth 2.0 endpoints will accept it as\nvalid for your project.\n\nBecause this token allows access to your auth endpoints without a\nvalid device, it is crucial that you keep it private. Don't commit it to a\npublic repository, and if a registered token is ever compromised, revoke it\nimmediately in the Firebase console.\n\nUse the debug provider in a CI environment\n------------------------------------------\n\nTo use the debug provider in a continuous integration (CI) environment, do the\nfollowing:\n\n1. In the [App Check](https://console.firebase.google.com/project/_/appcheck) section\n of the Firebase console, choose **Manage debug tokens** from your app's\n overflow menu. Then, create a new debug token. You'll need the token in the\n next step.\n\n Because this token allows access to your auth endpoints without\n a valid device, it is crucial that you keep it private. Don't commit it to a\n public repository, and if a registered token is ever compromised, revoke it\n immediately in the Firebase console.\n\n2. Add the debug token you just created to your CI system's secure key store\n (for example, GitHub Actions' [encrypted secrets](https://docs.github.com/en/actions/reference/encrypted-secrets)\n or Travis CI's [encrypted variables](https://docs.travis-ci.com/user/environment-variables/#defining-encrypted-variables-in-travisyml)).\n\n3. If necessary, configure your CI system to make your debug token available\n within the CI environment as an environment variable. Name the variable\n something like `APP_CHECK_DEBUG_TOKEN_FROM_CI`.\n\n4. In Xcode, add an environment variable to your testing scheme with the name\n `FIRAAppCheckDebugToken` and something like `$(APP_CHECK_DEBUG_TOKEN)` as\n the value.\n\n5. Configure your CI test script to pass the debug token as an environment\n variable. For example:\n\n ```\n xcodebuild test -scheme YourTestScheme -workspace YourProject.xcworkspace \\\n APP_CHECK_DEBUG_TOKEN=$(APP_CHECK_DEBUG_TOKEN_FROM_CI)\n ```\n6. Look up the iOS API key for your project on the [Credentials](https://console.cloud.google.com/apis/credentials?project=_)\n page of the **APIs \\& Services** section of the Google Cloud console.\n\n7. In your debug build, configure App Check to use the debug provider. You'll\n need to specify the API key you got in the previous step.\n\n #if targetEnvironment(simulator)\n GIDSignIn.sharedInstance.configureDebugProvider(withAPIKey: apiKey) { error in\n if let error {\n print(\"Error configuring `GIDSignIn` for App Check: \\(error)\")\n }\n }\n #else\n // Configure App Check for production.\n #endif\n\nWhen your app runs in a CI environment, Google's OAuth 2.0 endpoints will accept\nthe token it sends as valid for your project."]]