Önemli: Apple, 1 Mayıs 2024'ten itibaren GoogleSignIn-iOS dahil olmak üzere yaygın olarak kullanılan SDK'ları kullanan iOS uygulamaları için Gizlilik Manifestleri ve imzalarının zorunludur. 1 Mayıs 2024'ten önce GoogleSignIn-iOS 7.1.0+ sürümüne geçin. Yeni sürüme geçiş kılavuzumuzdaki adımları uygulayın.
Hata ayıklama sağlayıcısıyla Uygulama Kontrolü'nü kullanma
Koleksiyonlar ile düzeninizi koruyun
İçeriği tercihlerinize göre kaydedin ve kategorilere ayırın.
Uygulamanızı Uygulama Kontrolü'ne kaydettikten sonra
Uygulama Kontrolü'nün normalde geçerli olarak sınıflandıramadığı bir ortamda bulunması
Örneğin, geliştirme sırasında kullanılan bir simülatör veya sürekli entegrasyon (CI) aracılığıyla
uygulamanızın hata ayıklama derlemesini oluşturmak için
App Attest yerine Uygulama Kontrolü hata ayıklama sağlayıcısı.
Bir simülasyon aracında hata ayıklama sağlayıcıyı kullanma
Uygulamanızı bir simülasyon aracında etkileşimli olarak çalıştırırken hata ayıklama sağlayıcısını kullanmak için
(örneğin, geliştirme sırasında) aşağıdakileri yapın:
Kimlik bilgileri bölümünde projenizin iOS API anahtarını bulun
API'ler ve Hizmetler bölümünde bulabilirsiniz.
Hata ayıklama derlemenizde, hata ayıklama sağlayıcısını kullanmak için Uygulama Kontrolü'nü yapılandırın. Bir sonraki
önceki adımda aldığınız API anahtarını belirtmeniz gerekir.
#iftargetEnvironment(simulator)GIDSignIn.sharedInstance.configureDebugProvider(withAPIKey:apiKey){errorinifleterror{print("Error configuring `GIDSignIn` for App Check: \(error)")}}#else// Configure App Check for production.#endif
Uygulamayı başlatın. Aşağıdaki durumlarda Xcode konsoluna yerel bir hata ayıklama jetonu kaydedilir
SDK, arka uca istek göndermeye çalışır. Örneğin:
Uygulama Kontrolü bölümünde
bölümünde, uygulamanızın ayarlarından Hata ayıklama jetonlarını yönet'i
taşma menüsü. Ardından, önceki girişte günlüğe kaydettiğiniz hata ayıklama jetonunu kaydedin
adımına geçelim.
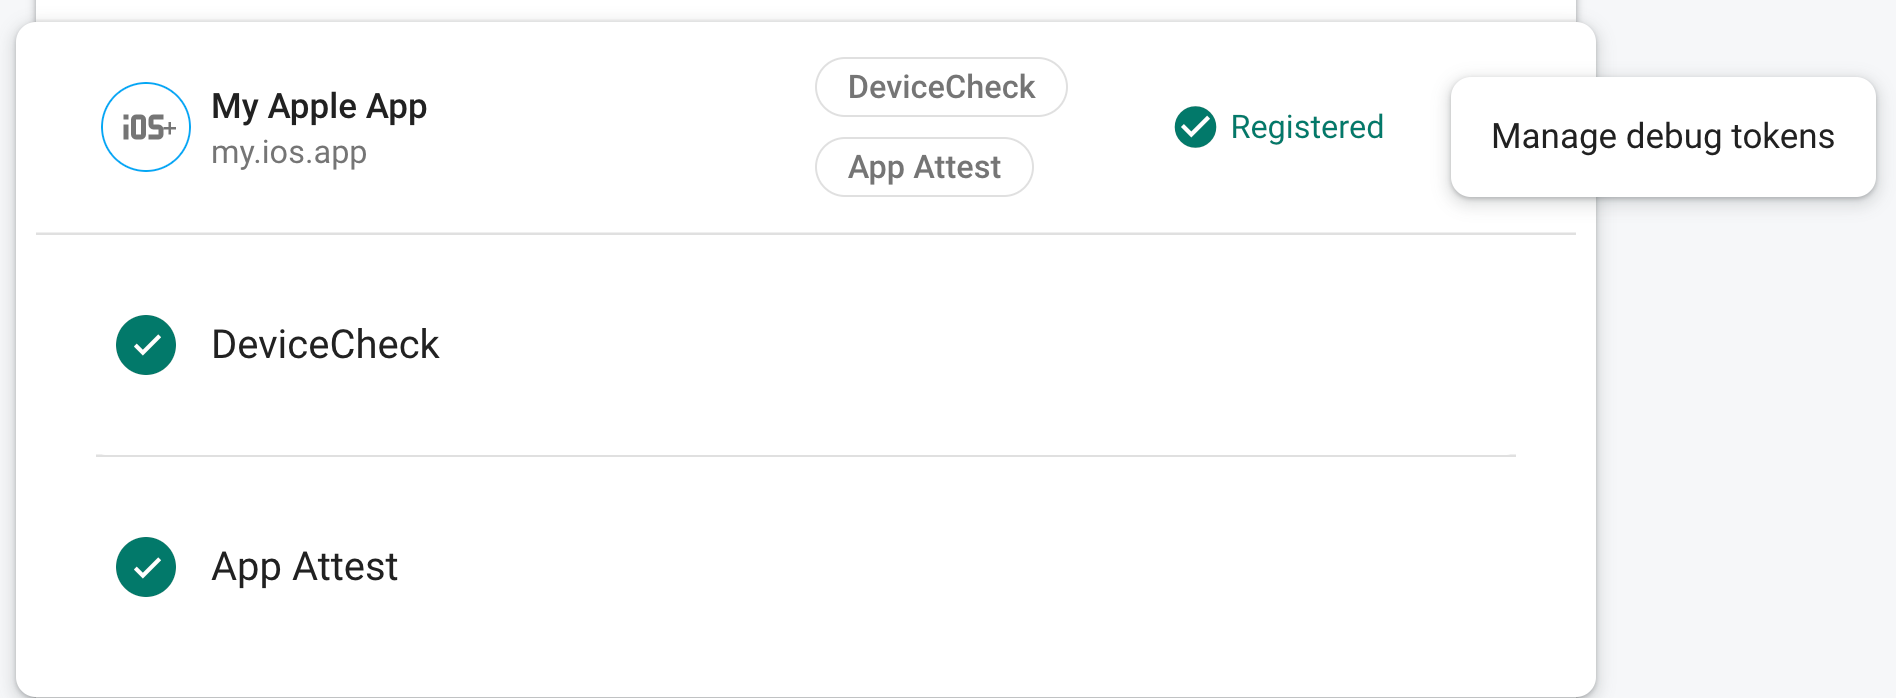
Jetonu kaydetmenizin ardından Google'ın OAuth 2.0 uç noktaları, jetonu şu şekilde kabul eder:
geçerli olur.
Bu jeton,
gizli tutmanız çok önemlidir. Hiçbir zaman
kayıtlı bir jetonun güvenliği ihlal edilirse bu kodu iptal edebilir
Firebase konsolunda hemen kullanabilirsiniz.
Hata ayıklama sağlayıcısını CI ortamında kullanma
Hata ayıklama sağlayıcısını sürekli entegrasyon (CI) ortamında kullanmak için
takip etmek için:
Uygulama Kontrolü bölümünde
bölümünde, uygulamanızın ayarlarından Hata ayıklama jetonlarını yönet'i
taşma menüsü. Ardından yeni bir hata ayıklama jetonu oluşturun. Belgenin
bir sonraki adıma geçebiliriz.
Bu jeton,
olması çok önemlidir. Bu nedenle, cihazı gizli tutmalısınız. Hiçbir zaman
kayıtlı bir jetonun güvenliği ihlal edilirse bu kodu iptal edebilir
Firebase konsolunda hemen kullanabilirsiniz.
Gerekirse hata ayıklama jetonunuzu kullanılabilir hale getirmek için CI sisteminizi yapılandırın
arasında bir ortam değişkeni olarak gösterilir. Değişkene ad verin
APP_CHECK_DEBUG_TOKEN_FROM_CI gibi bir değerdir.
Xcode'da şu adıyla test şemanıza bir ortam değişkeni ekleyin:
FIRAAppCheckDebugToken ve $(APP_CHECK_DEBUG_TOKEN) gibi bir ifade:
değer.
CI test komut dosyanızı, hata ayıklama jetonunu ortam olarak geçirecek şekilde yapılandırma
değişkenine eklenmelidir. Örneğin:
xcodebuild test -scheme YourTestScheme -workspace YourProject.xcworkspace \
APP_CHECK_DEBUG_TOKEN=$(APP_CHECK_DEBUG_TOKEN_FROM_CI)
Kimlik bilgileri bölümünde projenizin iOS API anahtarını bulun
API'ler ve Hizmetler bölümünde bulabilirsiniz.
Hata ayıklama derlemenizde, hata ayıklama sağlayıcısını kullanmak için Uygulama Kontrolü'nü yapılandırın. Bir sonraki
önceki adımda aldığınız API anahtarını belirtmeniz gerekir.
#iftargetEnvironment(simulator)GIDSignIn.sharedInstance.configureDebugProvider(withAPIKey:apiKey){errorinifleterror{print("Error configuring `GIDSignIn` for App Check: \(error)")}}#else// Configure App Check for production.#endif
Uygulamanız bir CI ortamında çalıştığında Google'ın OAuth 2.0 uç noktaları şunları kabul eder:
projeniz için geçerli olarak gönderdiği jetonu işaret eder.
[null,null,["Son güncelleme tarihi: 2025-07-25 UTC."],[[["\u003cp\u003eThe App Check debug provider enables app functionality in test environments like simulators and CI, bypassing the usual App Check verifications.\u003c/p\u003e\n"],["\u003cp\u003eFor simulator use, configure your debug build with the debug provider, obtain a debug token from the Xcode console, and register it in the Firebase console.\u003c/p\u003e\n"],["\u003cp\u003eWhen using the debug provider in a CI environment, create a debug token in the Firebase console, store it securely in your CI system, and configure your CI test script to use it.\u003c/p\u003e\n"],["\u003cp\u003e\u003cstrong\u003eImportant:\u003c/strong\u003e The debug provider bypasses security measures; therefore, debug tokens should be kept confidential and never used in production builds.\u003c/p\u003e\n"]]],[],null,["# Use App Check with the debug provider\n\nIf, after you have registered your app for App Check, you want to run your\napp in an environment that App Check would normally not classify as valid,\nsuch as a simulator during development, or from a continuous integration (CI)\nenvironment, you can create a debug build of your app that uses the\nApp Check debug provider instead of App Attest.\n\n\u003cbr /\u003e\n\n| **Firebase users**: You must follow the steps on this page to configure Google Sign-in to use the App Check debug provider, even if you've already configured Firebase services to use the App Check debug provider.\n\n\u003cbr /\u003e\n\n| **Warning:** The debug provider allows access to your project's auth endpoints from unverified devices. **Don't** use the debug provider in production builds of your app, and be careful not to leak your debug token.\n\nUse the debug provider in a simulator\n-------------------------------------\n\nTo use the debug provider while running your app in a simulator interactively\n(during development, for example), do the following:\n\n1. Look up the iOS API key for your project on the [Credentials](https://console.cloud.google.com/apis/credentials?project=_)\n page of the **APIs \\& Services** section of the Google Cloud console.\n\n2. In your debug build, configure App Check to use the debug provider. You'll\n need to specify the API key you got in the previous step.\n\n #if targetEnvironment(simulator)\n GIDSignIn.sharedInstance.configureDebugProvider(withAPIKey: apiKey) { error in\n if let error {\n print(\"Error configuring `GIDSignIn` for App Check: \\(error)\")\n }\n }\n #else\n // Configure App Check for production.\n #endif\n\n3. Launch the app. A local debug token will be logged to the Xcode console when\n the SDK tries to send a request to the backend. For example:\n\n \u003cWarning\u003e [AppCheckCore][I-GAC004001] App Check debug token:\n '123a4567-b89c-12d3-e456-789012345678'.\n\n4. In the [App Check](https://console.firebase.google.com/project/_/appcheck) section\n of the Firebase console, choose **Manage debug tokens** from your app's\n overflow menu. Then, register the debug token you logged in the previous\n step.\n\nAfter you register the token, Google's OAuth 2.0 endpoints will accept it as\nvalid for your project.\n\nBecause this token allows access to your auth endpoints without a\nvalid device, it is crucial that you keep it private. Don't commit it to a\npublic repository, and if a registered token is ever compromised, revoke it\nimmediately in the Firebase console.\n\nUse the debug provider in a CI environment\n------------------------------------------\n\nTo use the debug provider in a continuous integration (CI) environment, do the\nfollowing:\n\n1. In the [App Check](https://console.firebase.google.com/project/_/appcheck) section\n of the Firebase console, choose **Manage debug tokens** from your app's\n overflow menu. Then, create a new debug token. You'll need the token in the\n next step.\n\n Because this token allows access to your auth endpoints without\n a valid device, it is crucial that you keep it private. Don't commit it to a\n public repository, and if a registered token is ever compromised, revoke it\n immediately in the Firebase console.\n\n2. Add the debug token you just created to your CI system's secure key store\n (for example, GitHub Actions' [encrypted secrets](https://docs.github.com/en/actions/reference/encrypted-secrets)\n or Travis CI's [encrypted variables](https://docs.travis-ci.com/user/environment-variables/#defining-encrypted-variables-in-travisyml)).\n\n3. If necessary, configure your CI system to make your debug token available\n within the CI environment as an environment variable. Name the variable\n something like `APP_CHECK_DEBUG_TOKEN_FROM_CI`.\n\n4. In Xcode, add an environment variable to your testing scheme with the name\n `FIRAAppCheckDebugToken` and something like `$(APP_CHECK_DEBUG_TOKEN)` as\n the value.\n\n5. Configure your CI test script to pass the debug token as an environment\n variable. For example:\n\n ```\n xcodebuild test -scheme YourTestScheme -workspace YourProject.xcworkspace \\\n APP_CHECK_DEBUG_TOKEN=$(APP_CHECK_DEBUG_TOKEN_FROM_CI)\n ```\n6. Look up the iOS API key for your project on the [Credentials](https://console.cloud.google.com/apis/credentials?project=_)\n page of the **APIs \\& Services** section of the Google Cloud console.\n\n7. In your debug build, configure App Check to use the debug provider. You'll\n need to specify the API key you got in the previous step.\n\n #if targetEnvironment(simulator)\n GIDSignIn.sharedInstance.configureDebugProvider(withAPIKey: apiKey) { error in\n if let error {\n print(\"Error configuring `GIDSignIn` for App Check: \\(error)\")\n }\n }\n #else\n // Configure App Check for production.\n #endif\n\nWhen your app runs in a CI environment, Google's OAuth 2.0 endpoints will accept\nthe token it sends as valid for your project."]]