
Contoh ini membuat peta menggunakan SupportMapFragment dari Maps SDK for Android.
Untuk informasi selengkapnya, lihat dokumentasi.
Memulai
Anda harus mengonfigurasi lingkungan pengembangan Anda sebelum dapat mencoba kode contoh. Untuk informasi selengkapnya, lihat contoh kode Maps SDK for Android.
Melihat kode
Kotlin
class BasicMapDemoActivity : AppCompatActivity(), OnMapReadyCallback {
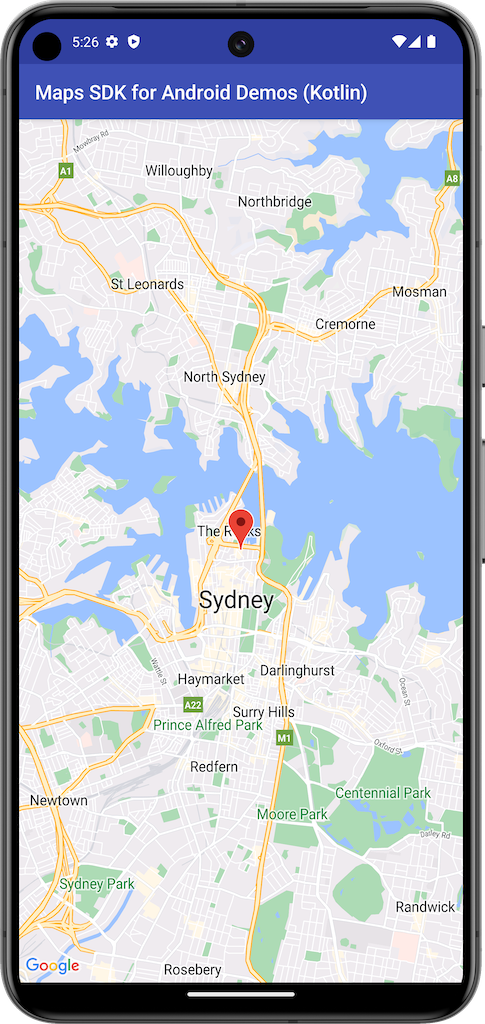
val SYDNEY = LatLng(-33.862, 151.21)
val ZOOM_LEVEL = 13f
override fun onCreate(savedInstanceState: Bundle?) {
super.onCreate(savedInstanceState)
setContentView(R.layout.activity_basic_map_demo)
val mapFragment : SupportMapFragment? =
supportFragmentManager.findFragmentById(R.id.map) as? SupportMapFragment
mapFragment?.getMapAsync(this)
}
/**
* This is where we can add markers or lines, add listeners or move the camera. In this case,
* we just move the camera to Sydney and add a marker in Sydney.
*/
override fun onMapReady(googleMap: GoogleMap) {
with(googleMap) {
moveCamera(CameraUpdateFactory.newLatLngZoom(SYDNEY, ZOOM_LEVEL))
addMarker(MarkerOptions().position(SYDNEY))
}
}
}
Java
public class BasicMapDemoActivity extends AppCompatActivity implements OnMapReadyCallback {
@Override
protected void onCreate(Bundle savedInstanceState) {
super.onCreate(savedInstanceState);
setContentView(R.layout.basic_demo);
SupportMapFragment mapFragment =
(SupportMapFragment) getSupportFragmentManager().findFragmentById(R.id.map);
mapFragment.getMapAsync(this);
}
/**
* This is where we can add markers or lines, add listeners or move the camera. In this case,
* we
* just add a marker near Africa.
*/
@Override
public void onMapReady(GoogleMap map) {
map.addMarker(new MarkerOptions().position(new LatLng(0, 0)).title("Marker"));
}
}
Meng-clone dan menjalankan contoh
Git diperlukan untuk menjalankan contoh ini secara lokal. Perintah berikut meng-clone repositori aplikasi contoh.
git clone git@github.com:googlemaps-samples/android-samples.git
Impor project contoh ke Android Studio:
- Di Android Studio, pilih File > New > Import Project.
Buka lokasi tempat Anda menyimpan repositori, lalu pilih direktori project untuk Kotlin atau Java:
- Kotlin:
PATH-REPO/android-samples/ApiDemos/kotlin - Java:
PATH-REPO/android-samples/ApiDemos/java
- Kotlin:
- Pilih Open. Android Studio akan membuat project Anda menggunakan alat build Gradle.
- Buat file
secrets.propertieskosong di direktori yang sama seperti filelocal.propertiesproject Anda. Untuk informasi selengkapnya, lihat Menambahkan kunci API ke project. Tambahkan string berikut ke
secrets.properties, dengan mengganti YOUR_API_KEY dengan nilai kunci API Anda:MAPS_API_KEY=YOUR_API_KEY- Jalankan aplikasi.