
이 예시에서는 Android용 Maps SDK의 SupportMapFragment를 사용하여 지도를 생성합니다.
자세한 내용은 문서를 참고하세요.
시작하기
샘플 코드를 사용하기 전에 개발 환경을 구성해야 합니다. 자세한 내용은 Android용 Maps SDK 코드 샘플을 참고하세요.
코드 보기
Kotlin
class BasicMapDemoActivity : AppCompatActivity(), OnMapReadyCallback {
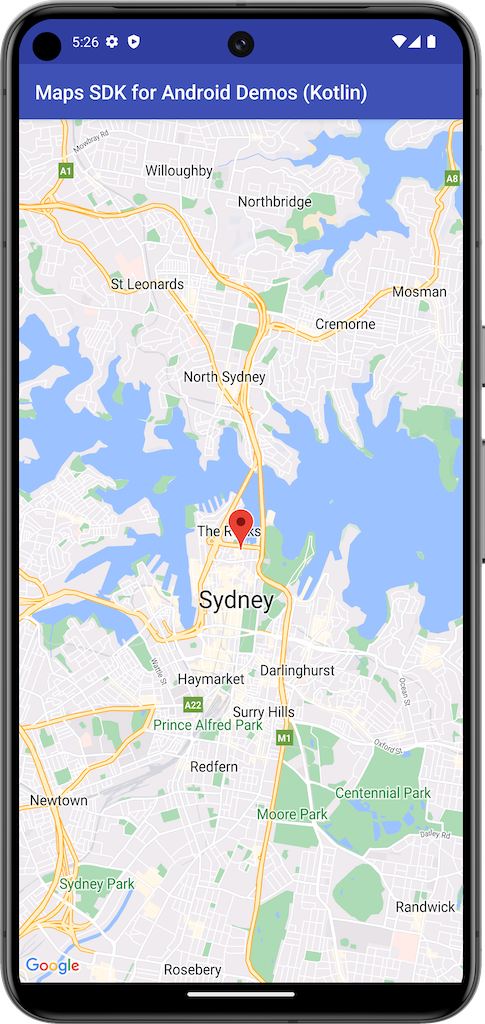
val SYDNEY = LatLng(-33.862, 151.21)
val ZOOM_LEVEL = 13f
override fun onCreate(savedInstanceState: Bundle?) {
super.onCreate(savedInstanceState)
setContentView(R.layout.activity_basic_map_demo)
val mapFragment : SupportMapFragment? =
supportFragmentManager.findFragmentById(R.id.map) as? SupportMapFragment
mapFragment?.getMapAsync(this)
}
/**
* This is where we can add markers or lines, add listeners or move the camera. In this case,
* we just move the camera to Sydney and add a marker in Sydney.
*/
override fun onMapReady(googleMap: GoogleMap) {
with(googleMap) {
moveCamera(CameraUpdateFactory.newLatLngZoom(SYDNEY, ZOOM_LEVEL))
addMarker(MarkerOptions().position(SYDNEY))
}
}
}
Java
public class BasicMapDemoActivity extends AppCompatActivity implements OnMapReadyCallback {
@Override
protected void onCreate(Bundle savedInstanceState) {
super.onCreate(savedInstanceState);
setContentView(R.layout.basic_demo);
SupportMapFragment mapFragment =
(SupportMapFragment) getSupportFragmentManager().findFragmentById(R.id.map);
mapFragment.getMapAsync(this);
}
/**
* This is where we can add markers or lines, add listeners or move the camera. In this case,
* we
* just add a marker near Africa.
*/
@Override
public void onMapReady(GoogleMap map) {
map.addMarker(new MarkerOptions().position(new LatLng(0, 0)).title("Marker"));
}
}
샘플 클론 및 실행
이 샘플을 로컬로 실행하려면 Git가 필요합니다. 다음 명령어는 샘플 애플리케이션 저장소를 클론합니다.
git clone git@github.com:googlemaps-samples/android-samples.git
샘플 프로젝트를 Android 스튜디오로 가져옵니다.
- Android 스튜디오에서 File > New > Import Project를 선택합니다.
저장소를 저장한 위치로 이동하여 Kotlin 또는 Java를 위한 프로젝트 디렉터리를 선택합니다.
- Kotlin:
PATH-REPO/android-samples/ApiDemos/kotlin - Java:
PATH-REPO/android-samples/ApiDemos/java
- Kotlin:
- 열기를 선택합니다. Android 스튜디오에서 Gradle 빌드 도구를 사용하여 프로젝트를 빌드합니다.
- 프로젝트의
local.properties파일과 동일한 디렉터리에서 빈secrets.properties파일을 만듭니다. 자세한 내용은 프로젝트에 직접 생성한 API 키 추가하기를 참고하세요. 다음 문자열을
secrets.properties에 추가하여 YOUR_API_KEY를 API 키의 값으로 변경합니다.MAPS_API_KEY=YOUR_API_KEY- 앱을 실행합니다.