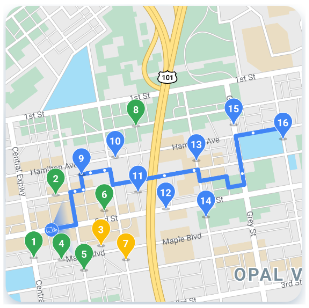
Puedes usar el SDK de consumidor para compilar y ejecutar un app para consumidores integrada en los servicios de backend de la solución On-demand Rides and Deliveries. Puedes crear una aplicación de Progreso del viaje y el pedido que pueda mostrar un viaje activo, responder a las actualizaciones de viaje y manejar los errores de los viajes.
Debido a que el SDK para consumidores tiene una arquitectura modular, usar las partes de la API que desees usar para tu aplicación y integrarlos a tus propias APIs, a los servicios de backend que proporciona la flota Engine y otras APIs de Google Maps Platform.
Requisitos mínimos del sistema
Configuración de proyectos
Swift Package Manager
El SDK para consumidores se puede instalar a través de Swift Package Manager. Para agregar el SDK, asegúrate de haber quitaste todas las dependencias existentes del SDK del consumidor.
Para agregar el SDK a un proyecto nuevo o existente, sigue estos pasos:
-
Abre tu Xcode
project
oworkspace
y, luego, ve a Archivo > Agrega dependencias de paquetes. - Ingresa https://github.com/googlemaps/ios-consumer-sdk como URL y presiona Intro. para extraer el paquete y haz clic en "Add Package".
-
Para instalar un
version
específico, establece el campo Dependency Rule en una de las siguientes opciones: las opciones basadas en la versión. Para los proyectos nuevos, recomendamos especificar la versión más reciente y usando la "Versión exacta" de 12 a 1 con la nueva opción de compresión. Cuando termines, haz clic en "Add Package". -
En la ventana Choose Package Products, verifica que se agregará
GoogleRidesharingConsumer
a tu objetivomain
designado. Cuando termines, haz clic en "Add Package". -
Para verificar la instalación, navega al panel
General
de tu destino. En Frameworks, bibliotecas y contenido incorporado, deberías ver los paquetes instalados. También puedes ver las dependencias de paquetes de "Project Navigator" para verificar el paquete y su versión.
Para actualizar el package
de un proyecto existente, sigue estos pasos:
Si actualizas desde una versión anterior a la 9.0.0, debes quitar las siguientes dependencias:
GoogleMapsBase
,GoogleMapsCore
yGoogleMapsM4B
después de la actualización. No quites la dependencia paraGoogleMaps
Para obtener más información, consulta la Notas de la versión 9.0.0Desde los ajustes de configuración del proyecto Xcode, busca Frameworks, Libraries, y Contenido Incorporado. Usa el signo menos(-) para quitar el siguiente marco de trabajo:
GoogleMapsBase
(solo para actualizaciones de versiones anteriores a la 9.0.0)GoogleMapsCore
(solo para actualizaciones de versiones anteriores a la 9.0.0)GoogleMapsM4B
(solo para actualizaciones de versiones anteriores a la 9.0.0)
- Desde Xcode, ve a “Archivo > Paquetes > Update To Last Package Versions”.
- Para verificar la instalación, ve a la sección Package Dependencies de Project Navigator. para verificar el paquete y su versión.
Para quitar las dependencias existentes del SDK del consumidor agregadas mediante
CocoaPods
, sigue estos pasos:
- Cierra tu espacio de trabajo de Xcode. Abre la terminal y ejecuta el siguiente comando:
sudo gem install cocoapods-deintegrate cocoapods-clean pod deintegrate pod cache clean --all
-
Quita el
Podfile
, elPodfile.resolved
y el Xcodeworkspace
si no los usas para nada que no sea CocoaPods.
Quita el SDK de consumidor existente que está instalado. manualmente, sigue estos pasos:
Desde los ajustes de configuración del proyecto Xcode, busca Frameworks, Bibliotecas y Contenido Incorporado Usa el signo menos
(-)
para quitarlo el siguiente framework:GoogleRidesharingConsumer.xcframework
Desde el directorio de nivel superior de tu proyecto de Xcode, quita el elemento Paquete de
GoogleRidesharingConsumer
.
CocoaPods
Para configurar el SDK del consumidor con CocoaPods, haz lo siguiente: necesitarás los siguientes elementos:
La herramienta CocoaPods: para instalar esta herramienta, abre la terminal y ejecuta el siguiente comando.
sudo gem install cocoapods
Consulta los primeros pasos de CocoaPods guía para obtener más información más detalles.
Crea un Podfile para el SDK para consumidores y úsalo para instalar la API y sus dependencias. Primero, crea un archivo llamado Podfile en el directorio de tu proyecto. Este archivo define las propiedades dependencias. Luego, edita el Podfile y agrega tus dependencias. Aquí tienes un ejemplo que incluye las dependencias:
source "https://github.com/CocoaPods/Specs.git" target 'YOUR_APPLICATION_TARGET_NAME_HERE' do pod 'GoogleRidesharingConsumer' end
Guarda el Podfile. Abre una terminal y ve al directorio que contiene los Podfile:
cd <path-to-project>
Ejecuta el comando pod install. Esto instalará las APIs especificadas en el Podfile, junto con las dependencias que puedan tener.
pod install
Cierra Xcode y, luego, abre (con doble clic) el .xcworkspace de tu proyecto para iniciar Xcode. Para abrir el proyecto más tarde, usa el archivo .xcworkspace .
Instalación manual
Un XCFramework es un paquete binario que usas para instalar el SDK para consumidores. Puedes usar este paquete en varias plataformas, incluidas máquinas que usan el chipset M1. En esta guía, se muestra cómo agregar manualmente el XCFramework que contiene los consumidor del SDK a tu proyecto y configura tu de compilación en Xcode.
Descarga el objeto binario y los recursos del SDK:
Descomprime los archivos comprimidos para acceder a XCFramework y los recursos.
Inicia Xcode y abre un proyecto existente o crea uno nuevo en un proyecto final. Si es la primera vez que usas iOS, crea un proyecto nuevo y selecciona el Plantilla de app.
Crear un grupo de marcos de trabajo en tu grupo de proyecto si no existe uno que ya existe.
Para instalar el SDK para consumidores, arrastra el archivo
GoogleRidesharingConsumer.xcframework
a tu proyecto en Frameworks, bibliotecas y contenido incorporado. Cuando se te solicite, selecciona Copiar elementos si es necesario.Arrastra el archivo
GoogleRidesharingConsumer.bundle
descargado al directorio de nivel superior de tu proyecto de Xcode. Cuando se te solicite, seleccionaCopy items if needed
.Selecciona tu proyecto en el navegador de proyectos y elige objetivo de tu aplicación.
Abre la pestaña Build Fases y, en Link Binary with Libraries, agrega el los siguientes frameworks y bibliotecas si aún no están presentes:
Accelerate.framework
CoreData.framework
CoreGraphics.framework
CoreImage.framework
CoreLocation.framework
CoreTelephony.framework
CoreText.framework
GLKit.framework
ImageIO.framework
libc++.tbd
libz.tbd
Metal.framework
OpenGLES.framework
QuartzCore.framework
SystemConfiguration.framework
UIKit.framework
Elige tu proyecto, en lugar de un destino específico, y abre la sección Build Configuración. En la sección Other Linker Flags, agrega
-ObjC
para depurar y lanzar. Si esta configuración no está visible, cambia el filtrar en la barra Build Settings de Basic a All.
Cómo inspeccionar el archivo de manifiesto de privacidad de Apple
Apple requiere detalles de privacidad para las apps que se encuentran en la App Store. Visita la página de detalles de privacidad de la App Store de Apple para obtener actualizaciones y más información.
El archivo de manifiesto de privacidad de Apple se incluye en el paquete de recursos del SDK. Para verificar que se haya incluido el archivo de manifiesto de privacidad y para inspeccionar su contenido, crea un archivo de tu app y genera un informe de privacidad a partir del archivo.
Integración de aplicaciones
Proporciona un token de autenticación
Cuando tu app para consumidores solicita actualizaciones de viaje a Fleet Engine, las solicitudes
debe incluir tokens de acceso válidos. Para autorizar y autenticar estas solicitudes,
el SDK del consumidor llama a tu objeto de acuerdo con el
GMTCAuthorization
. El objeto es responsable de proporcionar la
token de acceso requerido.
Como desarrollador de la app, tú eliges cómo se generan los tokens. Tu implementación debe proporcionar la capacidad de hacer lo siguiente:
- Recupera un token de acceso, posiblemente en formato JSON, desde un servidor HTTPS.
- Analiza y almacena en caché el token.
- Actualiza el token cuando venza.
Para obtener más información sobre los tokens que espera el servidor de Fleet Engine, consulta Crea un Token web JSON (JWT) para autorización.
El ID del proveedor es el mismo que el ID del proyecto de Google Cloud. Para obtener más información, consulta Getting Started with Fleet Engine.
En el siguiente ejemplo, se implementa un proveedor de tokens de acceso:
Swift
/*
* SampleAccessTokenProvider.swift
*/
import GoogleRidesharingConsumer
private let providerURL = "INSERT_YOUR_TOKEN_PROVIDER_URL"
class SampleAccessTokenProvider: NSObject, GMTCAuthorization {
private struct AuthToken {
// The cached trip token.
let token: String
// Keep track of when the token expires for caching.
let expiration: TimeInterval
// Keep track of the trip ID the cached token is for.
let tripID: String
}
enum AccessTokenError: Error {
case missingAuthorizationContext
case missingData
}
private var authToken: AuthToken?
func fetchToken(
with authorizationContext: GMTCAuthorizationContext?,
completion: @escaping GMTCAuthTokenFetchCompletionHandler
) {
// Get the trip ID from the authorizationContext. This is set by the Consumer SDK.
guard let authorizationContext = authorizationContext else {
completion(nil, AccessTokenError.missingAuthorizationContext)
return
}
let tripID = authorizationContext.tripID
// If appropriate, use the cached token.
if let authToken = authToken,
authToken.expiration > Date.now.timeIntervalSince1970 && authToken.tripID == tripID
{
completion(authToken.token, nil)
return
}
// Otherwise, try to fetch a new token from your server.
let request = URLRequest(url: URL(string: providerURL))
let task = URLSession.shared.dataTask(with: request) { [weak self] data, _, error in
guard let strongSelf = self else { return }
guard error == nil else {
completion(nil, error)
return
}
// Replace the following key values with the appropriate keys based on your
// server's expected response.
let tripTokenKey = "TRIP_TOKEN_KEY"
let tokenExpirationKey = "TOKEN_EXPIRATION"
guard let data = data,
let fetchData = try? JSONSerialization.jsonObject(with: data) as? [String: Any],
let token = fetchData[tripTokenKey] as? String,
let expiration = fetchData[tokenExpirationKey] as? Double
else {
completion(nil, AccessTokenError.missingData)
return
}
strongSelf.authToken = AuthToken(token: token, expiration: expiration, tripID: tripID)
completion(token, nil)
}
task.resume()
}
}
Objective-C
/*
* SampleAccessTokenProvider.h
*/
#import <Foundation/Foundation.h>
#import <GoogleRidesharingConsumer/GoogleRidesharingConsumer.h>
NS_ASSUME_NONNULL_BEGIN
@interface SampleAccessTokenProvider : NSObject <GMTCAuthorization>
@end
NS_ASSUME_NONNULL_END
/*
* SampleAccessTokenProvider.m
*/
#import "SampleAccessTokenProvider.h"
#import "GoogleRidesharingConsumer/GoogleRidesharingConsumer.h"
static NSString *const PROVIDER_URL = @"INSERT_YOUR_TOKEN_PROVIDER_URL";
// SampleAccessTokenProvider.m
@implementation SampleAccessTokenProvider {
// The cached token with claims to the current trip.
NSString *_cachedTripToken;
// Keep track of the Trip ID the cached token is for.
NSString *_lastKnownTripID;
// Keep track of when tokens expire for caching.
NSTimeInterval _tokenExpiration;
}
- (void)fetchTokenWithContext:(nullable GMTCAuthorizationContext *)authorizationContext
completion:(nonnull GMTCAuthTokenFetchCompletionHandler)completion {
// Get the trip ID from the authorizationContext. This is set by the Consumer SDK.
NSString *tripID = authorizationContext.tripID;
// Clear cached trip token if trip ID has changed.
if (![_lastKnownTripID isEqual:tripID]) {
_tokenExpiration = 0.0;
_cachedTripToken = nil;
}
_lastKnownTripID = tripID;
// Clear cached tripToken if it has expired.
if ([[NSDate date] timeIntervalSince1970] > _tokenExpiration) {
_cachedTripToken = nil;
}
// If appropriate, use the cached token.
if (_cachedTripToken) {
completion(_cachedTripToken, nil);
return;
}
// Otherwise, try to fetch a new token from your server.
NSURL *requestURL = [NSURL URLWithString:PROVIDER_URL];
NSMutableURLRequest *request =
[[NSMutableURLRequest alloc] initWithURL:requestURL];
request.HTTPMethod = @"GET";
// Replace the following key values with the appropriate keys based on your
// server's expected response.
NSString *tripTokenKey = @"TRIP_TOKEN_KEY";
NSString *tokenExpirationKey = @"TOKEN_EXPIRATION";
__weak typeof(self) weakSelf = self;
void (^handler)(NSData *_Nullable data, NSURLResponse *_Nullable response,
NSError *_Nullable error) =
^(NSData *_Nullable data, NSURLResponse *_Nullable response, NSError *_Nullable error) {
typeof(self) strongSelf = weakSelf;
if (error) {
completion(nil, error);
return;
}
NSError *JSONError;
NSMutableDictionary *JSONResponse =
[NSJSONSerialization JSONObjectWithData:data options:kNilOptions error:&JSONError];
if (JSONError) {
completion(nil, JSONError);
return;
} else {
// Sample code only. No validation logic.
id expirationData = JSONResponse[tokenExpirationKey];
if ([expirationData isKindOfClass:[NSNumber class]]) {
NSTimeInterval expirationTime = ((NSNumber *)expirationData).doubleValue;
strongSelf->_tokenExpiration = [[NSDate date] timeIntervalSince1970] + expirationTime;
}
strongSelf->_cachedTripToken = JSONResponse[tripTokenKey];
completion(JSONResponse[tripTokenKey], nil);
}
};
NSURLSessionConfiguration *config = [NSURLSessionConfiguration defaultSessionConfiguration];
NSURLSession *mainQueueURLSession =
[NSURLSession sessionWithConfiguration:config delegate:nil
delegateQueue:[NSOperationQueue mainQueue]];
NSURLSessionDataTask *task = [mainQueueURLSession dataTaskWithRequest:request completionHandler:handler];
[task resume];
}
@end
Inicialización de la aplicación
Swift
/*
* AppDelegate.swift
*/
import GoogleRidesharingConsumer
import GoogleMaps
@UIApplicationMain
class AppDelegate: UIResponder, UIApplicationDelegate {
func application(_ application: UIApplication,
didFinishLaunchingWithOptions launchOptions: [UIApplication.LaunchOptionsKey: Any]?) -> Bool {
// Register your API key for GMSServices.
GMSServices.provideAPIKey(yourMapsAPIKey)
// Set the instance of the SampleAccessTokenProvider.
GMTCServices.setAccessTokenProvider(SampleAccessTokenProvider(), providerID: yourProviderID)
// Other initialization code ...
return true
}
}
Objective-C
/*
* AppDelegate.m
*/
#import <GoogleMaps/GoogleMaps.h>
#import <GoogleRidesharingConsumer/GoogleRidesharingConsumer.h>
@implementation AppDelegate
- (BOOL)application:(UIApplication *)application
didFinishLaunchingWithOptions:(NSDictionary *)launchOptions {
//Register your API key for GMSServices.
[GMSServices provideAPIKey:yourMapsAPIKey];
//Set the instance of the AccessTokenFactory.
[GMTCServices setAccessTokenProvider:[[SampleAccessTokenProvider alloc] init]
providerID:yourProviderID];
// Other initialization code ...
return YES;
}
@end
Integración con la vista del mapa
Cómo inicializar la vista de mapa
En el siguiente ejemplo, se muestra cómo inicializar GMTCMapView
.
Swift
/*
* MapViewController.swift
*/
class ViewController: UIViewController, GMTCMapViewDelegate {
private var rideSharingMap: GMTCMapView?
override func viewDidLoad() {
super.viewDidLoad()
self.rideSharingMap = GMTCMapView(frame: UIScreen.main.bounds)
self.rideSharingMap.delegate = self
self.rideSharingMap?.settings.myLocationButton = true
self.view.addSubview(self.rideSharingMap!)
...
}
Objective-C
/*
* MapViewController.h
*/
@interface MapViewController : UIViewController<GMTCMapViewDelegate>
...
@end
/*
* MapViewController.m
*/
@implementation MapViewController
- (void)viewDidLoad {
[super viewDidLoad];
...
self.mapView = [[GMTCMapView alloc] initWithFrame:CGRectZero];
self.mapView.settings.myLocationButton = YES;
self.mapView.delegate = self;
...
}
...
@end
Controla los eventos de vista de mapa
En el siguiente ejemplo, se muestra cómo implementar un delegado para controlar el estado del cliente eventos.
Swift
func mapViewDidInitialize(_ mapview: GMTCMapView) {
// Handle the update to the state of the map view to browsing.
}
func mapView(_ mapView: GMSMapView, didTapConsumerMarker mapMarker: GMSMarker, markerType: GMTCMapViewMarkerType) -> Bool {
// Handle the mapView marker was tapped.
}
Objective-C
/*
* MapViewController.m
*/
#pragma mark - GMTCMapViewDelegate implementation
// Handle state update of map view.
- (void)mapViewDidInitializeCustomerState:(GMTCMapView *)mapview {
// Handle the update to the state of the map view to browsing.
}
- (void)mapView:(GMSMapView *)mapView
didTapConsumerMarker:(nonnull GMSMarker *)mapMarker
markerType:(GMTCMapViewMarkerType)markerType {
// Handle the mapView marker was tapped.
}
Viajes compartidos
Inicia un nuevo viaje cuando se cargó la vista
En el siguiente ejemplo, se muestra cómo comenzar a compartir el recorrido inmediatamente después de la
Ver cargas. Puedes recopilar todas las entradas del usuario, como las ubicaciones de entrega y retiro.
desde un ViewController
y, luego, crea un nuevo ViewController
para iniciar
compartir el recorrido directamente.
Swift
/*
* MapViewController.swift
*/
override func viewDidLoad() {
super.viewDidLoad()
...
self.mapView = GMTCMapView(frame: UIScreen.main.bounds)
self.mapView.delegate = self
self.view.addSubview(self.mapView)
}
func mapViewDidInitializeCustomerState(_: GMTCMapView) {
self.mapView.pickupLocation = self.selectedPickupLocation
self.mapView.dropoffLocation = self.selectedDropoffLocation
self.startConsumerMatchWithLocations(
pickupLocation: self.mapView.pickupLocation!,
dropoffLocation: self.mapView.dropoffLocation!
) { [weak self] (tripName, error) in
guard let strongSelf = self else { return }
if error != nil {
// print error message.
return
}
let tripService = GMTCServices.shared().tripService
// Create a tripModel instance for listening the update of the trip
// specified by this trip name.
let tripModel = tripService.tripModel(forTripName: tripName)
// Create a journeySharingSession instance based on the tripModel
let journeySharingSession = GMTCJourneySharingSession(tripModel: tripModel)
// Add the journeySharingSession instance on the mapView for UI updating.
strongSelf.mapView.show(journeySharingSession)
// Register for the trip update events.
tripModel.register(strongSelf)
strongSelf.currentTripModel = tripModel
strongSelf.currentJourneySharingSession = journeySharingSession
strongSelf.hideLoadingView()
}
self.showLoadingView()
}
Objective-C
/*
* MapViewController.m
*/
- (void)viewDidLoad {
[super viewDidLoad];
...
self.mapView = [[GMTCMapView alloc] initWithFrame:CGRectZero];
self.mapView.delegate = self;
[self.view addSubview:self.mapView];
}
// Handle the callback when the GMTCMapView did initialized.
- (void)mapViewDidInitializeCustomerState:(GMTCMapView *)mapview {
self.mapView.pickupLocation = self.selectedPickupLocation;
self.mapView.dropoffLocation = self.selectedDropoffLocation;
__weak __typeof(self) weakSelf = self;
[self startTripBookingWithPickupLocation:self.selectedPickupLocation
dropoffLocation:self.selectedDropoffLocation
completion:^(NSString *tripName, NSError *error) {
__typeof(self) strongSelf = weakSelf;
GMTCTripService *tripService = [GMTCServices sharedServices].tripService;
// Create a tripModel instance for listening to updates to the trip specified by this trip name.
GMTCTripModel *tripModel = [tripService tripModelForTripName:tripName];
// Create a journeySharingSession instance based on the tripModel.
GMTCJourneySharingSession *journeySharingSession =
[[GMTCJourneySharingSession alloc] initWithTripModel:tripModel];
// Add the journeySharingSession instance on the mapView for updating the UI.
[strongSelf.mapView showMapViewSession:journeySharingSession];
// Register for trip update events.
[tripModel registerSubscriber:self];
strongSelf.currentTripModel = tripModel;
strongSelf.currentJourneySharingSession = journeySharingSession;
[strongSelf hideLoadingView];
}];
[self showLoadingView];
}
Cancelar el viaje activo
En el siguiente ejemplo, se muestra cómo restablecer el viaje activo actual.
Swift
/*
* MapViewController.swift
*/
func cancelCurrentActiveTrip() {
// Stop the tripModel
self.currentTripModel.unregisterSubscriber(self)
// Remove the journey sharing session from the mapView's UI stack.
self.mapView.hide(journeySharingSession)
}
Objective-C
/*
* MapViewController.m
*/
- (void)cancelCurrentActiveTrip {
// Stop the tripModel
[self.currentTripModel unregisterSubscriber:self];
// Remove the journey sharing session from the mapView's UI stack.
[self.mapView hideMapViewSession:journeySharingSession];
}
Cómo detectar actualizaciones de viajes
En el siguiente ejemplo, se muestra cómo registrar la devolución de llamada tripModel
.
Swift
/*
* MapViewController.swift
*/
override func viewDidLoad() {
super.viewDidLoad()
// Register for trip update events.
self.currentTripModel.register(self)
}
Objective-C
/*
* MapViewController.m
*/
- (void)viewDidLoad {
[super viewDidLoad];
// Register for trip update events.
[self.currentTripModel registerSubscriber:self];
...
}
En el siguiente ejemplo, se muestra cómo cancelar el registro de tripModel
devolución de llamada.
Swift
/*
* MapViewController.swift
*/
deinit {
self.currentTripModel.unregisterSubscriber(self)
}
Objective-C
/*
* MapViewController.m
*/
- (void)dealloc {
[self.currentTripModel unregisterSubscriber:self];
...
}
En el siguiente ejemplo, se muestra cómo implementar GMTCTripModelSubscriber
protocolo para manejar devoluciones de llamada cuando se actualiza el estado del viaje.
Swift
/*
* MapViewController.swift
*/
func tripModel(_: GMTCTripModel, didUpdate trip: GMTSTrip?, updatedPropertyFields: GMTSTripPropertyFields) {
// Update the UI with the new `trip` data.
self.updateUI(with: trip)
}
func tripModel(_: GMTCTripModel, didUpdate tripStatus: GMTSTripStatus) {
// Handle trip status did change.
}
func tripModel(_: GMTCTripModel, didUpdateActiveRouteRemainingDistance activeRouteRemainingDistance: Int32) {
// Handle remaining distance of active route did update.
}
func tripModel(_: GMTCTripModel, didUpdateActiveRoute activeRoute: [GMTSLatLng]?) {
// Handle trip active route did update.
}
func tripModel(_: GMTCTripModel, didUpdate vehicleLocation: GMTSVehicleLocation?) {
// Handle vehicle location did update.
}
func tripModel(_: GMTCTripModel, didUpdatePickupLocation pickupLocation: GMTSTerminalLocation?) {
// Handle pickup location did update.
}
func tripModel(_: GMTCTripModel, didUpdateDropoffLocation dropoffLocation: GMTSTerminalLocation?) {
// Handle drop off location did update.
}
func tripModel(_: GMTCTripModel, didUpdatePickupETA pickupETA: TimeInterval) {
// Handle the pickup ETA did update.
}
func tripModel(_: GMTCTripModel, didUpdateDropoffETA dropoffETA: TimeInterval) {
// Handle the drop off ETA did update.
}
func tripModel(_: GMTCTripModel, didUpdateRemaining remainingWaypoints: [GMTSTripWaypoint]?) {
// Handle updates to the pickup, dropoff or intermediate destinations of the trip.
}
func tripModel(_: GMTCTripModel, didFailUpdateTripWithError error: Error?) {
// Handle the error.
}
func tripModel(_: GMTCTripModel, didUpdateIntermediateDestinations intermediateDestinations: [GMTSTerminalLocation]?) {
// Handle the intermediate destinations being updated.
}
func tripModel(_: GMTCTripModel, didUpdateActiveRouteTraffic activeRouteTraffic: GMTSTrafficData?) {
// Handle trip active route traffic being updated.
}
Objective-C
/*
* MapViewController.m
*/
#pragma mark - GMTCTripModelSubscriber implementation
- (void)tripModel:(GMTCTripModel *)tripModel
didUpdateTrip:(nullable GMTSTrip *)trip
updatedPropertyFields:(enum GMTSTripPropertyFields)updatedPropertyFields {
// Update the UI with the new `trip` data.
[self updateUIWithTrip:trip];
...
}
- (void)tripModel:(GMTCTripModel *)tripModel didUpdateTripStatus:(enum GMTSTripStatus)tripStatus {
// Handle trip status did change.
}
- (void)tripModel:(GMTCTripModel *)tripModel
didUpdateActiveRouteRemainingDistance:(int32_t)activeRouteRemainingDistance {
// Handle remaining distance of active route did update.
}
- (void)tripModel:(GMTCTripModel *)tripModel
didUpdateActiveRoute:(nullable NSArray<GMTSLatLng *> *)activeRoute {
// Handle trip active route did update.
}
- (void)tripModel:(GMTCTripModel *)tripModel
didUpdateVehicleLocation:(nullable GMTSVehicleLocation *)vehicleLocation {
// Handle vehicle location did update.
}
- (void)tripModel:(GMTCTripModel *)tripModel
didUpdatePickupLocation:(nullable GMTSTerminalLocation *)pickupLocation {
// Handle pickup location did update.
}
- (void)tripModel:(GMTCTripModel *)tripModel
didUpdateDropoffLocation:(nullable GMTSTerminalLocation *)dropoffLocation {
// Handle drop off location did update.
}
- (void)tripModel:(GMTCTripModel *)tripModel didUpdatePickupETA:(NSTimeInterval)pickupETA {
// Handle the pickup ETA did update.
}
- (void)tripModel:(GMTCTripModel *)tripModel
didUpdateRemainingWaypoints:(nullable NSArray<GMTSTripWaypoint *> *)remainingWaypoints {
// Handle updates to the pickup, dropoff or intermediate destinations of the trip.
}
- (void)tripModel:(GMTCTripModel *)tripModel didUpdateDropoffETA:(NSTimeInterval)dropoffETA {
// Handle the drop off ETA did update.
}
- (void)tripModel:(GMTCTripModel *)tripModel didFailUpdateTripWithError:(nullable NSError *)error {
// Handle the error.
}
- (void)tripModel:(GMTCTripModel *)tripModel
didUpdateIntermediateDestinations:
(nullable NSArray<GMTSTerminalLocation *> *)intermediateDestinations {
// Handle the intermediate destinations being updated.
}
- (void)tripModel:(GMTCTripModel *)tripModel
didUpdateActiveRouteTraffic:(nullable GMTSTrafficData *)activeRouteTraffic {
// Handle trip active route traffic being updated.
}
Manejo de errores
Si te suscribiste al tripModel y se produce un error, puedes obtener la devolución de llamada de
tripModel implementando el método delegado
tripModel(_:didFailUpdateTripWithError:)
Fleet Engine generó el error
que sigue el estándar de Google Cloud Error. Sobre el error de detalles
definición del mensaje y todos los códigos de error hacen referencia a Errores de Google Cloud
documentación.
Específicamente, para la supervisión de viajes, requiere proporcionar una autenticación
token. Se generará 401 UNAUTHENTICATED
si no hay una autenticación válida
credenciales, por ejemplo, si el token venció.Se generará 403 PERMISSION_DENIED
si el
el emisor no tiene permiso para llamar a una API específica (por ejemplo, un usuario con
rol intenta llamar a updateTrip), o bien la solicitud no tiene valores de vista de vehículo/trip_id válidos
en el token JWT.
Para obtener más información, consulta Error del SDK del consumidor Manipulación.
Personalización de la IU
Cómo obtener y establecer opciones personalizadas de la IU de polilíneas
En el siguiente ejemplo, se muestra cómo configurar opciones de IU personalizadas para las polilíneas.
Swift
/** MapViewController.swift */
func updatePolylineUIOptions() {
// The polyline type that you would like to set custom UI options for.
let customizablePolylineType = GMTCPolylineType.activeRoute
let polylineStyleOptions = GMTCMutablePolylineStyleOptions()
polylineStyleOptions.strokeWidth = 8.0
polylineStyleOptions.strokeColor = .blue
polylineStyleOptions.isVisible = true
polylineStyleOptions.zIndex = 1000
polylineStyleOptions.isGeodesic = true
let coordinator = self.mapView.consumerMapStyleCoordinator
coordinator.setPolylineStyleOptions(polylineStyleOptions, polylineType:customizablePolylineType)
}
Objective-C
/** MapViewController.m */
- (void)updatePolylineUIOptions {
// The polyline type that you would like to set custom UI options for.
GMTCPolylineType customizablePolylineType = GMTCPolylineTypeActiveRoute;
GMTCMutablePolylineStyleOptions *polylineStyleOptions =
[[GMTCMutablePolylineStyleOptions alloc] init];
polylineStyleOptions.strokeWidth = 8.0;
polylineStyleOptions.strokeColor = [UIColor blueColor];
polylineStyleOptions.isVisible = YES;
polylineStyleOptions.zIndex = 1000;
polylineStyleOptions.isGeodesic = YES;
[[_mapView consumerMapStyleCoordinator] setPolylineStyleOptions:polylineStyleOptions
polylineType:customizablePolylineType];
}
Cómo obtener y configurar opciones de IU de marcador personalizadas
En el siguiente ejemplo, se muestra cómo configurar opciones de IU personalizadas para los marcadores.
Swift
/** MapViewController.swift */
func updateMarkerUIOptions() {
let customizableMarkerType = GMTCCustomizableMarkerType.tripVehicle
let markerStyleOptions = GMTCMutableMarkerStyleOptions()
markerStyleOptions.groundAnchor = groundAnchor
markerStyleOptions.isVisible = true
markerStyleOptions.icon = icon
markerStyleOptions.zIndex = 100
markerStyleOptions.isFlat = false
let coordinator = self.mapView.consumerMapStyleCoordinator
coordinator.setMarkerStyleOptions(markerStyleOptions, markerType: customizableMarkerType)
}
Objective-C
/** MapViewController.m */
- (void)updateMarkerUIOptions {
// The marker type that you would like to set custom UI options for.
GMTCCustomizableMarkerType customizableMarkerType = GMTCCustomizableMarkerTypeTripVehicle;
GMTCMutableMarkerStyleOptions *markerStyleOptions =
[[GMTCMutableMarkerStyleOptions alloc] init];
markerStyleOptions.groundAnchor = groundAnchor;
markerStyleOptions.isVisible = YES;
markerStyleOptions.icon = icon;
markerStyleOptions.zIndex = 100;
markerStyleOptions.isFlat = NO;
[[_mapView consumerMapStyleCoordinator] setMarkerStyleOptions:markerStyleOptions markerType:customizableMarkerType];
}
Cómo ajustar el zoom de la cámara
La sección Mi ubicación botón del SDK de Maps para iOS centra la cámara en la ubicación del dispositivo.
Si hay una sesión activa de Viajes compartidos, puedes centrar la cámara para no solo en la ubicación del dispositivo.
El SDK de consumidor proporciona una función de cámara automática que es habilitado de forma predeterminada. La cámara se acerca para enfocarse en la ruta para compartir el viaje y el próximo punto de referencia.
Si necesitas más control del comportamiento de la cámara, puedes inhabilitar o habilitar
la función de cámara automática con el
isAllowCameraAutoUpdate
propiedad.
Para obtener más personalizaciones de la cámara, consulta Traslado del SDK de Maps para iOS cámara.