Adding a Map with Marker
Stay organized with collections
Save and categorize content based on your preferences.
Introduction

This tutorial shows you how to add a Google map to your Flutter app. The map
includes a marker, also called a pin, to indicate a specific location.
Getting the code
Clone or download the Flutter samples
repository. The sample
code can be found in
the google_maps
directory.
Setting up your development project
Be sure you've completed the steps outlined in the Set up a Flutter project
guide before continuing with this topic.
1. Import the Google Maps for Flutter package
- Open your
main.dart
file in your preferred IDE.
- Verify that following import statement has been added to the file:
import 'package:google_maps_flutter/google_maps_flutter.dart';
2. Add Google Maps to your Flutter app
Within the Scaffold
widget, add a GoogleMap
widget as
the body.
GoogleMap(
initialCameraPosition: CameraPosition(
target: _center,
zoom: 11.0,
),
markers: {
const Marker(
markerId: MarkerId('Sydney'),
position: LatLng(-33.86, 151.20),
)
},
)
- The
markerId
option labels your marker.
- The
position
option sets where the marker appears on your map.
3. Building and running your app
Start the Flutter app using one of the following options:
- From your IDE, click the
Run
button
- From the command line, run
flutter run
.
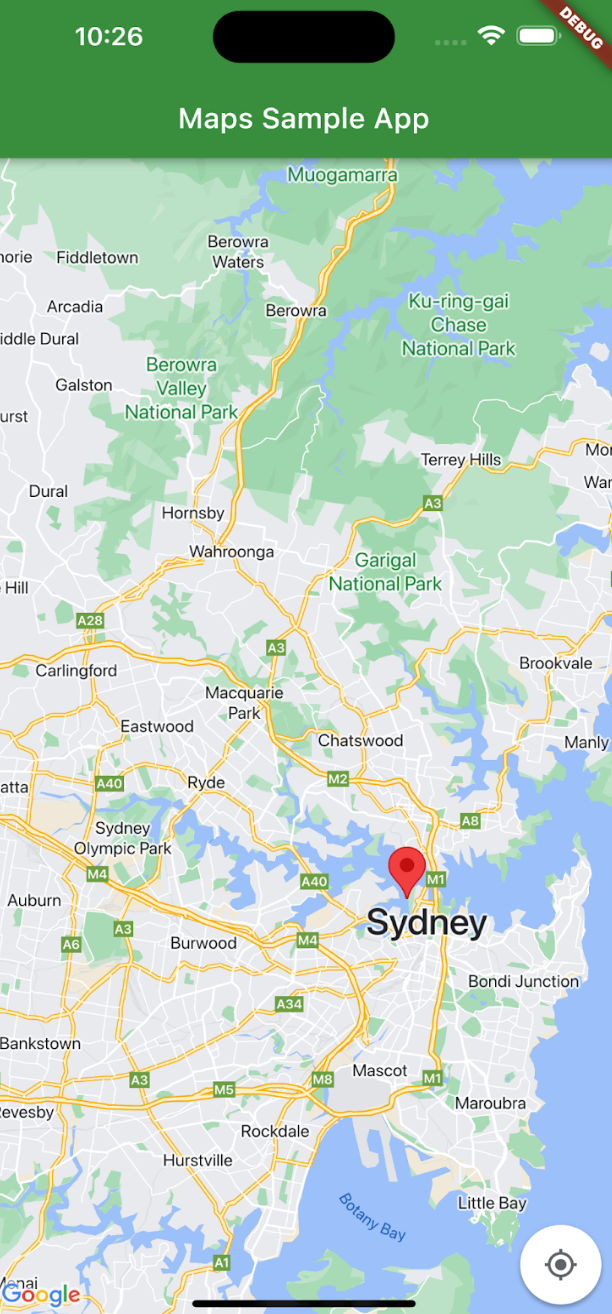
You should see a map with a marker centered on Sydney on the east coast of
Australia, similar to the image on this page.
Troubleshooting
- If you don't see a map, check that you've obtained an API key and added it to the app.
- If you used the iOS bundle identifier to restrict the API key, edit the key to add the bundle identifier for the app:
com.google.examples.map-with-marker
.
- Ensure that you have a good WiFi or GPS connection.
- Use the Flutter DevTools to view logs and debug the app.
- You can learn more about Running a Flutter app.
4. Understanding the code
This code can be found on
GitHub.
- Import the necessary packages and initialize the app.
import 'package:flutter/material.dart';
import 'package:google_maps_flutter/google_maps_flutter.dart';
void main() => runApp(const MyApp());
class MyApp extends StatefulWidget {
const MyApp({super.key});
@override
State<MyApp> createState() => _MyAppState();
}
- Create a map centered on Sydney, Australia.
class _MyAppState extends State<MyApp> {
late GoogleMapController mapController;
final LatLng _center = const LatLng(-33.86, 151.20);
void _onMapCreated(GoogleMapController controller) {
mapController = controller;
}
- Add the widgets needed to display a Map in an app.
@override
Widget build(BuildContext context) {
return MaterialApp(
home: Scaffold(
appBar: AppBar(
title: const Text('Maps Sample App'),
backgroundColor: Colors.green[700],
),
body: GoogleMap(
onMapCreated: _onMapCreated,
initialCameraPosition: CameraPosition(
target: _center,
zoom: 11.0,
), // CameraPosition
), // GoogleMap
), // Scaffold
); // MaterialApp
}
}
- Add the markers widgets to add the widget to your app.
body: GoogleMap(
onMapCreated: _onMapCreated,
initialCameraPosition: CameraPosition(
target: _center,
zoom: 11.0,
),
markers: {
const Marker(
markerId: const MarkerId("Sydney"),
position: LatLng(-33.86, 151.20),
), // Marker
}, // markers
), // GoogleMap
...
- Add an info window to the marker.
const Marker(
markerId: const MarkerId("Sydney"),
position: LatLng(-33.86, 151.20),
infoWindow: InfoWindow(
title: "Sydney",
snippet: "Capital of New South Wales",
), // InfoWindow
), //Marker
...
By default, the Google Maps for Flutter package displays the content of the info
window when the user taps a marker. There's no need to add a click listener
for the marker if you're happy to use the default behavior.
Congratulations! You've built an Flutter app that displays a Google map with a
marker to indicate a particular location and provide additional information in
an info window. You've also learned how to use the Google Maps for Flutter package.
Except as otherwise noted, the content of this page is licensed under the Creative Commons Attribution 4.0 License, and code samples are licensed under the Apache 2.0 License. For details, see the Google Developers Site Policies. Java is a registered trademark of Oracle and/or its affiliates.
Last updated 2025-08-28 UTC.
[null,null,["Last updated 2025-08-28 UTC."],[[["\u003cp\u003eThis tutorial provides a step-by-step guide on integrating a Google map with a marker into your Flutter application.\u003c/p\u003e\n"],["\u003cp\u003eYou will learn how to import the necessary package, add the Google Map widget, and position a marker using latitude and longitude coordinates.\u003c/p\u003e\n"],["\u003cp\u003eThe tutorial covers troubleshooting common issues like API key setup, connectivity problems, and debugging techniques.\u003c/p\u003e\n"],["\u003cp\u003eIt also includes a detailed explanation of the code, breaking down the process of initializing the map, adding markers, and displaying information windows.\u003c/p\u003e\n"],["\u003cp\u003eYou can find the complete source code on GitHub for easy reference and implementation in your projects.\u003c/p\u003e\n"]]],["To add a Google Map to a Flutter app, first, import the `google_maps_flutter` package. Within the `Scaffold` widget, add a `GoogleMap` widget, setting the `initialCameraPosition` and `markers`. Each marker requires a `markerId` and `position`. Run the app using the IDE or command line (`flutter run`). To add information to a marker use `infoWindow`. Debugging involves checking for an API key, connection issues, and using Flutter DevTools. The code is also available on Github.\n"],null,["# Adding a Map with Marker\n\nIntroduction\n------------\n\nThis tutorial shows you how to add a Google map to your Flutter app. The map\nincludes a marker, also called a pin, to indicate a specific location.\n\nGetting the code\n----------------\n\nClone or download the [Flutter samples\nrepository](https://github.com/flutter/samples/). The [sample\ncode](https://github.com/flutter/samples/tree/main/google_maps) can be found in\nthe `google_maps` directory.\n\nSetting up your development project\n-----------------------------------\n\nBe sure you've completed the steps outlined in the [Set up a Flutter project](/maps/flutter-package/config)\nguide before continuing with this topic.\n\n1. Import the Google Maps for Flutter package\n---------------------------------------------\n\n1. Open your `main.dart` file in your preferred IDE.\n2. Verify that following import statement has been added to the file:\n\n```python\nimport 'package:google_maps_flutter/google_maps_flutter.dart';\n```\n\n2. Add Google Maps to your Flutter app\n--------------------------------------\n\nWithin the `Scaffold` widget, add a `GoogleMap` widget as\nthe body. \n\n```gdscript\nGoogleMap(\n initialCameraPosition: CameraPosition(\n target: _center,\n zoom: 11.0,\n ),\n markers: {\n const Marker(\n markerId: MarkerId('Sydney'),\n position: LatLng(-33.86, 151.20),\n )\n },\n)\n```\n\n\u003cbr /\u003e\n\n- The `markerId` option labels your marker.\n- The `position` option sets where the marker appears on your map.\n\n3. Building and running your app\n--------------------------------\n\nStart the Flutter app using one of the following options:\n\n1. From your IDE, click the `Run` button\n2. From the command line, run `flutter run`.\n\nYou should see a map with a marker centered on Sydney on the east coast of\nAustralia, similar to the image on this page.\n\n### Troubleshooting\n\n- If you don't see a map, check that you've obtained an [API key](https://developers.google.com/maps/documentation/ios-sdk/config#get-key) and added it to the app.\n- If you used the iOS bundle identifier to restrict the API key, edit the key to add the bundle identifier for the app: `com.google.examples.map-with-marker`.\n- Ensure that you have a good WiFi or GPS connection.\n- Use the [Flutter DevTools](https://docs.flutter.dev/tools/devtools/overview) to view logs and debug the app.\n- You can learn more about [Running a Flutter](/maps/flutter-package/(https:/docs.flutter.dev/get-started/test-drive?tab=vscode) app.\n\n4. Understanding the code\n-------------------------\n\nThis code can be found on\n[GitHub](https://github.com/flutter/samples/tree/main/google_maps).\n\n1. Import the necessary packages and initialize the app. \n\n ```python\n import 'package:flutter/material.dart';\n import 'package:google_maps_flutter/google_maps_flutter.dart';\n\n void main() =\u003e runApp(const MyApp());\n\n class MyApp extends StatefulWidget {\n const MyApp({super.key});\n\n @override\n State\u003cMyApp\u003e createState() =\u003e _MyAppState();\n }\n ```\n2. Create a map centered on Sydney, Australia. \n\n ```gdscript\n class _MyAppState extends State\u003cMyApp\u003e {\n \r\n late GoogleMapController mapController;\n \r\n final LatLng _center = const LatLng(-33.86, 151.20);\n \r\n void _onMapCreated(GoogleMapController controller) {\n mapController = controller;\n }\n ```\n3. Add the widgets needed to display a Map in an app. \n\n ```gdscript\n @override\n Widget build(BuildContext context) {\n return MaterialApp(\n home: Scaffold(\n appBar: AppBar(\n title: const Text('Maps Sample App'),\n backgroundColor: Colors.green[700],\n ),\n body: GoogleMap(\n onMapCreated: _onMapCreated,\n initialCameraPosition: CameraPosition(\n target: _center,\n zoom: 11.0,\n ), // CameraPosition\n ), // GoogleMap\n ), // Scaffold\n ); // MaterialApp\n }\n }\n ```\n4. Add the markers widgets to add the widget to your app. \n\n ```gdscript\n body: GoogleMap(\n onMapCreated: _onMapCreated,\n initialCameraPosition: CameraPosition(\n target: _center,\n zoom: 11.0,\n ),\n markers: {\n const Marker(\n markerId: const MarkerId(\"Sydney\"),\n position: LatLng(-33.86, 151.20),\n ), // Marker\n }, // markers\n ), // GoogleMap\n ...\n ```\n5. Add an info window to the marker. \n\n ```gdscript\n const Marker(\n markerId: const MarkerId(\"Sydney\"),\n position: LatLng(-33.86, 151.20),\n infoWindow: InfoWindow(\n title: \"Sydney\",\n snippet: \"Capital of New South Wales\",\n ), // InfoWindow\n ), //Marker\n ...\n ```\n By default, the Google Maps for Flutter package displays the content of the info window when the user taps a marker. There's no need to add a click listener for the marker if you're happy to use the default behavior.\n\nCongratulations! You've built an Flutter app that displays a Google map with a\nmarker to indicate a particular location and provide additional information in\nan info window. You've also learned how to use the Google Maps for Flutter package."]]