添加带标记的地图
使用集合让一切井井有条
根据您的偏好保存内容并对其进行分类。
简介

本教程介绍了如何向 Flutter 应用添加 Google 地图。添加的地图中包含一个用于指示特定位置的标记,也称为图钉。
获取代码
克隆或下载 Flutter 示例代码库。您可以在 google_maps
目录中找到相应示例代码。
设置您的开发项目
请确保您已经完成了《设置 Flutter 项目》指南中所述的步骤,然后再执行本主题中的后续操作。
1. 导入 Flutter 版 Google 地图软件包
- 在您的首选 IDE 中打开
main.dart
文件。
- 确保在该文件中添加了以下导入语句:
import 'package:google_maps_flutter/google_maps_flutter.dart';
2. 向您的 Flutter 应用中添加 Google 地图
在 Scaffold
widget 内,添加一个 GoogleMap
widget 作为主体。
GoogleMap(
initialCameraPosition: CameraPosition(
target: _center,
zoom: 11.0,
),
markers: {
const Marker(
markerId: MarkerId('Sydney'),
position: LatLng(-33.86, 151.20),
)
},
)
markerId
选项可为您的标记加标签。
position
选项可设置相应标记在地图上的显示位置。
3. 构建并运行您的应用
使用以下任一方式启动 Flutter 应用:
- 在您的 IDE 中,点击
Run
按钮
- 在命令行中,运行
flutter run
。
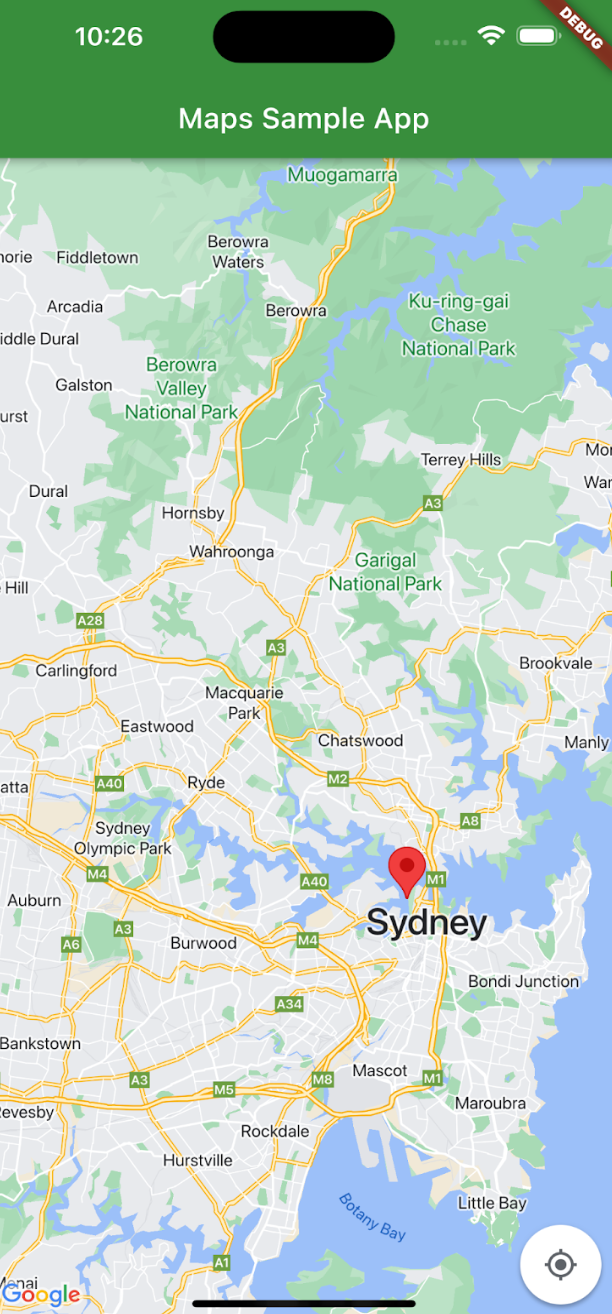
您应该会看到一张带有标记的地图,这张地图以位于澳大利亚东海岸的悉尼为中心,与本页上的图像类似。
问题排查
- 如果您没有看到地图,请检查您是否已获取 API 密钥并将其添加到您的应用。
- 如果您使用了 iOS 软件包标识符来限制 API 密钥,请修改该密钥,以便添加该应用的软件包标识符:
com.google.examples.map-with-marker
。
- 确保您的 Wi-Fi 或 GPS 连接信号良好。
- 使用 Flutter 开发者工具查看日志并调试应用。
- 您可以详细了解如何运行 Flutter 应用。
4. 理解代码
您可以在 GitHub 上找到这些代码。
- 导入必要的软件包,然后将应用初始化。
import 'package:flutter/material.dart';
import 'package:google_maps_flutter/google_maps_flutter.dart';
void main() => runApp(const MyApp());
class MyApp extends StatefulWidget {
const MyApp({super.key});
@override
State<MyApp> createState() => _MyAppState();
}
- 创建以澳大利亚悉尼为中心的地图。
class _MyAppState extends State<MyApp> {
late GoogleMapController mapController;
final LatLng _center = const LatLng(-33.86, 151.20);
void _onMapCreated(GoogleMapController controller) {
mapController = controller;
}
- 添加在应用中显示地图所需的 widget。
@override
Widget build(BuildContext context) {
return MaterialApp(
home: Scaffold(
appBar: AppBar(
title: const Text('Maps Sample App'),
backgroundColor: Colors.green[700],
),
body: GoogleMap(
onMapCreated: _onMapCreated,
initialCameraPosition: CameraPosition(
target: _center,
zoom: 11.0,
), // CameraPosition
), // GoogleMap
), // Scaffold
); // MaterialApp
}
}
- 添加“markers”widget,从而将该 widget 添加到您的应用中。
body: GoogleMap(
onMapCreated: _onMapCreated,
initialCameraPosition: CameraPosition(
target: _center,
zoom: 11.0,
),
markers: {
const Marker(
markerId: const MarkerId("Sydney"),
position: LatLng(-33.86, 151.20),
), // Marker
}, // markers
), // GoogleMap
...
- 为标记添加信息窗口。
const Marker(
markerId: const MarkerId("Sydney"),
position: LatLng(-33.86, 151.20),
infoWindow: InfoWindow(
title: "Sydney",
snippet: "Capital of New South Wales",
), // InfoWindow
), //Marker
...
默认情况下,Flutter 版 Google 地图软件包会在用户点按标记时显示信息窗口中的内容。如果您愿意使用该默认行为,则无需为标记添加点击监听器。
恭喜!您已构建了一个 Flutter 应用,该应用显示可使用标记来指示特定位置的 Google 地图,并且会在信息窗口内提供额外的信息。您还学习了如何使用 Flutter 版 Google 地图软件包。
如未另行说明,那么本页面中的内容已根据知识共享署名 4.0 许可获得了许可,并且代码示例已根据 Apache 2.0 许可获得了许可。有关详情,请参阅 Google 开发者网站政策。Java 是 Oracle 和/或其关联公司的注册商标。
最后更新时间 (UTC):2023-12-12。
[null,null,["最后更新时间 (UTC):2023-12-12。"],[[["\u003cp\u003eThis tutorial provides a step-by-step guide on integrating a Google map with a marker into your Flutter application.\u003c/p\u003e\n"],["\u003cp\u003eYou will learn how to import the necessary package, add the Google Map widget, and position a marker using latitude and longitude coordinates.\u003c/p\u003e\n"],["\u003cp\u003eThe tutorial covers troubleshooting common issues like API key setup, connectivity problems, and debugging techniques.\u003c/p\u003e\n"],["\u003cp\u003eIt also includes a detailed explanation of the code, breaking down the process of initializing the map, adding markers, and displaying information windows.\u003c/p\u003e\n"],["\u003cp\u003eYou can find the complete source code on GitHub for easy reference and implementation in your projects.\u003c/p\u003e\n"]]],["To add a Google Map to a Flutter app, first, import the `google_maps_flutter` package. Within the `Scaffold` widget, add a `GoogleMap` widget, setting the `initialCameraPosition` and `markers`. Each marker requires a `markerId` and `position`. Run the app using the IDE or command line (`flutter run`). To add information to a marker use `infoWindow`. Debugging involves checking for an API key, connection issues, and using Flutter DevTools. The code is also available on Github.\n"],null,["# Adding a Map with Marker\n\nIntroduction\n------------\n\nThis tutorial shows you how to add a Google map to your Flutter app. The map\nincludes a marker, also called a pin, to indicate a specific location.\n\nGetting the code\n----------------\n\nClone or download the [Flutter samples\nrepository](https://github.com/flutter/samples/). The [sample\ncode](https://github.com/flutter/samples/tree/main/google_maps) can be found in\nthe `google_maps` directory.\n\nSetting up your development project\n-----------------------------------\n\nBe sure you've completed the steps outlined in the [Set up a Flutter project](/maps/flutter-package/config)\nguide before continuing with this topic.\n\n1. Import the Google Maps for Flutter package\n---------------------------------------------\n\n1. Open your `main.dart` file in your preferred IDE.\n2. Verify that following import statement has been added to the file:\n\n```python\nimport 'package:google_maps_flutter/google_maps_flutter.dart';\n```\n\n2. Add Google Maps to your Flutter app\n--------------------------------------\n\nWithin the `Scaffold` widget, add a `GoogleMap` widget as\nthe body. \n\n```gdscript\nGoogleMap(\n initialCameraPosition: CameraPosition(\n target: _center,\n zoom: 11.0,\n ),\n markers: {\n const Marker(\n markerId: MarkerId('Sydney'),\n position: LatLng(-33.86, 151.20),\n )\n },\n)\n```\n\n\u003cbr /\u003e\n\n- The `markerId` option labels your marker.\n- The `position` option sets where the marker appears on your map.\n\n3. Building and running your app\n--------------------------------\n\nStart the Flutter app using one of the following options:\n\n1. From your IDE, click the `Run` button\n2. From the command line, run `flutter run`.\n\nYou should see a map with a marker centered on Sydney on the east coast of\nAustralia, similar to the image on this page.\n\n### Troubleshooting\n\n- If you don't see a map, check that you've obtained an [API key](https://developers.google.com/maps/documentation/ios-sdk/config#get-key) and added it to the app.\n- If you used the iOS bundle identifier to restrict the API key, edit the key to add the bundle identifier for the app: `com.google.examples.map-with-marker`.\n- Ensure that you have a good WiFi or GPS connection.\n- Use the [Flutter DevTools](https://docs.flutter.dev/tools/devtools/overview) to view logs and debug the app.\n- You can learn more about [Running a Flutter](/maps/flutter-package/(https:/docs.flutter.dev/get-started/test-drive?tab=vscode) app.\n\n4. Understanding the code\n-------------------------\n\nThis code can be found on\n[GitHub](https://github.com/flutter/samples/tree/main/google_maps).\n\n1. Import the necessary packages and initialize the app. \n\n ```python\n import 'package:flutter/material.dart';\n import 'package:google_maps_flutter/google_maps_flutter.dart';\n\n void main() =\u003e runApp(const MyApp());\n\n class MyApp extends StatefulWidget {\n const MyApp({super.key});\n\n @override\n State\u003cMyApp\u003e createState() =\u003e _MyAppState();\n }\n ```\n2. Create a map centered on Sydney, Australia. \n\n ```gdscript\n class _MyAppState extends State\u003cMyApp\u003e {\n \r\n late GoogleMapController mapController;\n \r\n final LatLng _center = const LatLng(-33.86, 151.20);\n \r\n void _onMapCreated(GoogleMapController controller) {\n mapController = controller;\n }\n ```\n3. Add the widgets needed to display a Map in an app. \n\n ```gdscript\n @override\n Widget build(BuildContext context) {\n return MaterialApp(\n home: Scaffold(\n appBar: AppBar(\n title: const Text('Maps Sample App'),\n backgroundColor: Colors.green[700],\n ),\n body: GoogleMap(\n onMapCreated: _onMapCreated,\n initialCameraPosition: CameraPosition(\n target: _center,\n zoom: 11.0,\n ), // CameraPosition\n ), // GoogleMap\n ), // Scaffold\n ); // MaterialApp\n }\n }\n ```\n4. Add the markers widgets to add the widget to your app. \n\n ```gdscript\n body: GoogleMap(\n onMapCreated: _onMapCreated,\n initialCameraPosition: CameraPosition(\n target: _center,\n zoom: 11.0,\n ),\n markers: {\n const Marker(\n markerId: const MarkerId(\"Sydney\"),\n position: LatLng(-33.86, 151.20),\n ), // Marker\n }, // markers\n ), // GoogleMap\n ...\n ```\n5. Add an info window to the marker. \n\n ```gdscript\n const Marker(\n markerId: const MarkerId(\"Sydney\"),\n position: LatLng(-33.86, 151.20),\n infoWindow: InfoWindow(\n title: \"Sydney\",\n snippet: \"Capital of New South Wales\",\n ), // InfoWindow\n ), //Marker\n ...\n ```\n By default, the Google Maps for Flutter package displays the content of the info window when the user taps a marker. There's no need to add a click listener for the marker if you're happy to use the default behavior.\n\nCongratulations! You've built an Flutter app that displays a Google map with a\nmarker to indicate a particular location and provide additional information in\nan info window. You've also learned how to use the Google Maps for Flutter package."]]