تنظيم صفحاتك في مجموعات
يمكنك حفظ المحتوى وتصنيفه حسب إعداداتك المفضّلة.
لبدء استخدام واجهات برمجة تطبيقات "صور Google"، عليك ضبط مشروعك من خلال تفعيل واجهتَي برمجة تطبيقات "صور Google" اللتين تحتاج إليهما باستخدام "وحدة تحكّم Google API" وإعداد معرّف عميل OAuth 2.0.
يتفاعل تطبيقك مع "صور Google" بالنيابة عن أحد
مستخدمي "صور Google". على سبيل المثال، عند إنشاء ألبومات في مكتبة
"صور Google" الخاصة بالمستخدم أو تحميل عناصر وسائط إلى
حسابه على "صور Google"، يمنح المستخدم الإذن بطلبات واجهة برمجة التطبيقات هذه باستخدام بروتوكول
OAuth 2.0.
يسمح معرّف عميل OAuth 2.0 لمستخدمي تطبيقك بتسجيل الدخول والمصادقة
وبالتالي استخدام واجهات برمجة التطبيقات في "صور Google". لا تتوافق واجهات برمجة التطبيقات في "صور Google" مع
حسابات الخدمة. لاستخدام واجهات برمجة التطبيقات هذه، يجب أن يكون المستخدمون مسجّلين الدخول إلى حساب Google
صالح.
ضبط إعدادات تطبيقك
عليك أولاً تفعيل واجهة برمجة التطبيقات، ثم طلب معرّف عميل OAuth 2.0.
تفعيل واجهة برمجة التطبيقات
قبل أن تتمكّن من استخدام واجهات برمجة تطبيقات "صور Google"، عليك تفعيلها في مشروعك.
من شريط القوائم، اختَر مشروعًا أو أنشئ مشروعًا جديدًا.
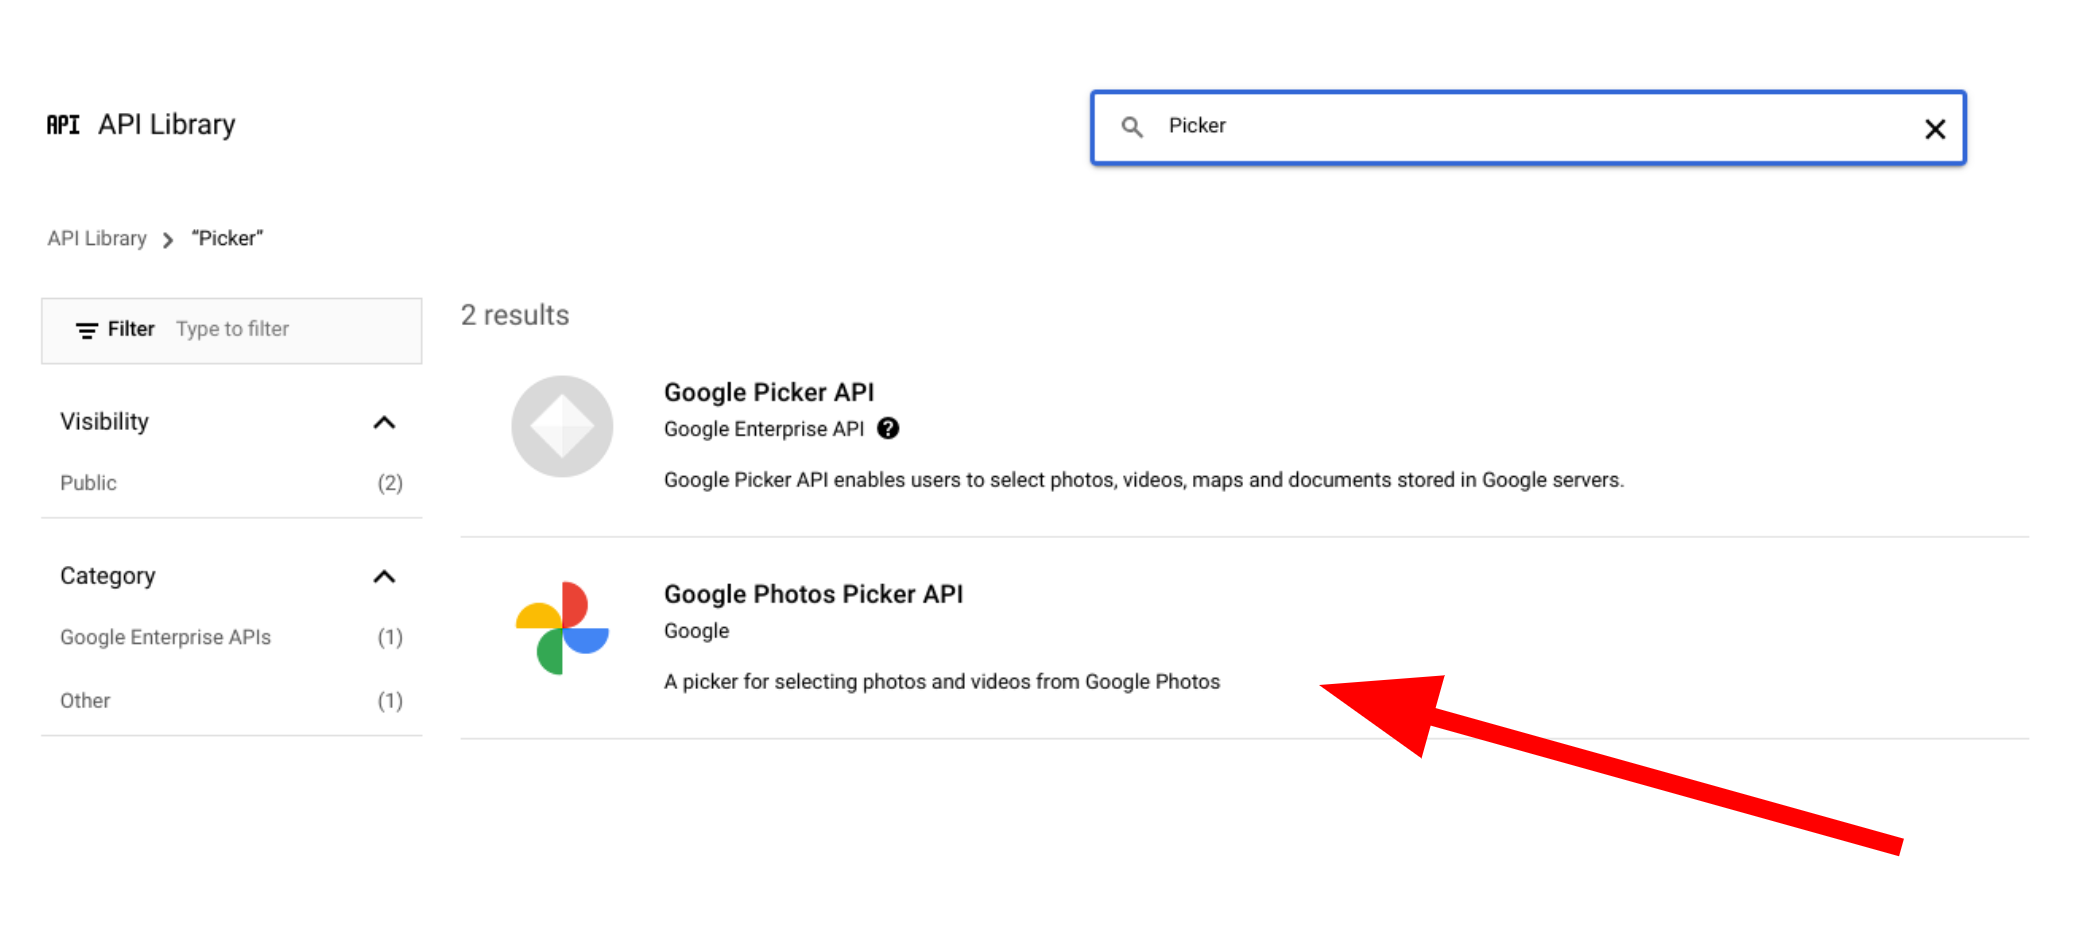
لفتح إحدى واجهات برمجة التطبيقات في "صور Google"، اختَر
واجهات برمجة التطبيقات والخدمات > المكتبة من قائمة "التنقّل".
ابحث عن "صور Google". اختَر واجهة واحدة أو أكثر من واجهات برمجة التطبيقات في "صور Google" وانقر على
تفعيل.
طلب معرّف عميل OAuth 2.0
اتّبِع الخطوات التالية لطلب معرّف عميل OAuth وضبطه لتطبيقك. يستخدم هذا المثال تطبيقًا يتم فيه التعامل مع مسار OAuth بالكامل من جهة الخادم، مثل التطبيق الوارد في نماذجنا. قد تختلف عملية الإعداد
في سيناريوهات التنفيذ الأخرى.
حقل معرّف الموارد المنتظم (URI) المعتمَد لإعادة التوجيه هو نقطة النهاية التي تتلقّى
الردود من خادم OAuth 2.0. ويشمل ذلك عادةً
بيئة التطوير ويشير إلى مسار في تطبيقك.
يمكن لتطبيقك الوصول إلى واجهات برمجة تطبيقات Google المفعَّلة باستخدام هذه القيم.
قبل أن تتمكّن من إطلاق تطبيق متاح للجميع يمكنه الوصول إلى واجهات برمجة التطبيقات في "صور Google"، يجب أن تراجع Google
تطبيقك. تظهر رسالة "التطبيق لم يتم إثبات ملكيته" على
الشاشة عند اختبار تطبيقك إلى أن يتم
إثبات ملكيته.
لا يمكن الوصول إلى الموارد التي تم إنشاؤها من خلال أي من واجهات برمجة تطبيقات "صور Google" أو تعديلها إلا باستخدام معرّف العميل الأصلي المستخدَم لإنشائها. على سبيل المثال، إذا
أنشأت session في Picker API باستخدام معرِّف عميل محدّد وغيّرت
لاحقًا معرِّف العميل هذا في تطبيقك، سيفقد تطبيقك إمكانية الوصول إلى أي موارد لواجهة برمجة التطبيقات
تم إنشاؤها باستخدام معرِّف العميل السابق.
خطط بعناية واختَر نوع رقم تعريف العميل الصحيح لواجهة برمجة التطبيقات Photos API التي تستخدمها. لا تغيِّر رقم تعريف العميل إلا إذا كان ذلك ضروريًا تمامًا لتجنُّب مشاكل تتعلّق بالوصول.
تاريخ التعديل الأخير: 2025-08-29 (حسب التوقيت العالمي المتفَّق عليه)
[null,null,["تاريخ التعديل الأخير: 2025-08-29 (حسب التوقيت العالمي المتفَّق عليه)"],[[["\u003cp\u003eTo use Google Photos APIs, enable them in your Google API Console project and set up an OAuth 2.0 client ID for user authentication.\u003c/p\u003e\n"],["\u003cp\u003eGoogle Photos APIs require user sign-in with a Google Account and do not support service accounts.\u003c/p\u003e\n"],["\u003cp\u003eBefore launching publicly, your application needs to be verified by Google to remove the "Unverified app" message.\u003c/p\u003e\n"],["\u003cp\u003eResources created with a specific client ID can only be accessed or modified using the same ID; changing it may lead to access issues.\u003c/p\u003e\n"],["\u003cp\u003eYou can get started with either the Picker API or the Library API after configuring your application.\u003c/p\u003e\n"]]],["To utilize Google Photos APIs, enable them in your project via the Google API Console. Then, request an OAuth 2.0 client ID, selecting your application type and registering authorized JavaScript origins and redirect URIs. Copy the client ID and secret for your app's use. Note that user sign-in via a valid Google Account is necessary. Applications must be verified by Google before public launch, and client ID changes can cause access issues to previously created resources.\n"],null,["# Configure your app\n\nTo start using the Google Photos APIs, configure your project by enabling the Photos\nAPIs you need using the Google API Console and setting up an OAuth 2.0 client ID.\n\nYour application interacts with Google Photos on behalf of a\nGoogle Photos user. For example, when you create albums in a user's\nGoogle Photos library or upload media items to a user's\nGoogle Photos account, the user authorizes these API requests using the\n[OAuth 2.0](/identity/protocols/OAuth2) protocol.\n\nThe OAuth 2.0 client ID allows your application users to sign in, authenticate,\nand thereby use the Photos APIs. The Photos APIs don't support\nservice accounts; to use these APIs, users must be signed in to a valid Google\nAccount.\n\nConfigure your app\n------------------\n\nFirst enable the API, then request an OAuth 2.0 client ID.\n\n### Enable the API\n\nBefore you can use the Photos APIs, you must enable them in your project.\n\n1. Go to the [Google API Console](https://console.developers.google.com/apis/library).\n2. From the menu bar, select a project or create a new project.\n3. To open one of the Google Photos APIs, from the Navigation menu, select **APIs \\& Services \\\u003e Library**.\n4. Search for \"Photos\". Select one or more of the Photos APIs and click **Enable**.\n\n| **Note:** When searching Google APIs, you may also see the \"Google Picker API\", which is different from the Google Photos Picker API.\n\n### Request an OAuth 2.0 client ID\n\nFollow these steps to request an OAuth client ID and configure it for your\napplication. This example uses an application where the entire OAuth flow is\nhandled server-side, such as the one in our samples. The setup process may vary\nfor other [implementation scenarios](/identity/protocols/OAuth2).\n\n1. Go to the [Google API Console](https://console.developers.google.com/apis/library) and select your project.\n2. From the menu, select **APIs \\& Services \\\u003e Credentials**.\n3. On the **Credentials** page, click **Create Credentials \\\u003e OAuth client ID**.\n\n | **Note:** If you're setting up a new project, you may be prompted to configure your project's consent screen.\n4. Select your **Application type** . In this example, the application type is\n **Web application**.\n\n5. Register the origins from which your app is allowed to access the Google\n APIs as follows:\n\n 1. To identify the client ID, enter a name.\n 2. In the **Authorized JavaScript origins** field, enter the origin for\n your app. This field doesn't allow wildcards.\n\n You can enter multiple origins to allow your app to run on different\n protocols, domains, or subdomains. The URLs you enter are allowed to\n start an OAuth request.\n\n The following example shows a local development URL (our samples use\n `localhost:8080`) and a production URL. \n\n http://localhost:8080\n https://myproductionurl.example.com\n\n 3. The **Authorized redirect URI** field is the endpoint that receives\n responses from the OAuth 2.0 server. Typically, this includes your\n development environment and points to a path in your application.\n\n http://localhost:8080/auth/google/callback\n https://myproductionurl.example.com/auth/google/callback\n\n 4. Click **Create**.\n\n\u003c!-- --\u003e\n\n6. From the resulting OAuth client dialog, copy the following:\n\n - Client ID\n - Client secret\n\n Your app can access the enabled Google APIs using these values.\n\nBefore you can launch a public application that accesses the Photos APIs,\nyour app must be reviewed by Google. An \"Unverified app\" message appears on the\nscreen when you test your application, until it is\n[verified](https://support.google.com/cloud/answer/7454865).\n\nAfter you've configured your app you're ready to get started:\n\n- [Get started with the Picker API](/photos/picker/guides/get-started-picker)\n- [Get started with the Library API](/photos/library/guides/get-started-library)\n\nChanging your client ID\n-----------------------\n\nResources created through any of the Google Photos APIs can only be accessed or\nmodified using the original client ID used to create them. For example, if you\ncreate a `session` in the Picker API with a specific client ID and later change\nthat client ID in your app, your app will lose access to any API resources\ncreated with the previous client ID.\n\nPlan carefully and choose the correct client ID type for the Photos API you are\nusing. Only change your client ID if absolutely necessary to avoid access\nissues."]]