如需开始使用 Google 相册 API,请使用 Google API 控制台启用所需的 Google 相册 API 并设置 OAuth 2.0 客户端 ID,以便配置您的项目。
您的应用会代表 Google 相册用户与 Google 相册进行互动。例如,当您在用户的 Google 相册媒体库中创建影集或将媒体内容上传到用户的 Google 相册账号时,该用户会使用 OAuth 2.0 协议授权这些 API 请求。
您的应用用户可利用 OAuth 2.0 客户端 ID 进行登录和身份验证,进而使用 Photos API。Google 相册 API 不支持服务账号;如需使用这些 API,用户必须登录到有效的 Google 账号。
配置您的应用
请先启用该 API,然后请求 OAuth 2.0 客户端 ID。
启用 API
您必须先在项目中启用 Google 相册 API,然后才能使用这些 API。
- 转到 Google API 控制台。
- 在菜单栏中选择项目或新建项目。
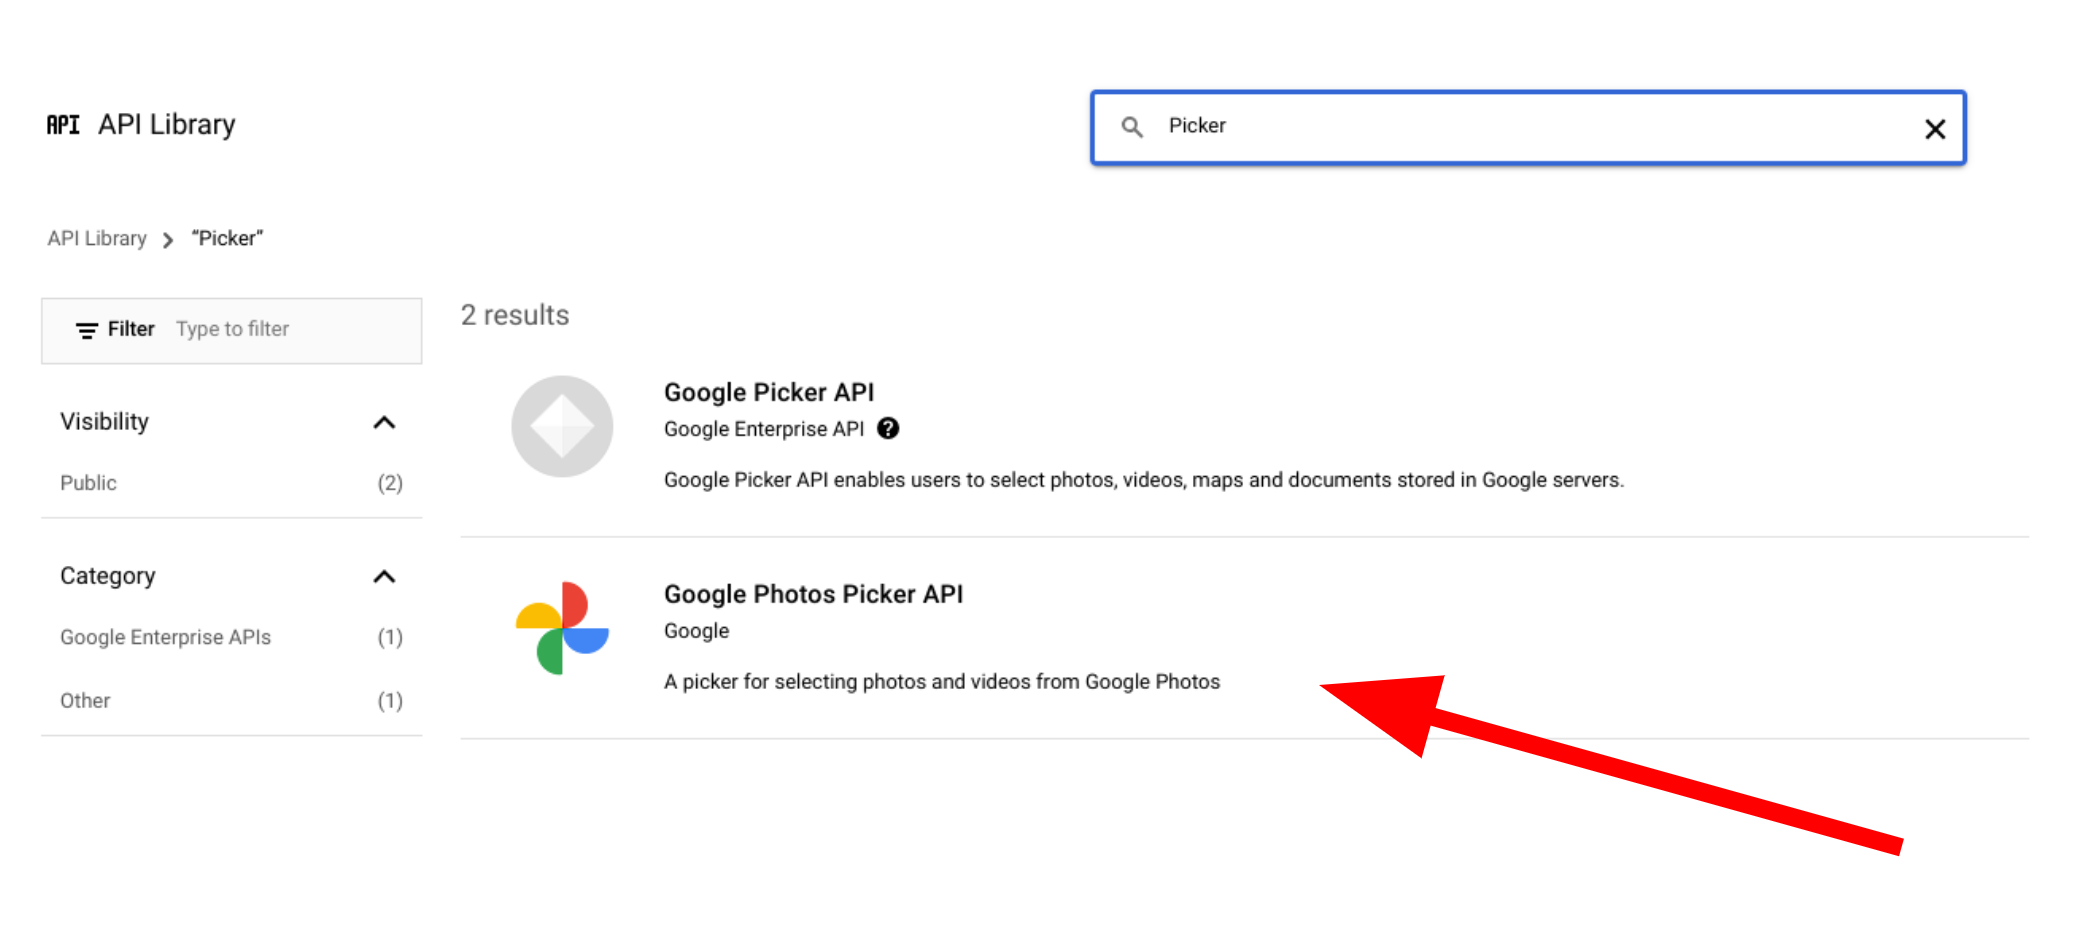
- 如需打开 Google 相册 API,请在导航菜单中依次选择 API 和服务 > 库。
- 搜索“Google 相册”。选择一个或多个 Google 相册 API,然后点击启用。
请求 OAuth 2.0 客户端 ID
请按照以下步骤请求 OAuth 客户端 ID 并为您的应用进行配置。此示例使用的是整个 OAuth 流程在服务器端处理的应用,例如我们的示例中的应用。针对其他实现场景,设置过程可能有所不同。
- 前往 Google API 控制台,然后选择您的项目。
- 在菜单中,依次选择 API 和服务 > 凭据。
在凭据页面上,依次点击创建凭据 > OAuth 客户端 ID。
选择您的应用类型。在此示例中,应用类型为 Web 应用。
按以下步骤注册允许您的应用访问 Google API 的源站:
- 为标识客户端 ID,请输入名称。
在已获授权的 JavaScript 来源字段中,为您的应用输入源站。此字段不支持通配符。
您可以输入多个源站,以便您的应用在不同的协议、网域或子网域上运行。输入的网址可以启动 OAuth 请求。
以下示例展示本地的开发环境网址(在我们的示例中为
localhost:8080)和生产环境网址。http://localhost:8080 https://myproductionurl.example.com已授权的重定向 URI 字段为接收 OAuth 2.0 服务器响应的端点。通常情况下,该端点包含您的开发环境并指向您应用中的路径。
http://localhost:8080/auth/google/callback https://myproductionurl.example.com/auth/google/callback点击创建。
-
在显示的 OAuth 客户端对话框中,复制以下内容:
- 客户 ID
- 客户端密钥
利用这些值,您的应用便可访问已启用的 Google API。
在您启动访问 Google 相册 API 的公开应用前,您的应用必须经过 Google 审核。测试应用时,屏幕上会显示“未经验证的应用”消息,直至应用通过验证。
配置应用后,您就可以开始了:
更改客户端 ID
通过任何 Google 相册 API 创建的资源只能使用创建这些资源时所用的原始客户端 ID 进行访问或修改。例如,如果您使用特定客户端 ID 在 Picker API 中创建了 session,但后来在应用中更改了该客户端 ID,则您的应用将无法再访问使用之前的客户端 ID 创建的任何 API 资源。
请仔细规划,为您使用的 Google 相册 API 选择正确的客户端 ID 类型。请仅在绝对必要时更改您的客户端 ID,以免出现访问问题。