Google 포토 API를 사용하려면 Google API 콘솔을 사용하여 필요한 포토 API를 사용 설정하고 OAuth 2.0 클라이언트 ID를 설정하여 프로젝트를 구성합니다.
애플리케이션이 Google 포토 사용자를 대신하여 Google 포토와 상호작용합니다. 예를 들어 사용자의 Google 포토 라이브러리에서 앨범을 만들거나 사용자의 Google 포토 계정에 미디어 항목을 업로드하는 경우 사용자는 OAuth 2.0 프로토콜을 사용하여 이러한 API 요청을 승인합니다.
OAuth 2.0 클라이언트 ID를 사용하면 애플리케이션 사용자가 로그인하고 인증하여 포토 API를 사용할 수 있습니다. Photos API는 서비스 계정을 지원하지 않습니다. 이 API를 사용하려면 사용자가 유효한 Google 계정에 로그인해야 합니다.
앱 구성
먼저 API를 사용 설정한 다음 OAuth 2.0 클라이언트 ID를 요청합니다.
API 사용 설정
Photos API를 사용하려면 먼저 프로젝트에서 사용 설정해야 합니다.
- Google API 콘솔로 이동합니다.
- 메뉴 바에서 프로젝트를 선택하거나 새 프로젝트를 만듭니다.
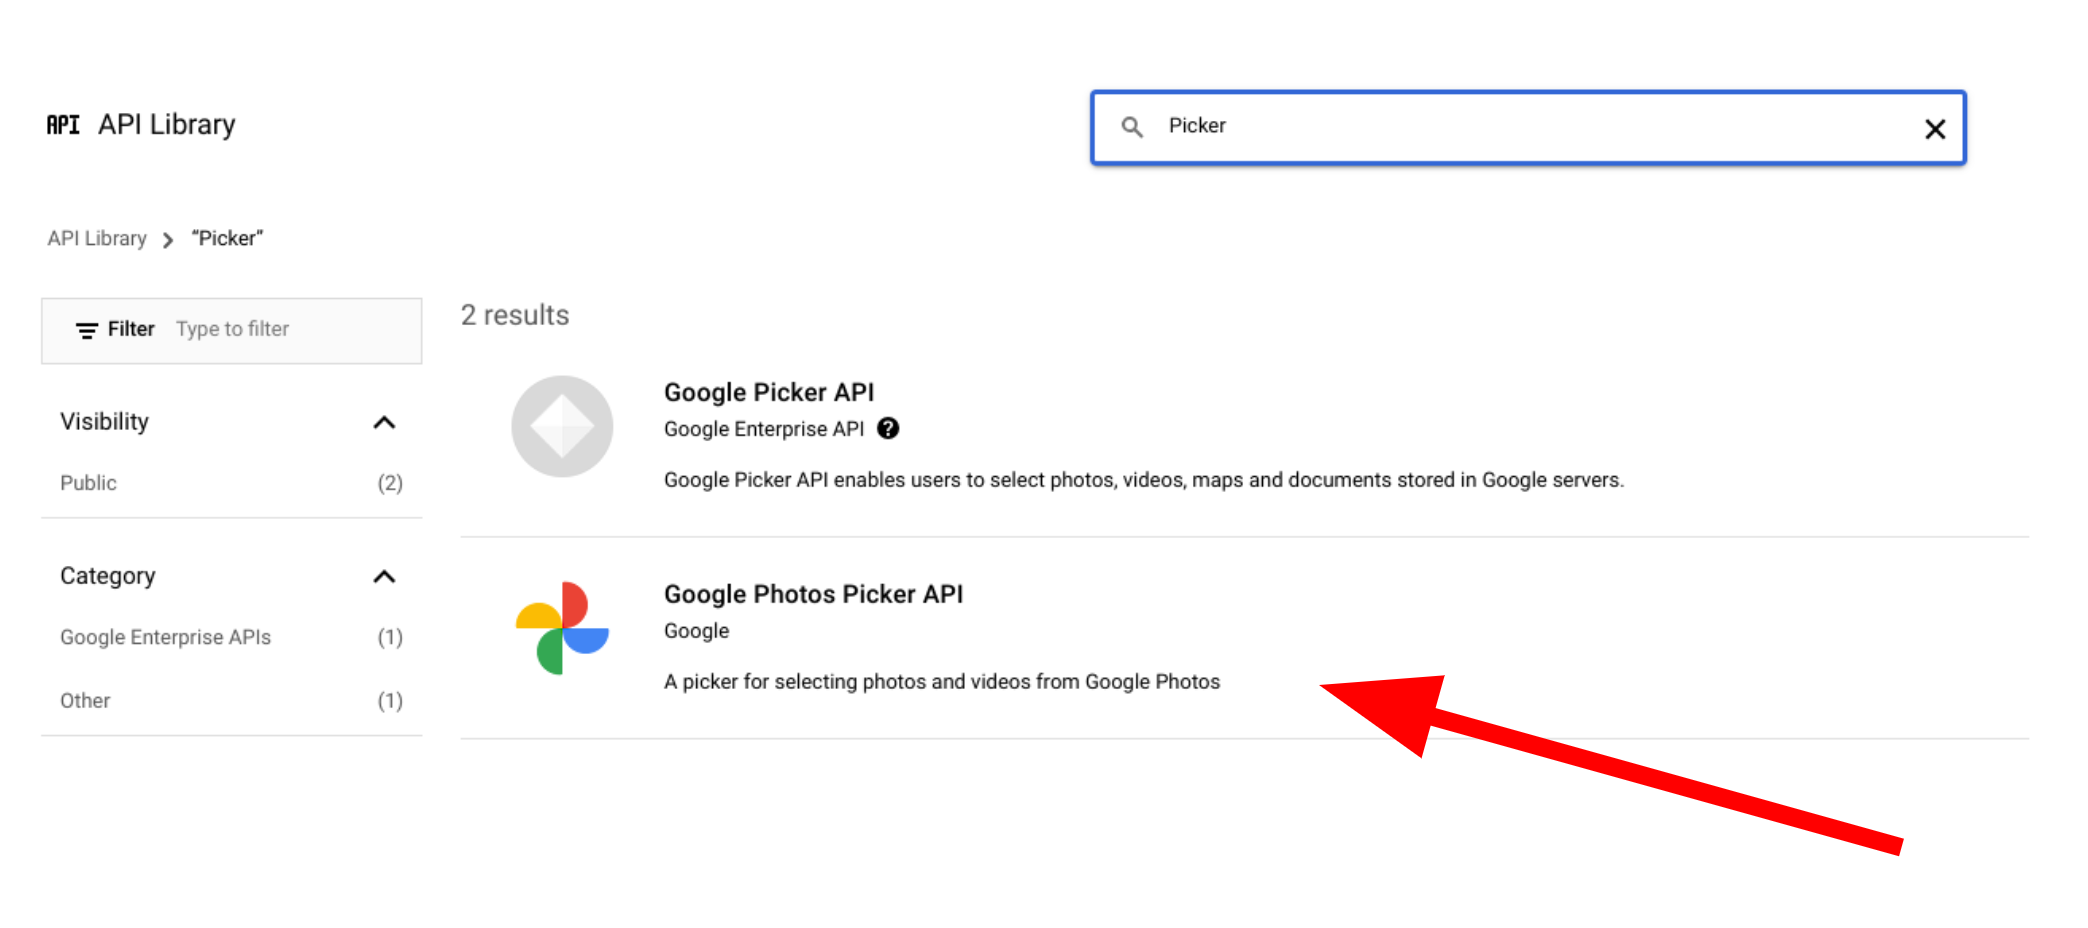
- Google 포토 API 중 하나를 열려면 탐색 메뉴에서 API 및 서비스 > 라이브러리를 선택합니다.
- '포토'를 검색합니다. Photos API를 하나 이상 선택하고 사용 설정을 클릭합니다.
OAuth 2.0 클라이언트 ID 요청
다음 단계에 따라 OAuth 클라이언트 ID를 요청하고 애플리케이션에 맞게 구성합니다. 이 예에서는 전체 OAuth 흐름이 서버 측에서 처리되는 애플리케이션(예: 샘플의 애플리케이션)을 사용합니다. 설정 프로세스는 다른 구현 시나리오에 따라 다를 수 있습니다.
- Google API 콘솔로 이동하여 프로젝트를 선택합니다.
- 메뉴에서 API 및 서비스 > 사용자 인증 정보를 선택합니다.
사용자 인증 정보 페이지에서 사용자 인증 정보 만들기 > OAuth 클라이언트 ID를 클릭합니다.
애플리케이션 유형을 선택합니다. 이 예에서 애플리케이션 유형은 웹 애플리케이션입니다.
다음과 같이 앱에서 Google API에 액세스할 수 있는 출처를 등록합니다.
- 클라이언트 ID를 식별하기 위해 이름을 입력합니다.
승인된 JavaScript 출처 필드에 앱의 출처를 입력합니다. 이 필드에는 와일드 카드가 허용되지 않습니다.
여러 출처를 입력하여 앱이 여러 프로토콜, 도메인 또는 하위 도메인에서 실행되도록 할 수 있습니다. 입력한 URL은 OAuth 요청을 시작할 수 있습니다.
다음 예는 로컬 개발 URL (샘플에서는
localhost:8080사용)과 프로덕션 URL을 보여줍니다.http://localhost:8080 https://myproductionurl.example.com승인된 리디렉션 URI 필드는 OAuth 2.0 서버에서 응답을 수신하는 엔드포인트입니다. 일반적으로 여기에는 개발 환경이 포함되며 애플리케이션의 경로를 가리킵니다.
http://localhost:8080/auth/google/callback https://myproductionurl.example.com/auth/google/callback만들기를 클릭합니다.
-
표시된 OAuth 클라이언트 대화상자에서 다음을 복사합니다.
- 클라이언트 ID
- 클라이언트 보안 비밀번호
앱은 이러한 값을 사용하여 사용 설정된 Google API에 액세스할 수 있습니다.
포토 API에 액세스하는 공개 애플리케이션을 출시하려면 먼저 Google에서 앱을 검토해야 합니다. 애플리케이션을 테스트할 때 인증될 때까지 화면에 'Unverified app'(앱 미인증) 메시지가 표시됩니다.
앱을 구성했다면 시작할 준비가 되었습니다.
클라이언트 ID 변경
Google 포토 API를 통해 만든 리소스는 만들 때 사용한 원래 클라이언트 ID를 사용하여만 액세스하거나 수정할 수 있습니다. 예를 들어 Picker API에서 특정 클라이언트 ID로 session를 만들고 나중에 앱에서 해당 클라이언트 ID를 변경하면 앱은 이전 클라이언트 ID로 만든 모든 API 리소스에 액세스할 수 없게 됩니다.
신중하게 계획하고 사용 중인 포토 API에 적합한 클라이언트 ID 유형을 선택하세요. 액세스 문제를 방지하기 위해 절대적으로 필요한 경우에만 클라이언트 ID를 변경하세요.