يساعدك هذا الدليل في فهم تجربة المستخدم عند اختيار عناصر الوسائط.
بعد اتّباع مسار Picker API العادي،
يبدأ الاختيار بعد أن يعرض تطبيقك pickerUri،
وأثناء أن يطلب تطبيقك mediaItemsSet لعرض القيمة "صحيح".
للاطّلاع على أي من هذه الخطوات على جهازك، يمكنك تجربة تطبيقنا النموذجي.
بدء جلسة الاختيار
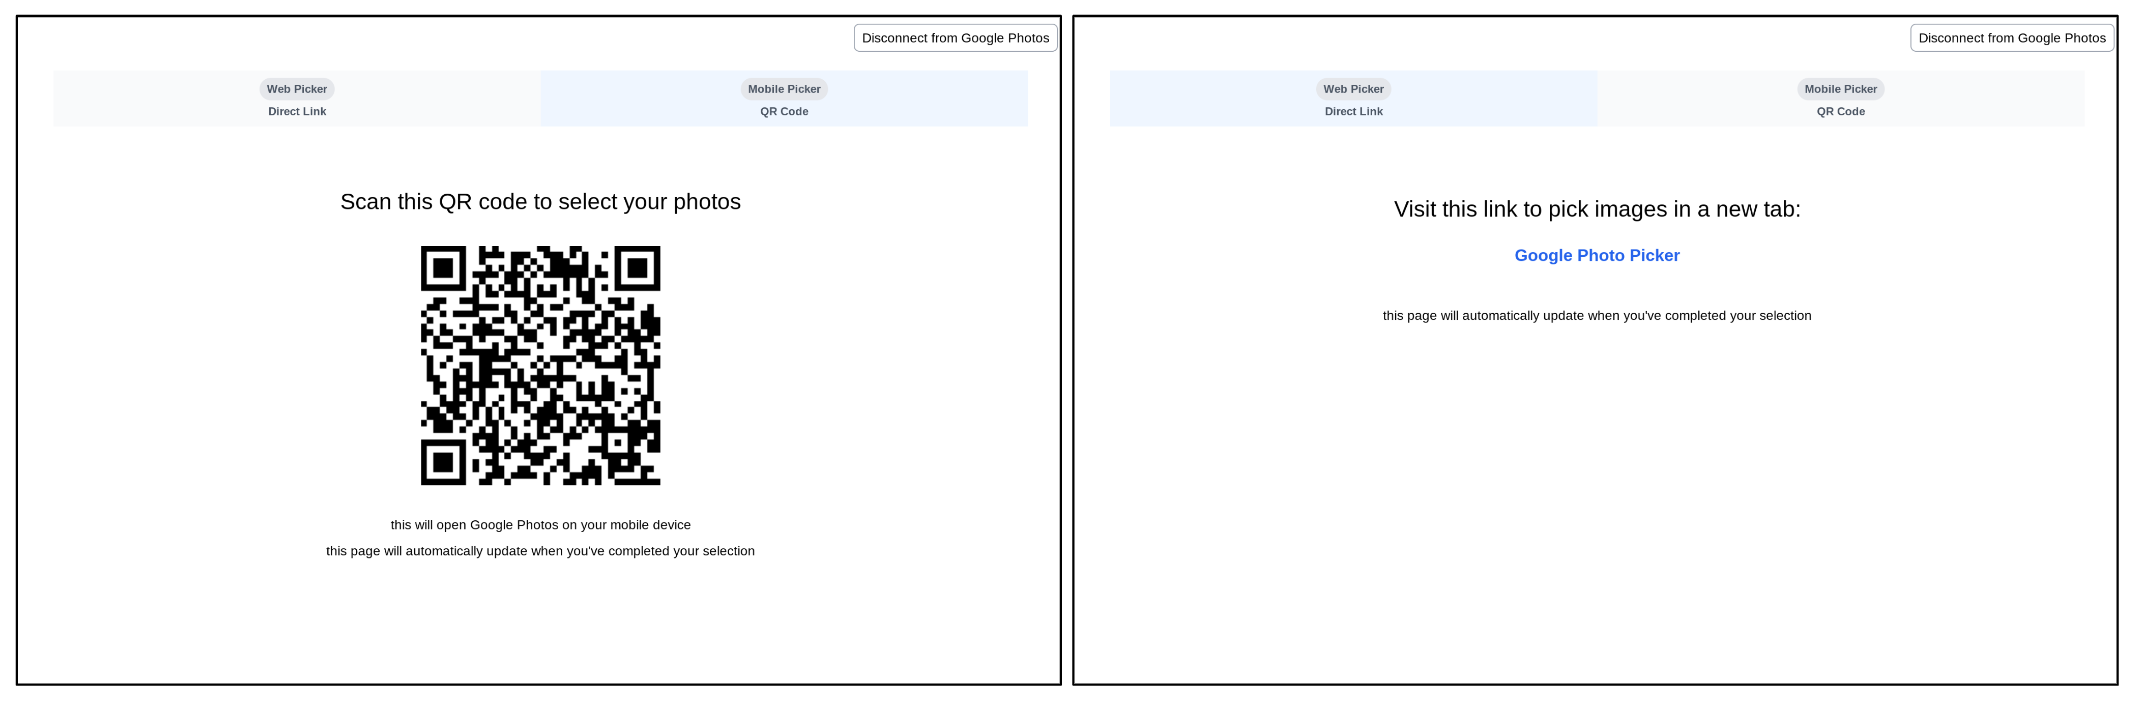
بعد إنشاء جلسة بنجاح، يجب أن يعرض تطبيقك pickerUri للمستخدمين.
بالنسبة إلى التطبيقات المستندة إلى الويب التي يؤدي فيها النقر على رابط إلى فتح "صور Google" في علامة تبويب أو نافذة متصفّح جديدة، يمكنك إضافة /autoclose إلى pickerUri. عند إضافة
/autoclose، يتم إغلاق علامة التبويب أو النافذة هذه تلقائيًا بعد أن ينتهي المستخدم من اختيار الصور. يؤدي ذلك إلى تخطّي شاشة "تم" وتوفير تجربة أكثر سلاسة. يُنصح بهذا السلوك فقط في مسارات الويب، وليس في التجارب التي قد يمسح فيها المستخدمون رمز استجابة سريعة لفتح "صور Google" على جهاز آخر.
- اعرض
pickerUriكرمز استجابة سريعة وعنوان URL. - قدِّم نصًا مفيدًا بجانب
pickerUri. على سبيل المثال، "امسح هذا الرمز ضوئيًا لفتح صور Google واختيار الملفات". - بالنسبة إلى الأجهزة التي تتضمّن إمكانات إدخال محدودة (مثل أكشاك البيع والأجهزة اللوحية وأجهزة التلفزيون الذكية)، يُرجى مراجعة توصيات الشركة المصنّعة للأجهزة بشأن حجم النص وعرض رمز الاستجابة السريعة.
البحث عن الصور واختيارها
عندما يصل المستخدم إلى pickerUri، يتم توجيهه إلى صفحة اختيار الصور
داخل تطبيق "صور Google".
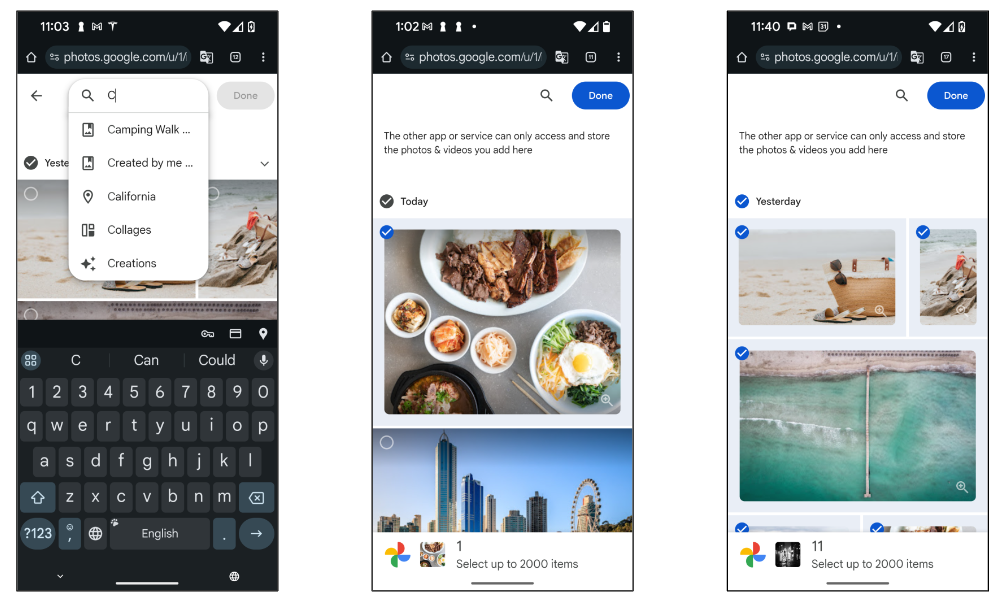
ستعرض هذه الصفحة دائمًا أحدث الصور من مكتبة "صور Google" الخاصة بالمستخدم. لا يتم عرض الألبومات والصور المفضّلة وفئات الصور الشائعة الأخرى مباشرةً. يمكن للمستخدمين البحث عن الصور باستخدام معايير مختلفة، مثل الكلمات الرئيسية والتواريخ والمواقع الجغرافية وعناوين الألبومات.
إذا كان تطبيقك يستخدم الألبومات أو التواريخ أو فئات الصور الشائعة الأخرى، يمكنك مساعدة المستخدمين من خلال مطالبتهم بالبحث فور دخولهم إلى تطبيق "صور Google".
على سبيل المثال، إذا كنت تطلب من المستخدمين مشاركة ألبوم معيّن، يمكنك تضمين النص التالي في الصفحة نفسها التي يربط المستخدمون من خلالها حساباتهم بخدمة "صور Google": "اربط حسابك بخدمة "صور Google"، ثم ابحث عن الألبوم الذي تريد مشاركته".
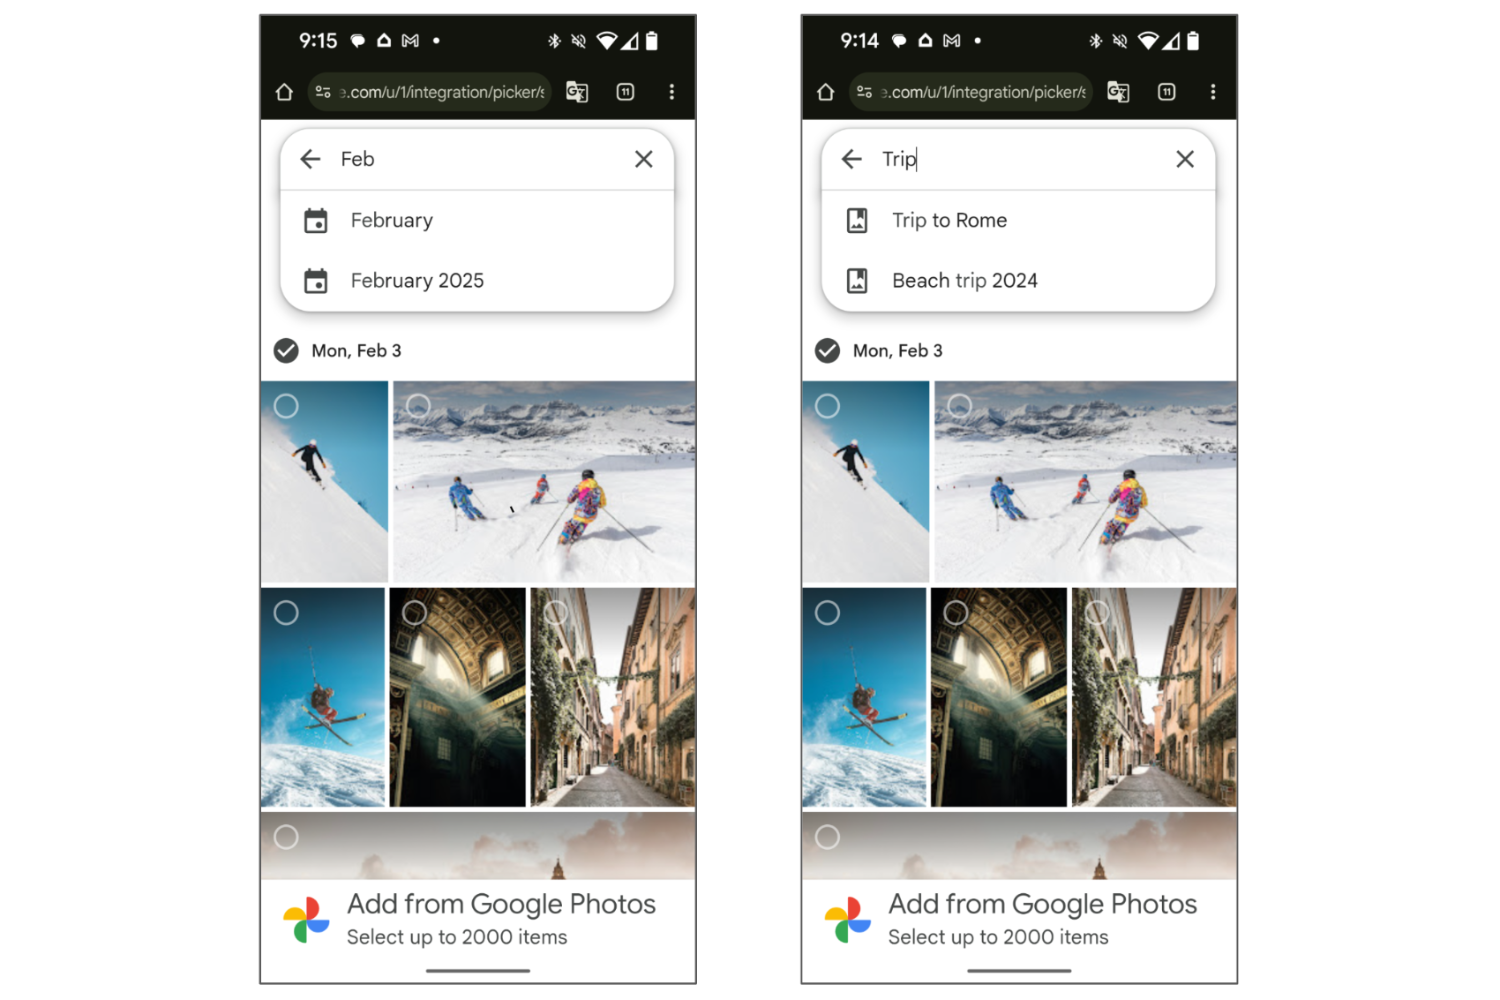
بعد البحث، يمكن للمستخدم اختيار عنصر واحد أو أكثر من النتائج.
شاشة "تم"
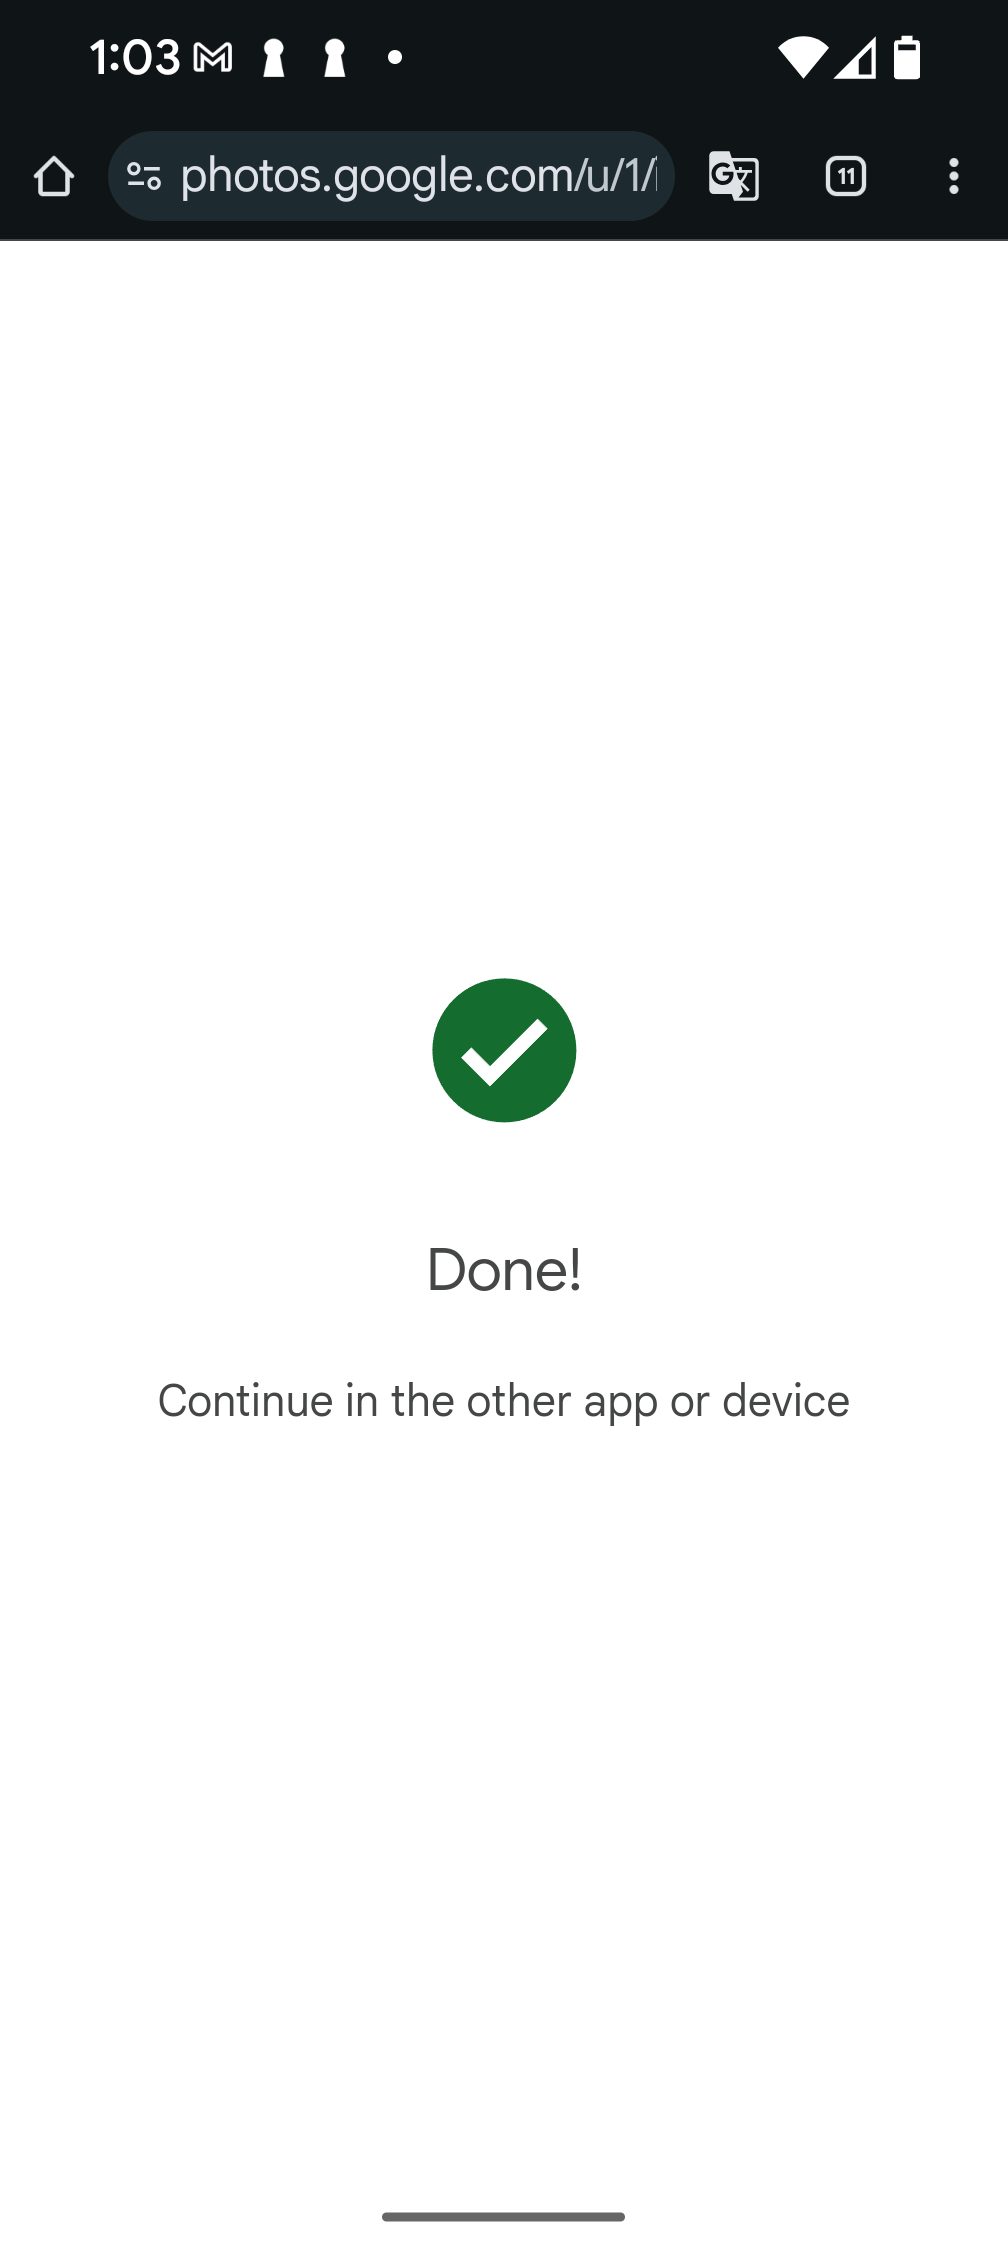
بعد أن ينقر المستخدم على الزر "تم" ويكمل عملية الاختيار، ستظهر له شاشة "تم" التي تنهي جلسة الاختيار وتعني أنّ pickerUri الحالي لن يعمل بعد ذلك.
يُرجى العِلم أنّه في حال أضفت /autoclose إلى pickerUri، سيتم تخطّي هذه الشاشة، وسيتم بدلاً من ذلك إغلاق علامة التبويب أو النافذة في المتصفّح بعد اكتمال عملية الاختيار.
لتوفير خيار تحديد المزيد من الصور للمستخدمين، أنشئ جلسة اختيار جديدة واعرض pickerUri مرة أخرى في تطبيقك.