כדי להקצות כרטיס סטודנט חדש, המשתמש צריך להשלים תהליך אימות ושיוך במכשיר שלו. הפעולה הזו מקשרת את חשבון המשתמש החיצוני שלהם לחשבון Google Wallet. במסמך הזה מתואר התהליך ברמה גבוהה במשטחים שונים.
הוספה ל-Google Wallet מאפליקציית Android
בקטע הזה מתואר התהליך לשמירת כרטיס ב-Google Wallet מאפליקציית Android של ספק שירותים.
מסלול המשתמש באפליקציה
האיורים האלה ממחישים את תהליך המשתמש להקצאת תעודת סטודנט מנקודת המבט של Google Wallet.

- בזמן שמתבצעת הגדרה של קישוריות הרשת והשירותים הראשוניים, מוצגת למשתמש אנימציה של חיבור מסתובב.
- אחרי שהפעולה הזו מסתיימת, המשתמש מאשר את התנאים וההגבלות וממשיך בתהליך.
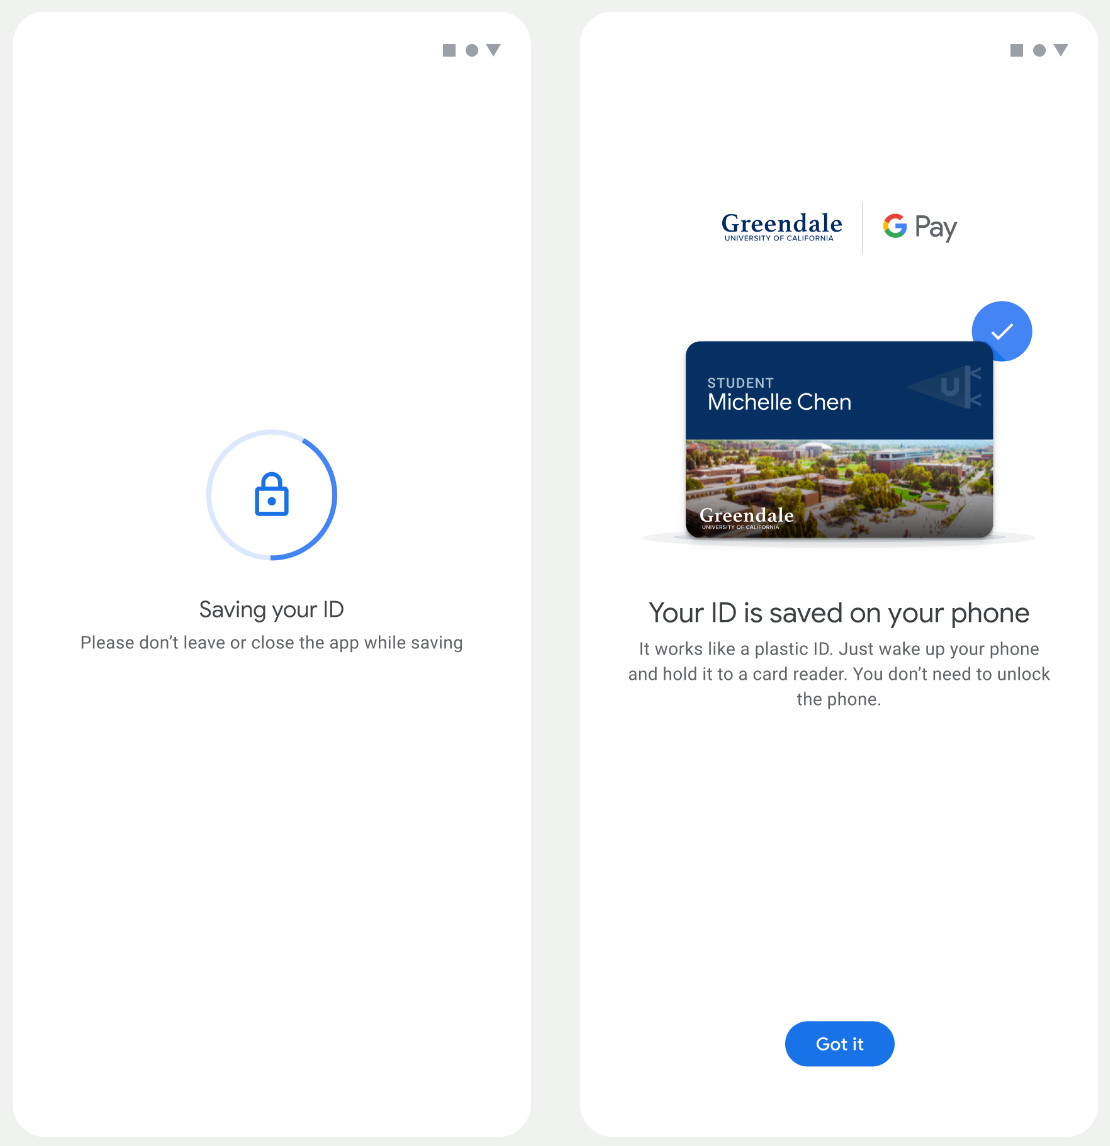
- בזמן ששירותי הרקע מקצים את החשבון במכשיר, מוצגת למשתמש אנימציה של שמירה מסתובבת.
- אחרי שהשירותים מסיימים את הפעולה, מופיע מסך אישור.
- יכול להיות שיוצג למשתמשים במסכים הבאים בקשה להוריד את אפליקציית Google Wallet, אם היא עדיין לא קיימת במכשיר שלהם.
נקודות עיקריות
- אם הכרטיס כבר שמור בחשבון Google שנבחר, במקום זאת מוצג למשתמש קישור לפתיחת הכרטיס באפליקציית Google Wallet, שבה הוא יכול לראות את פרטי הכרטיס.
- אם הכרטיס נשמר בחשבון Google אחר ולא בחשבון שאליו המשתמש מחובר, המשתמש יקבל הודעה שמציינת שהכרטיס כבר נשמר בחשבון Google אחר.
- אם המשתמש מנסה להוסיף כרטיס ואין לו חשבון Google, תוצג לו בקשה ליצור חשבון. אחרי שיוצרים את החשבון ב-Google, התהליך ממשיך כרגיל.
- אפליקציות שתומכות בתהליכי עבודה של כרטיס סטודנט צריכות להיות משולבות עם ממשקי Google Play Services API. עם זאת, קריאות השיטה מאפליקציית ספק השירות אל Google Play Services לא זמינות בגרסה המופצת לציבור של Google Play Services. מפתחי אפליקציות של ספקי שירות צריכים להוסיף מודולים בהתאמה אישית ולקבל גישה אליהם כדי להפעיל שיטות מסוימות. לפרטים נוספים, פנו אל ספק השירות.
הוספה ל-Google Wallet במכשיר לביש מאפליקציית Android
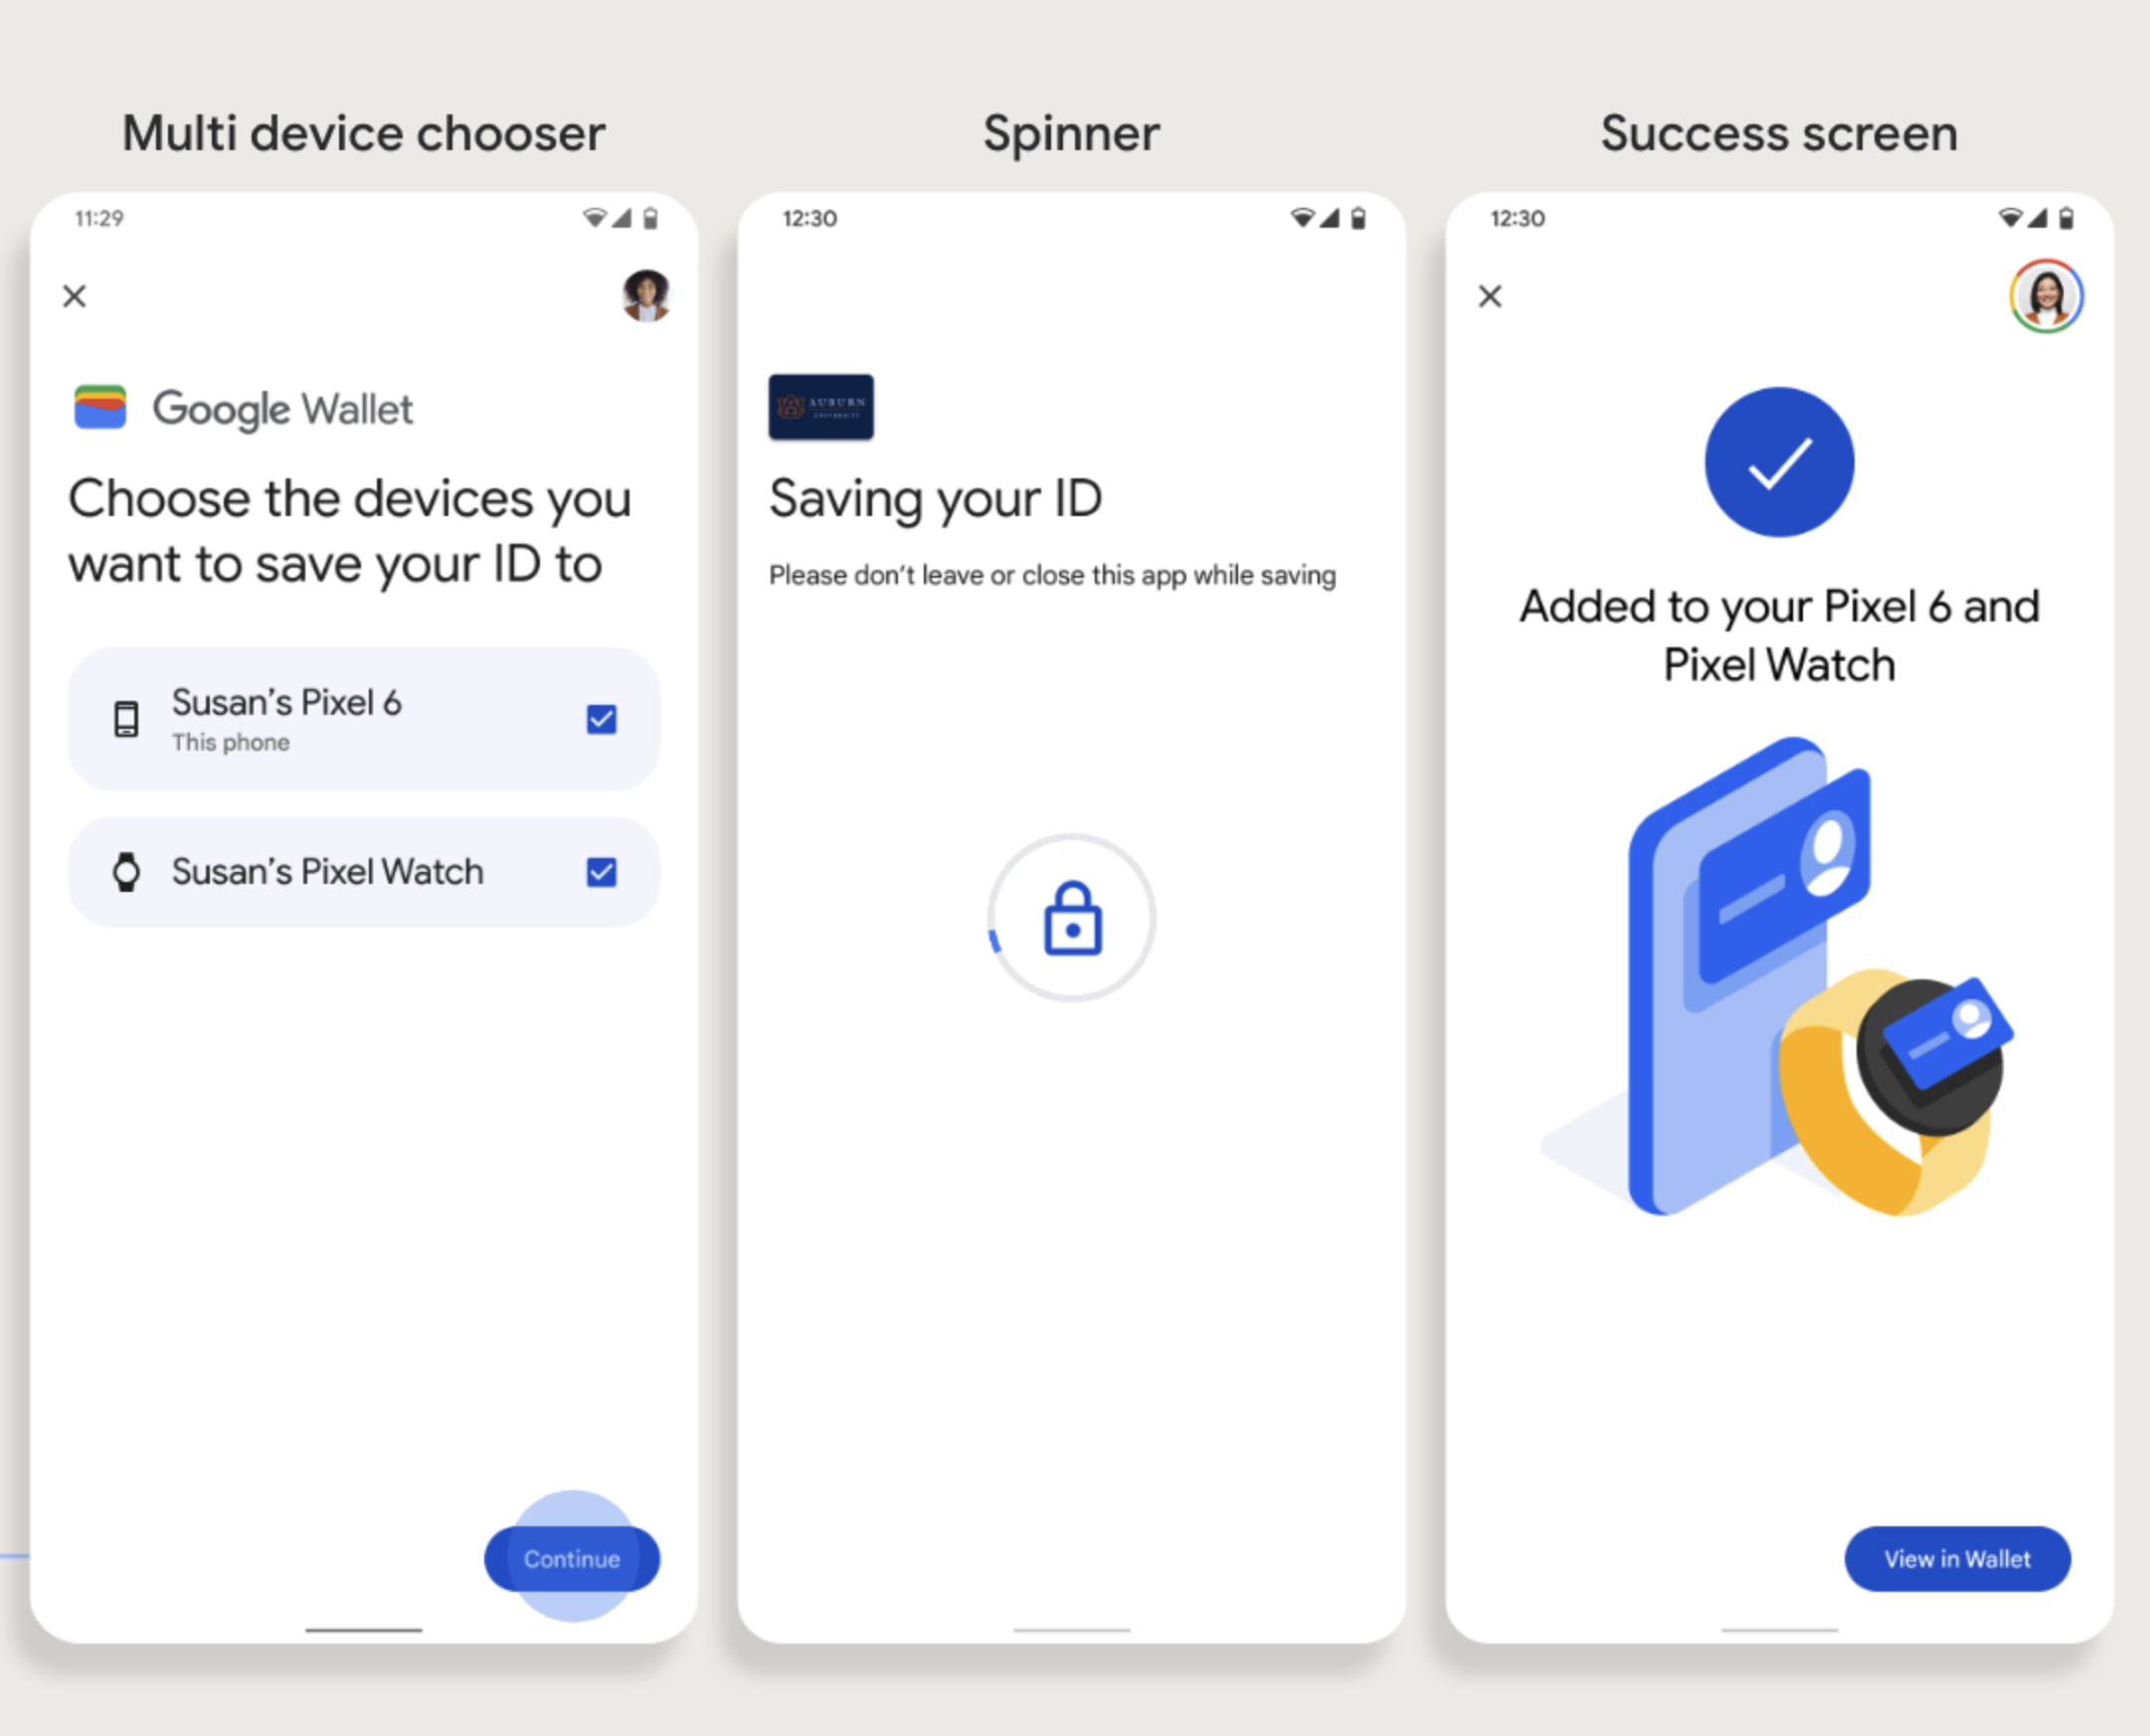
המשתמשים יכולים להקצות מכשירים לבישים על ידי הפעלת תהליך ההקצאה בטלפון ובחירת מכשיר לביש אחד, כמו שרואים באיור הזה:
נקודות עיקריות
- הקצאת כרטיס למכשיר לביש מחייבת טלפון שיכול להקצות כרטיס, ולכן צריך לשייך את שני המכשירים.
- המשתמשים יכולים להקצות את הכרטיס לטלפון ולמכשיר הלביש בתהליך אחד, או שהם יכולים להפעיל מחדש את התהליך כדי להוסיף אותו למכשיר הלביש אחרי שההקצאה הראשונה לטלפון הושלמה.
- ספק השירות צריך להגביל את המשתמשים כך שיוכלו להקצות רק מכשיר לביש אחד.
- אם מבטלים את ההתאמה של מכשיר Wearable לטלפון, הכרטיס הדיגיטלי נשאר במכשיר, אבל המשתמש לא יוכל להקצות כרטיס למכשיר Wearable שני בלי למחוק את הכרטיס הראשון.
- כדאי לפנות לספק השירות כדי לברר אם הוא מציע הקצאת הרשאות למכשירים לבישים.
- אפליקציות שתומכות בתהליכי עבודה של כרטיס סטודנט צריכות להיות משולבות עם ממשקי Google Play Services API. עם זאת, קריאות השיטה מאפליקציית ספק השירות אל Google Play Services לא זמינות בגרסה המופצת לציבור של Google Play Services. מפתחי אפליקציות של ספקי שירות צריכים להוסיף מודולים בהתאמה אישית ולקבל גישה אליהם כדי להפעיל שיטות מסוימות. לפרטים נוספים, פנו אל ספק השירות.