Per eseguire il provisioning di un nuovo ID campus, l'utente deve completare un flusso di autenticazione e associazione sul proprio dispositivo. In questo modo, l'account utente esterno viene collegato a un account Google Wallet. Questo documento descrive il processo a livello generale su piattaforme diverse.
Aggiungere a Google Wallet da un'app per Android
In questa sezione descriviamo il flusso per salvare una carta in Google Wallet dall'app Android di un fornitore di servizi.
Procedura
Queste cifre illustrano il flusso utente per il provisioning di una tessera universitaria dal punto di vista di Google Wallet.
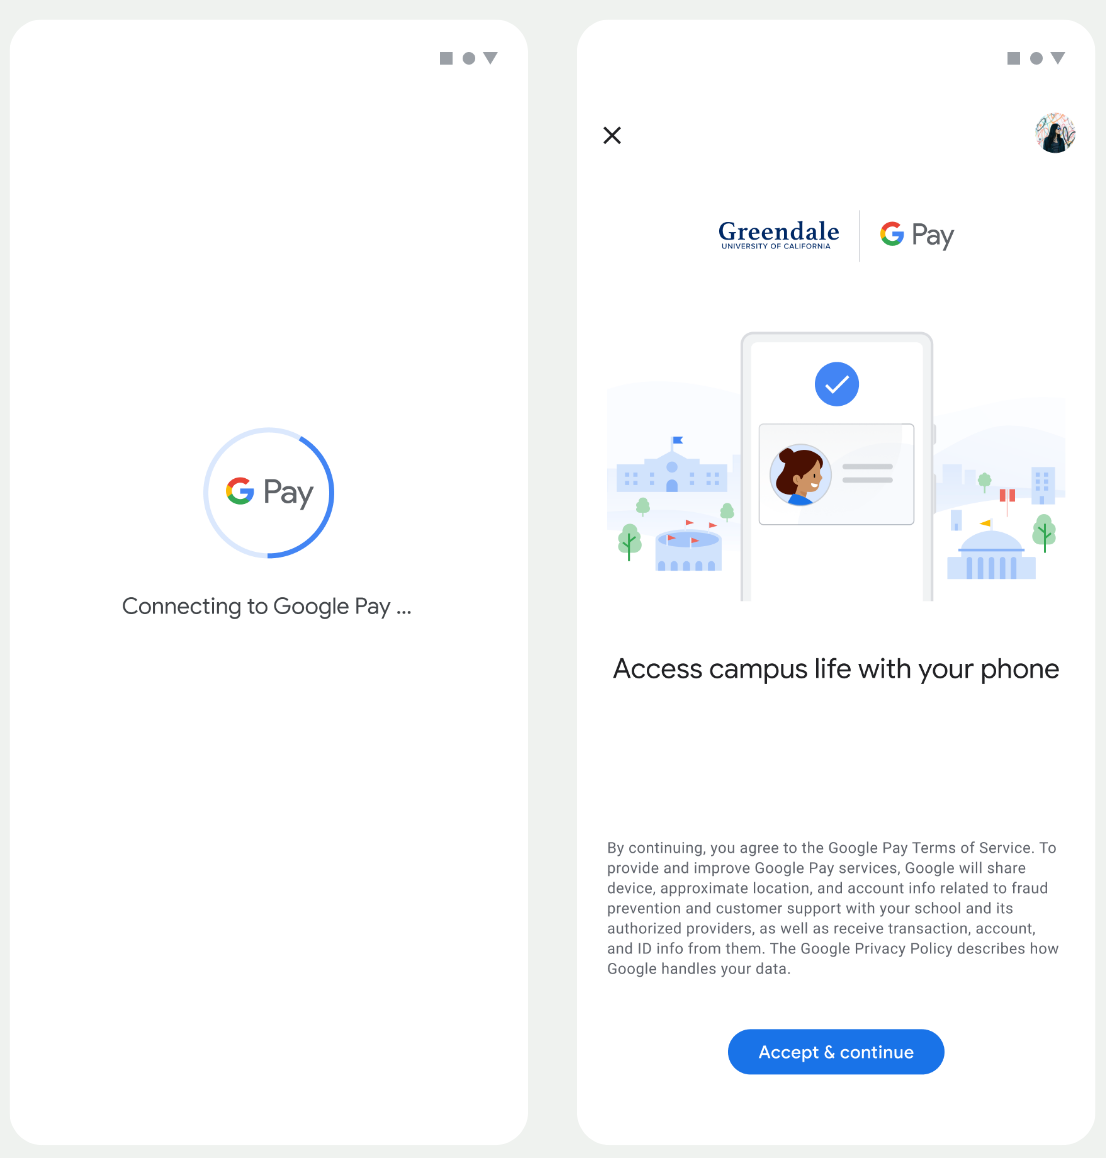
- All'utente viene mostrata un'animazione di connessione rotante mentre vengono configurati la connettività di rete e i servizi iniziali.
- Al termine, l'utente accetta i Termini di servizio e continua con il flusso.
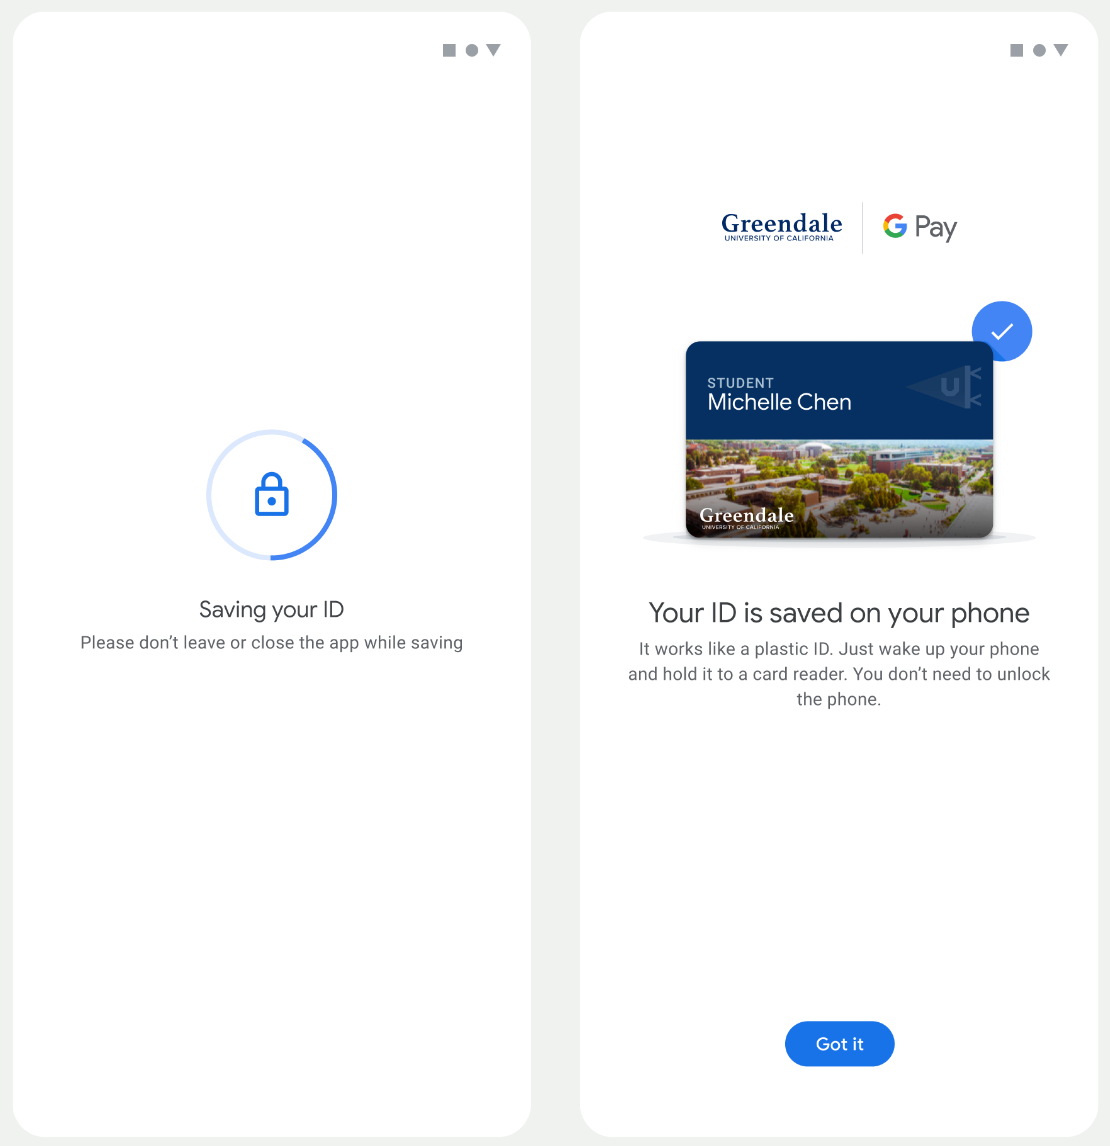
- All'utente viene mostrata un'animazione di salvataggio rotante mentre i servizi in background eseguono il provisioning dell'account sul dispositivo.
- Al termine dei servizi, viene visualizzata una schermata di operazione riuscita.
- Nelle schermate successive, all'utente potrebbe essere richiesto di scaricare l'app Google Wallet, se non è già presente sul suo dispositivo.
Punti chiave
- Se la carta è già salvata nell'Account Google selezionato, all'utente viene mostrato un link per aprire la carta nell'app Google Wallet, dove può visualizzare i dettagli della carta.
- Se la carta è salvata in un Account Google diverso da quello a cui l'utente ha eseguito l'accesso, l'utente riceve un messaggio che indica che un altro Account Google ha già salvato la carta.
- Se l'utente tenta di aggiungere una carta e non ha un Account Google, viene visualizzato un invito a creare un account. Dopo la creazione dell'Account Google, il flusso continua normalmente.
- Le app che supportano i flussi di ID campus devono integrarsi con le API dei servizi Google Play. Tuttavia, le chiamate ai metodi dall'app del fornitore di servizi a Google Play Services non sono disponibili nella versione di Google Play Services distribuita pubblicamente. Lo sviluppatore dell'app del fornitore di servizi deve aggiungere e ottenere l'accesso a moduli personalizzati per chiamare determinati metodi. Per maggiori informazioni, rivolgiti al tuo fornitore di servizi.
Aggiungere a Google Wallet su un dispositivo indossabile da un'app per Android
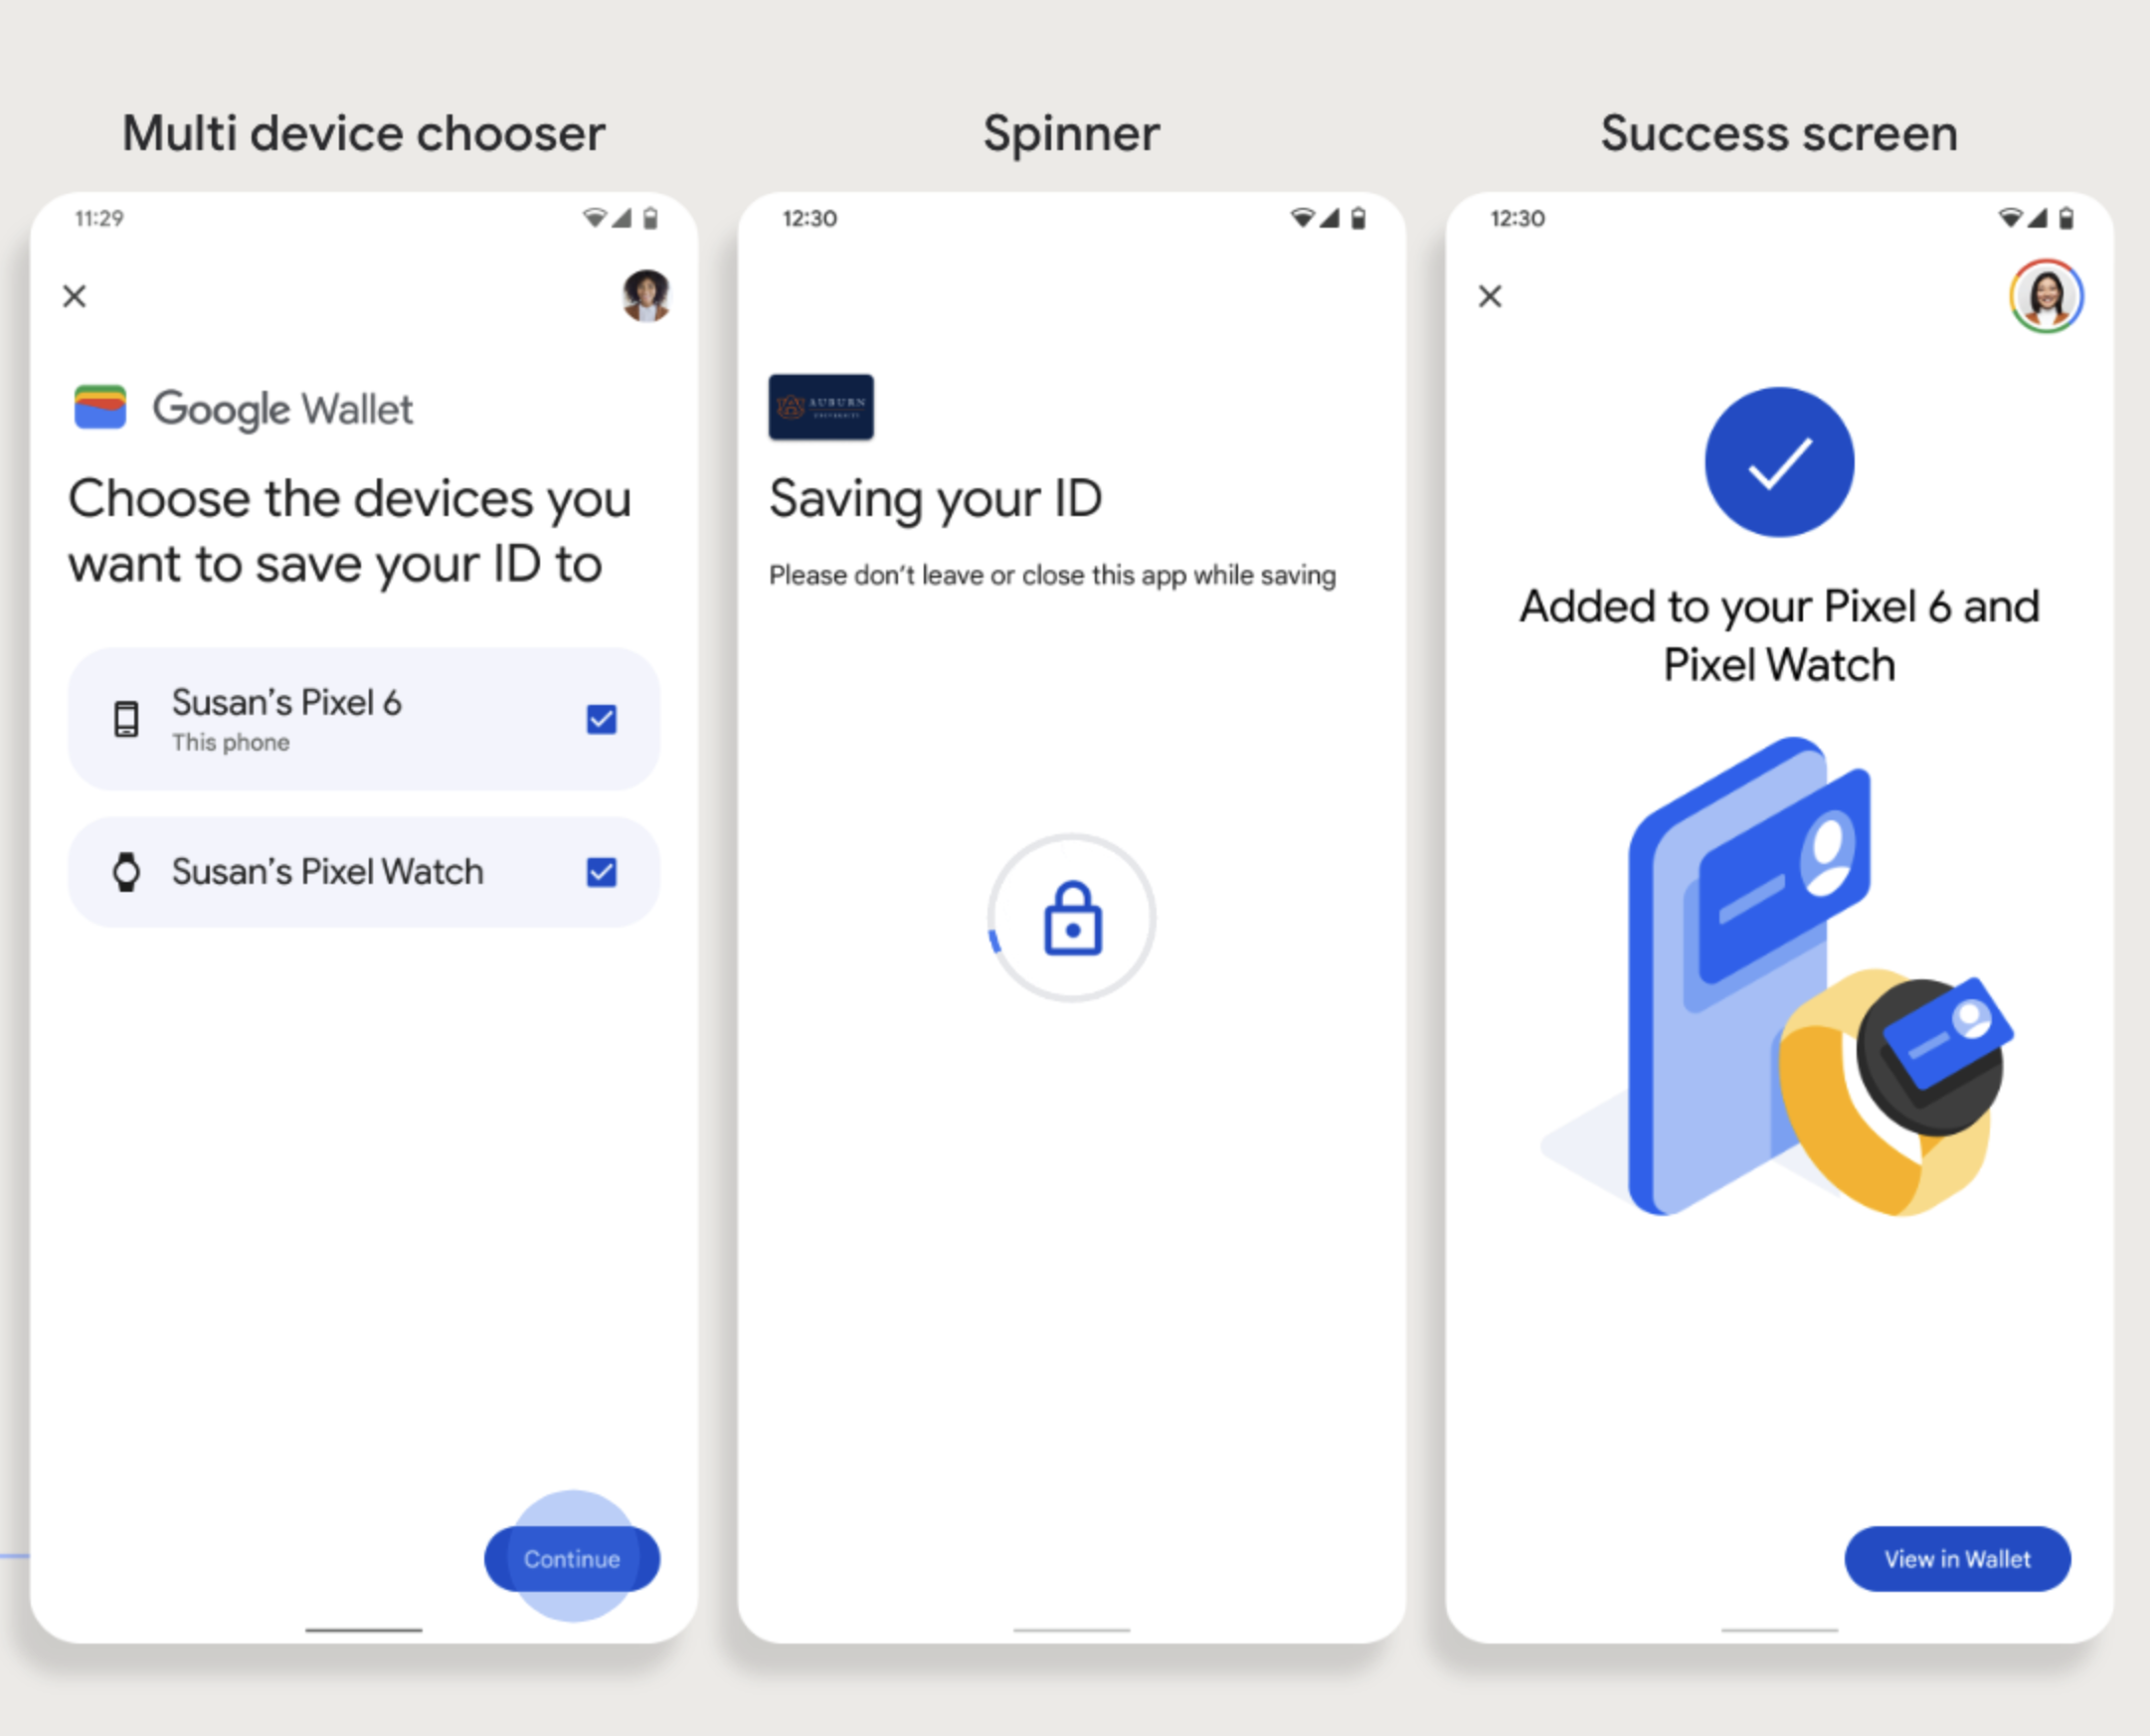
Gli utenti possono eseguire il provisioning sui propri dispositivi indossabili avviando il flusso di provisioning sul proprio smartphone e selezionando un singolo dispositivo indossabile, come mostrato in questa figura:
Punti chiave
- Il provisioning su un dispositivo indossabile richiede uno smartphone in grado di eseguire il provisioning di una carta, pertanto entrambi devono essere accoppiati.
- Gli utenti possono eseguire il provisioning sullo smartphone e sul dispositivo indossabile in un unico flusso oppure possono riavviare il flusso per aggiungerla a un dispositivo indossabile dopo che il primo provisioning sullo smartphone è stato completato.
- Il fornitore di servizi deve limitare gli utenti al provisioning di un solo dispositivo indossabile.
- Se un dispositivo indossabile viene disaccoppiato dallo smartphone, la carta digitale rimane sul dispositivo, ma l'utente non potrà eseguire il provisioning di una carta su un secondo dispositivo indossabile senza eliminare la prima.
- Informati presso il tuo fornitore di servizi sulla disponibilità del provisioning dei dispositivi indossabili.
- Le app che supportano i flussi di ID campus devono integrarsi con le API dei servizi Google Play. Tuttavia, le chiamate ai metodi dall'app del fornitore di servizi a Google Play Services non sono disponibili nella versione di Google Play Services distribuita pubblicamente. Lo sviluppatore dell'app del fornitore di servizi deve aggiungere e ottenere l'accesso a moduli personalizzati per chiamare determinati metodi. Per maggiori informazioni, rivolgiti al tuo fornitore di servizi.