Para aprovisionar una nueva identificación corporativa, el usuario debe completar un flujo de autenticación y asociación en su dispositivo. Esto vincula su cuenta de usuario externa a una cuenta de la Billetera de Google. En este documento, se describe ese proceso de forma general en diferentes plataformas.
Cómo agregar elementos a la Billetera de Google desde una app para Android
En esta sección, describimos el flujo para guardar una tarjeta en la Billetera de Google desde la app para Android de un proveedor de servicios.
Flujo de usuarios
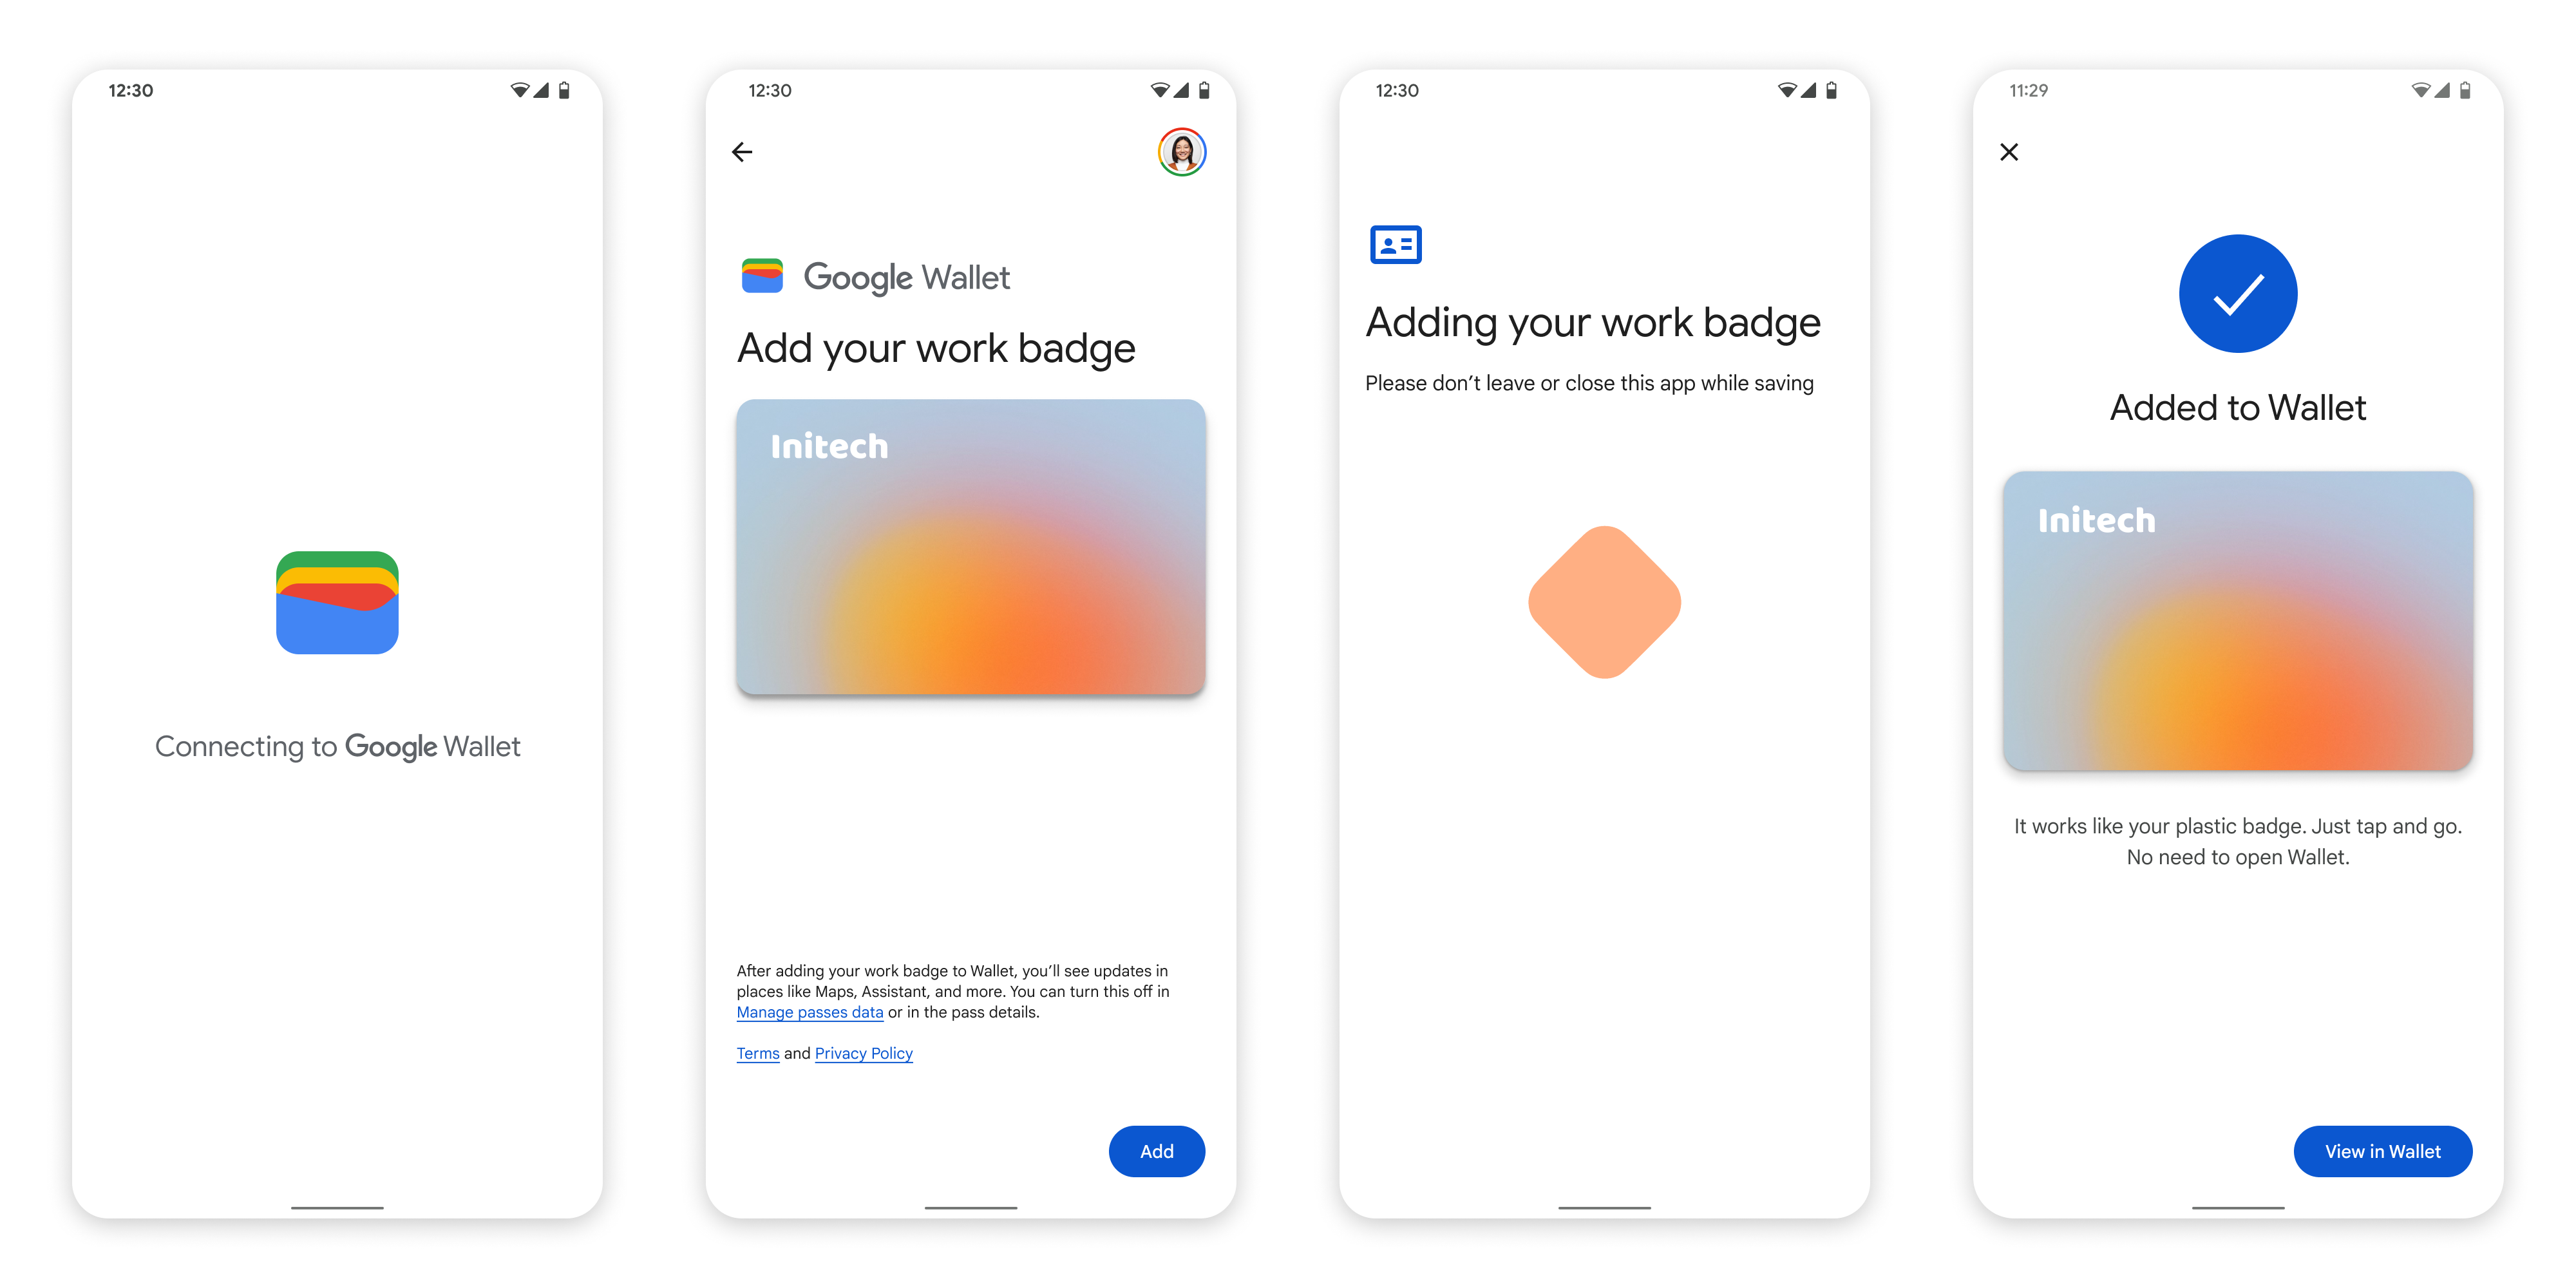
En estas figuras, se ilustra el flujo del usuario para aprovisionar una identificación corporativa desde la perspectiva de la Billetera de Google.
- Se muestra una animación de conexión giratoria al usuario mientras se configuran la conectividad de red y los servicios iniciales.
- Una vez que se completa este paso, el usuario acepta las Condiciones del Servicio y continúa con el flujo.
- Se muestra una animación de guardado giratoria al usuario mientras los servicios en segundo plano aprovisionan la cuenta en el dispositivo.
- Una vez que se completen los servicios, aparecerá una pantalla de éxito.
- Es posible que, en pantallas posteriores, se le solicite al usuario que descargue la app de la Billetera de Google si aún no existe en su dispositivo.
Puntos clave
- Si la tarjeta ya está guardada en la Cuenta de Google seleccionada, al usuario se le mostrará un vínculo para abrir la tarjeta en la app de la Billetera de Google, donde podrá ver los detalles de la tarjeta.
- Si la tarjeta se guardó en una Cuenta de Google diferente de la que el usuario accedió, este recibirá un mensaje que indica que otra Cuenta de Google ya guardó esa tarjeta.
- Si el usuario intenta agregar una tarjeta y no tiene una Cuenta de Google, aparecerá un mensaje para crear una cuenta. Después de crear la Cuenta de Google, el flujo continúa con normalidad.
- Las apps que admiten flujos de insignias corporativas deben integrarse con las APIs de los Servicios de Google Play. Sin embargo, las llamadas a métodos desde la app del proveedor de servicios a los Servicios de Google Play no están disponibles en la versión de distribución pública de los Servicios de Google Play. El desarrollador de la app del proveedor de servicios debe agregar módulos personalizados y obtener acceso a ellos para llamar a ciertos métodos. Consulta a tu proveedor de servicios para obtener más información.
Cómo agregar a la Billetera de Google en un wearable desde una app para Android
Los usuarios pueden aprovisionar sus wearables iniciando el flujo de aprovisionamiento en sus teléfonos y seleccionando un solo wearable, como se muestra en esta figura:
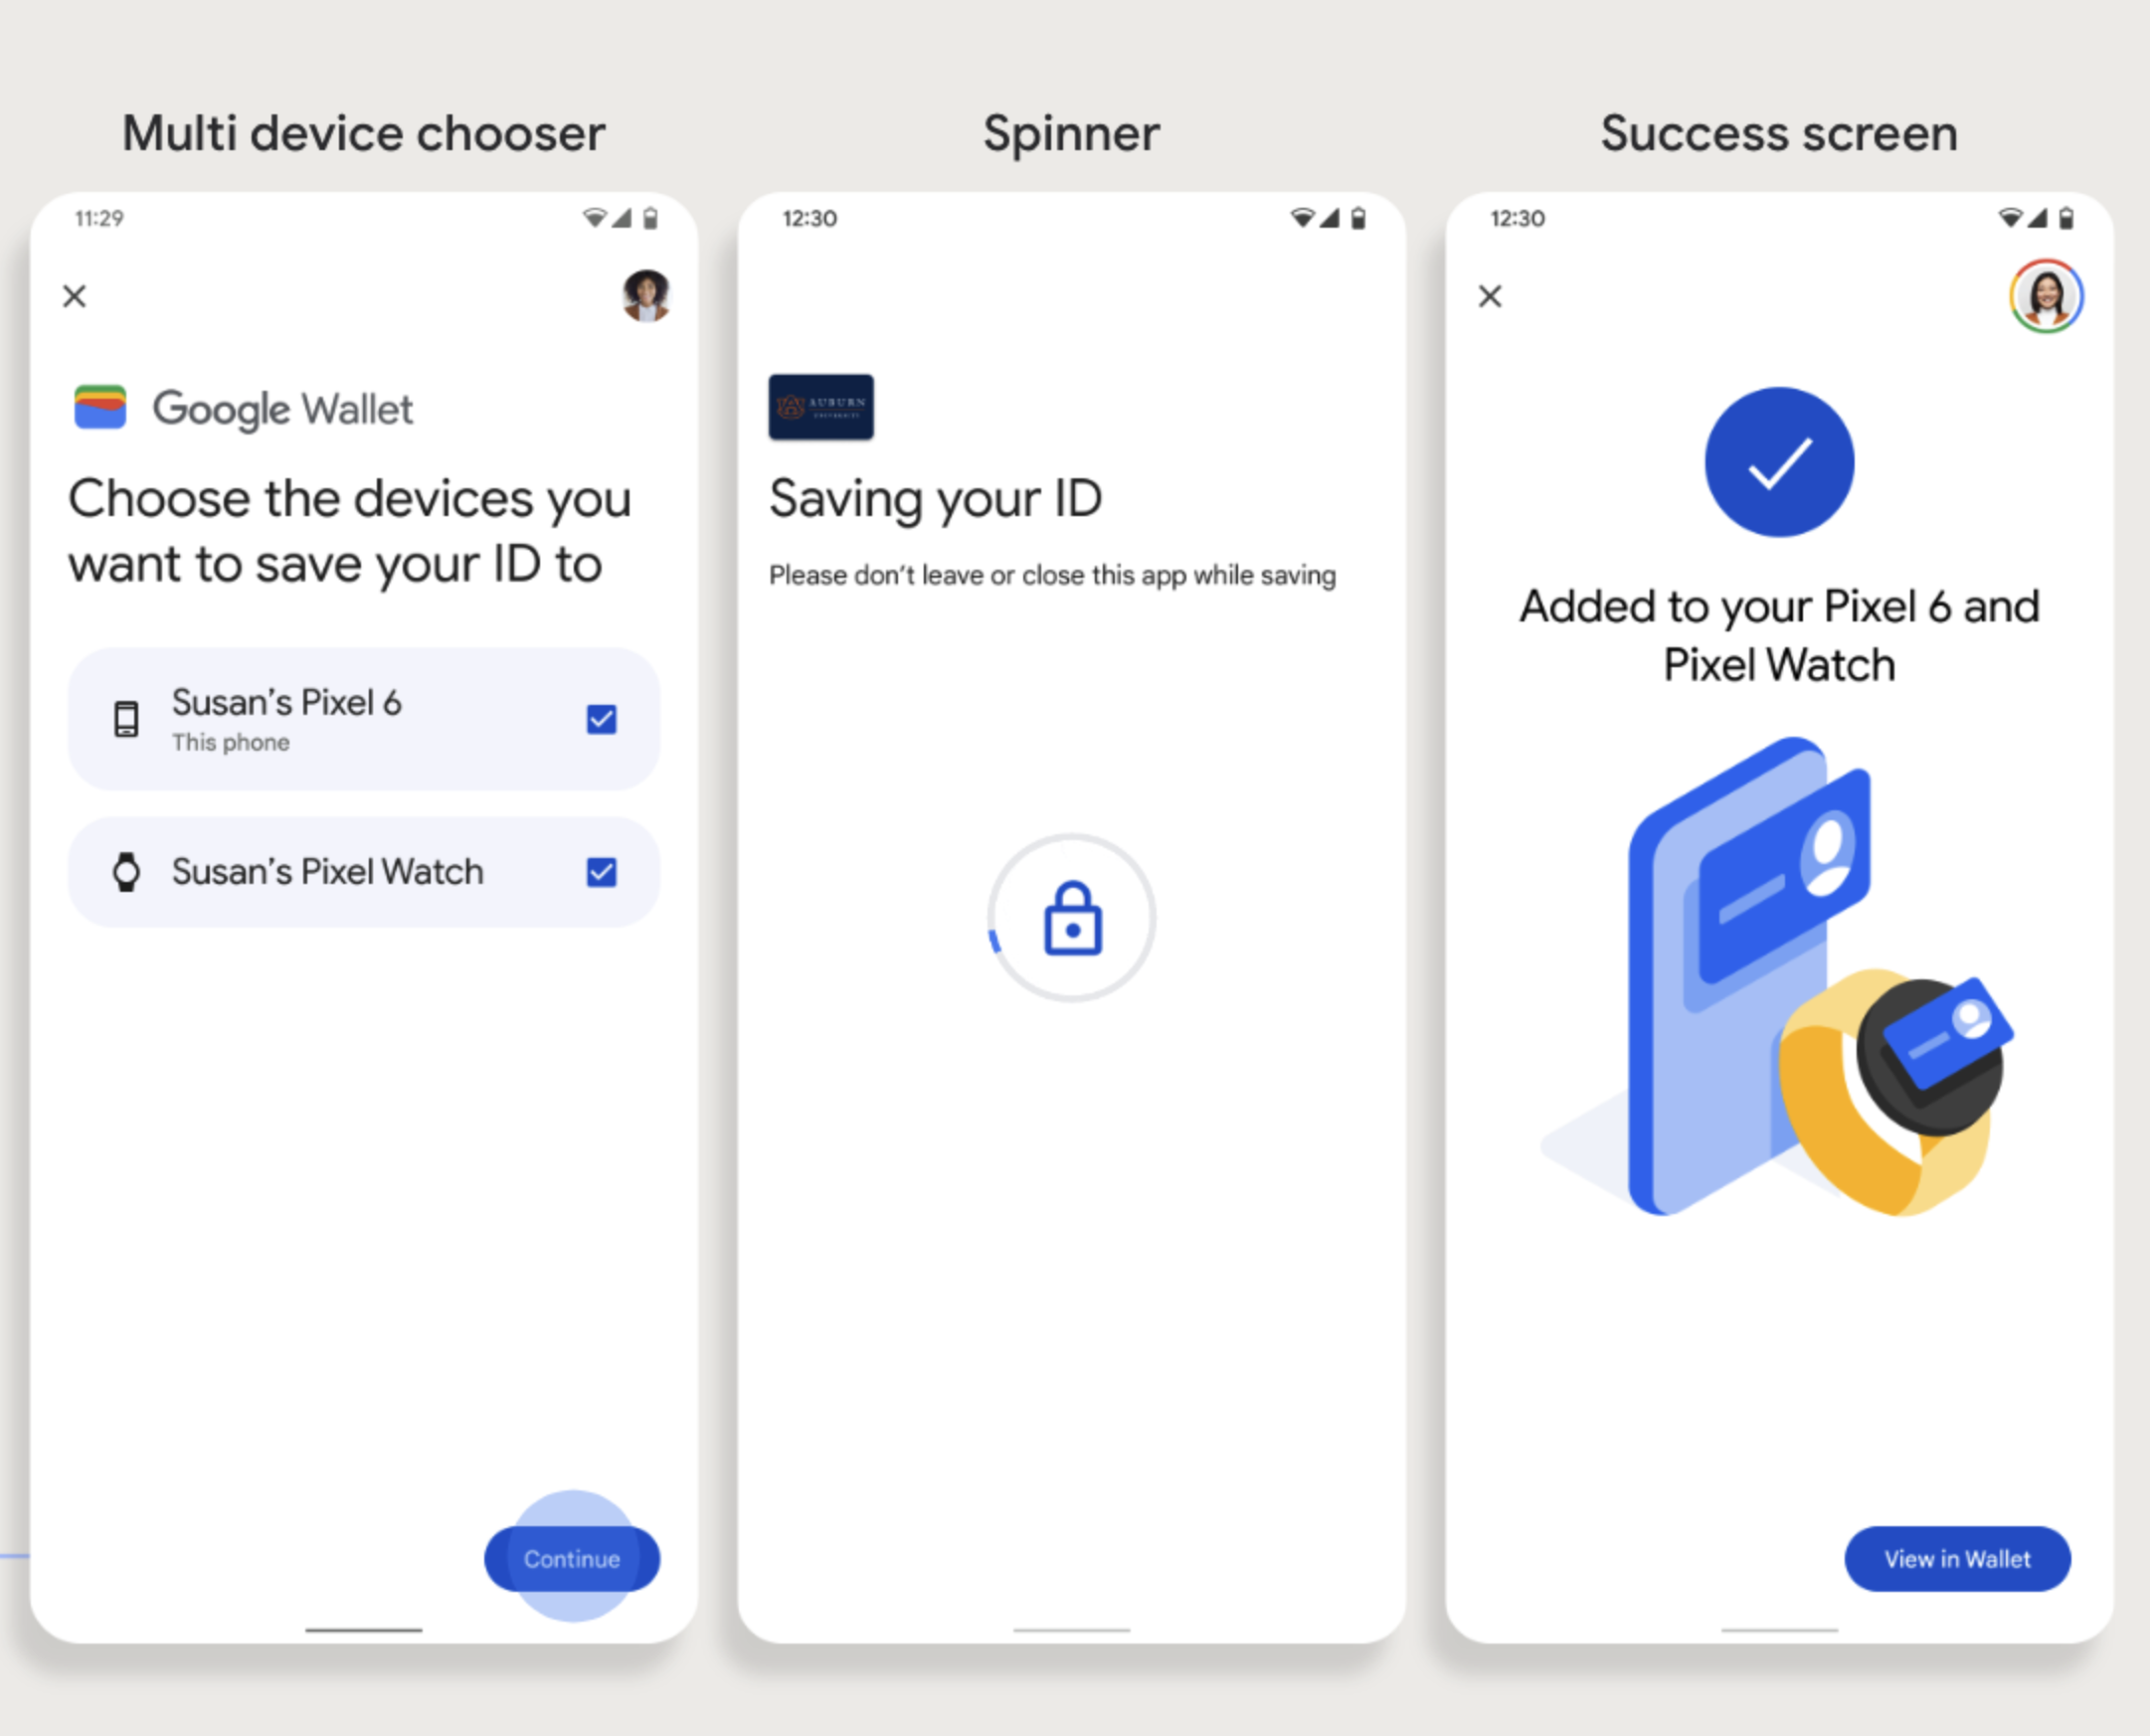
Puntos clave
- El aprovisionamiento en un wearable requiere un teléfono capaz de aprovisionar una tarjeta, por lo que ambos deben estar vinculados.
- Los usuarios pueden aprovisionar su teléfono y su dispositivo wearable en un solo flujo, o bien pueden reiniciar el flujo para agregarlo a un dispositivo wearable después de que se complete el primer aprovisionamiento en su teléfono.
- El proveedor de servicios debe limitar a los usuarios a aprovisionar solo un dispositivo wearable.
- Si se desvincula un wearable del teléfono, la tarjeta digital permanecerá en el dispositivo, pero el usuario no podrá aprovisionar una tarjeta en un segundo wearable sin borrar la primera.
- Consulta a tu proveedor de servicios sobre la disponibilidad del aprovisionamiento de dispositivos wearables.
- Las apps que admiten flujos de insignias corporativas deben integrarse con las APIs de los Servicios de Google Play. Sin embargo, las llamadas a métodos desde la app del proveedor de servicios a los Servicios de Google Play no están disponibles en la versión de distribución pública de los Servicios de Google Play. El desarrollador de la app del proveedor de servicios debe agregar módulos personalizados y obtener acceso a ellos para llamar a ciertos métodos. Consulta a tu proveedor de servicios para obtener más información.
Cómo agregar elementos a la Billetera de Google desde un sitio web
En esta sección, se describe el flujo para guardar una tarjeta en la Billetera de Google desde el sitio web de una entidad emisora.
Paso 1: Accede al sitio web
El primer paso del flujo es acceder al sitio web de la entidad emisora y seleccionar el botón Agregar a la Billetera de Google.
Paso 2: Accede con Google
El usuario completa el acceso con Google y, luego, ve una pantalla de carga en el sitio web de la entidad emisora antes de ser redireccionado a la Billetera de Google en el siguiente paso.
Paso 3: Completa el aprovisionamiento
El usuario completa el flujo de aprovisionamiento en la Billetera de Google.
Cómo agregar elementos a la Billetera de Google desde una app en el perfil de trabajo
Si un usuario tiene instalada la app del proveedor de servicios en su perfil de trabajo de Android, puede agregar la identificación corporativa a la Billetera de Google, que se ejecuta en su perfil personal. Cuando el usuario presiona el botón Agregar a la Billetera de Google desde una app en un perfil de trabajo, la Billetera de Google lo dirige a la app de la Billetera de Google en el perfil personal, donde puede seguir agregando su tarjeta. El resto de la administración de tarjetas es coherente con la forma en que se realiza cuando la tarjeta se guarda directamente desde el perfil personal.