Yeni bir yaka kartı sağlamak için kullanıcının cihazında kimlik doğrulama ve ilişkilendirme akışını tamamlaması gerekir. Bu işlem, kullanıcının harici kullanıcı hesabını Google Cüzdan hesabına bağlar. Bu belgede, farklı platformlardaki bu süreç genel hatlarıyla açıklanmaktadır.
Android uygulamasından Google Cüzdan'a ekleme
Bu bölümde, bir kartı Hizmet Sağlayıcı'nın Android uygulamasından Google Cüzdan'a kaydetme akışı açıklanmaktadır.
Kullanıcı işlemleri akışı
Bu şekiller, Google Cüzdan perspektifinden kurumsal rozet sağlama kullanıcı akışını gösterir.
- Ağ bağlantısı ve ilk hizmetler yapılandırılırken kullanıcıya dönen bir bağlantı animasyonu gösterilir.
- Bu işlem tamamlandıktan sonra kullanıcı Hizmet Şartları'nı kabul eder ve akışa devam eder.
- Arka plan hizmetleri cihazda hesabı sağlarken kullanıcıya dönen bir kaydetme animasyonu gösterilir.
- Hizmetler tamamlandıktan sonra başarı ekranı görünür.
- Kullanıcıdan, sonraki ekranlarda cihazında henüz yoksa Google Cüzdan uygulamasını indirmesi istenebilir.
Önemli noktalar
- Kart, seçilen Google Hesabı'na zaten kaydedilmişse kullanıcıya bunun yerine kartı Google Cüzdan uygulamasında açma bağlantısı gösterilir. Kullanıcı, kart ayrıntılarını bu uygulamada görüntüleyebilir.
- Kart, kullanıcının oturum açtığı Google Hesabı dışında bir Google Hesabı'na kaydedilmişse kullanıcı, başka bir Google Hesabı'nın bu kartı zaten kaydettiğini belirten bir mesaj alır.
- Kullanıcı kart eklemeye çalışırsa ve Google Hesabı yoksa hesap oluşturma istemi gösterilir. Google Hesabı oluşturulduktan sonra akış normal şekilde devam eder.
- Yaka kartı akışlarını destekleyen uygulamaların Google Play Hizmetleri API'leriyle entegre olması gerekir. Ancak, Hizmet Sağlayıcı uygulamasından Google Play Hizmetleri'ne yapılan yöntem çağrıları, Google Play Hizmetleri'nin herkese açık olarak dağıtılan sürümünde kullanılamaz. Servis sağlayıcı uygulama geliştiricisi, belirli yöntemleri çağırmak için özel modüller eklemeli ve bu modüllere erişim izni almalıdır. Daha fazla bilgi için servis sağlayıcınızla iletişime geçin.
Android uygulamasından giyilebilir cihazdaki Google Cüzdan'a ekleme
Kullanıcılar, telefonlarında hazırlama akışını başlatıp tek bir giyilebilir cihaz seçerek giyilebilir cihazlarını hazırlayabilir. Bu işlem, aşağıdaki şekilde gösterilmiştir:
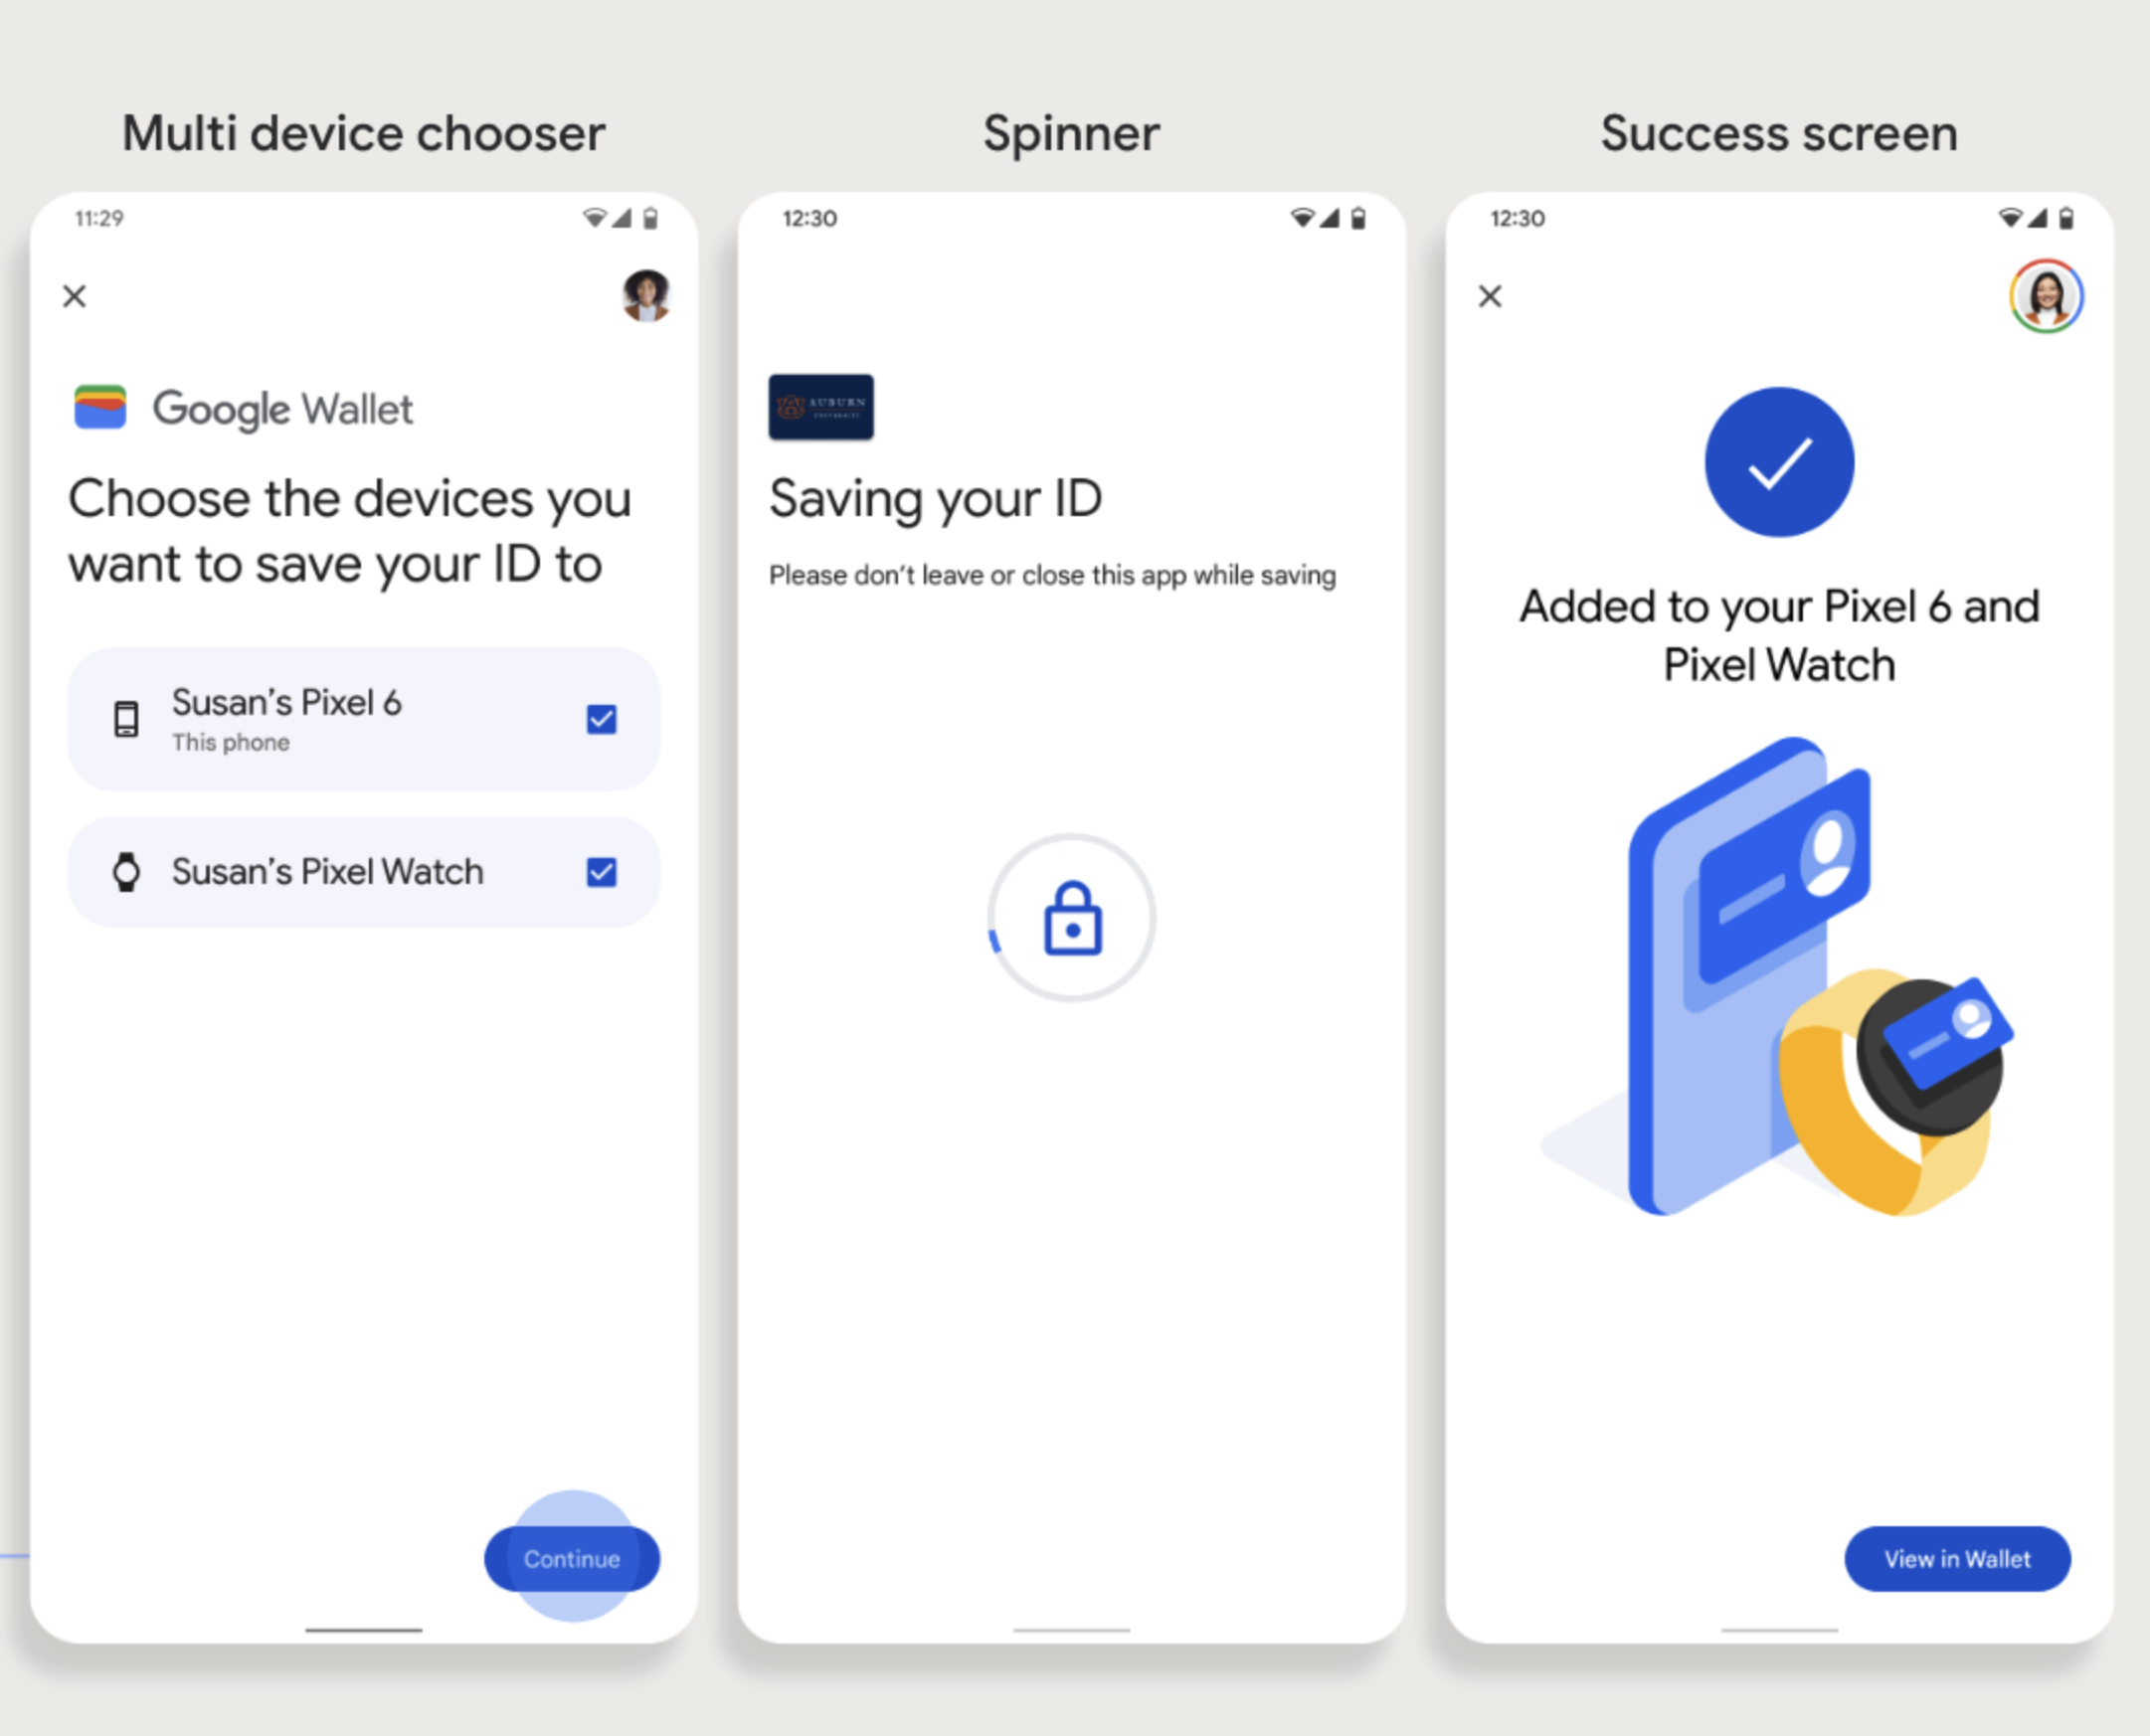
Önemli noktalar
- Bir giyilebilir cihaza kart sağlama işlemi için kart sağlayabilen bir telefon gerekir. Bu nedenle, her ikisinin de eşlenmesi gerekir.
- Kullanıcılar, tek bir akışta telefonlarına ve giyilebilir cihazlarına ödeme kartı ekleyebilir veya telefonlarına ilk ödeme kartı ekleme işlemi tamamlandıktan sonra akışı yeniden başlatarak giyilebilir cihazlarına ödeme kartı ekleyebilir.
- Kullanıcılar, Servis Sağlayıcı tarafından yalnızca tek bir giyilebilir cihazın sağlanmasıyla sınırlandırılmalıdır.
- Bir giyilebilir cihazın telefonla eşlemesi kaldırılırsa dijital kart cihazda kalır ancak kullanıcı, ilk kartı silmeden ikinci bir giyilebilir cihaza kart ekleyemez.
- Servis sağlayıcınıza Wearable cihaz hazırlama özelliğinin kullanılabilirliği hakkında bilgi sorun.
- Yaka kartı akışlarını destekleyen uygulamaların Google Play Hizmetleri API'leriyle entegre olması gerekir. Ancak, Hizmet Sağlayıcı uygulamasından Google Play Hizmetleri'ne yapılan yöntem çağrıları, Google Play Hizmetleri'nin herkese açık olarak dağıtılan sürümünde kullanılamaz. Servis sağlayıcı uygulama geliştiricisi, belirli yöntemleri çağırmak için özel modüller eklemeli ve bu modüllere erişim izni almalıdır. Daha fazla bilgi için servis sağlayıcınızla iletişime geçin.
Web sitesinden Google Cüzdan'a ekleme
Bu bölümde, bir kartı veren kuruluşun web sitesinden Google Cüzdan'a kaydetme akışı açıklanmaktadır.
1. adım: Web sitesinde oturum açın
Akışın ilk adımında, kartı veren kuruluşun web sitesinde oturum açıp Google Cüzdan'a ekle düğmesini seçmeniz gerekir.
2. adım: Google ile oturum açın
Kullanıcı, Google ile oturum açma işlemini tamamlar ve bir sonraki adımda Google Cüzdan'a yönlendirilmeden önce, düzenleyenin web sitesinde bir yükleme ekranı görür.
3. adım: Sağlama işlemini tamamlayın
Kullanıcı, Google Cüzdan'da sağlama akışını tamamlar.

Çalışma profilindeki bir uygulamadan Google Cüzdan'a ekleme
Kullanıcı, Servis Sağlayıcı'nın uygulamasını Android iş profiline yüklediyse kişisel profilinde çalışan Google Cüzdan'a yine de şirket rozetini ekleyebilir. Kullanıcı, iş profilindeki bir uygulamada Google Cüzdan'a ekle düğmesine dokunduğunda Google Cüzdan, kullanıcıyı kişisel profildeki Google Cüzdan uygulamasına yönlendirir. Kullanıcı, kartını eklemeye burada devam edebilir. Kart yönetimiyle ilgili diğer işlemler, kart kişisel profilden doğrudan kaydedildiğinde yapılan kart yönetimiyle aynıdır.