如要佈建新的飯店房卡,使用者必須在裝置上完成驗證和關聯流程。這會將外部使用者帳戶連結至 Google 錢包帳戶。本文將概略說明不同平台上的程序。
透過 Android 應用程式新增至 Google 錢包
本節說明如何透過服務供應商的 Android 應用程式,將卡片儲存至 Google 錢包。
使用者流程
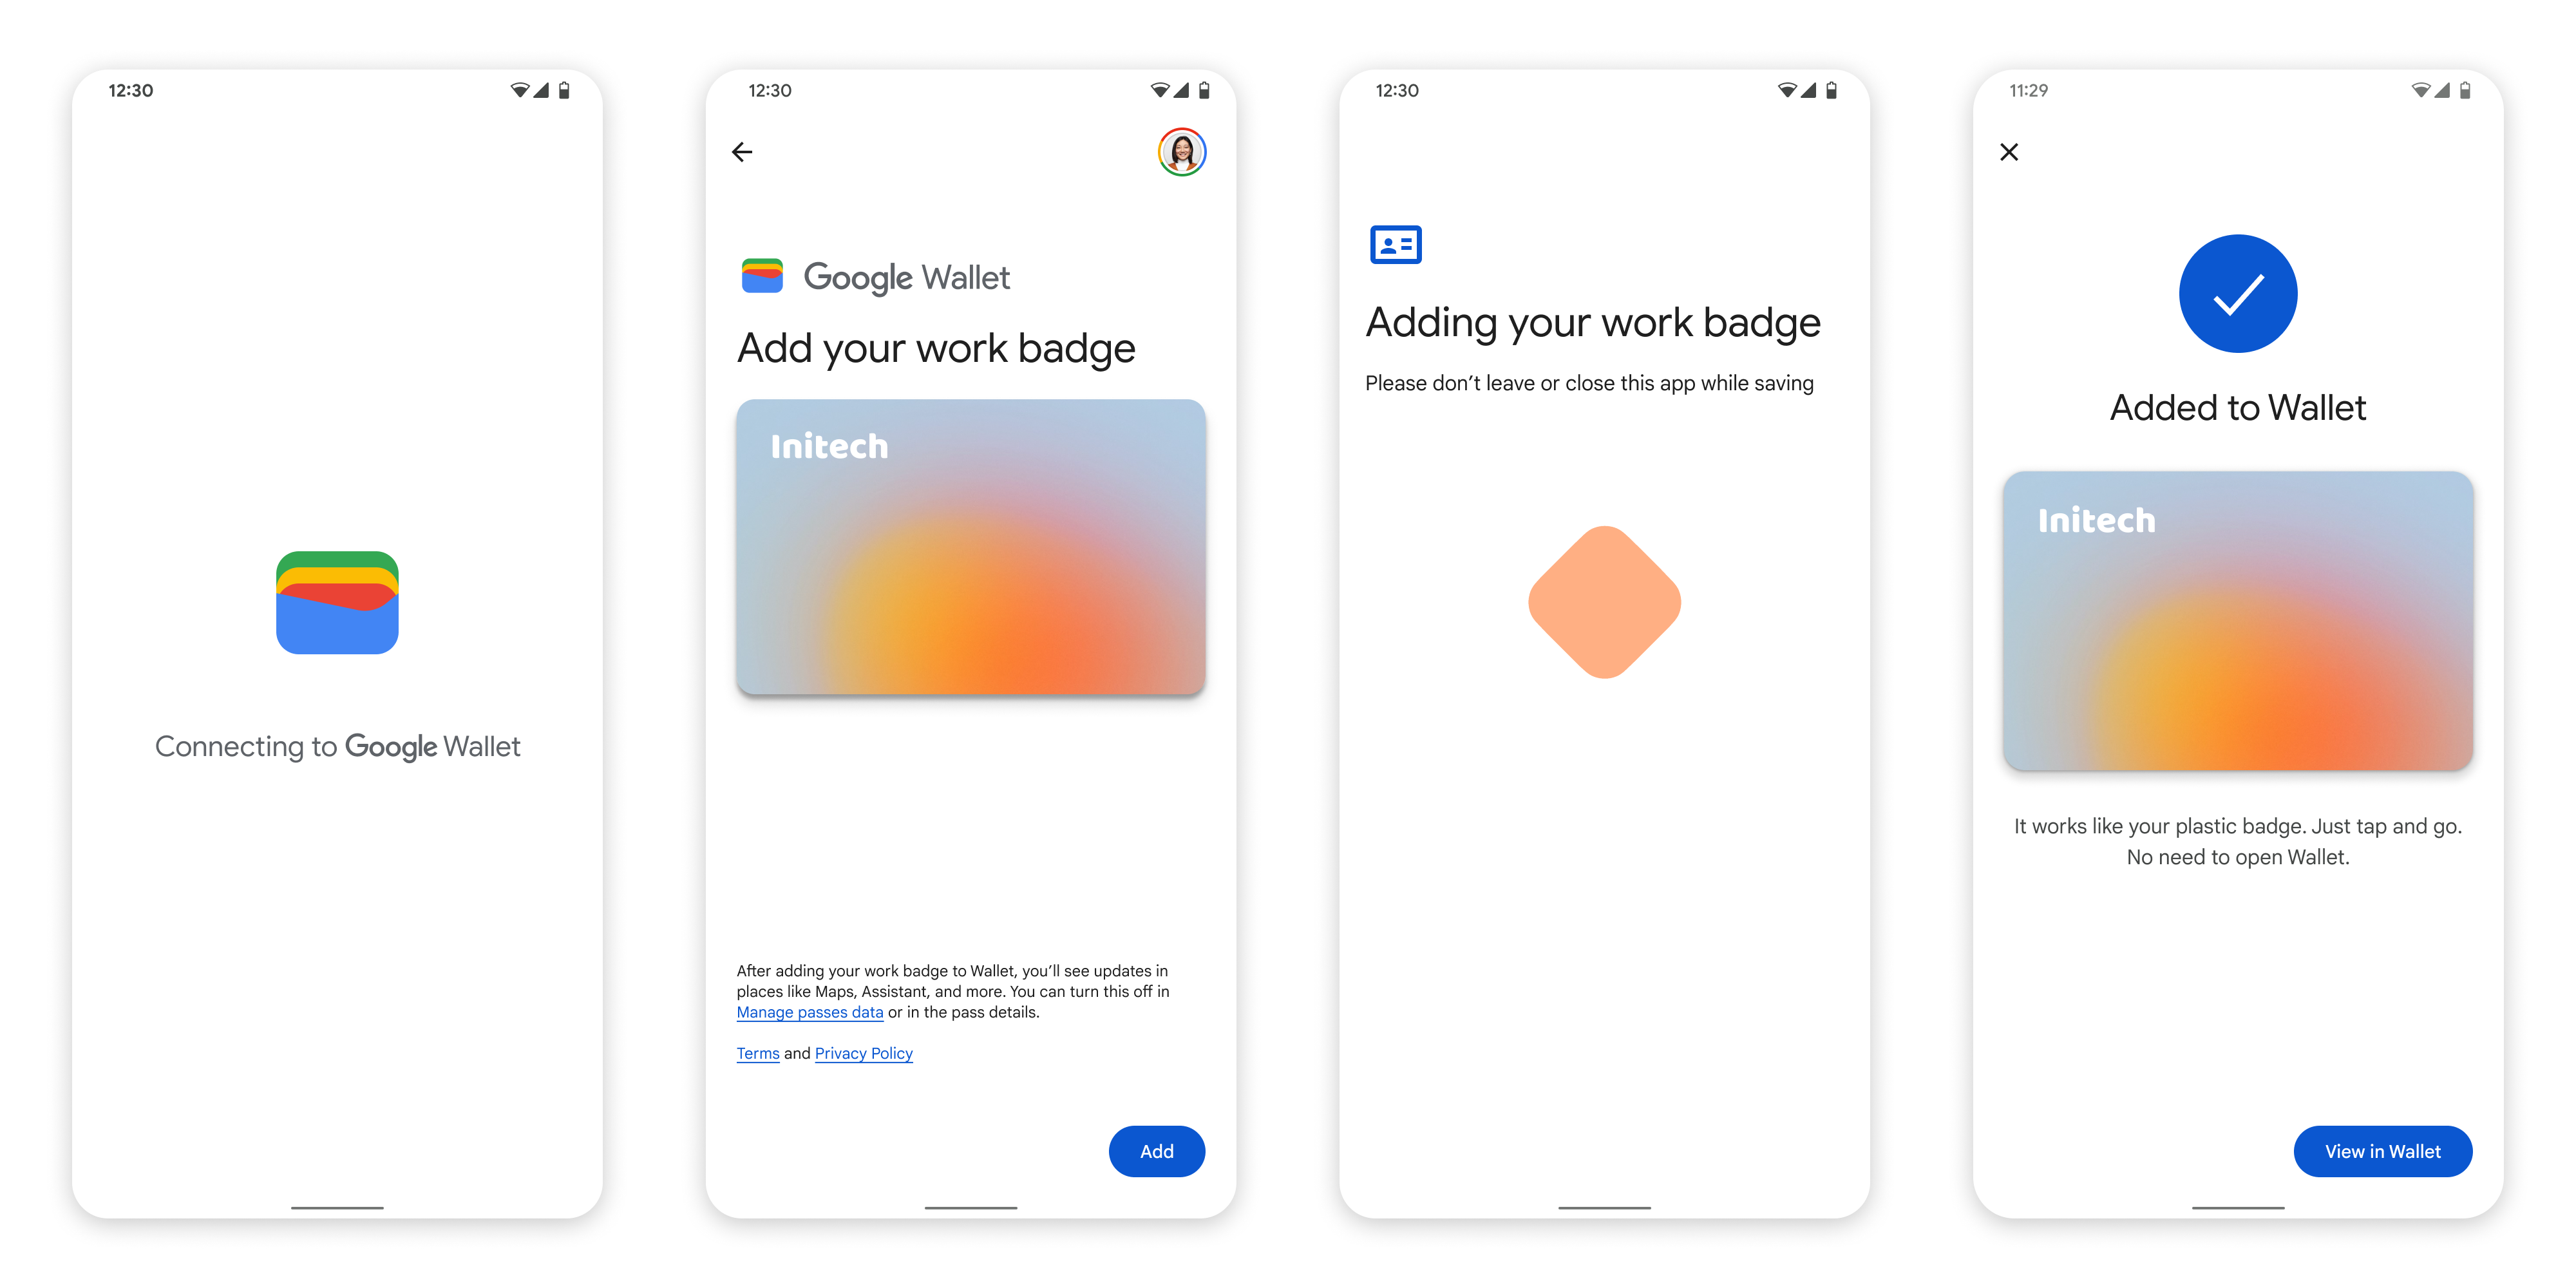
這些圖示說明從 Google 錢包的角度來看,如何佈建飯店房卡的使用者流程。
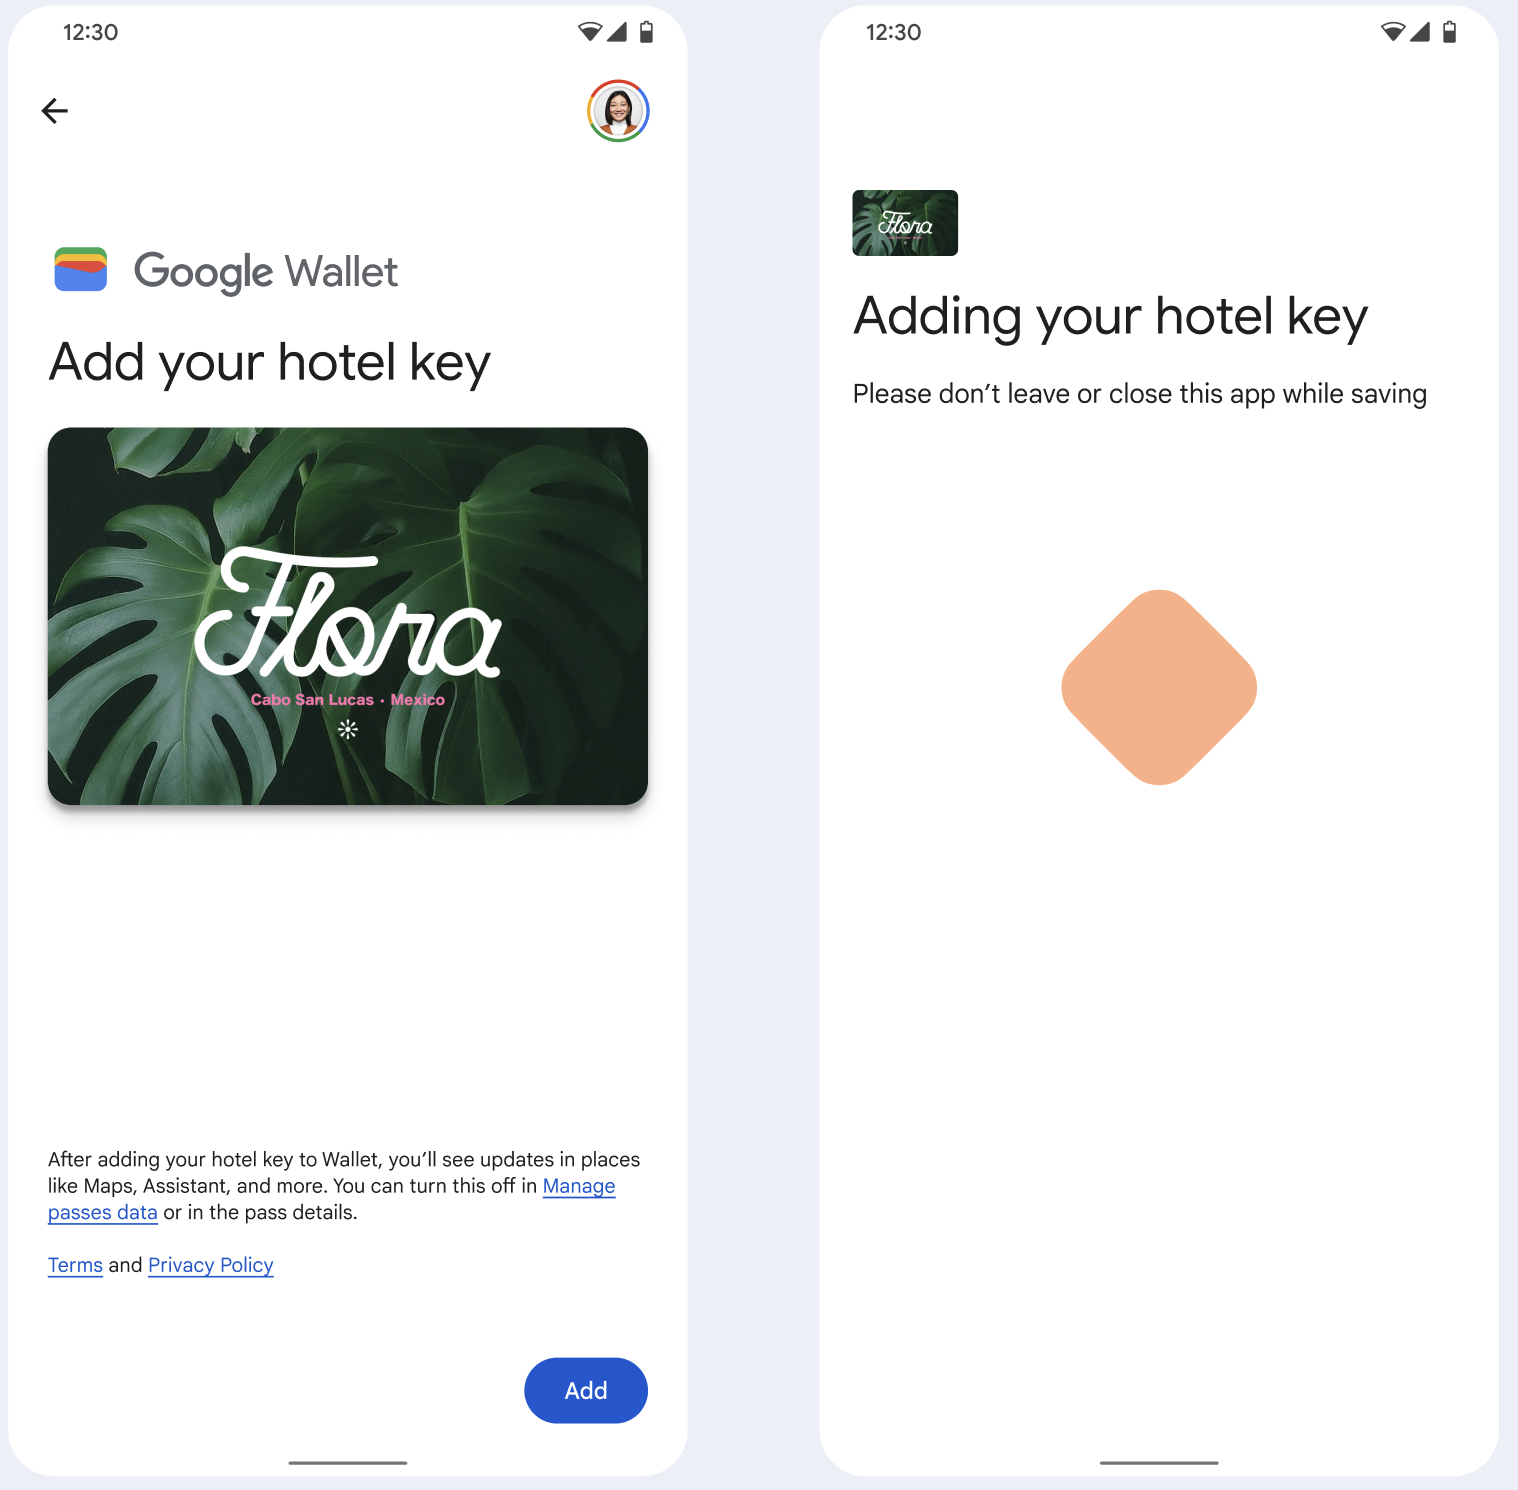
- 在設定網路連線和初始服務時,系統會向使用者顯示旋轉的連線動畫。
- 完成後,使用者接受《服務條款》,並繼續進行流程。
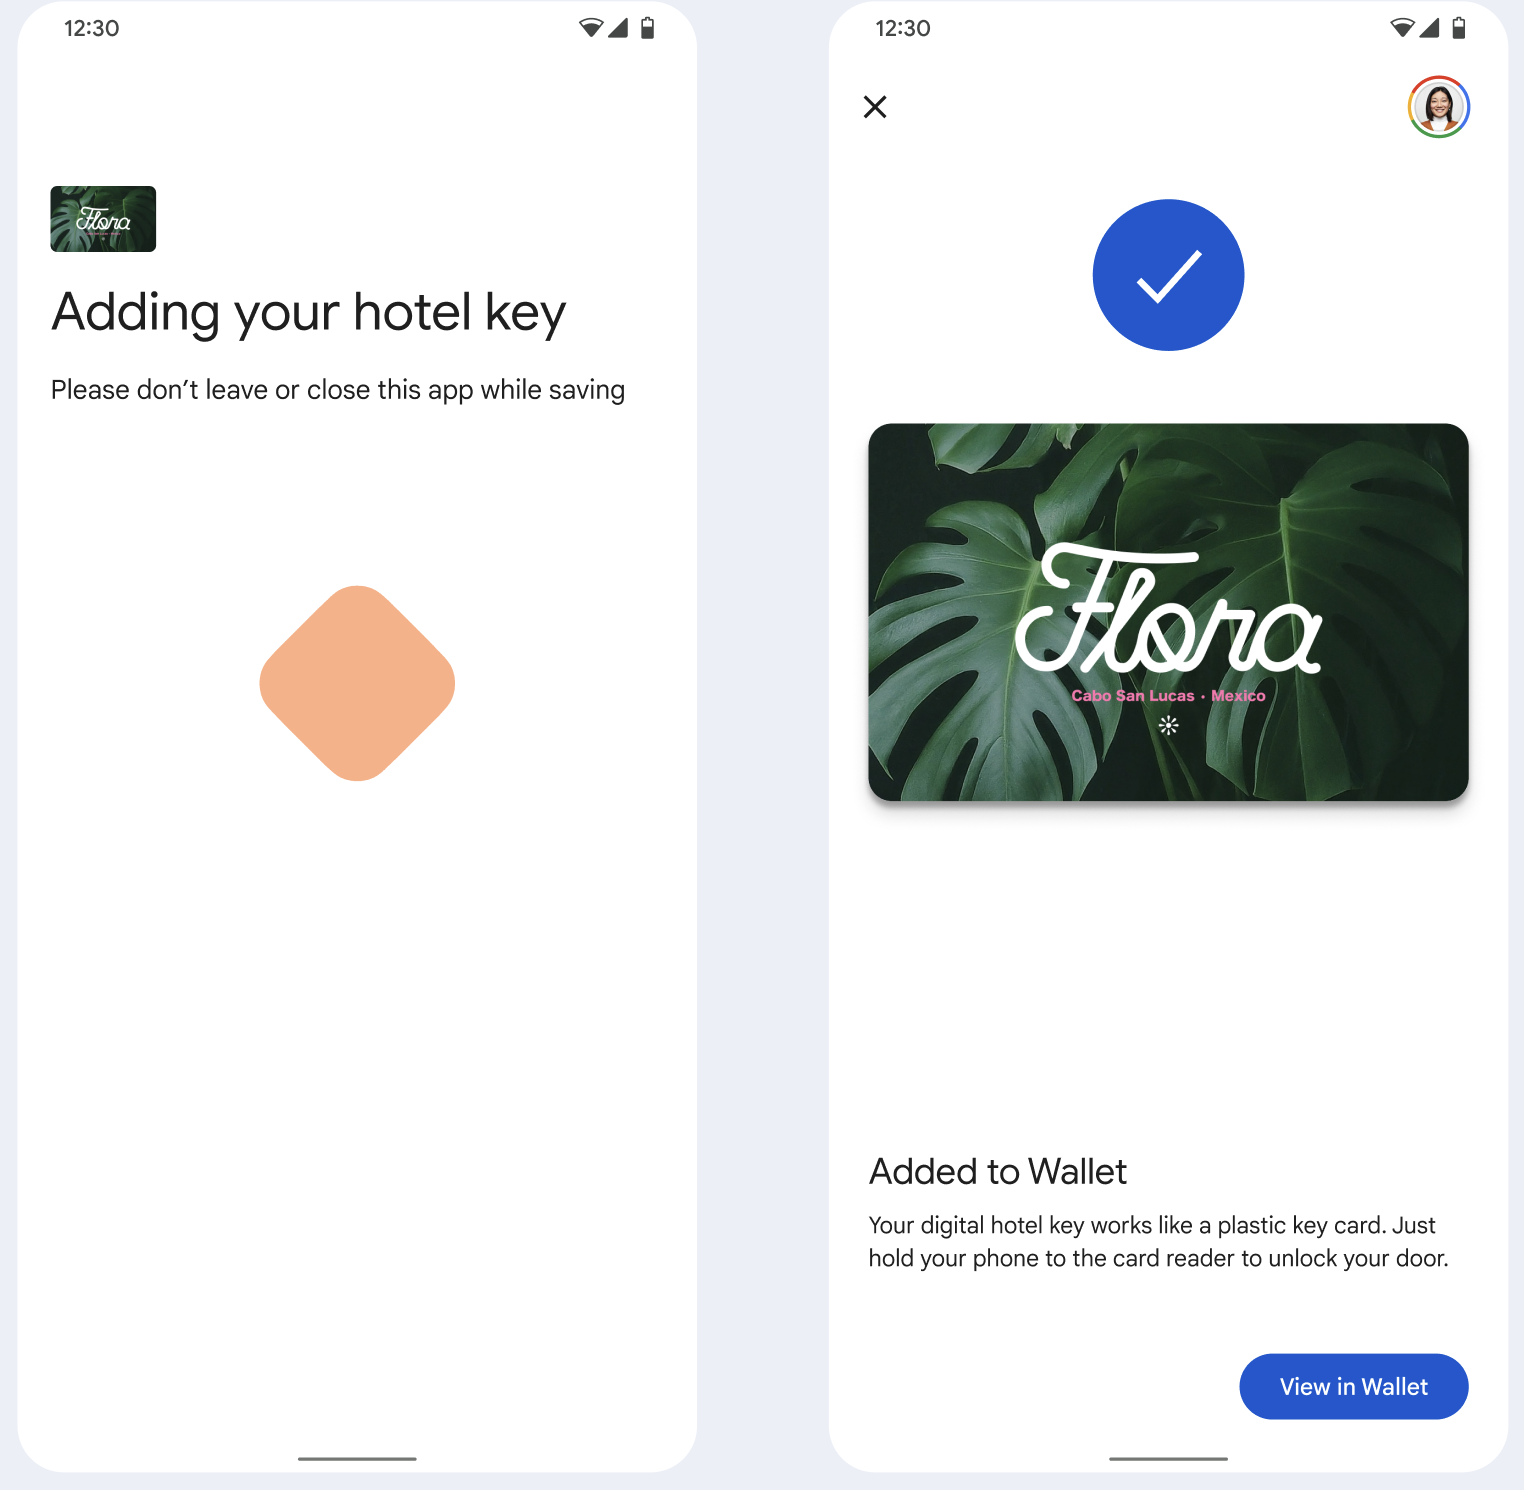
- 背景服務在裝置上佈建帳戶時,系統會向使用者顯示儲存動畫。
- 服務完成後,畫面上會顯示成功訊息。
- 如果裝置上沒有 Google 錢包應用程式,後續畫面可能會提示使用者下載。
重點
- 如果卡片已儲存至所選 Google 帳戶,系統會改為向使用者顯示連結,方便他們在 Google 錢包應用程式中開啟卡片,查看卡片詳細資料。
- 如果卡片儲存在使用者登入的 Google 帳戶以外的帳戶,使用者會收到訊息,指出其他 Google 帳戶已儲存該卡片。
- 如果使用者嘗試新增卡片,但沒有 Google 帳戶,系統會提示建立帳戶。建立 Google 帳戶後,系統會繼續正常運作。
- 支援飯店房卡流程的應用程式必須整合 Google Play 服務 API。不過,在公開發布的 Google Play 服務版本中,無法從服務供應商應用程式呼叫 Google Play 服務的方法。服務供應商應用程式開發人員必須新增及取得自訂模組的存取權,才能呼叫特定方法。詳情請洽詢服務供應商。
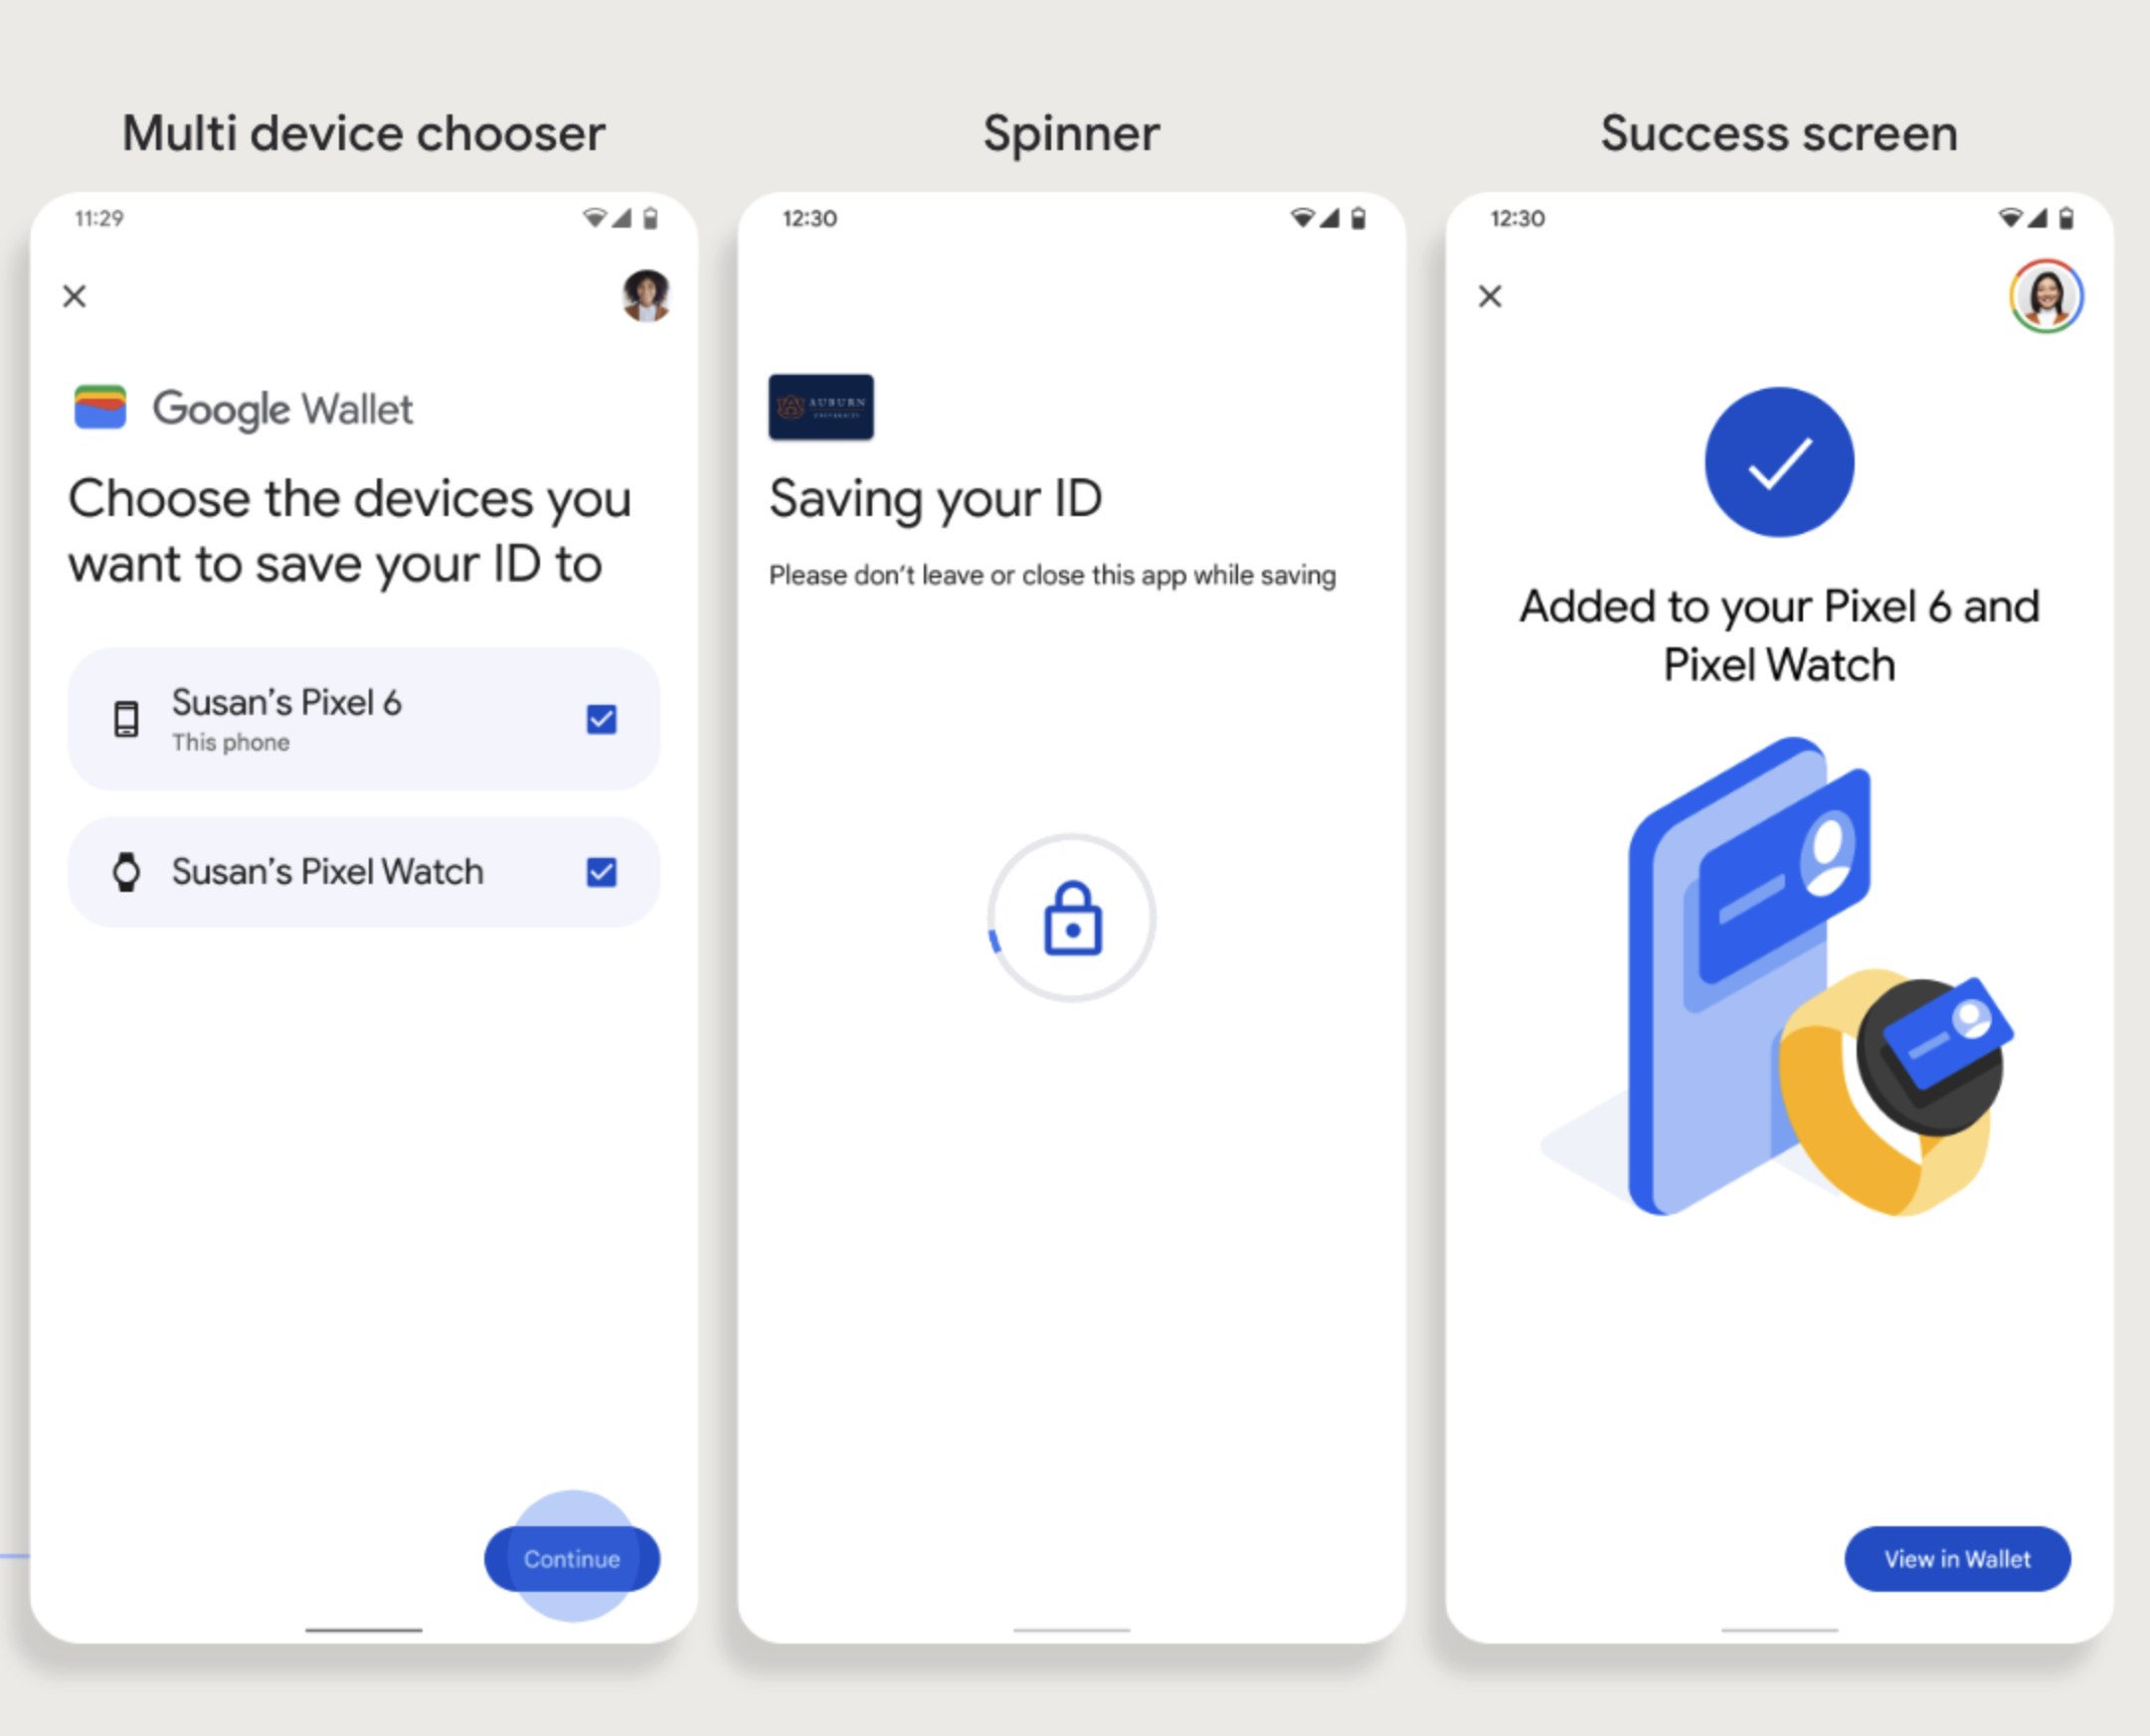
透過 Android 應用程式將卡片新增至 Wear OS 裝置的 Google 錢包
使用者可以在手機上啟動佈建流程,然後選取單一穿戴式裝置,即可佈建至該裝置,如圖所示:
重點
- 如要將卡片提供給穿戴式裝置,必須使用可提供卡片的手機,因此兩者都需要配對。
- 使用者可以透過單一流程在手機和 Wearable 裝置上完成設定,也可以在手機上完成首次設定後,重新啟動流程,將卡片新增至 Wearable 裝置。
- 服務供應商應限制使用者只能佈建單一穿戴式裝置。
- 如果智慧手錶與手機取消配對,數位卡片仍會保留在裝置上,但使用者必須先刪除第一張卡片,才能在第二支智慧手錶上佈建卡片。
- 向服務供應商詢問是否提供穿戴式裝置設定服務。
- 支援飯店房卡流程的應用程式必須整合 Google Play 服務 API。不過,公開發布的 Google Play 服務版本不支援從服務供應商應用程式呼叫 Google Play 服務的方法。服務供應商應用程式開發人員必須新增及取得自訂模組的存取權,才能呼叫特定方法。詳情請洽詢服務供應商。
從網站新增至 Google 錢包
本節說明如何透過發卡機構的網站,將卡片儲存到 Google 錢包。
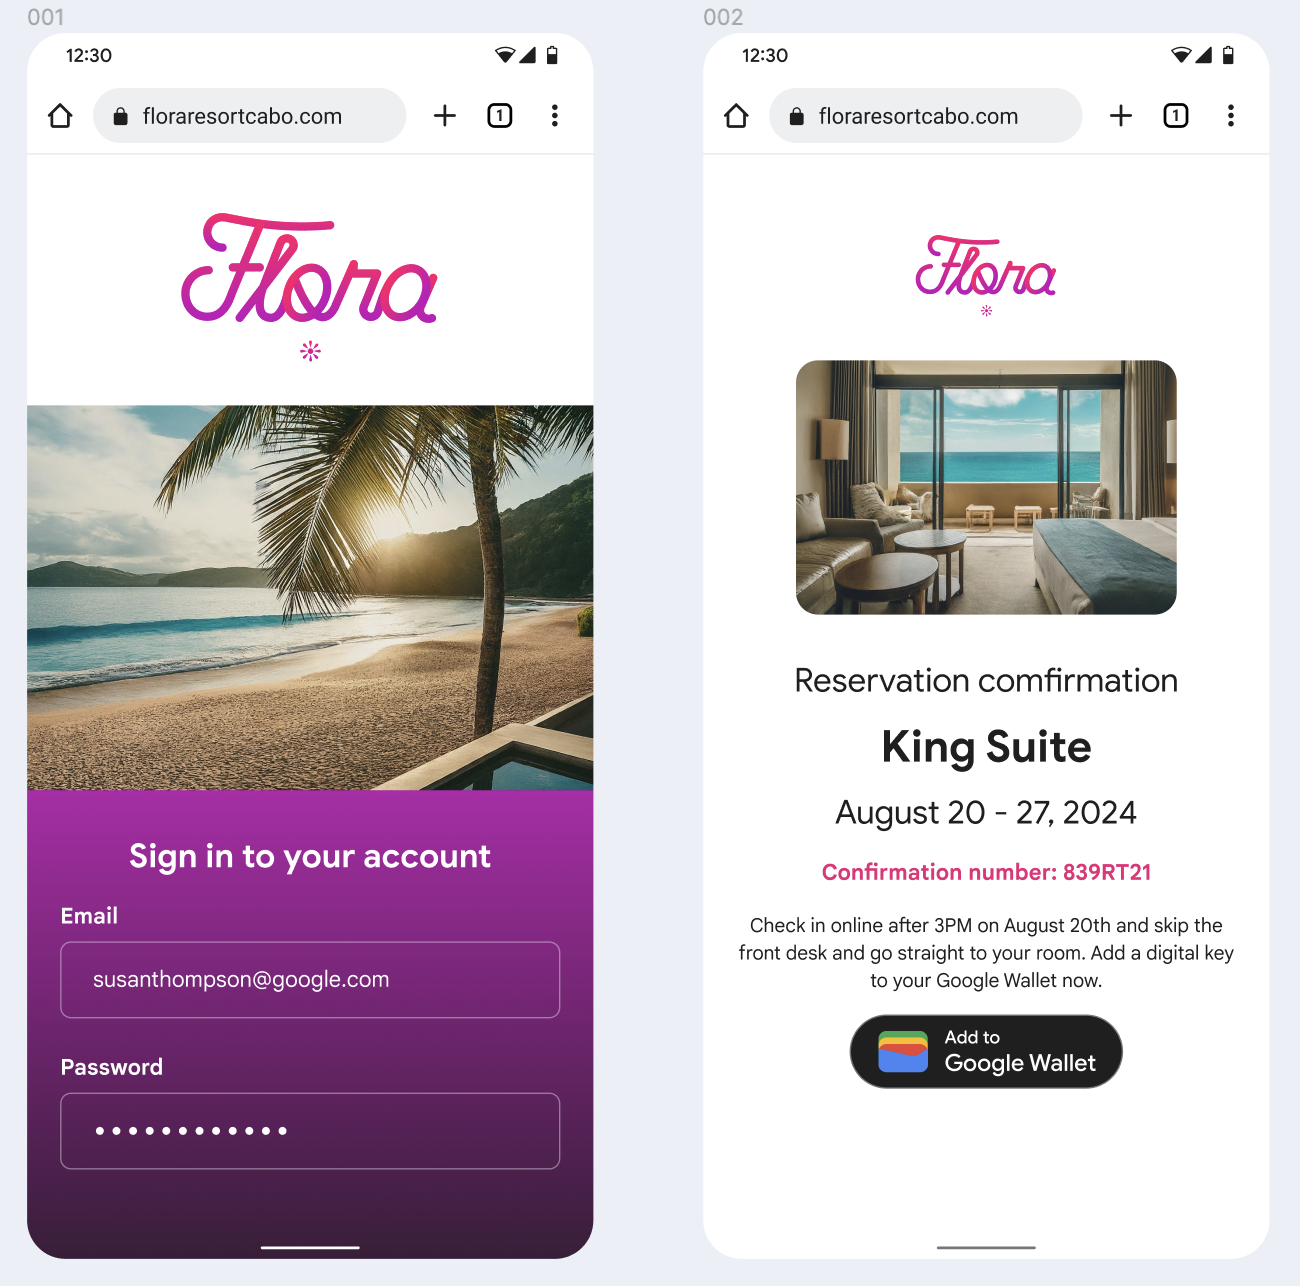
步驟 1:登入網站
流程的第一步是登入發卡機構的網站,然後選取「新增至 Google 錢包」按鈕。
步驟 2:使用 Google 帳戶登入
使用者完成「使用 Google 帳戶登入」程序後,會先在核發機構的網站上看到載入畫面,然後在下一個步驟中重新導向至 Google 錢包。
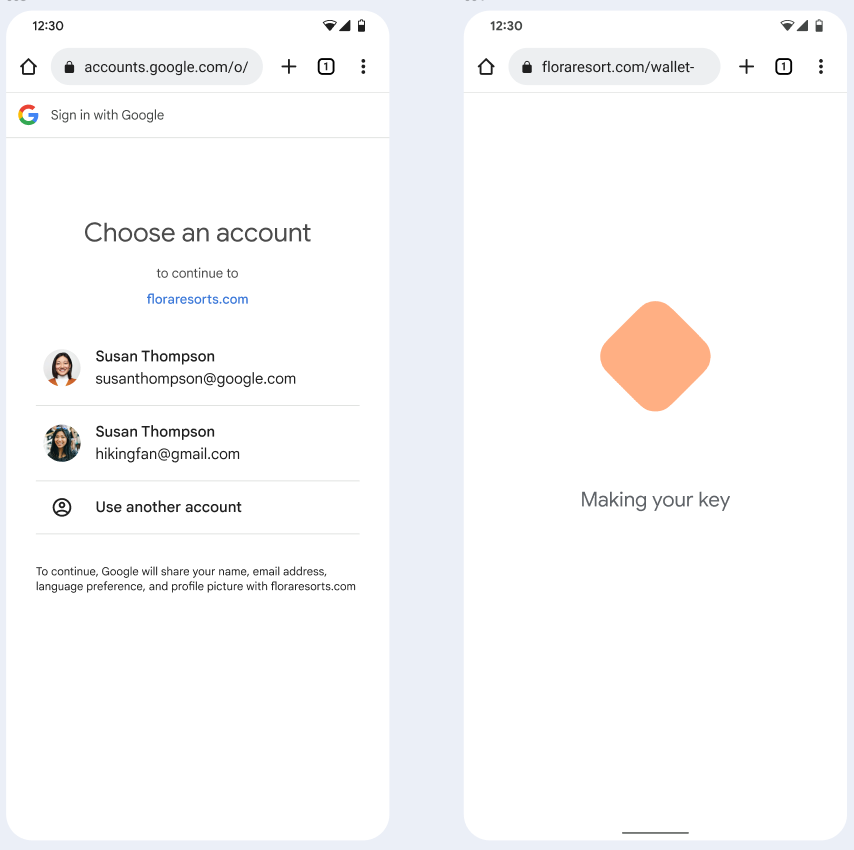
步驟 3:完成佈建
使用者在 Google 錢包中完成佈建流程。
從工作資料夾中的應用程式新增至 Google 錢包
如果使用者在 Android 工作資料夾中安裝了服務供應商的應用程式,仍可將飯店房卡新增至 Google 錢包 (在個人資料夾中執行)。如果使用者在工作資料夾的應用程式中輕觸「新增至 Google 錢包」按鈕,Google 錢包會將使用者帶往個人資料夾中的 Google 錢包應用程式,讓使用者繼續新增卡片。其餘卡片管理方式與直接從個人資料儲存卡片時的管理方式一致。