Stay organized with collections
Save and categorize content based on your preferences.
Each Google Chat app that you create requires its own
Google Cloud project with the Chat API enabled and configured. This page
shows you how to configure the Chat API.
Choose a display name, avatar, and description for your Chat app
When you enable the Chat API, you configure the details about your
Chat app that appear to users in Chat,
including a display name, avatar, and description. These details only appear
in Chat. To publish your Chat app to the
Marketplace, you must also specify the details that
appear in your Chat app's
Marketplace listing.
To call the Chat API, you must set up a
Google Chat app with the following information:
Field
Description
Format
App name
The display name for the Chat app.
Up to 25 alphanumeric characters
Avatar URL
The image that displays as your Chat app's
avatar.
An HTTPS URL pointing to a square graphics image (PNG or JPEG).
Recommended size is 256 by 256 pixels or more.
Description
A brief description of the purpose of the
Chat app.
Up to 40 alphanumeric characters
The Chat app's name, avatar, and description are
displayed to users in the Chat UI. For some Chat API
write requests, Chat uses this information to attribute the
actions that a Chat app takes in Chat.
For example, if you call the spaces.create() method, Chat
includes the name of the Chat app in the
description of who created the space, as shown in the following image:
Figure 1. The attribution message that Chat
displays when the 
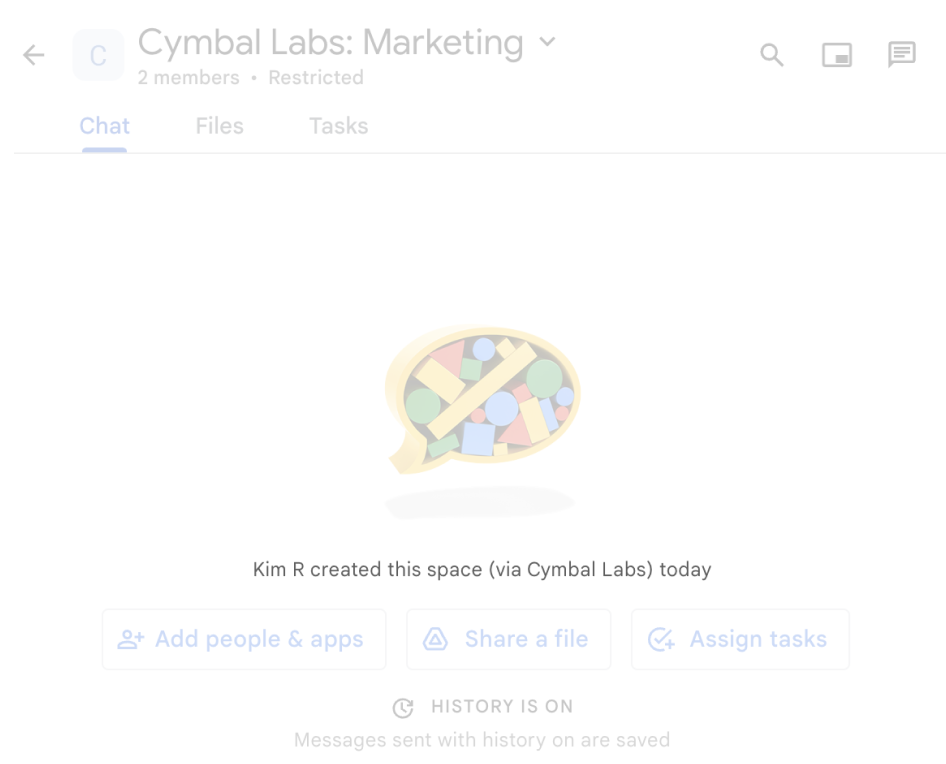
spaces.create() method is used to create a
space on behalf of a user.
To interact with Chat apps, users can also see or use this
information in the following ways:
Invoke the Chat app by @mentioning its name.
Find and start a direct message with the Chat app.
In the Apps menu, direct messages display the
Chat app's name and avatar.
From the compose bar, users can browse Chat apps and see
their name, avatar, and description.
Configure your Chat app in the Google Cloud console
When you have your Chat app details, open your
Cloud project and configure the Chat API:
In the Google Cloud console, go to the Chat API page and click the
Configuration page:
Under Application info, fill out the App name, Avatar URL,
and Description fields.
Under Interactive features, click the Enable interactive features toggle
to the off position to disable interactive features for the
Chat app. You can set this up later. To learn about
configuring and building interactive features, see
Receive and respond to user interactions.
Optional: Under Logs, select the Log errors to Logging checkbox to
use Google Cloud Logging. For more information, see
Query error logs for Chat apps.
Click Save.
Grant other people permission to configure the Chat API
You can
give specific users access
to the Chat app configuration page by granting them
the Chat apps Owner or Chat apps ViewerGoogle Cloud Identity Access Management (IAM) role.
Users with these roles can't navigate to the Chat apps
configuration page by using the APIs & Services dashboard, but can
access the configuration page by navigating to the Google Cloud console for the
Chat app's host Cloud project as follows:
[null,null,["Last updated 2025-08-28 UTC."],[[["\u003cp\u003eEvery Google Chat app needs its own Google Cloud project with the Chat API enabled and configured, following specific prerequisites.\u003c/p\u003e\n"],["\u003cp\u003eChat apps require a display name, avatar URL, and description, which are visible to users and used by Chat for attributions.\u003c/p\u003e\n"],["\u003cp\u003eThe Chat API is configured in the Google Cloud console, where you can set the app's details, enable/disable interactive features, and optionally enable error logging.\u003c/p\u003e\n"],["\u003cp\u003eAccess to the Chat app configuration page can be granted to other users via specific Google Cloud IAM roles.\u003c/p\u003e\n"]]],["Each Google Chat app requires a dedicated Google Cloud project with the Chat API enabled. Configuration involves setting up the app's display name (up to 25 characters), avatar URL (square image, 256x256 pixels or more), and description (up to 40 characters). In the Google Cloud console, you must fill out these application details, and optionally, enable or disable interactive features and log errors. Additionally, you can grant specific users access to configure the Chat API by assigning them the \"Chat apps Owner\" or \"Chat apps Viewer\" IAM roles.\n"],null,["# Configure the Google Chat API\n\nEach Google Chat app that you create requires its own\nGoogle Cloud project with the Chat API enabled and configured. This page\nshows you how to configure the Chat API.\n\nPrerequisites\n-------------\n\n- A Business or Enterprise [Google Workspace](https://support.google.com/a/answer/6043576) account with access to [Google Chat](https://workspace.google.com/products/chat/).\n- [Create a Google Cloud project](/workspace/guides/create-project).\n- [Configure the OAuth consent screen](/workspace/guides/configure-oauth-consent).\n- [Enable the Google Chat API](/workspace/guides/enable-apis).\n\nChoose a display name, avatar, and description for your Chat app\n----------------------------------------------------------------\n\nWhen you enable the Chat API, you configure the details about your\nChat app that appear to users in Chat,\nincluding a display name, avatar, and description. These details only appear\nin Chat. To publish your Chat app to the\nMarketplace, you must also specify the details that\nappear in your Chat app's\n[Marketplace listing](/workspace/marketplace/create-listing).\n\nTo call the Chat API, you must set up a\nGoogle Chat app with the following information:\n\n| Field | Description | Format |\n|-------------|-----------------------------------------------------|----------------------------------------------------------------------------------------------------------------|\n| App name | The display name for the Chat app. | Up to 25 alphanumeric characters |\n| Avatar URL | The image that displays as your Chat app's avatar. | An HTTPS URL pointing to a square graphics image (PNG or JPEG). Recommended size is 256 by 256 pixels or more. |\n| Description | A brief description of the purpose of the Chat app. | Up to 40 alphanumeric characters |\n\nThe Chat app's name, avatar, and description are\ndisplayed to users in the Chat UI. For some Chat API\nwrite requests, Chat uses this information to attribute the\nactions that a Chat app takes in Chat.\n\nFor example, if you call the `spaces.create()` method, Chat\nincludes the name of the Chat app in the\ndescription of who created the space, as shown in the following image:\n**Figure 1** . The attribution message that Chat displays when the `spaces.create()` method is used to create a space on behalf of a user.\n\nTo interact with Chat apps, users can also see or use this\ninformation in the following ways:\n\n- Invoke the Chat app by @mentioning its name.\n- Find and start a direct message with the Chat app. In the **Apps** menu, direct messages display the Chat app's name and avatar.\n- From the compose bar, users can browse Chat apps and see their name, avatar, and description.\n\nConfigure your Chat app in the Google Cloud console\n---------------------------------------------------\n\nWhen you have your Chat app details, open your\nCloud project and configure the Chat API:\n\n1. In the Google Cloud console, go to the Chat API page and click the\n **Configuration** page:\n\n [Go to Chat API Configuration page](https://console.cloud.google.com/apis/api/chat.googleapis.com/hangouts-chat)\n2. Under **Application info** , fill out the **App name** , **Avatar URL** ,\n and **Description** fields.\n\n3. Under Interactive features, click the **Enable interactive features** toggle\n to the off position to disable interactive features for the\n Chat app. You can set this up later. To learn about\n configuring and building interactive features, see\n [Receive and respond to user interactions](/workspace/chat/receive-respond-interactions).\n\n4. Optional: Under **Logs** , select the **Log errors to Logging** checkbox to\n use Google Cloud Logging. For more information, see\n [Query error logs for Chat apps](/workspace/chat/query-logs).\n\n5. Click **Save**.\n\nGrant other people permission to configure the Chat API\n-------------------------------------------------------\n\nYou can\n[give specific users access](https://cloud.google.com/iam/docs/granting-changing-revoking-access#single-role)\nto the Chat app configuration page by granting them\nthe **Chat apps Owner** or **Chat apps Viewer**\n[Google Cloud Identity Access Management (IAM) role](https://cloud.google.com/iam/docs/understanding-roles#chat-roles).\nUsers with these roles can't navigate to the Chat apps\nconfiguration page by using the **APIs \\& Services** dashboard, but can\naccess the configuration page by navigating to the Google Cloud console for the\nChat app's host Cloud project as follows: \n\n```\nhttps://console.developers.google.com/apis/api/chat.googleapis.com/hangouts-chat?project=PROJECT_ID\n```\n\nWhere \u003cvar translate=\"no\"\u003ePROJECT_ID\u003c/var\u003e is the project ID of the\nGoogle Cloud project hosting the Chat app.\n| Users with **Project** roles can also access the app configuration page.\n|\n|\n| Users with custom roles containing the\n| `resourcemanager.projects.(get|update)` permissions cannot access\n| the Chat app configuration. For custom roles, use\n| the `chat.bots.(get|update)` permissions instead.\n\nRelated topics\n--------------\n\n- [Choose a Chat app architecture](/workspace/chat/structure)\n- To configure your Chat app for interactive features, see [Receive and respond to user interactions](/workspace/chat/receive-respond-interactions)"]]