Restez organisé à l'aide des collections
Enregistrez et classez les contenus selon vos préférences.
Chaque application Google Chat que vous créez nécessite son propre projet Google Cloud avec l'API Chat activée et configurée. Cette page vous explique comment configurer l'API Chat.
Choisissez un nom à afficher, un avatar et une description pour votre application Chat.
Lorsque vous activez l'API Chat, vous configurez les informations sur votre application Chat qui s'affichent pour les utilisateurs dans Chat, y compris un nom à afficher, un avatar et une description. Ces informations n'apparaissent que dans Chat. Pour publier votre application Chat sur le Marketplace, vous devez également spécifier les informations qui s'affichent dans la fiche Marketplace de votre application Chat.
Pour appeler l'API Chat, vous devez configurer une application Google Chat avec les informations suivantes :
Champ
Description
Format
Nom de l'application
Nom à afficher de l'application Chat.
25 caractères alphanumériques maximum
URL de l'avatar
Image qui s'affiche comme avatar de l'application Chat.
URL HTTPS pointant vers une image carrée (PNG ou JPEG).
La taille recommandée est de 256 x 256 pixels ou plus.
Description
Brève description de l'objectif de l'application Chat.
Jusqu'à 40 caractères alphanumériques
Le nom, l'avatar et la description de l'application Chat sont affichés aux utilisateurs dans l'interface utilisateur de Chat. Pour certaines requêtes d'écriture de l'API Chat, Chat utilise ces informations pour attribuer les actions qu'une application Chat effectue dans Chat.
Par exemple, si vous appelez la méthode spaces.create(), Chat inclut le nom de l'application Chat dans la description de la personne qui a créé l'espace, comme illustré dans l'image suivante :
Figure 1. Message d'attribution que Chat affiche lorsque la méthode 
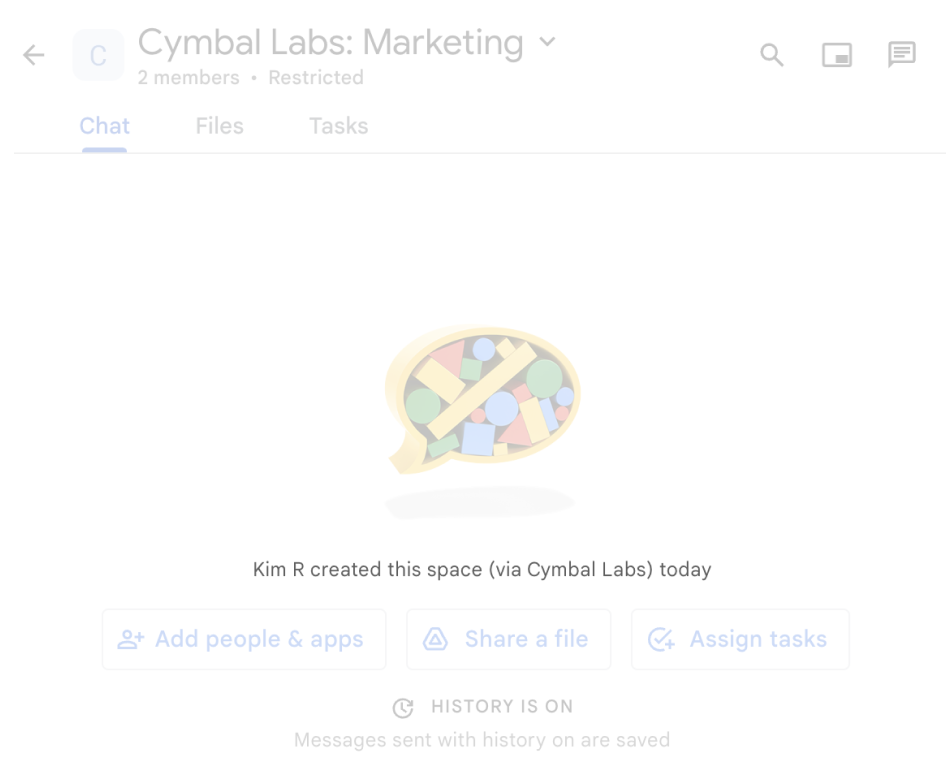
spaces.create() est utilisée pour créer un espace au nom d'un utilisateur.
Pour interagir avec les applications Chat, les utilisateurs peuvent également voir ou utiliser ces informations de différentes manières :
Appelez l'application Chat en mentionnant son nom avec @.
Recherchez l'application Chat et envoyez-lui un message privé.
Dans le menu Applications, les messages privés affichent le nom et l'avatar de l'application Chat.
Dans la barre de composition, les utilisateurs peuvent parcourir les applications Chat et voir leur nom, leur avatar et leur description.
Configurer votre application Chat dans la console Google Cloud
Une fois que vous avez les informations sur votre application Chat, ouvrez votre projet Cloud et configurez l'API Chat :
Dans la console Google Cloud, accédez à la page de l'API Chat, puis cliquez sur la page Configuration :
Sous Informations sur l'application, remplissez les champs Nom de l'application, URL de l'avatar et Description.
Sous "Fonctionnalités interactives", cliquez sur le bouton Activer les fonctionnalités interactives pour désactiver les fonctionnalités interactives de l'application Chat. Vous pourrez les configurer ultérieurement. Pour en savoir plus sur la configuration et la création de fonctionnalités interactives, consultez Recevoir des interactions utilisateur et y répondre.
Autoriser d'autres personnes à configurer l'API Chat
Vous pouvez accorder l'accès à des utilisateurs spécifiques à la page de configuration de l'application Chat en leur attribuant le rôle IAM (Identity and Access Management) Google Cloud Propriétaire des applications Chat ou Lecteur des applications Chat.
Les utilisateurs disposant de ces rôles ne peuvent pas accéder à la page de configuration des applications Chat à l'aide du tableau de bord API et services, mais ils peuvent y accéder en accédant à la console Google Cloud pour le projet Cloud hôte de l'application Chat comme suit :
Sauf indication contraire, le contenu de cette page est régi par une licence Creative Commons Attribution 4.0, et les échantillons de code sont régis par une licence Apache 2.0. Pour en savoir plus, consultez les Règles du site Google Developers. Java est une marque déposée d'Oracle et/ou de ses sociétés affiliées.
Dernière mise à jour le 2025/08/29 (UTC).
[null,null,["Dernière mise à jour le 2025/08/29 (UTC)."],[[["\u003cp\u003eEvery Google Chat app needs its own Google Cloud project with the Chat API enabled and configured, following specific prerequisites.\u003c/p\u003e\n"],["\u003cp\u003eChat apps require a display name, avatar URL, and description, which are visible to users and used by Chat for attributions.\u003c/p\u003e\n"],["\u003cp\u003eThe Chat API is configured in the Google Cloud console, where you can set the app's details, enable/disable interactive features, and optionally enable error logging.\u003c/p\u003e\n"],["\u003cp\u003eAccess to the Chat app configuration page can be granted to other users via specific Google Cloud IAM roles.\u003c/p\u003e\n"]]],["Each Google Chat app requires a dedicated Google Cloud project with the Chat API enabled. Configuration involves setting up the app's display name (up to 25 characters), avatar URL (square image, 256x256 pixels or more), and description (up to 40 characters). In the Google Cloud console, you must fill out these application details, and optionally, enable or disable interactive features and log errors. Additionally, you can grant specific users access to configure the Chat API by assigning them the \"Chat apps Owner\" or \"Chat apps Viewer\" IAM roles.\n"],null,["# Configure the Google Chat API\n\nEach Google Chat app that you create requires its own\nGoogle Cloud project with the Chat API enabled and configured. This page\nshows you how to configure the Chat API.\n\nPrerequisites\n-------------\n\n- A Business or Enterprise [Google Workspace](https://support.google.com/a/answer/6043576) account with access to [Google Chat](https://workspace.google.com/products/chat/).\n- [Create a Google Cloud project](/workspace/guides/create-project).\n- [Configure the OAuth consent screen](/workspace/guides/configure-oauth-consent).\n- [Enable the Google Chat API](/workspace/guides/enable-apis).\n\nChoose a display name, avatar, and description for your Chat app\n----------------------------------------------------------------\n\nWhen you enable the Chat API, you configure the details about your\nChat app that appear to users in Chat,\nincluding a display name, avatar, and description. These details only appear\nin Chat. To publish your Chat app to the\nMarketplace, you must also specify the details that\nappear in your Chat app's\n[Marketplace listing](/workspace/marketplace/create-listing).\n\nTo call the Chat API, you must set up a\nGoogle Chat app with the following information:\n\n| Field | Description | Format |\n|-------------|-----------------------------------------------------|----------------------------------------------------------------------------------------------------------------|\n| App name | The display name for the Chat app. | Up to 25 alphanumeric characters |\n| Avatar URL | The image that displays as your Chat app's avatar. | An HTTPS URL pointing to a square graphics image (PNG or JPEG). Recommended size is 256 by 256 pixels or more. |\n| Description | A brief description of the purpose of the Chat app. | Up to 40 alphanumeric characters |\n\nThe Chat app's name, avatar, and description are\ndisplayed to users in the Chat UI. For some Chat API\nwrite requests, Chat uses this information to attribute the\nactions that a Chat app takes in Chat.\n\nFor example, if you call the `spaces.create()` method, Chat\nincludes the name of the Chat app in the\ndescription of who created the space, as shown in the following image:\n**Figure 1** . The attribution message that Chat displays when the `spaces.create()` method is used to create a space on behalf of a user.\n\nTo interact with Chat apps, users can also see or use this\ninformation in the following ways:\n\n- Invoke the Chat app by @mentioning its name.\n- Find and start a direct message with the Chat app. In the **Apps** menu, direct messages display the Chat app's name and avatar.\n- From the compose bar, users can browse Chat apps and see their name, avatar, and description.\n\nConfigure your Chat app in the Google Cloud console\n---------------------------------------------------\n\nWhen you have your Chat app details, open your\nCloud project and configure the Chat API:\n\n1. In the Google Cloud console, go to the Chat API page and click the\n **Configuration** page:\n\n [Go to Chat API Configuration page](https://console.cloud.google.com/apis/api/chat.googleapis.com/hangouts-chat)\n2. Under **Application info** , fill out the **App name** , **Avatar URL** ,\n and **Description** fields.\n\n3. Under Interactive features, click the **Enable interactive features** toggle\n to the off position to disable interactive features for the\n Chat app. You can set this up later. To learn about\n configuring and building interactive features, see\n [Receive and respond to user interactions](/workspace/chat/receive-respond-interactions).\n\n4. Optional: Under **Logs** , select the **Log errors to Logging** checkbox to\n use Google Cloud Logging. For more information, see\n [Query error logs for Chat apps](/workspace/chat/query-logs).\n\n5. Click **Save**.\n\nGrant other people permission to configure the Chat API\n-------------------------------------------------------\n\nYou can\n[give specific users access](https://cloud.google.com/iam/docs/granting-changing-revoking-access#single-role)\nto the Chat app configuration page by granting them\nthe **Chat apps Owner** or **Chat apps Viewer**\n[Google Cloud Identity Access Management (IAM) role](https://cloud.google.com/iam/docs/understanding-roles#chat-roles).\nUsers with these roles can't navigate to the Chat apps\nconfiguration page by using the **APIs \\& Services** dashboard, but can\naccess the configuration page by navigating to the Google Cloud console for the\nChat app's host Cloud project as follows: \n\n```\nhttps://console.developers.google.com/apis/api/chat.googleapis.com/hangouts-chat?project=PROJECT_ID\n```\n\nWhere \u003cvar translate=\"no\"\u003ePROJECT_ID\u003c/var\u003e is the project ID of the\nGoogle Cloud project hosting the Chat app.\n| Users with **Project** roles can also access the app configuration page.\n|\n|\n| Users with custom roles containing the\n| `resourcemanager.projects.(get|update)` permissions cannot access\n| the Chat app configuration. For custom roles, use\n| the `chat.bots.(get|update)` permissions instead.\n\nRelated topics\n--------------\n\n- [Choose a Chat app architecture](/workspace/chat/structure)\n- To configure your Chat app for interactive features, see [Receive and respond to user interactions](/workspace/chat/receive-respond-interactions)"]]