Mantieni tutto organizzato con le raccolte
Salva e classifica i contenuti in base alle tue preferenze.
Ogni app Google Chat che crei richiede un proprio progetto Google Cloud con l'API Chat abilitata e configurata. Questa pagina
mostra come configurare l'API Chat.
Scegliere un nome visualizzato, un avatar e una descrizione per l'app Chat
Quando abiliti l'API Chat, configuri i dettagli della tua
app Chat che vengono visualizzati dagli utenti in Chat,
inclusi nome visualizzato, avatar e descrizione. Questi dettagli vengono visualizzati
solo in Chat. Per pubblicare la tua app di chat su Marketplace, devi anche specificare i dettagli che vengono visualizzati nella scheda di Marketplace della tua app di chat.
Per chiamare l'API Chat, devi configurare un'app Google Chat con le seguenti informazioni:
Campo
Descrizione
Formato
Nome dell'app
Il nome visualizzato dell'app Chat.
Fino a 25 caratteri alfanumerici
URL avatar
L'immagine visualizzata come avatar
dell'app di chat.
Un URL HTTPS che rimanda a un'immagine grafica quadrata (PNG o JPEG).
Le dimensioni consigliate sono 256 x 256 pixel o superiori.
Descrizione
Una breve descrizione dello scopo dell'app Chat.
Fino a 40 caratteri alfanumerici
Il nome, l'avatar e la descrizione dell'app Chat
vengono visualizzati agli utenti nell'interfaccia utente di Chat. Per alcune richieste di scrittura dell'API Chat, Chat utilizza queste informazioni per attribuire le azioni intraprese da un'app Chat in Chat.
Ad esempio, se chiami il metodo spaces.create(), Chat
include il nome dell'app Chat nella
descrizione di chi ha creato lo spazio, come mostrato nell'immagine seguente:
Figura 1. Il messaggio di attribuzione visualizzato da Chat
quando viene utilizzato il metodo 
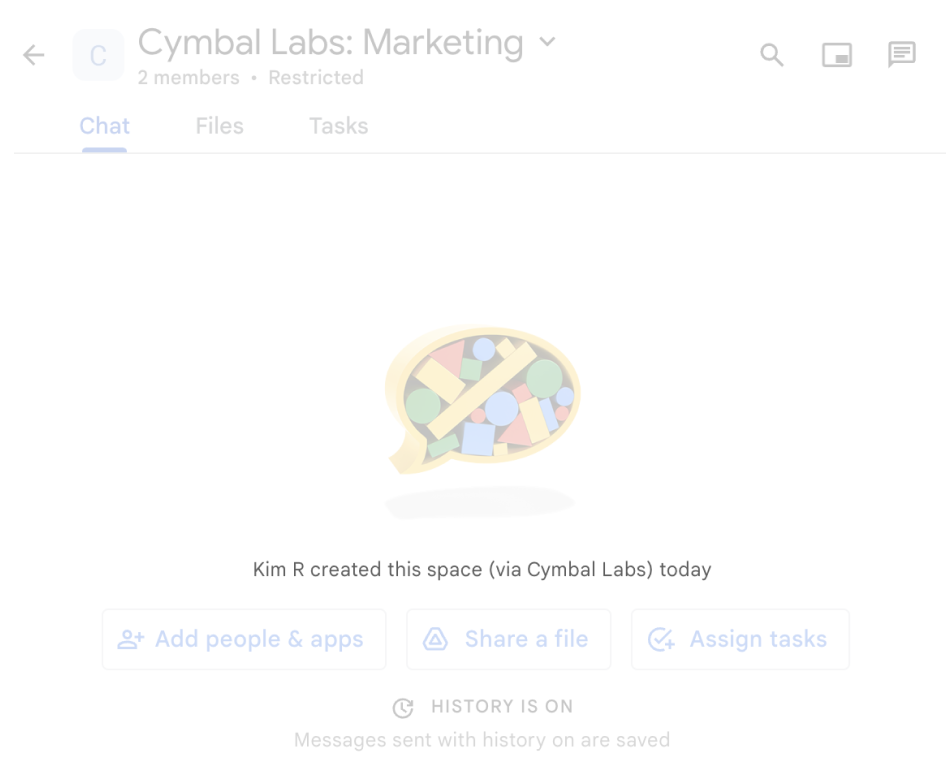
spaces.create() per creare uno
spazio per conto di un utente.
Per interagire con le app di chat, gli utenti possono anche visualizzare o utilizzare queste
informazioni nei seguenti modi:
Richiama l'app Chat menzionandone il nome con @.
Trova e avvia un messaggio diretto con l'app di Chat.
Nel menu App, i messaggi diretti mostrano il nome e l'avatar dell'app di Chat.
Dalla barra di composizione, gli utenti possono sfogliare le app di Chat e visualizzarne il nome, l'avatar e la descrizione.
Configurare l'app Chat nella console Google Cloud
Una volta ottenuti i dettagli dell'app Chat, apri il tuo
progetto cloud e configura l'API Chat:
Nella console Google Cloud, vai alla pagina dell'API Chat e fai clic sulla pagina
Configurazione:
Nella sezione Informazioni sull'applicazione, compila i campi Nome app, URL avatar
e Descrizione.
In Funzionalità interattive, fai clic sul pulsante di attivazione/disattivazione Attiva funzionalità interattive
per disabilitare le funzionalità interattive per l'app Chat. Puoi configurarle in un secondo momento. Per scoprire di più
sulla configurazione e sulla creazione di funzionalità interattive, consulta
Ricevere e rispondere alle interazioni degli utenti.
(Facoltativo) In Log, seleziona la casella di controllo Registra errori in Logging per
utilizzare Google Cloud Logging. Per maggiori informazioni, vedi
Log degli errori delle query per le app di chat.
Fai clic su Salva.
Concedere ad altre persone l'autorizzazione per configurare l'API Chat
Puoi
concedere l'accesso a utenti specifici
alla pagina di configurazione dell'app di chat concedendo loro
il ruolo IAM (Identity and Access Management) di proprietario o visualizzatoredelle app di chat di Google Cloud.
Gli utenti con questi ruoli non possono accedere alla pagina di configurazione delle app di chat utilizzando la dashboard API e servizi, ma possono accedere alla pagina di configurazione accedendo alla console Google Cloud per il progetto Cloud host dell'app di chat nel seguente modo:
[null,null,["Ultimo aggiornamento 2025-08-29 UTC."],[[["\u003cp\u003eEvery Google Chat app needs its own Google Cloud project with the Chat API enabled and configured, following specific prerequisites.\u003c/p\u003e\n"],["\u003cp\u003eChat apps require a display name, avatar URL, and description, which are visible to users and used by Chat for attributions.\u003c/p\u003e\n"],["\u003cp\u003eThe Chat API is configured in the Google Cloud console, where you can set the app's details, enable/disable interactive features, and optionally enable error logging.\u003c/p\u003e\n"],["\u003cp\u003eAccess to the Chat app configuration page can be granted to other users via specific Google Cloud IAM roles.\u003c/p\u003e\n"]]],["Each Google Chat app requires a dedicated Google Cloud project with the Chat API enabled. Configuration involves setting up the app's display name (up to 25 characters), avatar URL (square image, 256x256 pixels or more), and description (up to 40 characters). In the Google Cloud console, you must fill out these application details, and optionally, enable or disable interactive features and log errors. Additionally, you can grant specific users access to configure the Chat API by assigning them the \"Chat apps Owner\" or \"Chat apps Viewer\" IAM roles.\n"],null,["# Configure the Google Chat API\n\nEach Google Chat app that you create requires its own\nGoogle Cloud project with the Chat API enabled and configured. This page\nshows you how to configure the Chat API.\n\nPrerequisites\n-------------\n\n- A Business or Enterprise [Google Workspace](https://support.google.com/a/answer/6043576) account with access to [Google Chat](https://workspace.google.com/products/chat/).\n- [Create a Google Cloud project](/workspace/guides/create-project).\n- [Configure the OAuth consent screen](/workspace/guides/configure-oauth-consent).\n- [Enable the Google Chat API](/workspace/guides/enable-apis).\n\nChoose a display name, avatar, and description for your Chat app\n----------------------------------------------------------------\n\nWhen you enable the Chat API, you configure the details about your\nChat app that appear to users in Chat,\nincluding a display name, avatar, and description. These details only appear\nin Chat. To publish your Chat app to the\nMarketplace, you must also specify the details that\nappear in your Chat app's\n[Marketplace listing](/workspace/marketplace/create-listing).\n\nTo call the Chat API, you must set up a\nGoogle Chat app with the following information:\n\n| Field | Description | Format |\n|-------------|-----------------------------------------------------|----------------------------------------------------------------------------------------------------------------|\n| App name | The display name for the Chat app. | Up to 25 alphanumeric characters |\n| Avatar URL | The image that displays as your Chat app's avatar. | An HTTPS URL pointing to a square graphics image (PNG or JPEG). Recommended size is 256 by 256 pixels or more. |\n| Description | A brief description of the purpose of the Chat app. | Up to 40 alphanumeric characters |\n\nThe Chat app's name, avatar, and description are\ndisplayed to users in the Chat UI. For some Chat API\nwrite requests, Chat uses this information to attribute the\nactions that a Chat app takes in Chat.\n\nFor example, if you call the `spaces.create()` method, Chat\nincludes the name of the Chat app in the\ndescription of who created the space, as shown in the following image:\n**Figure 1** . The attribution message that Chat displays when the `spaces.create()` method is used to create a space on behalf of a user.\n\nTo interact with Chat apps, users can also see or use this\ninformation in the following ways:\n\n- Invoke the Chat app by @mentioning its name.\n- Find and start a direct message with the Chat app. In the **Apps** menu, direct messages display the Chat app's name and avatar.\n- From the compose bar, users can browse Chat apps and see their name, avatar, and description.\n\nConfigure your Chat app in the Google Cloud console\n---------------------------------------------------\n\nWhen you have your Chat app details, open your\nCloud project and configure the Chat API:\n\n1. In the Google Cloud console, go to the Chat API page and click the\n **Configuration** page:\n\n [Go to Chat API Configuration page](https://console.cloud.google.com/apis/api/chat.googleapis.com/hangouts-chat)\n2. Under **Application info** , fill out the **App name** , **Avatar URL** ,\n and **Description** fields.\n\n3. Under Interactive features, click the **Enable interactive features** toggle\n to the off position to disable interactive features for the\n Chat app. You can set this up later. To learn about\n configuring and building interactive features, see\n [Receive and respond to user interactions](/workspace/chat/receive-respond-interactions).\n\n4. Optional: Under **Logs** , select the **Log errors to Logging** checkbox to\n use Google Cloud Logging. For more information, see\n [Query error logs for Chat apps](/workspace/chat/query-logs).\n\n5. Click **Save**.\n\nGrant other people permission to configure the Chat API\n-------------------------------------------------------\n\nYou can\n[give specific users access](https://cloud.google.com/iam/docs/granting-changing-revoking-access#single-role)\nto the Chat app configuration page by granting them\nthe **Chat apps Owner** or **Chat apps Viewer**\n[Google Cloud Identity Access Management (IAM) role](https://cloud.google.com/iam/docs/understanding-roles#chat-roles).\nUsers with these roles can't navigate to the Chat apps\nconfiguration page by using the **APIs \\& Services** dashboard, but can\naccess the configuration page by navigating to the Google Cloud console for the\nChat app's host Cloud project as follows: \n\n```\nhttps://console.developers.google.com/apis/api/chat.googleapis.com/hangouts-chat?project=PROJECT_ID\n```\n\nWhere \u003cvar translate=\"no\"\u003ePROJECT_ID\u003c/var\u003e is the project ID of the\nGoogle Cloud project hosting the Chat app.\n| Users with **Project** roles can also access the app configuration page.\n|\n|\n| Users with custom roles containing the\n| `resourcemanager.projects.(get|update)` permissions cannot access\n| the Chat app configuration. For custom roles, use\n| the `chat.bots.(get|update)` permissions instead.\n\nRelated topics\n--------------\n\n- [Choose a Chat app architecture](/workspace/chat/structure)\n- To configure your Chat app for interactive features, see [Receive and respond to user interactions](/workspace/chat/receive-respond-interactions)"]]