
借助 Google 幻灯片 API,您可以在页面上创建和修改表格。本页上的示例展示了如何使用
presentations.batchUpdate
方法执行一些常见的表格操作。
这些示例使用以下变量:
- PRESENTATION_ID - 表示您提供 演示文稿 ID的位置。您可以从演示文稿网址中找到此 ID 的值。
- PAGE_ID - 表示您提供 页面对象 ID 的位置。您可以从网址中检索此 ID 的值,也可以使用 API 读取请求来检索。
- TABLE_ID - 表示您提供要处理的表格的 页面 元素对象 ID 的位置。您可以为自己创建的元素指定此 ID (有一些限制) ,也可以让幻灯片 API 自动创建一个。您可以通过 API 读取请求检索元素 ID。
这些示例以 HTTP 请求的形式呈现,以保持语言中立。如需了解 如何使用 Google API 客户端库以不同语言实现批量更新,请参阅添加形状和 文本。
创建表
以下
presentations.batchUpdate
代码示例展示了如何使用
CreateTableRequest
方法将表格添加到由 PAGE_ID 指定的幻灯片中。
此表格有 8 行 5 列。请注意,幻灯片 API
会忽略作为
elementProperties的一部分提供的任何 size 或 transform 字段。
相反,API 会创建一个大致位于幻灯片中心位置的表格,并根据指定的行数和列数调整表格大小(如果可能)。
以下是创建表的请求协议:
POST https://slides.googleapis.com/v1/presentations/PRESENTATION_ID:batchUpdate
{
  "requests": [
    {
      "createTable": {
        "objectId": TABLE_ID,
        "elementProperties": {
          "pageObjectId": PAGE_ID,
        },
        "rows": 8,
        "columns": 5
      }
    }
  ]
}
删除表格行或列
以下
presentations.batchUpdate
代码示例展示了如何使用
DeleteTableRowRequest
方法移除第六行。然后,它使用
DeleteTableColumnRequest
方法移除第四列。表格由
TABLE_ID 指定。cellLocation 中的 rowIndex 和 columnIndex 均以 0 为基准。
以下是删除表格行或列的请求协议:
POST https://slides.googleapis.com/v1/presentations/PRESENTATION_ID:batchUpdate
{
  "requests": [
    {
      "deleteTableRow": {
        "tableObjectId": TABLE_ID,
        "cellLocation": {
          "rowIndex": 5
        }
      }
    },
    {
      "deleteTableColumn": {
        "tableObjectId": TABLE_ID,
        "cellLocation": {
          "columnIndex": 3
        }
      }
    }
  ]
}
修改表格数据
以下
presentations.batchUpdate
代码示例展示了如何使用
DeleteTextRequest
方法移除
textRange中单元格内的所有文本。然后,它使用
InsertTextRequest
方法将文本替换为新文本“Kangaroo”。
表格由 TABLE_ID 指定。受影响的单元格位于第五行第三列。cellLocation 中的 rowIndex 和 columnIndex 均以 0 为基准。
以下是修改表格数据的请求协议:
POST https://slides.googleapis.com/v1/presentations/PRESENTATION_ID:batchUpdate
{
  "requests": [
    {
      "deleteText": {
        "objectId": TABLE_ID,
        "cellLocation": {
          "rowIndex": 4,
          "columnIndex": 2
        },
        "textRange": {
          "type": "ALL",
        }
      }
    },
    {
      "insertText": {
        "objectId": TABLE_ID,
        "cellLocation": {
          "rowIndex": 4,
          "columnIndex": 2
        },
        "text": "Kangaroo",
        "insertionIndex": 0
      }
    }
  ]
}
设置表格标题行的格式
以下
presentations.batchUpdate
代码示例展示了如何使用
UpdateTableCellPropertiesRequest
方法设置表格元素的标题行的格式(在
tableRange内),由 TABLE_ID 指定。然后,它使用
TableCellProperties
方法将标题行的背景颜色设置为黑色。
以下每个请求都使用
UpdateTextStyleRequest
方法将标题行中一个单元格的文本格式设置为粗体、白色 18 号
Cambria 字体(在
textRange内)。然后,您需要为标题中的每个其他单元格重复此请求。
location 和 cellLocation 中的 rowIndex 和 columnIndex 均以 0 为基准。
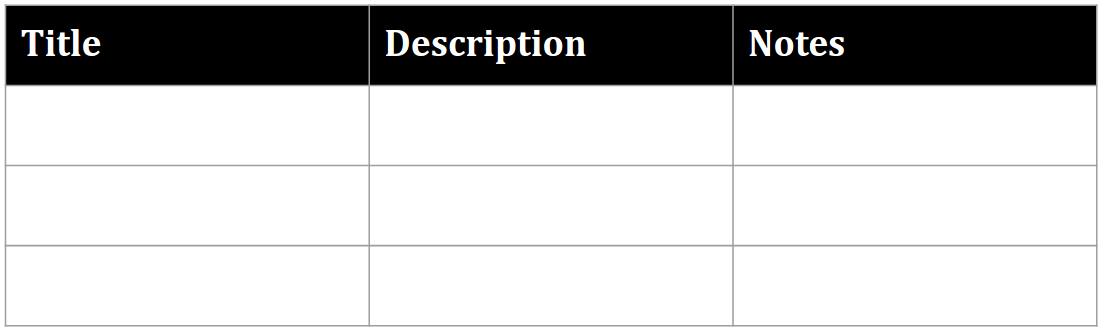
以下是设置表格标题行格式的请求协议:
POST https://slides.googleapis.com/v1/presentations/PRESENTATION_ID:batchUpdate
{
  "requests": [
    {
      "updateTableCellProperties": {
        "objectId": TABLE_ID,
        "tableRange": {
          "location": {
            "rowIndex": 0,
            "columnIndex": 0
          },
          "rowSpan": 1,
          "columnSpan": 3
        },
        "tableCellProperties": {
          "tableCellBackgroundFill": {
            "solidFill": {
              "color": {
                "rgbColor": {
                  "red": 0.0,
                  "green": 0.0,
                  "blue": 0.0
                }
              }
            }
          }
        },
        "fields": "tableCellBackgroundFill.solidFill.color"
      }
    },
    {
      "updateTextStyle": {
        "objectId": TABLE_ID,
        "cellLocation": {
          "rowIndex": 0,
          "columnIndex": 0
        },
        "style": {
          "foregroundColor": {
            "opaqueColor": {
              "rgbColor": {
                "red": 1.0,
                "green": 1.0,
                "blue": 1.0
              }
            }
          },
          "bold": true,
          "fontFamily": "Cambria",
          "fontSize": {
            "magnitude": 18,
            "unit": "PT"
          }
        },
        "textRange": {
          "type": "ALL"
        },
        "fields": "foregroundColor,bold,fontFamily,fontSize"
      }
    },
    // Repeat the above request for each additional cell in the header row....
  ]
}
以下是经过这些更新后设置了格式的标题行的外观:
插入表格行或列
以下
presentations.batchUpdate
代码示例展示了如何使用
InsertTableRowsRequest
方法在第六行下方添加三行。然后,它使用
InsertTableColumnsRequest
方法在同一表格中第四列的左侧添加两列。
表格由 TABLE_ID 指定。cellLocation 中的 rowIndex 和 columnIndex 均以 0 为基准。
以下是插入表格行或列的请求协议:
POST https://slides.googleapis.com/v1/presentations/PRESENTATION_ID:batchUpdate
{
  "requests": [
    {
      "insertTableRows": {
        "tableObjectId": TABLE_ID,
        "cellLocation": {
          "rowIndex": 5
        },
        "insertBelow": true,
        "number": 3
      }
    },
    {
      "insertTableColumns": {
        "tableObjectId": TABLE_ID,
        "cellLocation": {
          "columnIndex": 3
        },
        "insertRight": false,
        "number": 2
      }
    }
  ]
}