이 페이지에 설명된 단계에서는 YouTube Data API에 요청을 보내는 간단한 iOS 애플리케이션을 빠르게 만드는 방법을 설명합니다. 이 샘플은 GoogleDevelopers YouTube 채널에 관한 데이터를 가져오는 방법을 보여줍니다. 이 코드에는 현재 사용자의 YouTube 채널에 관한 데이터를 가져오도록 쿼리를 수정하는 방법을 설명하는 주석도 포함되어 있습니다.
기본 요건
이 빠른 시작을 실행하려면 다음이 필요합니다.
1단계: YouTube Data API 사용 설정
-
이 마법사를 사용하여 Google 개발자 콘솔에서 프로젝트를 만들거나 선택하고 API를 자동으로 사용 설정합니다. 계속을 클릭한 다음 사용자 인증 정보로 이동을 클릭합니다.
-
사용자 인증 정보 만들기 페이지에서 취소 버튼을 클릭합니다.
-
페이지 상단에서 OAuth 동의 화면 탭을 선택합니다. 이메일 주소를 선택하고 아직 설정되지 않은 경우 제품 이름을 입력한 다음 저장 버튼을 클릭합니다.
-
사용자 인증 정보 탭을 선택하고 사용자 인증 정보 만들기 버튼을 클릭한 후 OAuth 클라이언트 ID를 선택합니다.
- 애플리케이션 유형 iOS를 선택하고 이름 'YouTube Data API Quickstart'와 번들 ID
com.example.QuickstartApp를 입력한 후 만들기 버튼을 클릭합니다.
2단계: 작업공간 준비
- Xcode를 열고 새 프로젝트를 만듭니다.
- File > New > Project를 클릭하고 iOS > Application > Single View Application 템플릿을 선택한 후 Next를 클릭합니다.
- 제품 이름을 'QuickstartApp'으로, 조직 식별자를 'com.example'로, 언어를Objective-C로 설정합니다.
조직 식별자 아래에 1.b단계에서 입력한 iOS 번들 ID(
com.example.QuickstartApp)와 일치하는 생성된 번들 식별자가 표시됩니다. - 다음을 클릭합니다.
- 프로젝트의 대상 디렉터리를 선택하고 만들기를 클릭합니다.
- File > Close Project를 클릭하여 프로젝트를 닫습니다.
- 터미널 창을 열고 방금 만든
QuickstartApp.xcodeproj파일이 있는 디렉터리로 이동합니다. 다음 명령어를 실행하여 Podfile을 만들고 라이브러리를 설치하고 결과로 생성된 Xcode 프로젝트를 엽니다.
cat << EOF > Podfile &&
platform :ios, '8.0'
target 'QuickstartApp' do
    pod 'GoogleAPIClientForREST/YouTube', '~> 1.2.1'
    pod 'Google/SignIn', '~> 3.0.3'
end
EOF
pod install &&
open QuickstartApp.xcworkspace
Xcode 프로젝트 탐색기에서 'QuickstartApp' 프로젝트 노드를 선택합니다. 그런 다음 메뉴 항목 파일 > 'QuickstartApp'에 파일 추가를 클릭합니다.
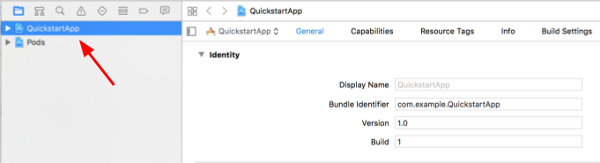
이전에 다운로드한
GoogleService-Info.plist파일을 찾아 선택합니다. 옵션 버튼을 클릭합니다.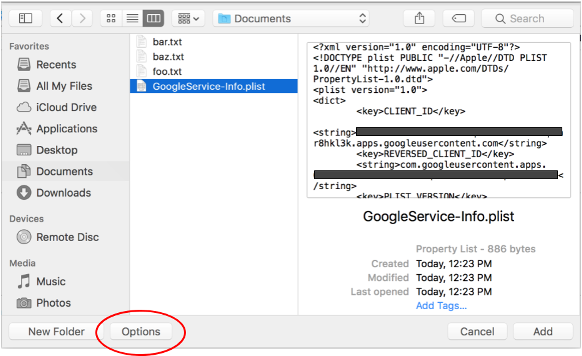
옵션 창에서 다음을 선택한 후 추가 버튼을 클릭합니다.
- 필요한 경우 항목 복사 체크박스를 선택합니다.
- 타겟에 추가 섹션에 나열된 모든 타겟을 선택합니다.

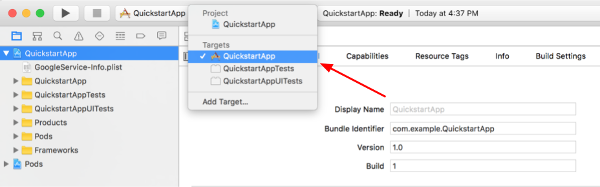
프로젝트 노드가 선택된 상태에서 아래 두 이미지에 표시된 대로 TARGETS 섹션에서 'QuickstartApp'을 선택합니다.
이 스크린샷에 표시된 영역을 클릭합니다.
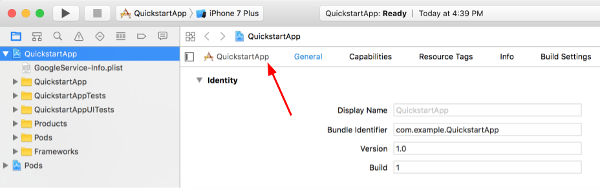
그런 다음 적절한 타겟을 선택합니다.
정보 탭을 선택하고 URL 유형 섹션을 펼칩니다.
+ 버튼을 클릭하고 반전된 클라이언트 ID의 URL 스키마를 추가합니다. 이 값을 찾으려면 2.f단계에서 선택한
GoogleService-Info.plist구성 파일을 엽니다. REVERSED_CLIENT_ID 키를 찾습니다. 이 키의 값을 복사하여 구성 페이지의 URL 스킴 상자에 붙여넣습니다. 다른 필드는 비워 둡니다.프로젝트를 다시 빌드합니다.
- 제품 > 빌드 폴더 정리를 클릭합니다 (옵션 키를 누른 상태).
- 제품 > 빌드를 클릭합니다.
3단계: 샘플 설정
다음 파일의 내용을 제공된 코드로 바꿉니다.#import <UIKit/UIKit.h> @import GoogleSignIn; @interface AppDelegate : UIResponder <UIApplicationDelegate> @property (strong, nonatomic) UIWindow *window; @end
#import "AppDelegate.h"

@implementation AppDelegate

- (BOOL)application:(UIApplication *)application
didFinishLaunchingWithOptions:(NSDictionary *)launchOptions {
    // Initialize Google sign-in.
    [GIDSignIn sharedInstance].clientID = @"<YOUR_CLIENT_ID>";

    return YES;
}

- (BOOL)application:(UIApplication *)application
            openURL:(NSURL *)url
  sourceApplication:(NSString *)sourceApplication
         annotation:(id)annotation {
    return [[GIDSignIn sharedInstance] handleURL:url
                               sourceApplication:sourceApplication
                                      annotation:annotation];
}


@end
#import <UIKit/UIKit.h>
@import GoogleSignIn;
#import <GTLRYouTube.h>

@interface ViewController : UIViewController <GIDSignInDelegate, GIDSignInUIDelegate>

@property (nonatomic, strong) IBOutlet GIDSignInButton *signInButton;
@property (nonatomic, strong) UITextView *output;
@property (nonatomic, strong) GTLRYouTubeService *service;


@end
#import "ViewController.h"

@implementation ViewController

- (void)viewDidLoad {
    [super viewDidLoad];
    // Configure Google Sign-in.
    GIDSignIn* signIn = [GIDSignIn sharedInstance];
    signIn.delegate = self;
    signIn.uiDelegate = self;
    signIn.scopes = [NSArray arrayWithObjects:kGTLRAuthScopeYouTubeReadonly, nil];
    [signIn signInSilently];

    // Add the sign-in button.
    self.signInButton = [[GIDSignInButton alloc] init];
    [self.view addSubview:self.signInButton];

    // Create a UITextView to display output.
    self.output = [[UITextView alloc] initWithFrame:self.view.bounds];
    self.output.editable = false;
    self.output.contentInset = UIEdgeInsetsMake(20.0, 0.0, 20.0, 0.0);
    self.output.autoresizingMask = UIViewAutoresizingFlexibleHeight | UIViewAutoresizingFlexibleWidth;
    self.output.hidden = true;
    [self.view addSubview:self.output];

    // Initialize the service object.
    self.service = [[GTLRYouTubeService alloc] init];
}

- (void)signIn:(GIDSignIn *)signIn
didSignInForUser:(GIDGoogleUser *)user
     withError:(NSError *)error {
    if (error != nil) {
        [self showAlert:@"Authentication Error" message:error.localizedDescription];
        self.service.authorizer = nil;
    } else {
        self.signInButton.hidden = true;
        self.output.hidden = false;
        self.service.authorizer = user.authentication.fetcherAuthorizer;
        [self fetchChannelResource];
    }
}


// Construct a query and retrieve the channel resource for the GoogleDevelopers
// YouTube channel. Display the channel title, description, and view count.
- (void)fetchChannelResource {
    GTLRYouTubeQuery_ChannelsList *query =
    [GTLRYouTubeQuery_ChannelsList queryWithPart:@"snippet,statistics"];
  query.identifier = @"UC_x5XG1OV2P6uZZ5FSM9Ttw";
  // To retrieve data for the current user's channel, comment out the previous
  // line (query.identifier ...) and uncomment the next line (query.mine ...).
  // query.mine = true;

  [self.service executeQuery:query
                    delegate:self
           didFinishSelector:@selector(displayResultWithTicket:finishedWithObject:error:)];
}

// Process the response and display output
- (void)displayResultWithTicket:(GTLRServiceTicket *)ticket
             finishedWithObject:(GTLRYouTube_ChannelListResponse *)channels
                          error:(NSError *)error {
  if (error == nil) {
    NSMutableString *output = [[NSMutableString alloc] init];
    if (channels.items.count > 0) {
      [output appendString:@"Channel information:\n"];
      for (GTLRYouTube_Channel *channel in channels) {
        NSString *title = channel.snippet.title;
        NSString *description = channel.snippet.description;
        NSNumber *viewCount = channel.statistics.viewCount;
        [output appendFormat:@"Title: %@\nDescription: %@\nViewCount: %@\n", title, description, viewCount];
      }
    } else {
      [output appendString:@"Channel not found."];
    }
    self.output.text = output;
  } else {
    [self showAlert:@"Error" message:error.localizedDescription];
  }
}


// Helper for showing an alert
- (void)showAlert:(NSString *)title message:(NSString *)message {
    UIAlertController *alert =
    [UIAlertController alertControllerWithTitle:title
                                        message:message
                                 preferredStyle:UIAlertControllerStyleAlert];
    UIAlertAction *ok =
    [UIAlertAction actionWithTitle:@"OK"
                             style:UIAlertActionStyleDefault
                           handler:^(UIAlertAction * action)
     {
         [alert dismissViewControllerAnimated:YES completion:nil];
     }];
    [alert addAction:ok];
    [self presentViewController:alert animated:YES completion:nil];
}


@end
4단계: 샘플 실행
제품 > 스키마 > QuickstartApp을 클릭하여 QuickstartApp 스키마로 전환하고 기기 시뮬레이터 또는 구성된 기기를 사용하여 샘플을 실행합니다 (Cmd+R). 샘플을 처음 실행하면 Google 계정에 로그인하고 액세스를 승인하라는 메시지가 표시됩니다.
참고
- 승인 정보가 키체인에 저장되므로 후속 실행에서는 승인을 요청하지 않습니다.