Authentication
컬렉션을 사용해 정리하기
내 환경설정을 기준으로 콘텐츠를 저장하고 분류하세요.
모든 Google Ad Manager API 호출은OAuth2
사용자가 서드 파티 애플리케이션에 권한을 부여할 수 있도록 허용하므로
사용자를 대신하여 웹 서비스와 상호작용할 수 있습니다. OAuth2를 사용하면
Ad Manager API 클라이언트 애플리케이션이 사용자의 Ad Manager 계정에 액세스하도록
사용자 이름이나 비밀번호를 처리하거나 저장할 필요가 없습니다.
OAuth2 사용자 인증 정보 생성
OAuth2 사용자 인증 정보를 생성하려면 다음 단계를 따르세요.
1. 인증 유형 확인
아래 표에서 가장 적절한 인증 유형을 확인하세요.
다음과 같습니다.
OAuth2 인증 유형 선택 |
서비스 계정 |
자체 Ad Manager 데이터에만 액세스해야 하는 경우 이 옵션을 선택하세요.
자세히 알아보기
|
웹 애플리케이션 |
권한을 부여하는 사용자로 인증하려면 이 옵션을 선택합니다.
권한을 부여해야 합니다.
자세히 알아보기
|
2. OAuth2 사용자 인증 정보 만들기
인증 유형을 확인했으면 해당 탭을 클릭합니다.
OAuth2 사용자 인증 정보를 생성하려면 아래 안내를 따르세요.
<ph type="x-smartling-placeholder">
</ph>
<ph type="x-smartling-placeholder"></ph>
-
Google API 콘솔 사용자 인증 정보 페이지를 참조하세요.
- 프로젝트 드롭다운에서 새 프로젝트 만들기를 선택하고 이름을 입력합니다.
필요한 경우 제공된 프로젝트 ID를 수정합니다. 클릭
만들기:
- 사용자 인증 정보 페이지에서 사용자 인증 정보 만들기를 선택한 다음
서비스 계정 키를 선택합니다.
- 새 서비스 계정을 선택하고 JSON을 선택합니다.
- 만들기를 클릭하여 비공개 키가 포함된 파일을 다운로드합니다.
를 통해 개인정보처리방침을 정의할 수 있습니다.
<ph type="x-smartling-placeholder"></ph>
-
Google API 콘솔 사용자 인증 정보 페이지를 참조하세요.
- 프로젝트 드롭다운에서 새 프로젝트 만들기를 선택하고 이름을 입력합니다.
(제공된 프로젝트 ID를 수정할 수도 있음) 클릭하고
만들기:
- 사용자 인증 정보 페이지에서 사용자 인증 정보 만들기를 선택한 다음
OAuth 클라이언트 ID를 선택합니다.
- 페이지에서 제품 이름을 설정하라는
동의 화면 페이지 이 경우 동의 화면 구성을 클릭합니다.
제공하고 저장을 클릭하여
사용자 인증 정보 페이지
- 애플리케이션 유형에서 웹 애플리케이션을 선택합니다.
안내에 따라 JavaScript 출처, 리디렉션 URI 또는 둘 다를 입력할 수 있습니다.
- 만들기를 클릭합니다.
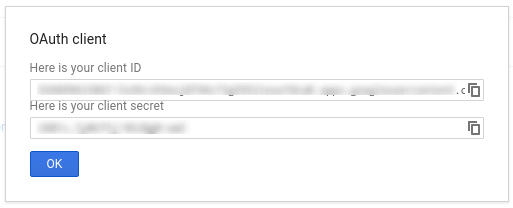
- 표시되는 페이지에서 클라이언트 ID와 클라이언트 보안 비밀번호를 복사합니다.
클립보드에 복사하면 됩니다.
있습니다.
서드 파티 개발자인 경우 클라이언트에게 이 작업을 수행하도록 해야 할 수도 있습니다.
준비해 두었습니다
<ph type="x-smartling-placeholder">
</ph>
<ph type="x-smartling-placeholder"></ph>
- Ad Manager 네트워크로 이동합니다.
- 관리 탭을 클릭합니다.
- API 액세스가 사용 설정되어 있는지 확인합니다.
- 서비스 계정 사용자 추가 버튼을 클릭합니다.
- 서비스 계정 이메일을 사용하여 양식을 작성합니다. 이
서비스 계정 사용자에게
마치 해당 서비스 계정 사용자가
있습니다.
- 저장 버튼을 클릭합니다. 메시지가 표시되어
서비스 계정을 추가할 수 있습니다
- 사용자 탭으로 이동하여 기존 서비스 계정 사용자를 확인한 다음
서비스 계정 필터를 클릭합니다.
를 통해 개인정보처리방침을 정의할 수 있습니다.
<ph type="x-smartling-placeholder"></ph>
- Ad Manager 네트워크로 이동합니다.
- 관리 탭을 클릭합니다.
- API 액세스가 사용 설정되어 있는지 확인합니다.
클라이언트 라이브러리에서 사용자 인증 정보를 사용하려면 다음 가이드를 따르세요.
클라이언트 라이브러리 중 하나를 사용하지 않으려면
OAuth2 서비스 계정 또는 웹
앱 흐름을 직접 관리하는 데 도움이 됩니다.
비하인드 스토리
클라이언트 라이브러리는 아래 설명된 세부사항을 자동으로 처리하므로
비하인드 스토리에 관심이 있는 경우에만 읽으세요.
이 섹션은 이미 익숙한 고급 사용자를 대상으로 합니다.
OAuth2 사양 및
Google API에서 OAuth2를 사용하는 방법을 알아야 합니다.
Ad Manager API로 전송되는 모든 요청의 HTTP 헤더에는
다음 형식으로 토큰화할 수 있습니다.
Authorization: Bearer ACCESS_TOKEN
예를 들면 다음과 같습니다.
POST … HTTP/1.1
Host: …
Authorization: Bearer 1/fFAGRNJru1FTz70BzhT3Zg
Content-Type: text/xml;charset=UTF-8
Content-Length: …
<?xml version="1.0"?>
<soap:Envelope xmlns:soap="http://www.w3.org/2001/12/soap-envelope">
…
</soap:Envelope>
범위
단일 액세스 토큰은 여러 API에 다양한 수준의 액세스 권한을 부여할 수 있습니다. 가
scope
이라는 변수 매개변수는 리소스 집합을 제어하고
작업을 실행할 수 있습니다. 액세스 토큰 요청 중
애플리케이션은 scope
매개변수에 하나 이상의 값을 전송합니다.
Ad Manager에는 아래와 같이 하나의 범위만 있습니다. 인증을 수행해야 합니다.
제품 내 사용자 수준에서 이루어집니다
범위 |
권한 |
https://www.googleapis.com/auth/dfp |
Ad Manager에서 캠페인을 보고 관리합니다. |
달리 명시되지 않는 한 이 페이지의 콘텐츠에는 Creative Commons Attribution 4.0 라이선스에 따라 라이선스가 부여되며, 코드 샘플에는 Apache 2.0 라이선스에 따라 라이선스가 부여됩니다. 자세한 내용은 Google Developers 사이트 정책을 참조하세요. 자바는 Oracle 및/또는 Oracle 계열사의 등록 상표입니다.
최종 업데이트: 2025-08-31(UTC)
[null,null,["최종 업데이트: 2025-08-31(UTC)"],[[["\u003cp\u003eAll Google Ad Manager API calls require OAuth2 authorization for secure access to user data without storing sensitive login information.\u003c/p\u003e\n"],["\u003cp\u003eChoose between Service Account or Web Application authentication type based on your application's needs.\u003c/p\u003e\n"],["\u003cp\u003eGenerate OAuth2 credentials by following instructions for your chosen authentication type via the Google API Console.\u003c/p\u003e\n"],["\u003cp\u003eConfigure your Ad Manager network settings and client library according to provided guidelines for the specific authentication method and programming language.\u003c/p\u003e\n"],["\u003cp\u003eClient libraries handle most OAuth2 complexities but you can delve into the background details concerning HTTP headers and scopes if needed.\u003c/p\u003e\n"]]],["Google Ad Manager API access requires OAuth2 authorization. First, choose between \"Service account\" for personal data or \"Web application\" for user-authorized access. Then, create OAuth2 credentials via the Google API Console, either generating a JSON key for service accounts or a client ID and secret for web applications. Next, configure the Ad Manager network to allow API access, adding the service account email if applicable. Lastly, configure and use a client library, or implement the OAuth2 flow directly, including the access token in the HTTP header.\n"],null,["# Authentication\n\nAll Google Ad Manager API calls must be authorized through [OAuth2](http://oauth.net/2/) an open standard that\nallows users to grant permissions to third-party applications, so the\napplication can interact with web services on the user's behalf. OAuth2 enables\nyour Ad Manager API client application to access a user's Ad Manager account\nwithout having to handle or store the user's username or password.\n\nGenerate OAuth2 credentials\n---------------------------\n\nPerform the following steps to generate the OAuth2 credentials.\n\n### 1. Determine your authentication type\n\nCheck the table below to see which **authentication type** is most appropriate\nfor your Ad Manager API application:\n\n| Choose your OAuth2 authentication type ||\n|---------------------|-----------------------------------------------------------------------------------------------------------------------------------------------------------------------------------|\n| **Service account** | Choose this if you only need access to your own Ad Manager data. [Learn more.](/identity/protocols/OAuth2ServiceAccount) |\n| **Web application** | Choose this if you want to authenticate as any user who grants permission to your application to access their Ad Manager data. [Learn more.](/identity/protocols/OAuth2WebServer) |\n\n### 2. Create OAuth2 credentials\n\nOnce you've determined your authentication type, click the corresponding tab\nbelow and follow the instructions to generate the OAuth2 credentials:\nService Account\n\n1. Open the [Google API Console Credentials page](https://console.cloud.google.com/apis/credentials).\n2. From the project drop-down, choose **Create a new project** , enter a name for the project, and optionally, edit the provided Project ID. Click **Create**.\n3. On the Credentials page, select **Create credentials** , then select **Service account key**.\n4. Select [New service account](//console.developers.google.com/apis/credentials/serviceaccountkey), and select **JSON**.\n5. Click **Create** to download a file containing a private key.\nWeb application\n\n1. Open the [Google API Console Credentials page](https://console.cloud.google.com/apis/credentials).\n2. From the project drop-down, choose **Create a new project** , enter a name for the project (and optionally, edit the provided Project ID), and click **Create**.\n3. On the Credentials page, select **Create credentials** , then select **OAuth client ID**.\n4. You may be prompted to set a product name on the Consent Screen page; if so, click **Configure consent screen** , supply the requested information, and click **Save** to return to the Credentials page.\n5. Select **Web Application** for the **Application Type**. Follow the instructions to enter JavaScript origins, redirect URIs, or both.\n6. Click **Create**.\n7. On the page that appears, copy the **client ID** and **client secret** to your clipboard, as you will need them when you configure your client library.\n\n### 3. Configure your Ad Manager network\n\nIf you are a third-party developer, you may need to have your client do this\nstep for you.\nService Account\n\n1. Go to your [Ad Manager network](//admanager.google.com).\n2. Click the **Admin** tab.\n3. Ensure that **API access** is enabled.\n4. Click the **Add a service account user** button.\n5. Fill in the form using the service account email. The service account user must be granted with permissions to access the entities as if that service account user would access the entities on the UI.\n6. Click on the **Save** button. A message should appear, confirming the addition of your service account.\n7. View existing service account users by going to the Users tab and then clicking the **Service Account** filter.\nWeb application\n\n1. Go to your [Ad Manager network](//admanager.google.com).\n2. Click the **Admin** tab.\n3. Ensure that **API access** is enabled.\n\n### 4. Configure and use a client library\n\nFollow the appropriate guide below to use the credentials in your client library: \n\n### Java\n\n- [Service account flow](//github.com/googleads/googleads-java-lib/wiki/API-access-using-own-credentials-(server-to-server-flow)#step-2---setting-up-the-client-library)\n- [Web app flow](//github.com/googleads/googleads-java-lib/wiki/API-access-on-behalf-of-your-clients-(web-flow)#step-2---setting-up-the-client-library)\n\n### .NET\n\n- [Service account flow](//github.com/googleads/googleads-dotnet-lib/wiki/API-access-using-own-credentials-(server-to-server-flow)#step-2---setting-up-the-client-library)\n- [Web app flow](//github.com/googleads/googleads-dotnet-lib/wiki/API-access-on-behalf-of-your-clients-(web-flow)#step-2---setting-up-the-client-library)\n\n### Python\n\n- [Service account flow](//github.com/googleads/googleads-python-lib/wiki/API-access-using-own-credentials-(server-to-server-flow)#step-2---setting-up-the-client-library)\n- [Web app flow](//github.com/googleads/googleads-python-lib/wiki/API-access-on-behalf-of-your-clients-(web-flow)#step-2---setting-up-the-client-library)\n\n### PHP\n\n- [Service account flow](https://github.com/googleads/googleads-php-lib/wiki/API-access-using-own-credentials-(server-to-server-flow))\n- [Web app flow](https://github.com/googleads/googleads-php-lib/wiki/API-access-on-behalf-of-your-clients-(web-flow))\n\n### Ruby\n\n- [Service account flow](//github.com/googleads/google-api-ads-ruby/wiki/API-access-using-own-credentials-(server-to-server-flow)#step-2---setting-up-the-client-library)\n- [Web app flow](//github.com/googleads/google-api-ads-ruby/wiki/API-access-on-behalf-of-your-clients-(web-flow)#step-2---setting-up-the-client-library)\n\n\u003cbr /\u003e\n\nIf you choose not to use one of our client libraries, you'll need to implement\nthe OAuth2 [service account](/identity/protocols/OAuth2ServiceAccount) or [web\napp](/identity/protocols/OAuth2WebServer) flow yourself.\n\nBehind the scenes\n-----------------\n\nOur client libraries automatically take care of the details covered below so\nonly read on if you're interested in what's happening behind the scenes.\nThis section is intended for advanced users who are already familiar\nwith the [OAuth2 specification](http://tools.ietf.org/html/rfc6749) and\nknow how to [use OAuth2 with Google APIs](/accounts/docs/OAuth2).\n\n#### HTTP request header\n\nThe HTTP header in every request to the Ad Manager API must include an access\ntoken in this form: \n\n```actionscript-3\nAuthorization: Bearer ACCESS_TOKEN\n```\n\nFor example: \n\n```http\nPOST ... HTTP/1.1\nHost: ...\nAuthorization: Bearer 1/fFAGRNJru1FTz70BzhT3Zg\nContent-Type: text/xml;charset=UTF-8\nContent-Length: ...\n\n\u003c?xml version=\"1.0\"?\u003e\n\u003csoap:Envelope xmlns:soap=\"http://www.w3.org/2001/12/soap-envelope\"\u003e\n…\n\u003c/soap:Envelope\u003e\n```\n\n#### Scope\n\nA single access token can grant varying degrees of access to multiple APIs. A\nvariable parameter called `scope` controls the set of resources and\noperations that an access token permits. During the access token request, your\napplication sends one or more values in the `scope` parameter.\n\nAd Manager has only one scope, shown below. Authorization should be performed\nat the user level within the product.\n\n| Scope | Permissions |\n|---------------------------------------|-----------------------------------------------|\n| `https://www.googleapis.com/auth/dfp` | View and manage your campaigns on Ad Manager. |"]]