Authentication
透過集合功能整理內容
你可以依據偏好儲存及分類內容。
所有 Google Ad Manager API 呼叫都必須透過 OAuth2 公開標準
讓使用者將權限授予第三方應用程式,因此
應用程式可代表使用者與網路服務互動。OAuth2 啟用
您的 Ad Manager API 用戶端應用程式,存取使用者的 Ad Manager 帳戶
無需處理或儲存使用者的使用者名稱和密碼
產生 OAuth2 憑證
請按照下列步驟產生 OAuth2 憑證。
1. 決定驗證類型
請參閱下表,瞭解最合適的驗證類型
Ad Manager API 應用程式:
選擇 OAuth2 驗證類型 |
服務帳戶 |
如果您只需要存取自己的 Ad Manager 資料,請選擇這個選項。
瞭解詳情。
|
網頁應用程式 |
如要以任何授予授權的使用者身分進行驗證,請選擇這個選項
授予應用程式存取 Ad Manager 資料的權限。
瞭解詳情。
|
2. 建立 OAuth2 憑證
決定驗證類型後,按一下對應的分頁
並按照操作說明產生 OAuth2 憑證:
- 開啟
Google API 控制台「憑證」頁面。
- 從專案下拉式選單中選取 [建立新專案] 並輸入名稱。
並視需要編輯提供的專案 ID。按一下
建立。
- 在「憑證」頁面上選取「建立憑證」,然後
選取「服務帳戶金鑰」。
- 選取「New service account」(新增服務帳戶),然後選取「JSON」JSON。
- 按一下「建立」,下載內含私密金鑰的檔案。
,瞭解如何調查及移除這項存取權。
- 開啟
Google API 控制台「憑證」頁面。
- 從專案下拉式選單中選取 [建立新專案] 並輸入名稱。
(也可視需要編輯提供的專案 ID),然後按一下
建立。
- 在「憑證」頁面上選取「建立憑證」,然後
選取「OAuth 用戶端 ID」。
- 系統可能會提示您設定產品名稱
同意畫面頁面;如果需要,請按一下「設定同意畫面」。
提供必要資訊,然後按一下 [儲存] 返回
「憑證」頁面。
- 在「應用程式類型」中選取 [網路應用程式]。跟著
瞭解如何輸入 JavaScript 來源和/或重新導向 URI。
- 按一下「建立」。
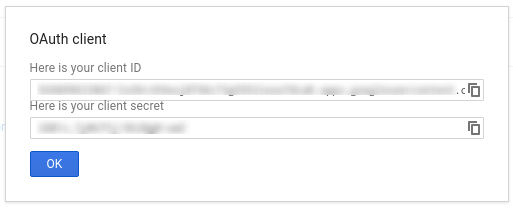
- 在隨即顯示的網頁中,複製「用戶端 ID」與「用戶端密鑰」。
到剪貼簿,因為在設定用戶端時將會需要
資源庫。
如果您是第三方開發人員,可能需要請客戶進行這項操作
。
- 前往您的 Ad Manager 聯播網。
- 按一下 [管理] 標籤。
- 確認已啟用 API 存取權。
- 按一下「新增服務帳戶使用者」按鈕。
- 使用服務帳戶電子郵件地址填寫表單。
服務帳戶使用者必須獲得
就好比服務帳戶使用者能存取
以及如何透過使用者介面
- 按一下「Save」按鈕。系統會顯示訊息
以及新增服務帳戶
- 如要查看現有服務帳戶使用者,請前往「使用者」分頁,然後
按一下 [Service Account] (服務帳戶) 篩選器。
,瞭解如何調查及移除這項存取權。
- 前往您的 Ad Manager 聯播網。
- 按一下 [管理] 標籤。
- 確認已啟用 API 存取權。
請按照下列適當指南使用用戶端程式庫中的憑證:
如果您選擇不使用我們的用戶端程式庫,就必須將
OAuth2 服務帳戶或網路
應用程式流程
幕後花絮
我們的用戶端程式庫會自動處理下方的細節,因此
但一定要瞭解幕後花絮。
本節適用於熟悉的進階使用者
OAuth2 規格和
瞭解如何搭配使用 OAuth2 與 Google API。
傳送至 Ad Manager API 的每個請求中,HTTP 標頭都必須包含存取權
符記:
Authorization: Bearer ACCESS_TOKEN
例如:
POST … HTTP/1.1
Host: …
Authorization: Bearer 1/fFAGRNJru1FTz70BzhT3Zg
Content-Type: text/xml;charset=UTF-8
Content-Length: …
<?xml version="1.0"?>
<soap:Envelope xmlns:soap="http://www.w3.org/2001/12/soap-envelope">
…
</soap:Envelope>
範圍
單一存取權杖可以授予不同程度的多個 API 存取權。A 罩杯
名為 scope
的變數參數可控制一組資源和
作業。在存取權杖要求期間,您的
應用程式會在 scope
參數中傳送一或多個值。
Ad Manager 只有一個範圍,如下所示。應執行授權
產品內使用者層級的操作
範圍 |
權限 |
https://www.googleapis.com/auth/dfp |
查看及管理您在 Ad Manager 中的廣告活動。 |
除非另有註明,否則本頁面中的內容是採用創用 CC 姓名標示 4.0 授權,程式碼範例則為阿帕契 2.0 授權。詳情請參閱《Google Developers 網站政策》。Java 是 Oracle 和/或其關聯企業的註冊商標。
上次更新時間:2025-08-31 (世界標準時間)。
[null,null,["上次更新時間:2025-08-31 (世界標準時間)。"],[[["\u003cp\u003eAll Google Ad Manager API calls require OAuth2 authorization for secure access to user data without storing sensitive login information.\u003c/p\u003e\n"],["\u003cp\u003eChoose between Service Account or Web Application authentication type based on your application's needs.\u003c/p\u003e\n"],["\u003cp\u003eGenerate OAuth2 credentials by following instructions for your chosen authentication type via the Google API Console.\u003c/p\u003e\n"],["\u003cp\u003eConfigure your Ad Manager network settings and client library according to provided guidelines for the specific authentication method and programming language.\u003c/p\u003e\n"],["\u003cp\u003eClient libraries handle most OAuth2 complexities but you can delve into the background details concerning HTTP headers and scopes if needed.\u003c/p\u003e\n"]]],["Google Ad Manager API access requires OAuth2 authorization. First, choose between \"Service account\" for personal data or \"Web application\" for user-authorized access. Then, create OAuth2 credentials via the Google API Console, either generating a JSON key for service accounts or a client ID and secret for web applications. Next, configure the Ad Manager network to allow API access, adding the service account email if applicable. Lastly, configure and use a client library, or implement the OAuth2 flow directly, including the access token in the HTTP header.\n"],null,["# Authentication\n\nAll Google Ad Manager API calls must be authorized through [OAuth2](http://oauth.net/2/) an open standard that\nallows users to grant permissions to third-party applications, so the\napplication can interact with web services on the user's behalf. OAuth2 enables\nyour Ad Manager API client application to access a user's Ad Manager account\nwithout having to handle or store the user's username or password.\n\nGenerate OAuth2 credentials\n---------------------------\n\nPerform the following steps to generate the OAuth2 credentials.\n\n### 1. Determine your authentication type\n\nCheck the table below to see which **authentication type** is most appropriate\nfor your Ad Manager API application:\n\n| Choose your OAuth2 authentication type ||\n|---------------------|-----------------------------------------------------------------------------------------------------------------------------------------------------------------------------------|\n| **Service account** | Choose this if you only need access to your own Ad Manager data. [Learn more.](/identity/protocols/OAuth2ServiceAccount) |\n| **Web application** | Choose this if you want to authenticate as any user who grants permission to your application to access their Ad Manager data. [Learn more.](/identity/protocols/OAuth2WebServer) |\n\n### 2. Create OAuth2 credentials\n\nOnce you've determined your authentication type, click the corresponding tab\nbelow and follow the instructions to generate the OAuth2 credentials:\nService Account\n\n1. Open the [Google API Console Credentials page](https://console.cloud.google.com/apis/credentials).\n2. From the project drop-down, choose **Create a new project** , enter a name for the project, and optionally, edit the provided Project ID. Click **Create**.\n3. On the Credentials page, select **Create credentials** , then select **Service account key**.\n4. Select [New service account](//console.developers.google.com/apis/credentials/serviceaccountkey), and select **JSON**.\n5. Click **Create** to download a file containing a private key.\nWeb application\n\n1. Open the [Google API Console Credentials page](https://console.cloud.google.com/apis/credentials).\n2. From the project drop-down, choose **Create a new project** , enter a name for the project (and optionally, edit the provided Project ID), and click **Create**.\n3. On the Credentials page, select **Create credentials** , then select **OAuth client ID**.\n4. You may be prompted to set a product name on the Consent Screen page; if so, click **Configure consent screen** , supply the requested information, and click **Save** to return to the Credentials page.\n5. Select **Web Application** for the **Application Type**. Follow the instructions to enter JavaScript origins, redirect URIs, or both.\n6. Click **Create**.\n7. On the page that appears, copy the **client ID** and **client secret** to your clipboard, as you will need them when you configure your client library.\n\n### 3. Configure your Ad Manager network\n\nIf you are a third-party developer, you may need to have your client do this\nstep for you.\nService Account\n\n1. Go to your [Ad Manager network](//admanager.google.com).\n2. Click the **Admin** tab.\n3. Ensure that **API access** is enabled.\n4. Click the **Add a service account user** button.\n5. Fill in the form using the service account email. The service account user must be granted with permissions to access the entities as if that service account user would access the entities on the UI.\n6. Click on the **Save** button. A message should appear, confirming the addition of your service account.\n7. View existing service account users by going to the Users tab and then clicking the **Service Account** filter.\nWeb application\n\n1. Go to your [Ad Manager network](//admanager.google.com).\n2. Click the **Admin** tab.\n3. Ensure that **API access** is enabled.\n\n### 4. Configure and use a client library\n\nFollow the appropriate guide below to use the credentials in your client library: \n\n### Java\n\n- [Service account flow](//github.com/googleads/googleads-java-lib/wiki/API-access-using-own-credentials-(server-to-server-flow)#step-2---setting-up-the-client-library)\n- [Web app flow](//github.com/googleads/googleads-java-lib/wiki/API-access-on-behalf-of-your-clients-(web-flow)#step-2---setting-up-the-client-library)\n\n### .NET\n\n- [Service account flow](//github.com/googleads/googleads-dotnet-lib/wiki/API-access-using-own-credentials-(server-to-server-flow)#step-2---setting-up-the-client-library)\n- [Web app flow](//github.com/googleads/googleads-dotnet-lib/wiki/API-access-on-behalf-of-your-clients-(web-flow)#step-2---setting-up-the-client-library)\n\n### Python\n\n- [Service account flow](//github.com/googleads/googleads-python-lib/wiki/API-access-using-own-credentials-(server-to-server-flow)#step-2---setting-up-the-client-library)\n- [Web app flow](//github.com/googleads/googleads-python-lib/wiki/API-access-on-behalf-of-your-clients-(web-flow)#step-2---setting-up-the-client-library)\n\n### PHP\n\n- [Service account flow](https://github.com/googleads/googleads-php-lib/wiki/API-access-using-own-credentials-(server-to-server-flow))\n- [Web app flow](https://github.com/googleads/googleads-php-lib/wiki/API-access-on-behalf-of-your-clients-(web-flow))\n\n### Ruby\n\n- [Service account flow](//github.com/googleads/google-api-ads-ruby/wiki/API-access-using-own-credentials-(server-to-server-flow)#step-2---setting-up-the-client-library)\n- [Web app flow](//github.com/googleads/google-api-ads-ruby/wiki/API-access-on-behalf-of-your-clients-(web-flow)#step-2---setting-up-the-client-library)\n\n\u003cbr /\u003e\n\nIf you choose not to use one of our client libraries, you'll need to implement\nthe OAuth2 [service account](/identity/protocols/OAuth2ServiceAccount) or [web\napp](/identity/protocols/OAuth2WebServer) flow yourself.\n\nBehind the scenes\n-----------------\n\nOur client libraries automatically take care of the details covered below so\nonly read on if you're interested in what's happening behind the scenes.\nThis section is intended for advanced users who are already familiar\nwith the [OAuth2 specification](http://tools.ietf.org/html/rfc6749) and\nknow how to [use OAuth2 with Google APIs](/accounts/docs/OAuth2).\n\n#### HTTP request header\n\nThe HTTP header in every request to the Ad Manager API must include an access\ntoken in this form: \n\n```actionscript-3\nAuthorization: Bearer ACCESS_TOKEN\n```\n\nFor example: \n\n```http\nPOST ... HTTP/1.1\nHost: ...\nAuthorization: Bearer 1/fFAGRNJru1FTz70BzhT3Zg\nContent-Type: text/xml;charset=UTF-8\nContent-Length: ...\n\n\u003c?xml version=\"1.0\"?\u003e\n\u003csoap:Envelope xmlns:soap=\"http://www.w3.org/2001/12/soap-envelope\"\u003e\n…\n\u003c/soap:Envelope\u003e\n```\n\n#### Scope\n\nA single access token can grant varying degrees of access to multiple APIs. A\nvariable parameter called `scope` controls the set of resources and\noperations that an access token permits. During the access token request, your\napplication sends one or more values in the `scope` parameter.\n\nAd Manager has only one scope, shown below. Authorization should be performed\nat the user level within the product.\n\n| Scope | Permissions |\n|---------------------------------------|-----------------------------------------------|\n| `https://www.googleapis.com/auth/dfp` | View and manage your campaigns on Ad Manager. |"]]