Page Summary
-
Ad Manager API calls require authorization through OAuth2, an open standard for granting third-party application permissions without sharing user credentials.
-
You can choose between two OAuth2 authentication types: Service account for accessing your own data or Web application for accessing data on behalf of any user who grants permission.
-
Generating OAuth2 credentials involves creating a new project in the Google API Console and following specific steps for either service account or web application types.
-
After generating credentials, you need to configure your Ad Manager network by enabling API access and potentially adding a service account user.
-
Finally, you configure and use a client library for your chosen programming language to implement the OAuth2 flow with the generated credentials.
All Google Ad Manager API calls must be authorized through OAuth2 an open standard that allows users to grant permissions to third-party applications, so the application can interact with web services on the user's behalf. OAuth2 enables your Ad Manager API client application to access a user's Ad Manager account without having to handle or store the user's username or password.
Generate OAuth2 credentials
Perform the following steps to generate the OAuth2 credentials.
1. Determine your authentication type
Check the table below to see which authentication type is most appropriate for your Ad Manager API application:
| Choose your OAuth2 authentication type | |
|---|---|
| Service account |
Choose this if you only need access to your own Ad Manager data. Learn more. |
| Web application |
Choose this if you want to authenticate as any user who grants permission to your application to access their Ad Manager data. Learn more. |
2. Create OAuth2 credentials
Once you've determined your authentication type, click the corresponding tab below and follow the instructions to generate the OAuth2 credentials:
- Open the Google API Console Credentials page.
- From the project drop-down, choose Create a new project, enter a name for the project, and optionally, edit the provided Project ID. Click Create.
- On the Credentials page, select Create credentials, then select Service account key.
- Select New service account, and select JSON.
- Click Create to download a file containing a private key.
- Open the Google API Console Credentials page.
- From the project drop-down, choose Create a new project, enter a name for the project (and optionally, edit the provided Project ID), and click Create.
- On the Credentials page, select Create credentials, then select OAuth client ID.
- You may be prompted to set a product name on the Consent Screen page; if so, click Configure consent screen, supply the requested information, and click Save to return to the Credentials page.
- Select Web Application for the Application Type. Follow the instructions to enter JavaScript origins, redirect URIs, or both.
- Click Create.
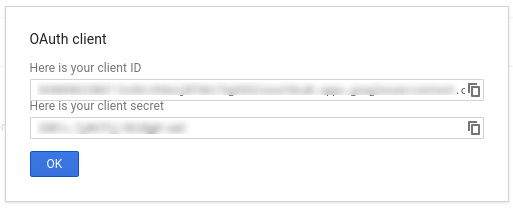
- On the page that appears, copy the client ID and client secret to your clipboard, as you will need them when you configure your client library.

3. Configure your Ad Manager network
If you are a third-party developer, you may need to have your client do this step for you.
- Go to your Ad Manager network.
- Click the Admin tab.
- Ensure that API access is enabled.
- Click the Add a service account user button.
- Fill in the form using the service account email. The service account user must be granted with permissions to access the entities as if that service account user would access the entities on the UI.
- Click on the Save button. A message should appear, confirming the addition of your service account.
- View existing service account users by going to the Users tab and then clicking the Service Account filter.
- Go to your Ad Manager network.
- Click the Admin tab.
- Ensure that API access is enabled.
4. Configure and use a client library
Follow the appropriate guide below to use the credentials in your client library:
Java
.NET
Python
PHP
Ruby
If you choose not to use one of our client libraries, you'll need to implement the OAuth2 service account or web app flow yourself.
Behind the scenes
Our client libraries automatically take care of the details covered below so only read on if you're interested in what's happening behind the scenes. This section is intended for advanced users who are already familiar with the OAuth2 specification and know how to use OAuth2 with Google APIs.
HTTP request header
The HTTP header in every request to the Ad Manager API must include an access token in this form:
Authorization: Bearer ACCESS_TOKEN
For example:
POST … HTTP/1.1
Host: …
Authorization: Bearer 1/fFAGRNJru1FTz70BzhT3Zg
Content-Type: text/xml;charset=UTF-8
Content-Length: …

<?xml version="1.0"?>
<soap:Envelope xmlns:soap="http://www.w3.org/2001/12/soap-envelope">
…
</soap:Envelope>
Scope
A single access token can grant varying degrees of access to multiple APIs. A
variable parameter called scope controls the set of resources and
operations that an access token permits. During the access token request, your
application sends one or more values in the scope parameter.
Ad Manager has only one scope, shown below. Authorization should be performed at the user level within the product.
| Scope | Permissions |
|---|---|
https://www.googleapis.com/auth/dfp |
View and manage your campaigns on Ad Manager. |
