با مجموعهها، منظم بمانید
ذخیره و طبقهبندی محتوا براساس اولویتهای شما.
یک پروژه اکشن تمام اکشن های شما را در یک ظرف واحد بسته بندی می کند. شما این پروژه را در Actions on Google منتشر میکنید تا «دستیار Google» بداند چگونه تجربیات مکالمهای شما را کشف و فراخوانی کند.
شکل 1 . ساختار پروژه اقدامات
شما از اجزای سطح پایین زیر برای ساخت پروژه Actions خود استفاده می کنید:
تنظیمات و منابع ابرداده پروژه و منابعی مانند نمادهای پروژه را تعریف می کنند. Google از این اطلاعات برای انتشار Actions شما در فهرست راهنمای Assistant استفاده میکند تا کاربران بتوانند آنها را کشف کرده و فراخوانی کنند.
Intent ها وظیفه ای را نشان می دهند که باید انجام شود، مانند برخی از ورودی های کاربر یا یک رویداد سیستم که نیاز به پردازش دارد. متداول ترین نوع قصدی که استفاده می کنید، مقاصد کاربر است. این مقاصد به شما امکان میدهد عبارات آموزشی را که به طور طبیعی توسط موتور NLU (درک زبان طبیعی) گسترش مییابد تا عبارات مشابه بیشتری را شامل شود، اعلام کنید. NLU از تجمیع این عبارات برای آموزش یک مدل زبان استفاده می کند که دستیار برای مطابقت با ورودی کاربر استفاده می کند. در طول مکالمه، اگر برخی از ورودی های کاربر با مدل زبان intent مطابقت داشته باشد، Assistant runtime intent را به Action شما ارسال می کند تا بتواند آن را پردازش کرده و به کاربر پاسخ دهد.
انواع به شما امکان می دهد داده های ساخت یافته را از ورودی کاربر استخراج کنید. با حاشیه نویسی عبارات آموزشی با انواع، NLU می تواند داده های مرتبط و ساختار یافته را برای شما استخراج کند، بنابراین شما مجبور نیستید ورودی های باز را تجزیه کنید.
صحنه ها اهداف را پردازش می کنند و مجریان منطق اصلی برای Actions شما هستند. آنها می توانند پر کردن شکاف ها را انجام دهند، منطق شرطی را ارزیابی کنند، درخواست ها را به کاربر برگردانند، و حتی از خدمات وب خارجی برای اجرای منطق تجاری فراخوانی کنند. در ترکیب با مقاصد، صحنه ها راهی قدرتمند برای شناسایی ورودی های کاربر خاص یا رویدادهای سیستم و اجرای منطق مربوطه به شما می دهند.
درخواستها پاسخهای ایستا یا پویا را تعریف میکنند که از آنها برای پاسخ دادن به کاربران استفاده میکنید.
Webhooks به شما امکان میدهد کار اضافی را به سرویسهای وب واگذار کنید (تکمیل)، مانند اعتبارسنجی دادهها یا ایجاد درخواستها. اقدامات شما از طریق یک پروتکل webhook مبتنی بر JSON با انجام شما ارتباط برقرار می کند.
بوم تعاملی به شما امکان می دهد با برنامه های وب که از HTML، CSS و جاوا اسکریپت استفاده می کنند، تجربیات غنی و همه جانبه ایجاد کنید.
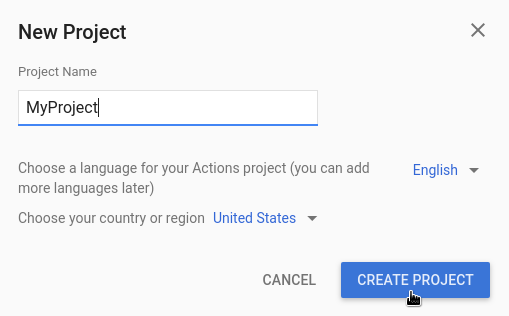
یک پروژه ایجاد کنید
قبل از اینکه بتوانید برای Google Assistant توسعه دهید، باید یک پروژه در کنسول Actions ایجاد کنید. برای ایجاد یک پروژه:
یک نام برای پروژه خود وارد کنید و روی ایجاد پروژه کلیک کنید.
در چه نوع اکشنی می خواهید بسازید؟ در صفحه، دسته ای را انتخاب کنید که به بهترین شکل پروژه شما را نشان می دهد و روی Next کلیک کنید.
در صفحه چگونه می خواهید آن را بسازید ، روشی را برای ساخت انتخاب کنید و روی Start building کلیک کنید. به عنوان مثال، می توانید با یک پروژه خالی یا با یک نمونه شروع کنید.
تعریف اطلاعات پروژه
تنظیمات و منابع پروژه شما اطلاعاتی را درباره پروژه شما مانند پشتیبانی از ویژگی و سطح، مناطق پشتیبانی شده، نام نمایش، توضیحات، لوگوها و موارد دیگر تعریف می کند. جدول زیر تنظیمات اصلی و منابعی را که ارائه می کنید توضیح می دهد. Actions on Google از این اطلاعات برای استقرار و انتشار پروژه شما در فهرست راهنمای Assistant استفاده می کند.
نام
توضیحات
اطلاعات دایرکتوری
اطلاعاتی را ارائه می دهد تا Actions on Google بتواند پروژه شما را در فهرست راهنمای Assistant منتشر کند. شامل متادیتا و توضیحاتی در مورد پروژه شما و منابع تصویری برای لوگوها و تصاویر بنر است.
مکان یابی
مناطقی را که Actions شما در آنها در دسترس هستند پیکربندی می کند.
قابلیت های سطحی
سطوحی را که Actions شما در آنها در دسترس هستند پیکربندی می کند.
جزئیات شرکت
اطلاعات تماس شرکت شما را مشخص می کند.
تایید برند
وبسایت یا برنامه اندرویدی را که مالک آن هستید وصل کنید تا از مزایای اضافی مانند نامهای فراخوان رزرو شده و پیوند وبسایت در Actions خود استفاده کنید.
رها کنید
نسخه های مختلف آزمایش و تولید را برای Action شما برای آزمایش و تولید پیکربندی می کند.
پیوندهای دستیار
به کاربران اجازه دهید تا Actions شما را از ویژگی های وب شما فراخوانی کنند.
برای تعریف اطلاعات پروژه:
تست پروژه ها در شبیه ساز
کنسول Actions یک شبیهساز برای پیشنمایش اقدامات شما ارائه میکند. شبیهساز به شما امکان میدهد اطلاعات اشکالزدایی را ببینید، قابلیتهای دستگاه را تنظیم کنید، محلی را شبیهسازی کنید، و موارد دیگر.
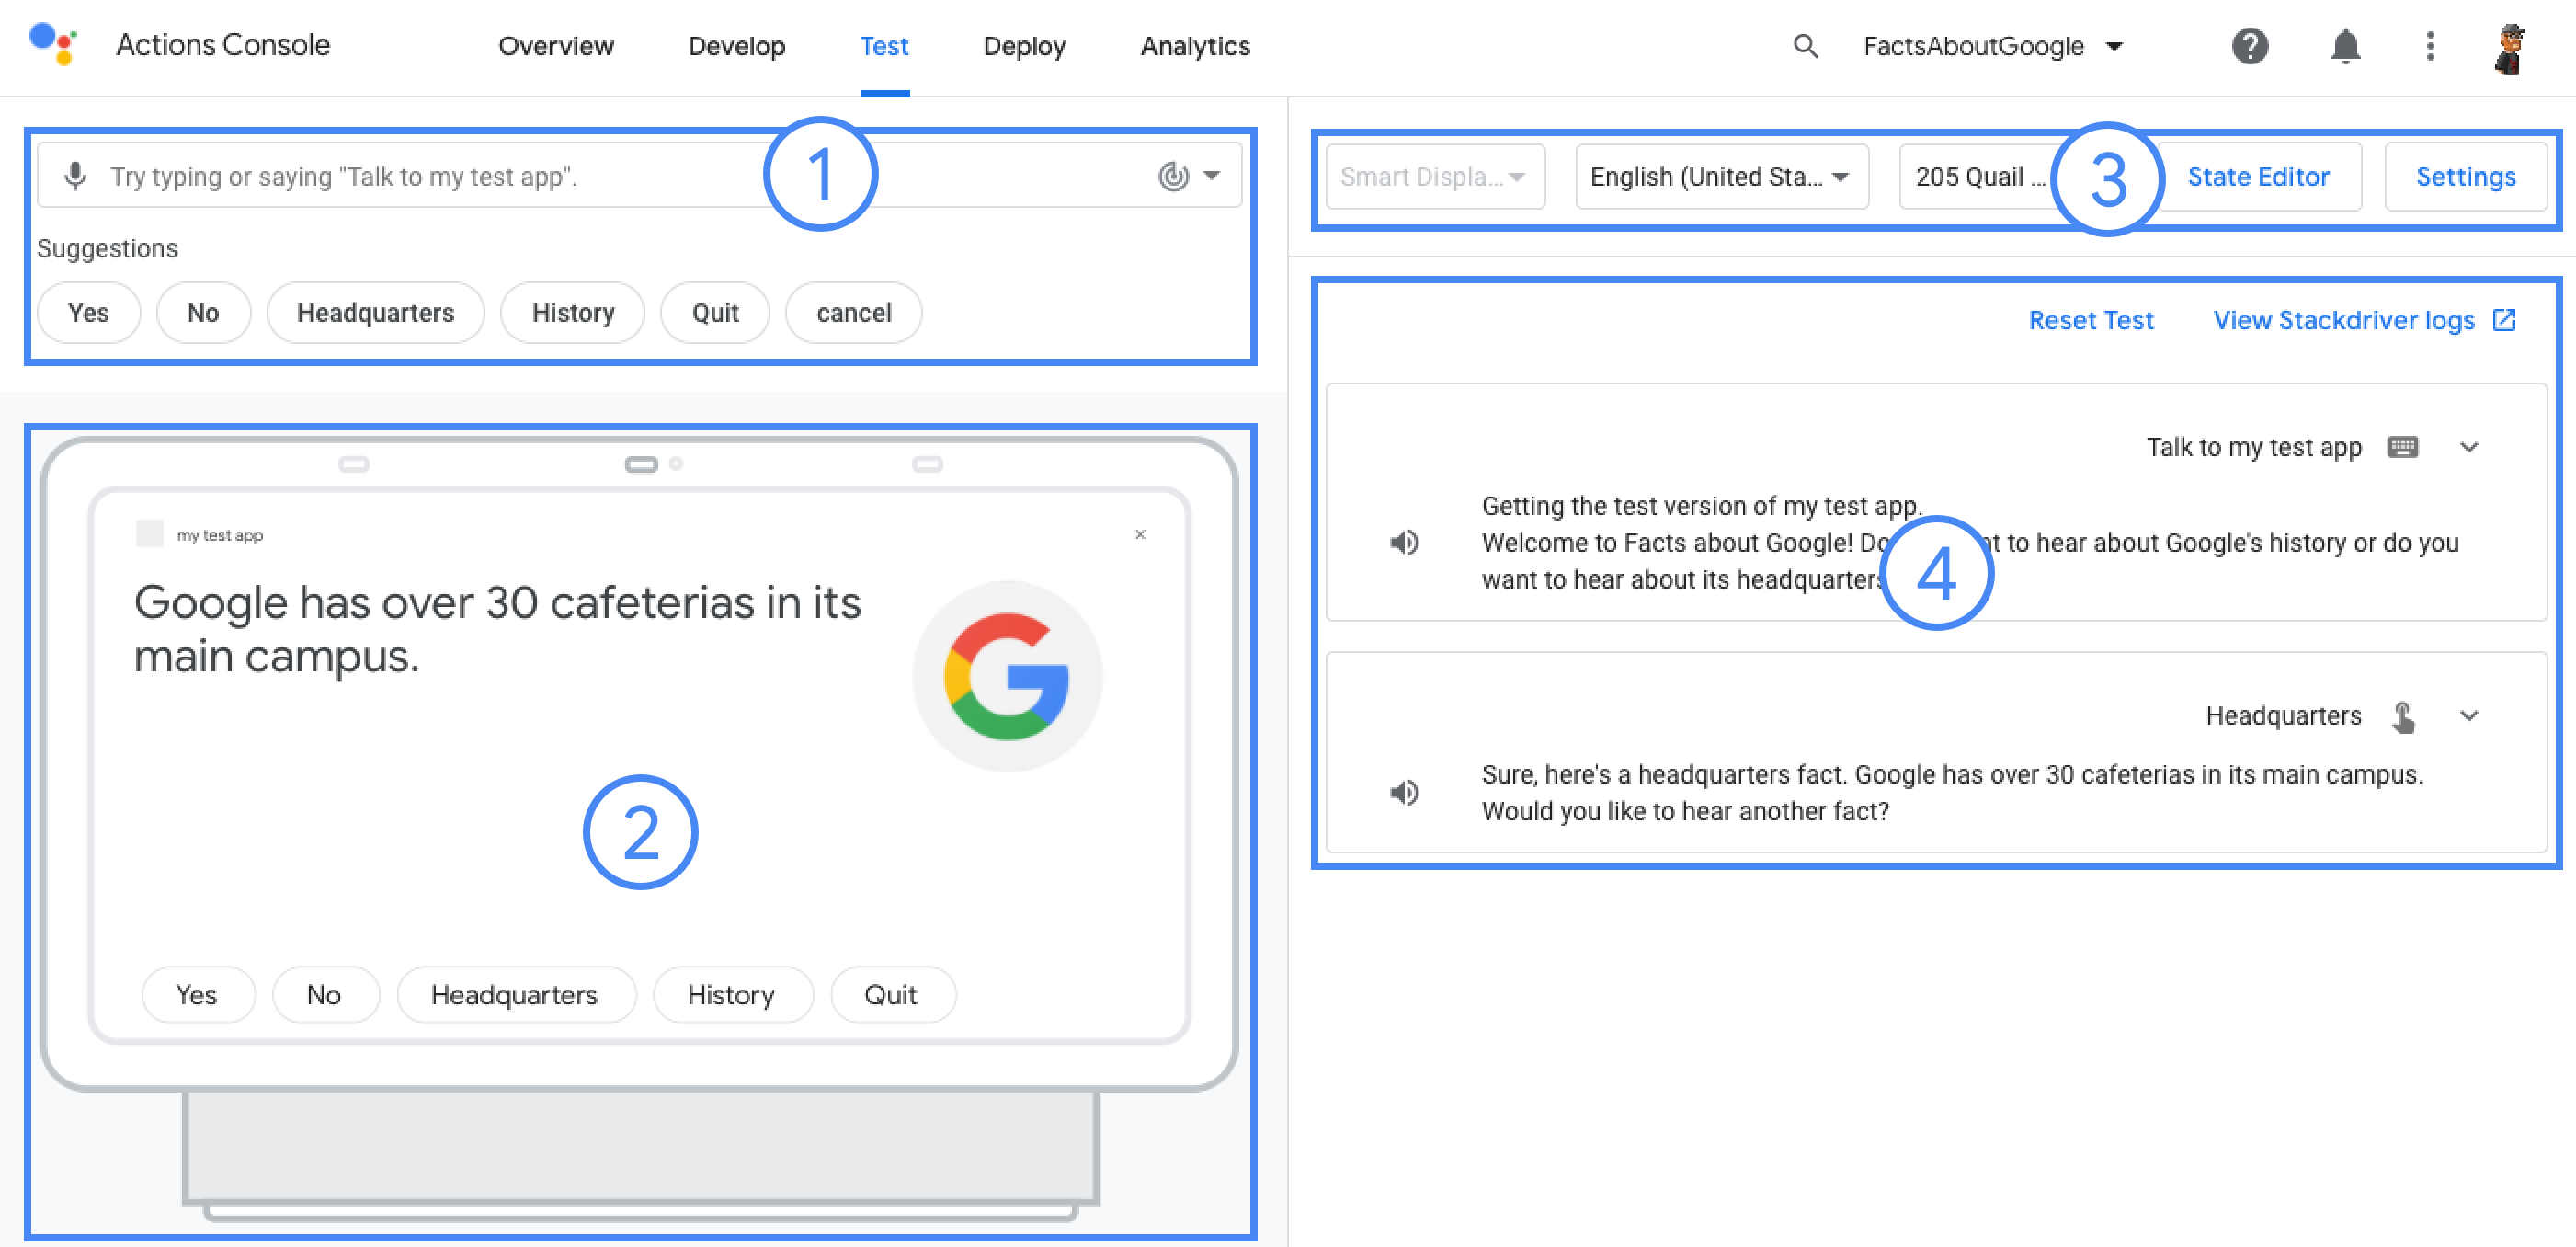
شکل 3. قسمت های اصلی شبیه ساز: (1) ورودی کاربر، (2) نمای دستگاه، (3) گزینه ها و تنظیمات، و (4) گزارش مکالمه.
تاریخ آخرین بهروزرسانی 2025-07-25 بهوقت ساعت هماهنگ جهانی.
[null,null,["تاریخ آخرین بهروزرسانی 2025-07-25 بهوقت ساعت هماهنگ جهانی."],[[["\u003cp\u003eAn Actions project enables the creation of conversational experiences for Google Assistant by packaging all actions into a single container for publishing.\u003c/p\u003e\n"],["\u003cp\u003eBuilding an Actions project involves utilizing components such as intents, types, scenes, prompts, webhooks and more for defining user interactions and logic.\u003c/p\u003e\n"],["\u003cp\u003eDefining project information in the Actions console, including directory information, locales and surfaces, is crucial for publishing and deploying to the Assistant directory.\u003c/p\u003e\n"],["\u003cp\u003eThe Actions console simulator provides a comprehensive environment for testing projects with features such as debugging, device settings, and locale simulation.\u003c/p\u003e\n"]]],[],null,["# Build projects\n\nActions Builder Actions SDK \n\nAn Actions project packages all of your Actions into a single container. You\npublish this project to Actions on Google so Google Assistant knows how to discover\nand invoke your conversational experiences.\n**Figure 1**. Actions project structure\n\nYou use the following low-level components to build your Actions project:\n\n- [**Settings and resources**](#define_project_information) define project metadata\n and resources like project icons. Google uses this information to publish\n your Actions to the Assistant directory, so that users can discover and invoke\n them.\n\n- [**Intents**](../intents) represent a task to be carried out, such as some\n user input or a system event that needs processing. The most common type of\n intent you'll use are user intents. These intents let you declare training\n phrases that are naturally expanded by the NLU (natural language understanding)\n engine to include many more, similar phrases. The NLU uses the aggregation of\n these phrases to train a language model that the Assistant uses to match user\n input. During a conversation, if some user input matches the intent's language\n model, the Assistant runtime sends the intent to your Action, so that it can\n process it and respond to the user.\n\n- [**Types**](../types) let you extract structured data from user input. By\n annotating training phrases with types, the NLU can extract relevant, structured\n data for you, so you don't have to parse open-ended input.\n\n- [**Scenes**](../scenes) process intents and are the main logic executors for\n your Actions. They can do slot-filling, evaluate conditional logic, return\n prompts to the user, and even call on external web services to carry out\n business logic. In combination with intents, scenes give you a powerful way to\n detect specific user input or system events and to carry out corresponding\n logic.\n\n- [**Prompts**](../prompts) define static or dynamic responses that you use to\n respond back to users.\n\n- [**Webhooks**](../webhooks) let you delegate extra work to web services\n (fulfillment), such as validating data or generating prompts. Your Actions\n communicate with your fulfillment through a JSON-based, webhook protocol.\n\n- [**Interactive Canvas**](/assistant/interactivecanvas) lets you create rich\n and immersive experiences with web apps that utilize HTML, CSS, and JavaScript.\n\nCreate a project\n----------------\n\nYou must create a project in the Actions console before you can develop for\nGoogle Assistant. To create a project:\n\n1. Go to the [Actions console](//console.actions.google.com/).\n2. Click **New project**.\n3. Enter a name for your project and click **Create Project** .\n4. In the **What kind of Action do you want to build?** screen, select a category that best represents your project and click **Next**.\n5. In the **How do you want to build it** screen, select a way to build and click **Start building**. For example, you can start with an empty project or with a sample.\n\n| **Key Point:** If you are building for Interactive Canvas, follow these additional steps:\n|\n| 1. If you did not select the **Game** card on the **What type of Action\n| do you want to build?** screen, click **Deploy** in the top navigation. Under **Additional Information** , select the **Games \\& fun** category. Click **Save**.\n| 2. Click **Develop** in the top navigation of the Actions console.\n| 3. Click **Interactive Canvas** in the left navigation.\n| 4. Under **Does your Action use Interactive Canvas?** , select **Yes**.\n| 5. **Optional** : Enter your web app URL into the **Set your default web app URL** field. This action adds a default `Canvas` response with the URL field to your Main invocation.\n| 6. Click **Save**.\n\n\u003cbr /\u003e\n\nDefine project information\n--------------------------\n\n| **Note:** See the [Directory information](/assistant/console/directory-information) documentation for more details on how to manage project information.\n\nYour project's settings and resources define information about your project like\nfeature and surface support, supported locales, display name, description,\nlogos, and more. The following table describes the main settings and resources\nyou provide. Actions on Google uses this\ninformation to deploy and publish your project to the [Assistant\ndirectory](//assistant.google.com/explore).\n\n| Name | Description |\n|-----------------------|-------------------------------------------------------------------------------------------------------------------------------------------------------------------------------------------------------------|\n| Directory information | Provides information so that Actions on Google can publish your project to the Assistant directory. Includes metadata and desecriptions about your project and image resources for logos and banner images. |\n| Location targeting | Configures the locales that your Actions are available in. |\n| Surface capabilities | Configures the surfaces that your Actions are available on. |\n| Company details | Specifies contact information for your company. |\n| Brand verification | Connect a website or Android app that you own to gain extra benefits such as reserved invocation names and website linking within your Actions. |\n| Release | Configures different testing and production releases for your Action for testing and production. |\n| Assistant links | Let users invoke your Actions from your web properties. |\n\nTo define project information:\n\nTest projects in the simulator\n------------------------------\n\n| **Note:** See the [Actions simulator](/assistant/console/simulator) documentation for complete information about testing your projects.\n\nThe Actions console provides a simulator to preview your Actions in. The\nsimulator lets you see debug information, set device capabilities, simulate\nlocale, and more.\n**Figure 3.** The main areas of the simulator: (1) user input, (2) device view, (3) options and settings, and (4) conversation log.\n\nTo test a project:"]]