
يجمع مشروع "الإجراءات" كل "الإجراءات" في حاوية واحدة. إِنْتَ نشر هذا المشروع في "المهام مع مساعد Google" حتى يعرف "مساعد Google" طريقة اكتشاف واستدعاء تجاربك الحوارية.

يمكنك استخدام المكونات المنخفضة المستوى التالية لإنشاء مشروع "الإجراءات" الخاص بك:
الإعدادات والموارد تحدد البيانات الوصفية للمشروع والموارد مثل أيقونات المشروع. تستخدم Google هذه المعلومات لنشر الإجراءات إلى دليل مساعد Google، حتى يتمكن المستخدمون من اكتشاف واستدعاء معهم.
تمثّل الأهداف مَهمّة يجب تنفيذها، مثل بعض البيانات التي أدخلها المستخدم أو حدث النظام الذي يحتاج إلى المعالجة إن النوع الأكثر شيوعًا من الغرض الذي ستستخدمه هو نوايا المستخدم. تتيح لك هذه الأهداف الإعلان عن التدريب. العبارات التي يتم توسيعها بشكل طبيعي بواسطة NLU (فهم اللغة الطبيعية) لتضمين العديد من العبارات المتشابهة. تستخدم NLU تجميع هذه العبارات لتدريب نموذج لغوي يستخدمه "مساعد Google" لمطابقة بيانات المستخدم إدخال. أثناء المحادثة، إذا تطابق بعض إدخالات المستخدم مع لغة الغرض ، يُرسِل وقت تشغيل "مساعد Google" الهدف إلى المهمّة ومعالجتها والاستجابة للمستخدم.
تتيح لك الأنواع استخراج البيانات المنظَّمة من البيانات التي يُدخلها المستخدمون. من ونضع تعليقات توضيحية على العبارات التدريبية بأنواعها، يمكن لـ NLU استخراج بيانات منظَّمة البيانات نيابة عنك، لذا لن تحتاج إلى تحليل الإدخالات المفتوحة.
المَشاهد تعالج الأهداف وهي المنطق الرئيسي إجراءاتك. حيث يمكنه ملء الخانات وتقييم المنطق الشرطي وإرجاع المستخدمين، وكذلك الاتصال بخدمات ويب خارجية لتنفيذ ومنطق الأعمال. إلى جانب الأهداف، تمنحك المشاهد وسيلة فعّالة اكتشاف مدخلات المستخدم أو أحداث النظام وتنفيذ المنطق.
تحدد الطلبات الردود الثابتة أو الديناميكية التي تستخدمها والاستجابة للمستخدمين.
تتيح لك الردّ التلقائي على الويب تفويض خدمات الويب بالعمل الإضافي. (التنفيذ)، مثل التحقق من صحة البيانات أو إنشاء الطلبات. الإجراءات التواصل مع التنفيذ من خلال بروتوكول ردّ تلقائي على الويب مستند إلى JSON.
تتيح لك لوحة الرسم التفاعلية إنشاء محتوى غني وتجارب غامرة مع تطبيقات الويب التي تستخدم HTML وCSS وJavaScript.
إنشاء مشروع
يجب إنشاء مشروع في وحدة تحكّم المهام قبل أن تتمكّن من تطويره. مساعد Google لإنشاء مشروع، اتّبِع الخطوات التالية:
- انتقِل إلى وحدة تحكّم الإجراءات.
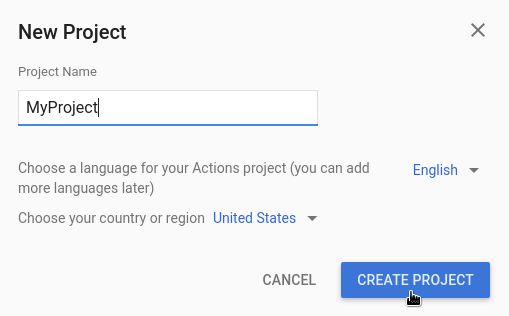
- انقر على مشروع جديد.
- أدخِل اسمًا لمشروعك وانقر على إنشاء مشروع.
- في شاشة ما نوع الإجراء الذي تريد إنشاءه؟، اختَر الفئة التي تمثل مشروعك على أفضل وجه، ثم انقر على التالي.
- في شاشة كيفية إنشاء التطبيق، اختَر طريقة لإنشاء وانقر على بدء البناء. على سبيل المثال، يمكنك البدء بحقل مشروعك أو باستخدام عينة.
تحديد معلومات المشروع
تحدد إعدادات وموارد مشروعك معلومات حول مشروعك مثل دعم الميزات والمساحات، واللغات المتاحة، والاسم المعروض، والوصف والشعارات وغيرها. يوضّح الجدول التالي الإعدادات والموارد الرئيسية. التي تقدمها. يستخدم "المهام مع مساعد Google" هذه الميزة المعلومات لنشر مشروعك ونشره في "مساعد Google" الدليل.
| الاسم | الوصف |
|---|---|
| معلومات الدليل | توفر معلومات لتمكين "المهام مع مساعد Google" من نشر مشروع إلى دليل "مساعد Google". يتضمّن ذلك البيانات الوصفية والأوصاف. حول مشروعك وموارد الصور المتعلقة بالشعارات وصور البانر. |
| الاستهداف حسب الموقع الجغرافي | تتيح هذه السياسة ضبط اللغات التي تتوفّر فيها "إجراءاتك". |
| إمكانات سطح المكتب | تتيح هذه السياسة إعداد مساحات العرض التي تتوفّر عليها إجراءاتك. |
| تفاصيل الشركة | يحدد معلومات الاتصال بشركتك. |
| طلب تأكيد معلومات العلامة التجارية | ربط موقع إلكتروني أو تطبيق Android تملكه للاستفادة من مزايا إضافية مثل أسماء الاستدعاء المحجوزة وربط مواقع الويب ضمن "الإجراءات". |
| الإصدار | تعمل هذه السياسة على ضبط إصدارات الاختبار والإنتاج المختلفة للإجراء الخاص بك. للاختبار والإنتاج. |
| روابط "مساعد Google" | السماح للمستخدمين باستدعاء الإجراءات من مواقعك على الويب. |
لتحديد معلومات المشروع:
اختبار المشاريع في المحاكي
توفّر وحدة تحكّم "المهام" محاكيًا لمعاينة المهام في "المهام". تشير رسالة الأشكال البيانية يتيح لك المحاكي الاطّلاع على معلومات تصحيح الأخطاء وتحديد إمكانيات الجهاز والمحاكاة. واللغة وغير ذلك.
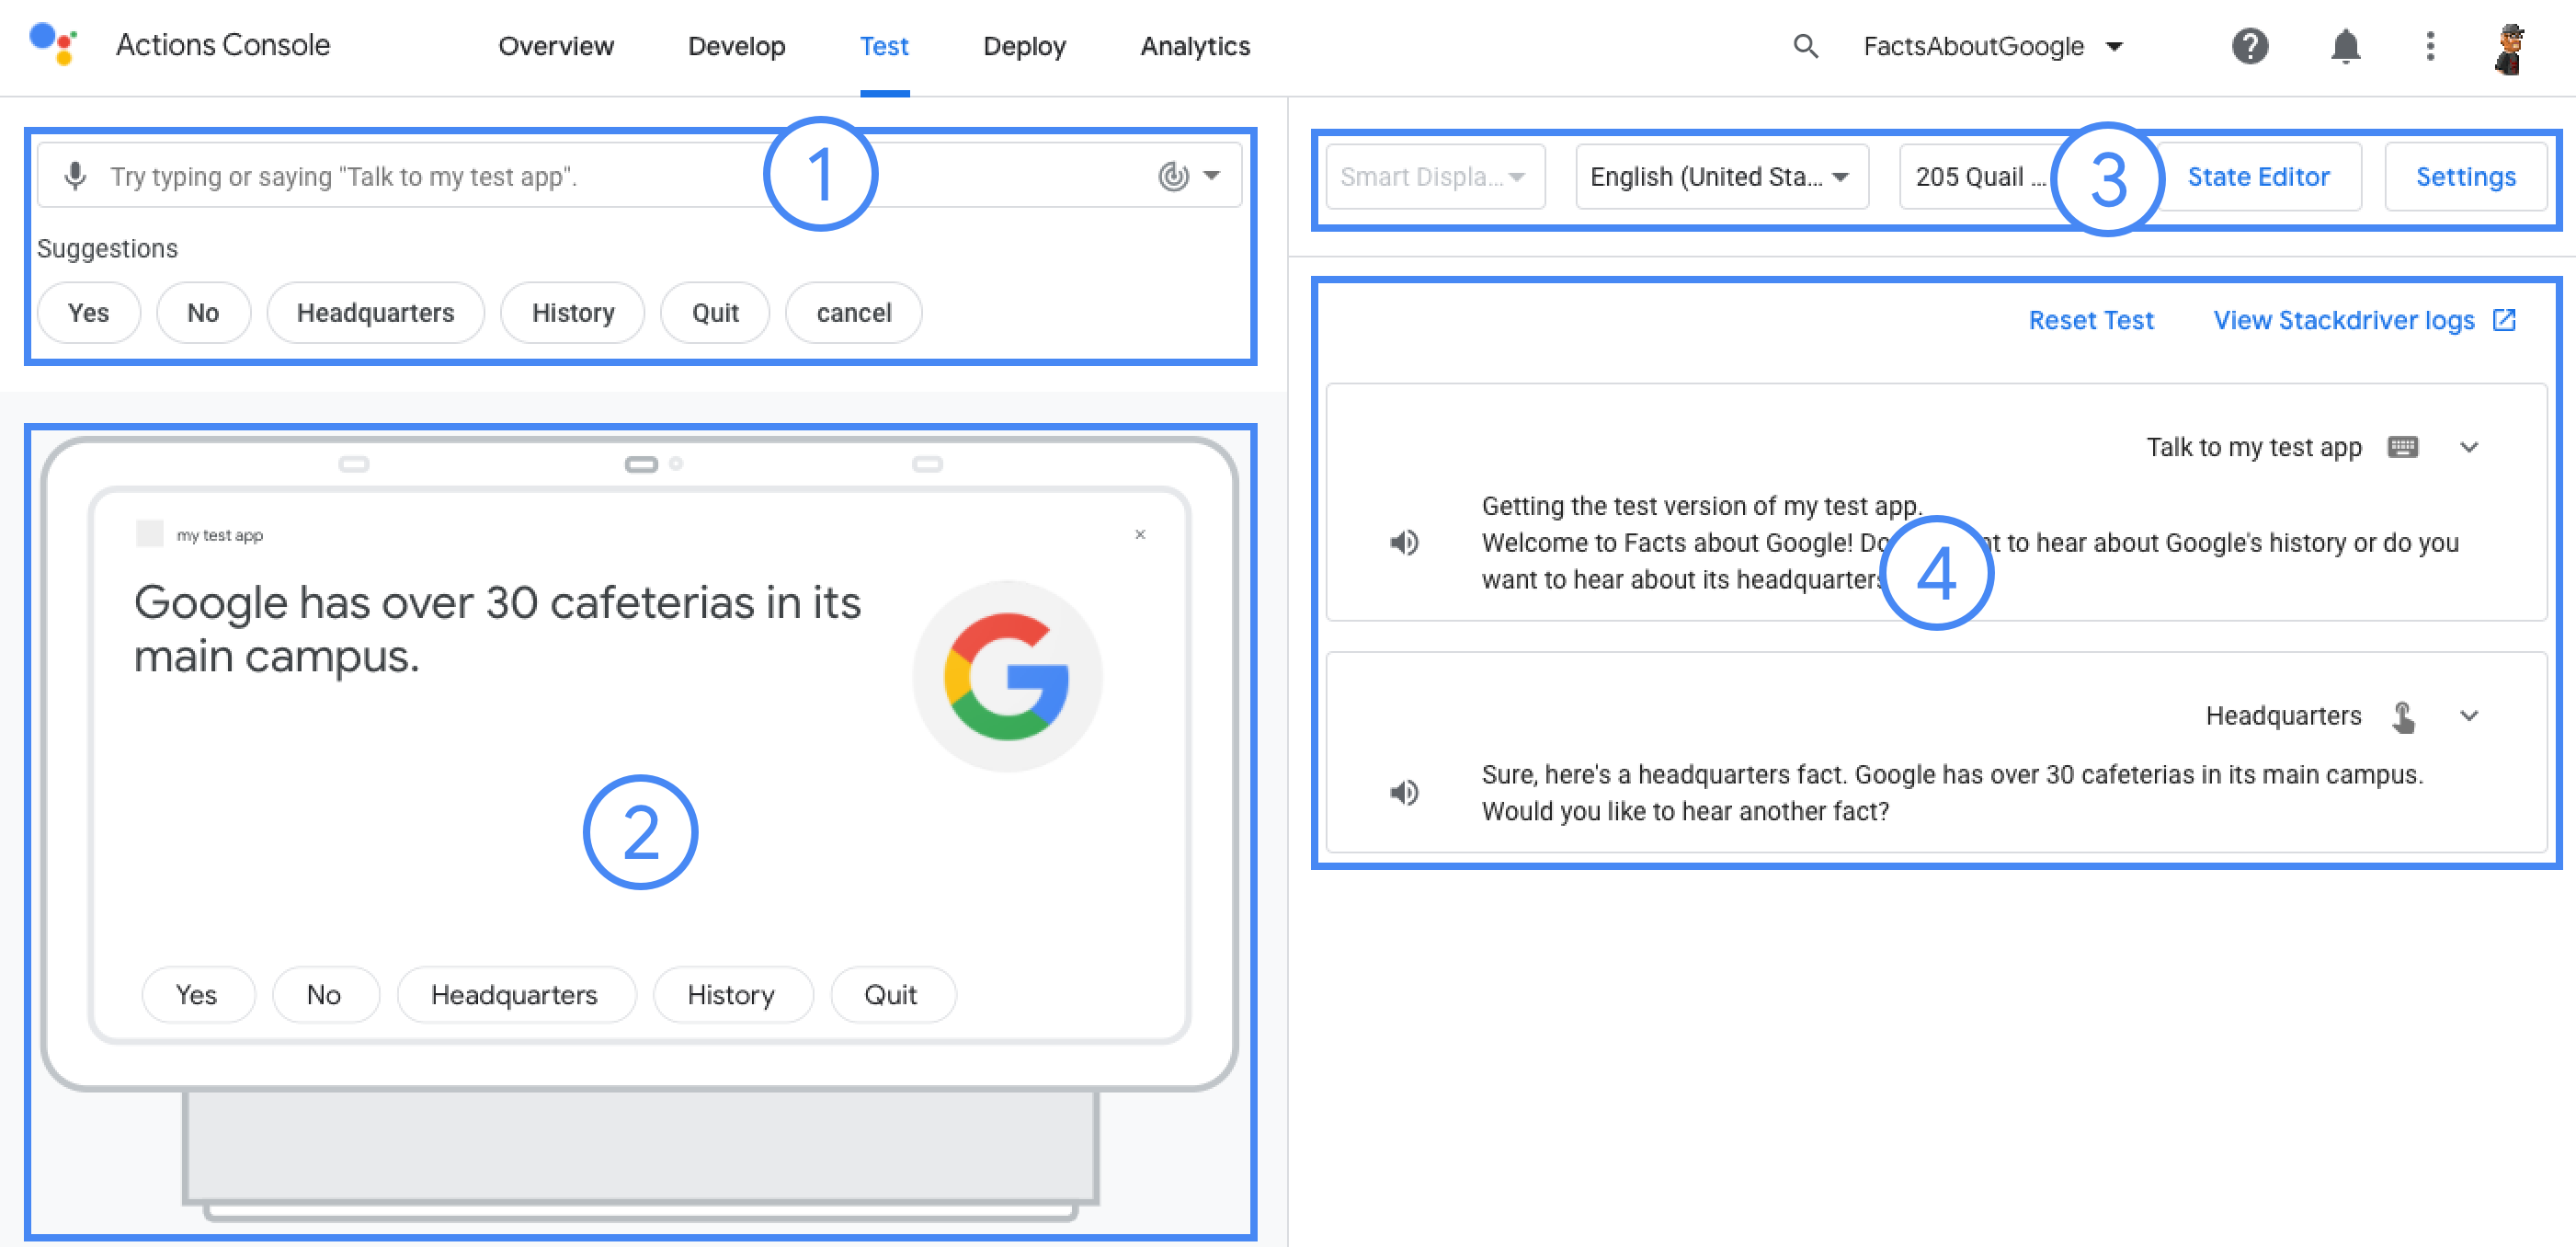
لاختبار مشروع: