Un progetto Azioni pacchettizza tutte le azioni in un unico container. Tu pubblica questo progetto su Actions on Google in modo che l'Assistente Google sappia come scoprire e richiamare le tue esperienze di conversazione.

Puoi usare i seguenti componenti di basso livello per creare il tuo progetto Actions:
Le impostazioni e le risorse definiscono i metadati di progetto e risorse come le icone di progetto. Google utilizza queste informazioni per pubblicare le tue Azioni alla directory dell'assistente, in modo che gli utenti possano rilevare e richiamare che li rappresentano.
Gli intent rappresentano un'attività da eseguire, ad esempio input dell'utente o un evento di sistema che deve essere elaborato. Il tipo più comune di l'intent che utilizzerai sono gli intenti dell'utente. Questi intent ti consentono di dichiarare Frasi che vengono espanse in modo naturale dalla NLU (comprensione del linguaggio naturale) per includere molte altre frasi simili. La NLU utilizza l'aggregazione queste frasi per addestrare un modello linguistico che l'assistente utilizza per abbinare di testo. Durante una conversazione, se un input utente corrisponde alla lingua dell'intent modello, il runtime dell'assistente invia l'intent all'azione, in modo che possa elaborarlo e rispondere all'utente.
I tipi ti consentono di estrarre dati strutturati dall'input degli utenti. Di Annotando frasi di addestramento con tipi, la NLU può estrarre pertinenti, strutturati i dati, in modo da non dover analizzare l'input a risposta aperta.
Gli intent di processo delle scene e sono i principali esecutori logici per le tue Azioni. Possono eseguire il riempimento degli slot, valutare la logica condizionale, restituire i prompt all'utente e persino chiamare servizi web esterni per la logica di business. In combinazione con gli intent, le scene sono uno strumento efficace per rilevare input utente specifici o eventi di sistema e svolgere logica.
I prompt definiscono le risposte statiche o dinamiche che utilizzi per e rispondere agli utenti.
I webhook consentono di delegare il lavoro aggiuntivo ai servizi web (fulfillment), ad esempio la convalida dei dati o la generazione di prompt. Le tue azioni comunicare con il tuo fulfillment tramite un protocollo webhook basato su JSON.
Interactive Canvas ti consente di creare richiami e coinvolgenti con le app web che utilizzano HTML, CSS e JavaScript.
Creare un progetto
Devi creare un progetto nella console di Actions prima di poter sviluppare Assistente Google. Per creare un progetto:
- Vai alla console Actions.
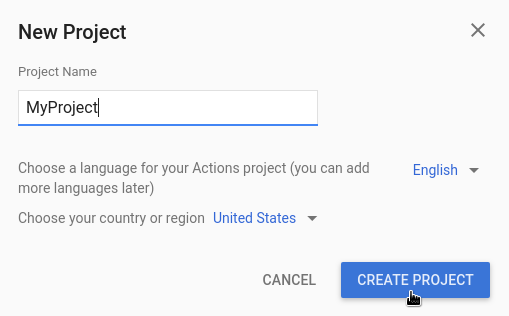
- Fai clic su Nuovo progetto.
- Inserisci un nome per il progetto e fai clic su Crea progetto.
- Nella schermata Che tipo di azione vuoi creare?, seleziona una categoria che rappresenti al meglio il tuo progetto e fai clic su Avanti.
- Nella schermata Come vuoi crearlo, seleziona un modo per creare e fai clic su Inizia a creare. Ad esempio, puoi iniziare con uno spazio progetto o con un campione.
Definisci le informazioni del progetto
Le impostazioni e le risorse del progetto definiscono informazioni sul progetto, funzioni e piattaforme, lingue supportate, nome visualizzato, descrizione, loghi e altro ancora. La tabella seguente descrive le impostazioni e le risorse principali che fornisci. Actions on Google utilizza questa opzione per implementare e pubblicare il progetto sull'Assistente Google Google Cloud.
| Nome | Descrizione |
|---|---|
| Informazioni sulla directory | Fornisce informazioni per consentire ad Actions on Google di pubblicare il tuo progetto nella directory dell'assistente. Include metadati e descrizioni sul tuo progetto e sulle risorse per le immagini per i loghi e le immagini dei banner. |
| Targeting per località | Consente di configurare le impostazioni internazionali in cui sono disponibili le azioni. |
| Capacità di superficie | Consente di configurare le piattaforme su cui sono disponibili le Azioni. |
| Dettagli dell'azienda | Specifica i dati di contatto della tua azienda. |
| Verifica del brand | Collega un sito web o un'app per Android di tua proprietà per ottenere vantaggi extra come nomi di chiamata riservati e collegamenti a siti web all'interno delle Azioni. |
| Rilascia | Configura release di test e produzione diverse per l'azione per i test e la produzione. |
| Link all'assistente | Consenti agli utenti di richiamare le azioni dalle tue proprietà web. |
Per definire le informazioni del progetto:
Testa i progetti nel simulatore
La console di Actions fornisce un simulatore in cui visualizzare l'anteprima delle azioni. La permette di vedere informazioni di debug, impostare funzionalità del dispositivo, simulare impostazioni internazionali e altre impostazioni.
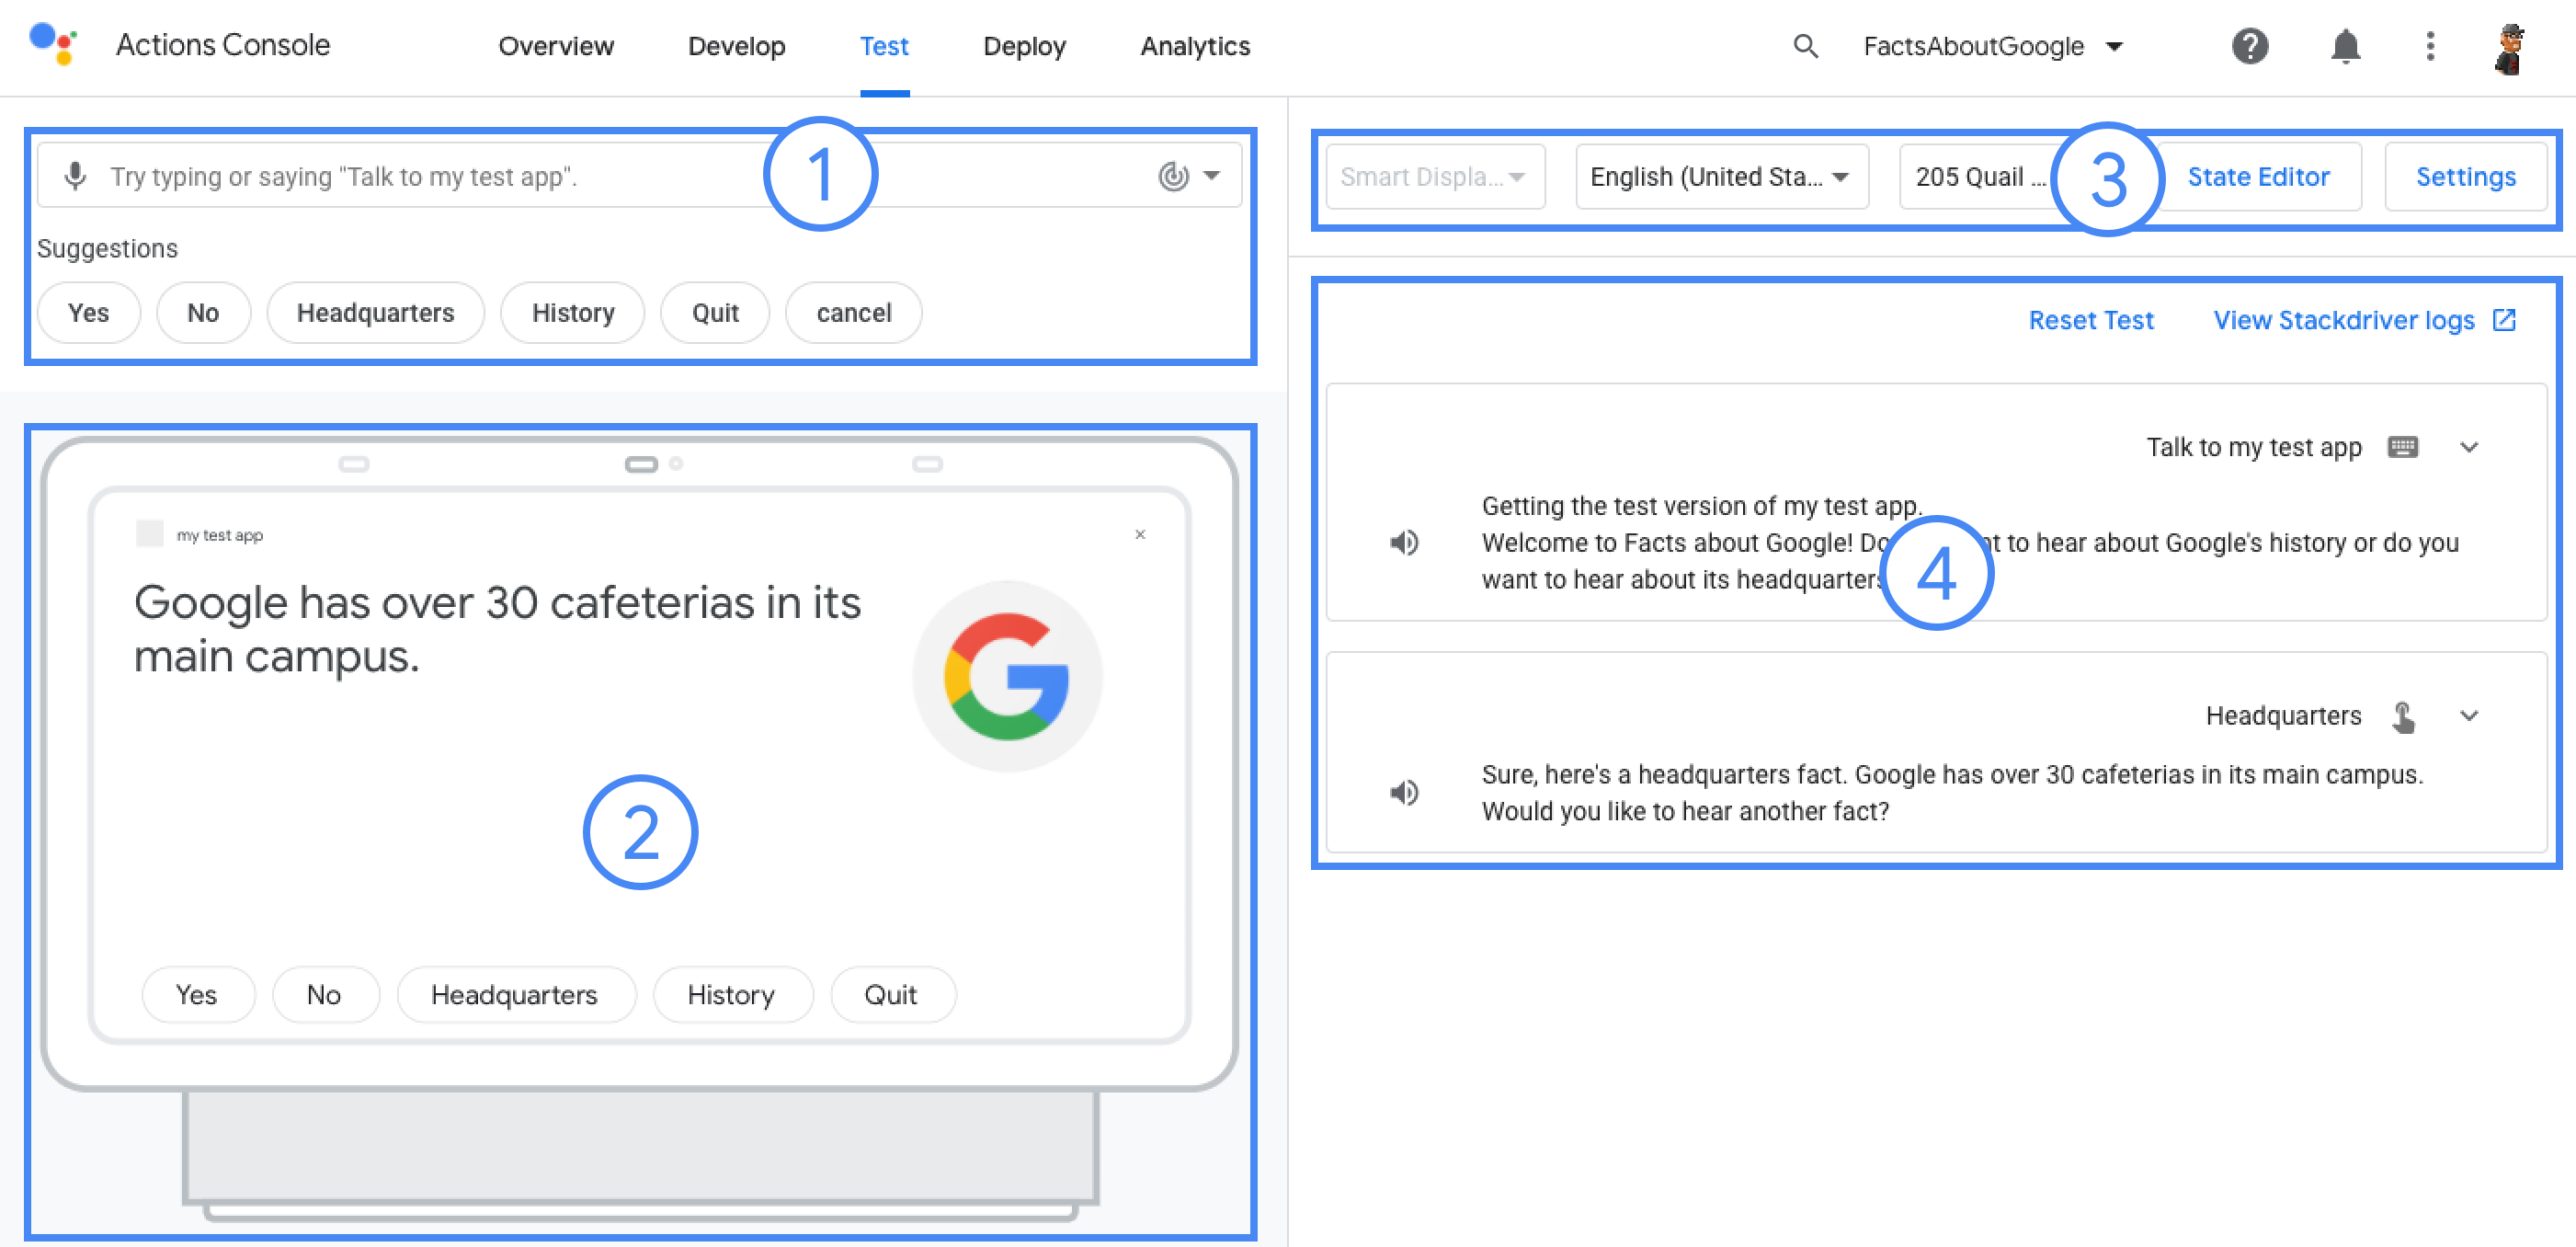
Per testare un progetto: