대화형 작업이 2023년 6월 13일에 지원 중단되었습니다. 자세한 내용은
대화 작업 지원 중단을 참고하세요.
개발자 프로젝트 및 계정 설정 구성
컬렉션을 사용해 정리하기
내 환경설정을 기준으로 콘텐츠를 저장하고 분류하세요.
Actions 콘솔 프로젝트 구성
Actions Console에서 관리하는 Google Cloud Platform 프로젝트를 사용하면 프로젝트에서 Google 어시스턴트 API에 액세스할 수 있습니다. 프로젝트는 할당량 사용량을 추적하고 하드웨어에서 이루어진 요청에 관한 유용한 측정항목을 제공합니다.
Google 어시스턴트 API에 대한 액세스를 사용 설정하려면 다음 단계를 수행하세요.
Actions Console을 엽니다.
Actions 콘솔로 이동
프로젝트 추가/가져오기를 클릭합니다.
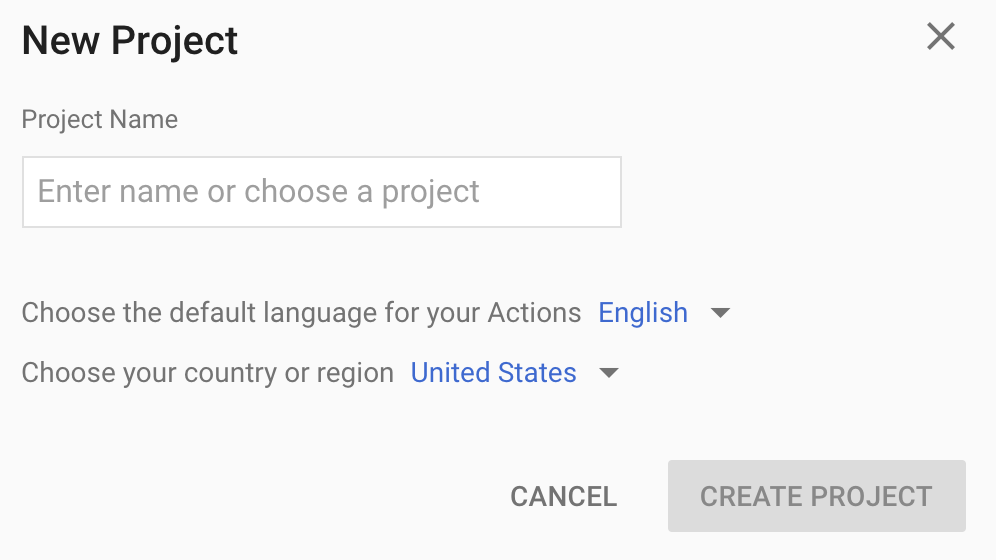
새 프로젝트를 만들려면 프로젝트 이름 상자에 이름을 입력하고 프로젝트 만들기를 클릭합니다.
기존 Google Cloud Platform 프로젝트가 있는 경우 새 프로젝트를 만드는 대신 해당 프로젝트를 선택하여 가져올 수 있습니다.
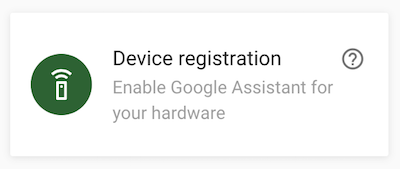
새 프로젝트를 만든 경우 페이지 하단 근처에 있는 기기 등록 상자를 클릭합니다. 이전에 만든 프로젝트를 가져온 경우 이 상자가 표시되지 않습니다. 왼쪽 탐색 메뉴에서 기기 등록 탭 (고급 옵션 아래)을 선택하세요.
이 브라우저 탭을 열어 둡니다. 나중에 기기 모델을 등록하는 데 사용합니다.
선택한 프로젝트에서 Google 어시스턴트 API를 사용 설정합니다 (서비스 약관 참고). 이 작업은 Cloud Platform Console에서 수행해야 합니다.
API 사용 설정
사용 설정을 클릭합니다.
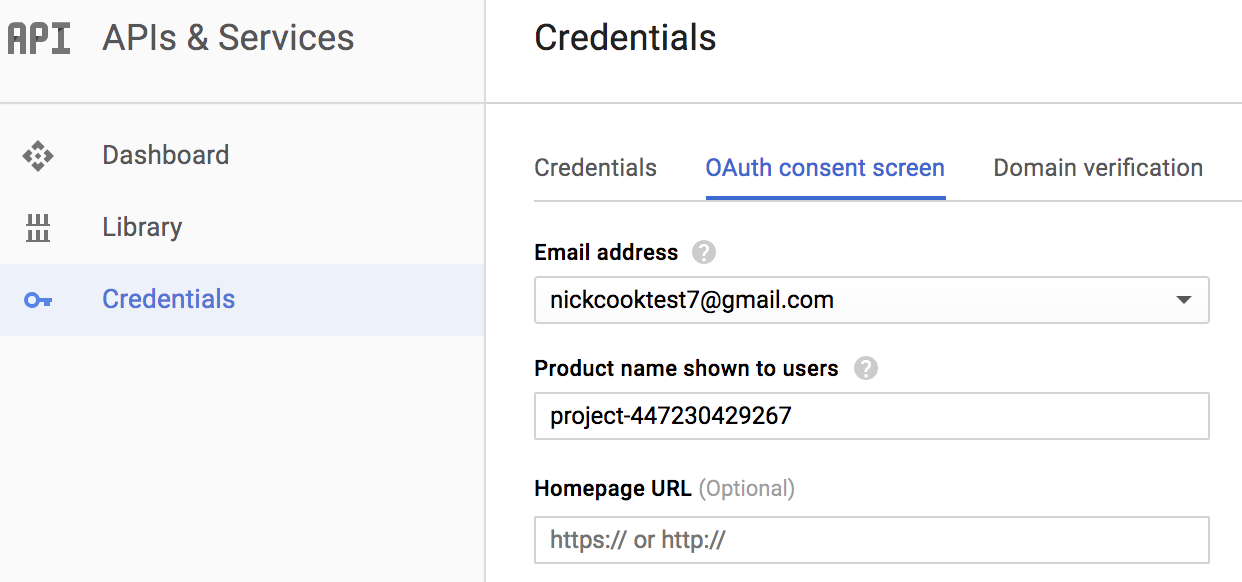
Cloud Platform 콘솔에서 프로젝트의 OAuth 동의 화면을 구성해야 합니다. 이 페이지의 대부분의 필드는 선택사항입니다.
계정의 활동 제어 설정하기
Google 어시스턴트를 사용하려면 특정 활동 데이터를 Google과 공유해야 합니다. 이 데이터는 Google 어시스턴트가 제대로 작동하는 데 필요합니다. 이는 SDK에만 국한되지 않습니다. 이 데이터를 공유하려면 아직 없는 경우 Google 계정을 만드세요.
어시스턴트와 함께 사용하려는 Google 계정의 활동 제어 페이지를 엽니다. 모든 Google 계정을 사용할 수 있습니다. 개발자 계정이 아니어도 됩니다.
다음 전환 스위치가 사용 설정되어 있는지 확인합니다 (파란색).
- 웹 및 앱 활동
- Chrome 방문 기록 및 Google 서비스를 사용하는 사이트, 앱, 기기에서 이루어진 활동 포함 체크박스도 선택해야 합니다.
- 기기 정보
- 음성 및 오디오 활동
다음 단계
기기 모델 등록
달리 명시되지 않는 한 이 페이지의 콘텐츠에는 Creative Commons Attribution 4.0 라이선스에 따라 라이선스가 부여되며, 코드 샘플에는 Apache 2.0 라이선스에 따라 라이선스가 부여됩니다. 자세한 내용은 Google Developers 사이트 정책을 참조하세요. 자바는 Oracle 및/또는 Oracle 계열사의 등록 상표입니다.
최종 업데이트: 2025-07-26(UTC)
[null,null,["최종 업데이트: 2025-07-26(UTC)"],[[["\u003cp\u003eAn Actions Console project provides access to the Google Assistant API, tracks quota usage, and provides valuable metrics.\u003c/p\u003e\n"],["\u003cp\u003eTo enable Assistant API access, you need to create or import a project in the Actions Console and enable the necessary API.\u003c/p\u003e\n"],["\u003cp\u003eFor the Assistant to function, ensure your Google Account's "Web & App Activity," "Device Information," and "Voice & Audio Activity" are enabled within the Activity Controls.\u003c/p\u003e\n"],["\u003cp\u003eBefore using the Assistant, be sure to register a Device Model in the Actions Console to associate with your project.\u003c/p\u003e\n"]]],["To begin, open the Actions Console and add or import a Google Cloud Platform project. If creating a new project, enter a name and proceed to \"Device registration\"; if importing, go directly to the \"Device registration\" tab. Then, enable the Google Assistant API in the Cloud Platform Console. Lastly, configure the OAuth consent screen for your project in the Cloud Platform Console. Ensure your Google account's activity controls are enabled for Web & App, Device Information, and Voice & Audio activity.\n"],null,["# Configure a Developer Project and Account Settings\n\nConfigure an Actions Console project\n------------------------------------\n\nA Google Cloud Platform project, managed by the Actions Console, gives your\nproject access to the Google Assistant API. The project tracks quota usage and\ngives you valuable metrics for the requests made from your hardware.\n\nTo enable access to the Google Assistant API, perform the following steps:\n\n1. Open the Actions Console.\n\n [Go\n to the Actions Console](https://console.actions.google.com/)\n2. Click **Add/import project**.\n\n3. To create a new project, enter a name in the **Project name** box and click\n **CREATE PROJECT**.\n\n \u003cbr /\u003e\n\n If you already have an existing Google Cloud Platform project, you can select that\n project and import it rather than creating a new one.\n\n4.\n If you created a new project, click the **Device registration** box near the\n bottom of the page. If you imported a previously-created project, this box\n does not appear; select the **Device registration** tab (under\n **ADVANCED OPTIONS**) from the left navbar.\n\n Keep this browser tab open. You will use it to register a device model in\n a later step.\n5. Enable the Google Assistant API on the project you selected (see the [Terms\n of Service](/assistant/sdk/terms-of-service)). You need to do this in the\n Cloud Platform Console.\n\n [Enable\n the API](https://console.developers.google.com/apis/api/embeddedassistant.googleapis.com/overview)\n\n Click **Enable**.\n6. You must configure the [OAuth consent\n screen](https://console.developers.google.com/apis/credentials/consent)\n for your project in the Cloud Platform Console. Note that most fields on\n this page are optional.\n\n\nSet activity controls for your account\n--------------------------------------\n\nIn order to use the Google Assistant, you must share certain activity data with\nGoogle. The Google Assistant needs this data to function properly; this is not\nspecific to the SDK. To share this data, create a\n[Google account](https://support.google.com/accounts/answer/27441)\nif you don't already have one.\n\nOpen the [Activity Controls page](https://myaccount.google.com/activitycontrols)\nfor the Google account that you want to use with the Assistant. You can use any\nGoogle account---it does not need to be your developer account.\n\n**Ensure the following toggle switches are enabled (blue)**:\n\n- Web \\& App Activity\n - In addition, be sure to select the **Include Chrome history and activity\n from sites, apps, and devices that use Google services** checkbox.\n- Device Information\n- Voice \\& Audio Activity\n\nNext step\n---------\n\n[Register the Device Model](/assistant/sdk/guides/service/python/embed/register-device)"]]