Настройка проекта разработчика и настроек учетной записи
Оптимизируйте свои подборки
Сохраняйте и классифицируйте контент в соответствии со своими настройками.
Настройка проекта консоли действий
Проект Google Cloud Platform, управляемый консолью действий, предоставляет вашему проекту доступ к API Google Assistant. Проект отслеживает использование квот и предоставляет ценные показатели запросов, сделанных с вашего оборудования.
Чтобы включить доступ к API Google Assistant, выполните следующие действия:
Откройте консоль действий.
Перейдите в консоль действий
Нажмите «Добавить/импортировать проект» .
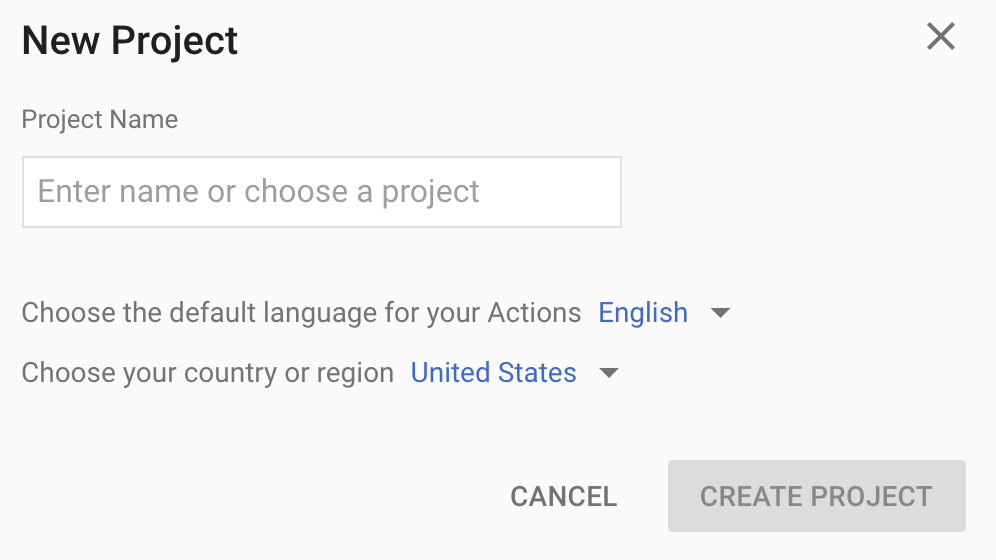
Чтобы создать новый проект, введите имя в поле «Имя проекта» и нажмите «СОЗДАТЬ ПРОЕКТ» .
Если у вас уже есть существующий проект Google Cloud Platform, вы можете выбрать этот проект и импортировать его, а не создавать новый.

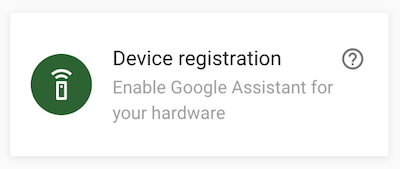
Если вы создали новый проект, щелкните поле регистрации устройства в нижней части страницы. Если вы импортировали ранее созданный проект, это поле не появится; выберите вкладку «Регистрация устройства» (в разделе «ДОПОЛНИТЕЛЬНЫЕ ОПЦИИ» ) на левой панели навигации.

Держите эту вкладку браузера открытой. Вы будете использовать его для регистрации модели устройства на более позднем этапе.
Включите Google Assistant API в выбранном вами проекте (см. Условия использования ). Вам нужно сделать это в консоли облачной платформы.
Включить API
Нажмите Включить .
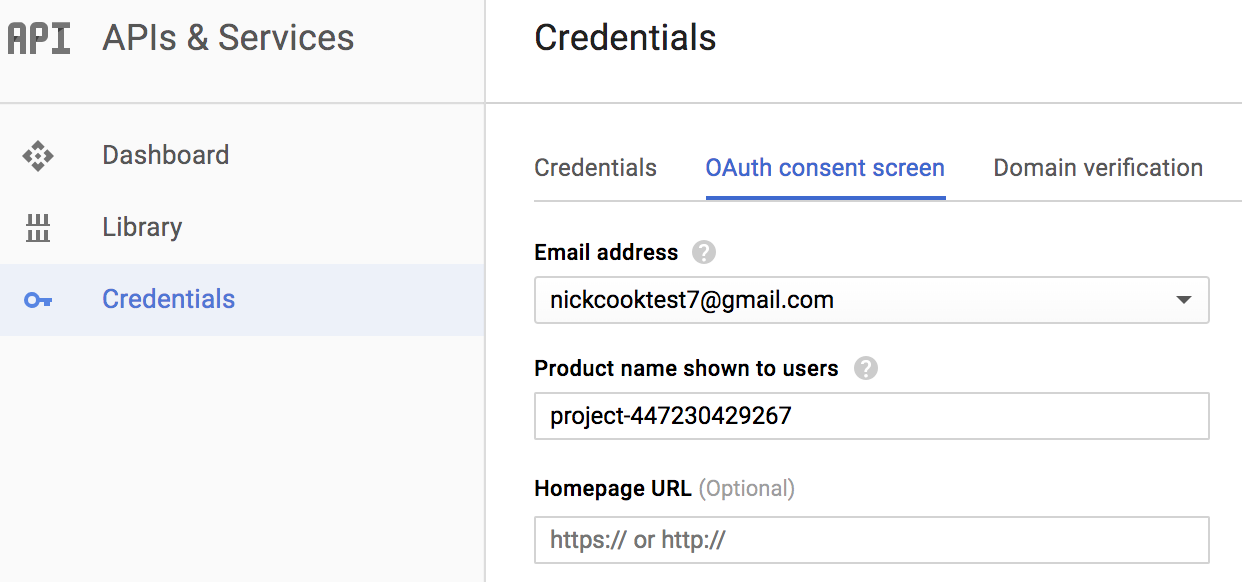
Вам необходимо настроить экран согласия OAuth для вашего проекта в консоли Cloud Platform. Обратите внимание, что большинство полей на этой странице являются необязательными.

Установите контроль активности для своей учетной записи
Чтобы использовать Google Assistant, вы должны предоставить Google определенные данные о деятельности. Google Assistant нужны эти данные для правильной работы; это не относится только к SDK. Чтобы поделиться этими данными, создайте учетную запись Google , если у вас ее еще нет.
Откройте страницу «Контроль активности» для учетной записи Google, которую вы хотите использовать с Ассистентом. Вы можете использовать любую учетную запись Google — это не обязательно должна быть ваша учетная запись разработчика.
Убедитесь, что следующие тумблеры включены (синие) :
- Активность в Интернете и приложениях
- Кроме того, обязательно установите флажок Включать историю и активность Chrome на сайтах, приложениях и устройствах, использующих сервисы Google .
- Информация об устройстве
- Голосовая и аудио активность
Следующий шаг
Зарегистрируйте модель устройства
Если не указано иное, контент на этой странице предоставляется по лицензии Creative Commons "С указанием авторства 4.0", а примеры кода – по лицензии Apache 2.0. Подробнее об этом написано в правилах сайта. Java – это зарегистрированный товарный знак корпорации Oracle и ее аффилированных лиц.
Последнее обновление: 2025-07-24 UTC.
[null,null,["Последнее обновление: 2025-07-24 UTC."],[[["\u003cp\u003eAn Actions Console project provides access to the Google Assistant API, tracks quota usage, and provides valuable metrics.\u003c/p\u003e\n"],["\u003cp\u003eTo enable Assistant API access, you need to create or import a project in the Actions Console and enable the necessary API.\u003c/p\u003e\n"],["\u003cp\u003eFor the Assistant to function, ensure your Google Account's "Web & App Activity," "Device Information," and "Voice & Audio Activity" are enabled within the Activity Controls.\u003c/p\u003e\n"],["\u003cp\u003eBefore using the Assistant, be sure to register a Device Model in the Actions Console to associate with your project.\u003c/p\u003e\n"]]],["To begin, open the Actions Console and add or import a Google Cloud Platform project. If creating a new project, enter a name and proceed to \"Device registration\"; if importing, go directly to the \"Device registration\" tab. Then, enable the Google Assistant API in the Cloud Platform Console. Lastly, configure the OAuth consent screen for your project in the Cloud Platform Console. Ensure your Google account's activity controls are enabled for Web & App, Device Information, and Voice & Audio activity.\n"],null,["# Configure a Developer Project and Account Settings\n\nConfigure an Actions Console project\n------------------------------------\n\nA Google Cloud Platform project, managed by the Actions Console, gives your\nproject access to the Google Assistant API. The project tracks quota usage and\ngives you valuable metrics for the requests made from your hardware.\n\nTo enable access to the Google Assistant API, perform the following steps:\n\n1. Open the Actions Console.\n\n [Go\n to the Actions Console](https://console.actions.google.com/)\n2. Click **Add/import project**.\n\n3. To create a new project, enter a name in the **Project name** box and click\n **CREATE PROJECT**.\n\n \u003cbr /\u003e\n\n If you already have an existing Google Cloud Platform project, you can select that\n project and import it rather than creating a new one.\n\n4.\n If you created a new project, click the **Device registration** box near the\n bottom of the page. If you imported a previously-created project, this box\n does not appear; select the **Device registration** tab (under\n **ADVANCED OPTIONS**) from the left navbar.\n\n Keep this browser tab open. You will use it to register a device model in\n a later step.\n5. Enable the Google Assistant API on the project you selected (see the [Terms\n of Service](/assistant/sdk/terms-of-service)). You need to do this in the\n Cloud Platform Console.\n\n [Enable\n the API](https://console.developers.google.com/apis/api/embeddedassistant.googleapis.com/overview)\n\n Click **Enable**.\n6. You must configure the [OAuth consent\n screen](https://console.developers.google.com/apis/credentials/consent)\n for your project in the Cloud Platform Console. Note that most fields on\n this page are optional.\n\n\nSet activity controls for your account\n--------------------------------------\n\nIn order to use the Google Assistant, you must share certain activity data with\nGoogle. The Google Assistant needs this data to function properly; this is not\nspecific to the SDK. To share this data, create a\n[Google account](https://support.google.com/accounts/answer/27441)\nif you don't already have one.\n\nOpen the [Activity Controls page](https://myaccount.google.com/activitycontrols)\nfor the Google account that you want to use with the Assistant. You can use any\nGoogle account---it does not need to be your developer account.\n\n**Ensure the following toggle switches are enabled (blue)**:\n\n- Web \\& App Activity\n - In addition, be sure to select the **Include Chrome history and activity\n from sites, apps, and devices that use Google services** checkbox.\n- Device Information\n- Voice \\& Audio Activity\n\nNext step\n---------\n\n[Register the Device Model](/assistant/sdk/guides/service/python/embed/register-device)"]]