会話型アクションのサポートは 2023 年 6 月 13 日に終了しました。詳細については、
会話型アクションの廃止をご覧ください。
デベロッパー プロジェクトとアカウント設定を構成する
コレクションでコンテンツを整理
必要に応じて、コンテンツの保存と分類を行います。
Actions Console プロジェクトを構成する
Actions Console によって管理される Google Cloud Platform プロジェクトは、お客様のプロジェクトが Google Assistant API にアクセスできるようにします。プロジェクトは割り当ての使用状況を追跡し、ハードウェアから発行されたリクエストに関する有益な指標を提供します。
Google Assistant API へのアクセスを有効にするには、次の手順を行います。
Actions Console を開きます。
Actions Console に移動
[Add/import project](プロジェクトを追加 / インポート)をクリックします。
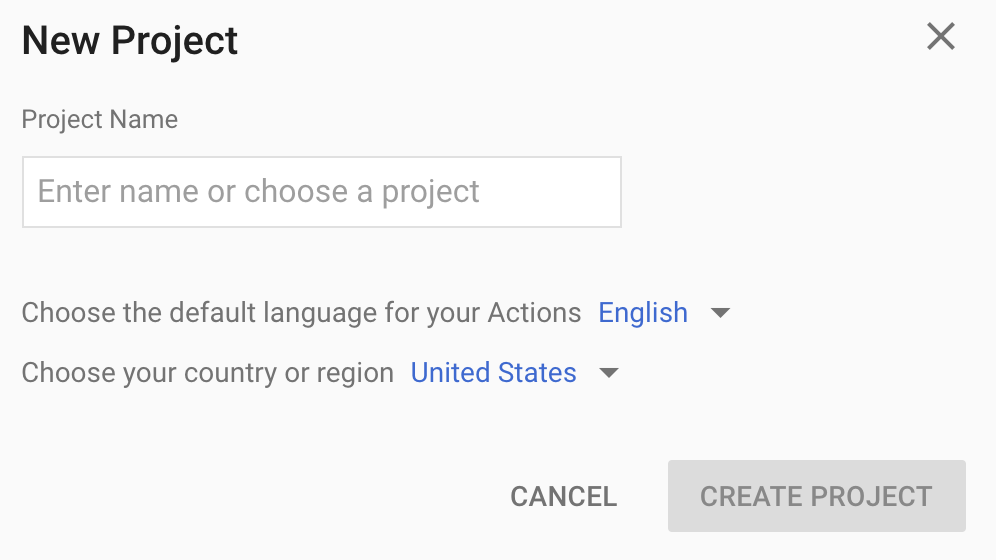
新しいプロジェクトを作成するには、[Project name](プロジェクト名)ボックスに名前を入力し、[CREATE PROJECT](プロジェクトを作成)をクリックします。
既存の Google Cloud Platform プロジェクトがある場合は、新しいプロジェクトを作成する代わりにそのプロジェクトを選択してインポートできます。
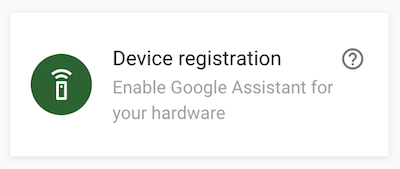
新しいプロジェクトを作成した場合は、ページの下の方にある [Device registration](デバイス登録)ボックスをクリックします。以前に作成したプロジェクトをインポートした場合、このボックスは表示されません。左のナビゲーション バーから、[ADVANCED OPTIONS](詳細オプション)の下の [Device registration](デバイス登録)タブを選択します。
このブラウザタブを開いたままにしておきます。後でこのタブを使用してデバイスモデルを登録します。
選択したプロジェクトで Google Assistant API を有効にします(利用規約をご覧ください)。これは Cloud Platform Console で行う必要があります。
API を有効にする
[有効にする] をクリックします。
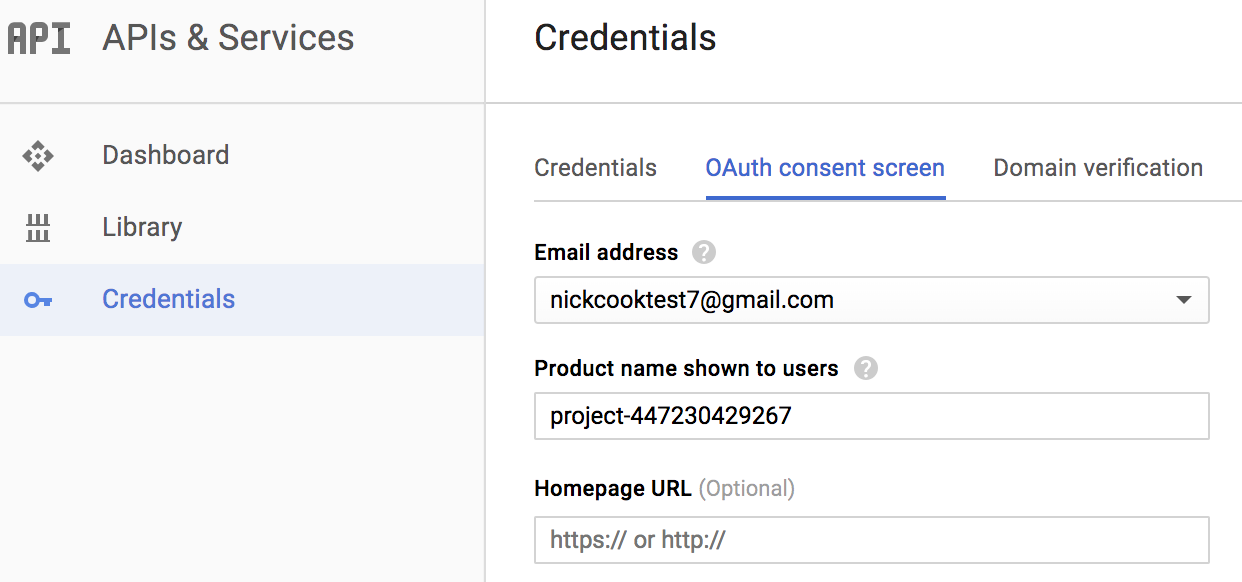
Cloud Platform Console でプロジェクトの OAuth 同意画面を構成する必要があります。このページのほとんどのフィールドは省略可能です。
アカウントのアクティビティ管理を設定する
Google アシスタントを使用するには、特定のアクティビティ データを Google と共有する必要があります。このデータは Google アシスタントが適切に機能するために必要となります。これは SDK に固有のものではありません。データを共有するには、Google アカウントを作成します(まだ作成していない場合)。
アシスタントで使用する Google アカウントのアクティビティ管理ページを開きます。どの Google アカウントでも使用できます。デベロッパー アカウントである必要はありません。
次のトグルスイッチが有効(青)になっていることを確認します。
- ウェブとアプリのアクティビティ
- さらに、[Chrome の履歴と Google サービスを使用するサイト、アプリ、デバイスでのアクティビティを含める] チェックボックスを必ず選択してください。
- デバイス情報
- 音声アクティビティ
次のステップ
デバイスモデルを登録する
特に記載のない限り、このページのコンテンツはクリエイティブ・コモンズの表示 4.0 ライセンスにより使用許諾されます。コードサンプルは Apache 2.0 ライセンスにより使用許諾されます。詳しくは、Google Developers サイトのポリシーをご覧ください。Java は Oracle および関連会社の登録商標です。
最終更新日 2025-07-26 UTC。
[null,null,["最終更新日 2025-07-26 UTC。"],[[["\u003cp\u003eAn Actions Console project provides access to the Google Assistant API, tracks quota usage, and provides valuable metrics.\u003c/p\u003e\n"],["\u003cp\u003eTo enable Assistant API access, you need to create or import a project in the Actions Console and enable the necessary API.\u003c/p\u003e\n"],["\u003cp\u003eFor the Assistant to function, ensure your Google Account's "Web & App Activity," "Device Information," and "Voice & Audio Activity" are enabled within the Activity Controls.\u003c/p\u003e\n"],["\u003cp\u003eBefore using the Assistant, be sure to register a Device Model in the Actions Console to associate with your project.\u003c/p\u003e\n"]]],["To begin, open the Actions Console and add or import a Google Cloud Platform project. If creating a new project, enter a name and proceed to \"Device registration\"; if importing, go directly to the \"Device registration\" tab. Then, enable the Google Assistant API in the Cloud Platform Console. Lastly, configure the OAuth consent screen for your project in the Cloud Platform Console. Ensure your Google account's activity controls are enabled for Web & App, Device Information, and Voice & Audio activity.\n"],null,["# Configure a Developer Project and Account Settings\n\nConfigure an Actions Console project\n------------------------------------\n\nA Google Cloud Platform project, managed by the Actions Console, gives your\nproject access to the Google Assistant API. The project tracks quota usage and\ngives you valuable metrics for the requests made from your hardware.\n\nTo enable access to the Google Assistant API, perform the following steps:\n\n1. Open the Actions Console.\n\n [Go\n to the Actions Console](https://console.actions.google.com/)\n2. Click **Add/import project**.\n\n3. To create a new project, enter a name in the **Project name** box and click\n **CREATE PROJECT**.\n\n \u003cbr /\u003e\n\n If you already have an existing Google Cloud Platform project, you can select that\n project and import it rather than creating a new one.\n\n4.\n If you created a new project, click the **Device registration** box near the\n bottom of the page. If you imported a previously-created project, this box\n does not appear; select the **Device registration** tab (under\n **ADVANCED OPTIONS**) from the left navbar.\n\n Keep this browser tab open. You will use it to register a device model in\n a later step.\n5. Enable the Google Assistant API on the project you selected (see the [Terms\n of Service](/assistant/sdk/terms-of-service)). You need to do this in the\n Cloud Platform Console.\n\n [Enable\n the API](https://console.developers.google.com/apis/api/embeddedassistant.googleapis.com/overview)\n\n Click **Enable**.\n6. You must configure the [OAuth consent\n screen](https://console.developers.google.com/apis/credentials/consent)\n for your project in the Cloud Platform Console. Note that most fields on\n this page are optional.\n\n\nSet activity controls for your account\n--------------------------------------\n\nIn order to use the Google Assistant, you must share certain activity data with\nGoogle. The Google Assistant needs this data to function properly; this is not\nspecific to the SDK. To share this data, create a\n[Google account](https://support.google.com/accounts/answer/27441)\nif you don't already have one.\n\nOpen the [Activity Controls page](https://myaccount.google.com/activitycontrols)\nfor the Google account that you want to use with the Assistant. You can use any\nGoogle account---it does not need to be your developer account.\n\n**Ensure the following toggle switches are enabled (blue)**:\n\n- Web \\& App Activity\n - In addition, be sure to select the **Include Chrome history and activity\n from sites, apps, and devices that use Google services** checkbox.\n- Device Information\n- Voice \\& Audio Activity\n\nNext step\n---------\n\n[Register the Device Model](/assistant/sdk/guides/service/python/embed/register-device)"]]