با مجموعهها، منظم بمانید
ذخیره و طبقهبندی محتوا براساس اولویتهای شما.
اکنون که دستیار را روی دستگاه اجرا می کنید، وقت آن است که آن را با Device Actions گسترش دهید. Device Actions به شما امکان می دهد دستگاه خود را از طریق صدا کنترل کنید. برای این مثال، شما از یک اکشن دستگاه داخلی برای روشن و خاموش کردن چراغ استفاده خواهید کرد.
این دستورالعمل ها را برای نصب یک LED روی Raspberry Pi 3 Model B دنبال کنید. در مرحله بعد، کد نمونه را تغییر می دهید تا LED را با فرمان صوتی روشن کنید.
الزامات سخت افزاری
قبل از شروع این مثال، به اجزای زیر نیاز دارید:
یک تخته نان
یک LED
یک مقاومت سری
دو سیم جامپر، هر دو با کانکتور نری و مادگی
مقاومت الکتریکی مقاومت باید به LED خاص گره خورده باشد. برای یافتن مقدار صحیح، می توانید از یک ماشین حساب آنلاین استفاده کنید (یا یک کیت بخرید).
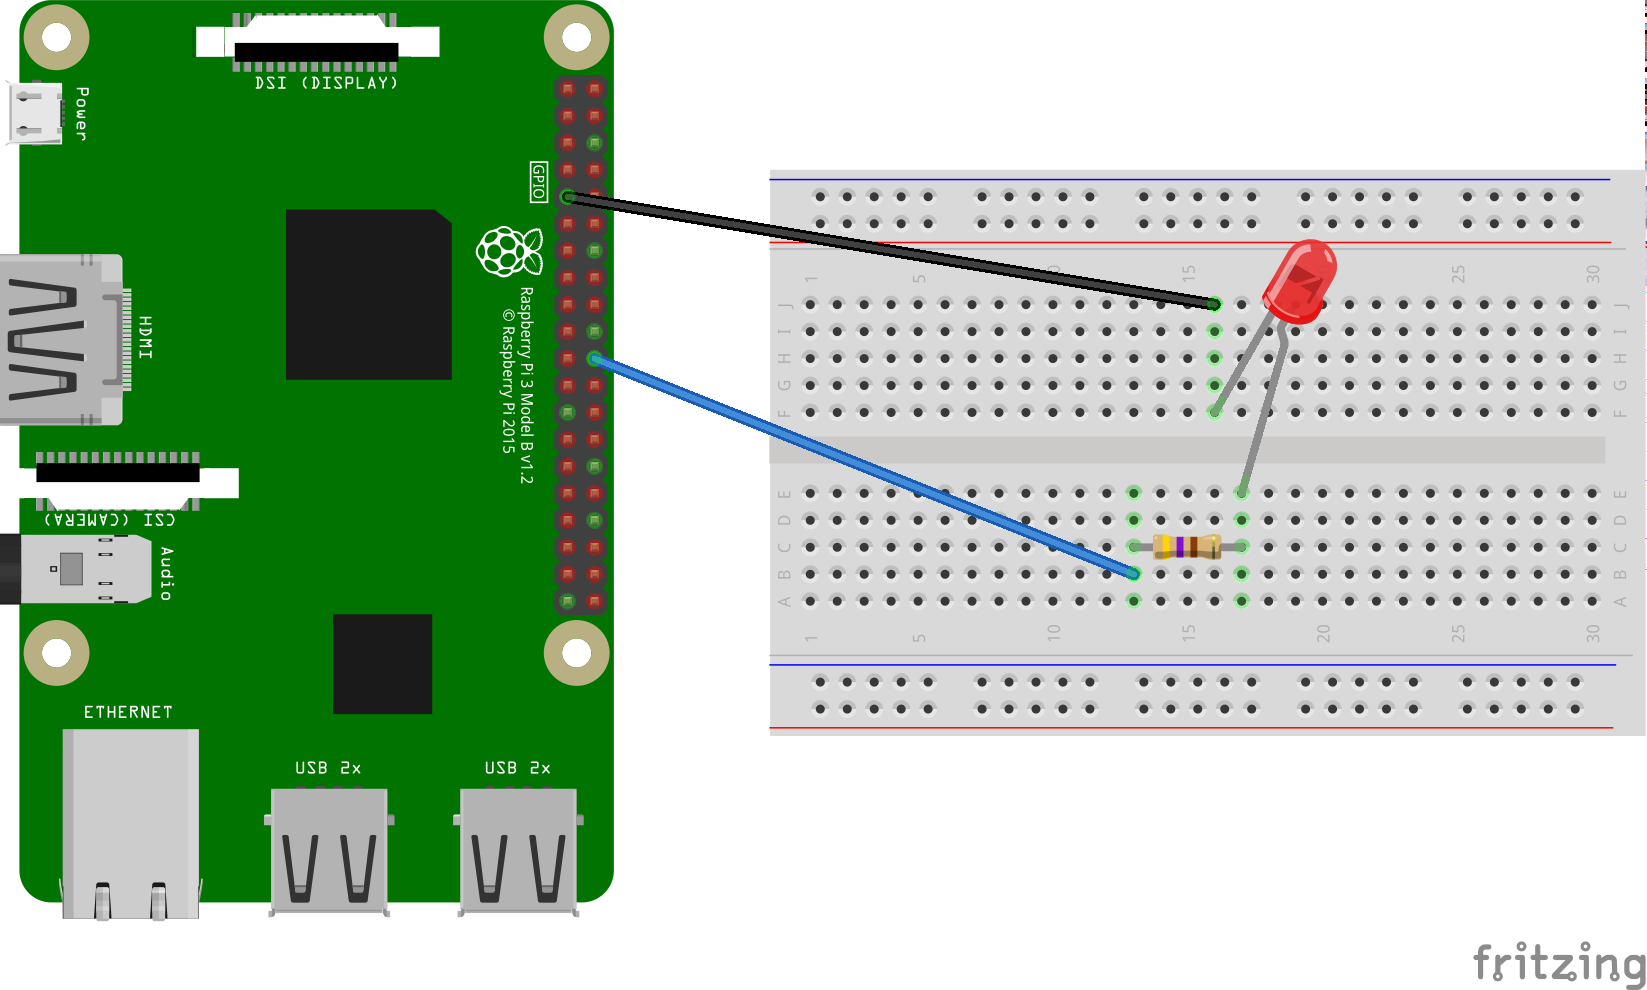
قطعات را به هم وصل کنید
پایه خروجی GPIO BCM25 را به یک طرف مقاومت سری وصل کنید. توجه داشته باشید که این پین فیزیکی 22 در Raspberry Pi 3 است.
طرف دیگر مقاومت را به طرف آند (سرب بلندتر) LED وصل کنید.
تاریخ آخرین بهروزرسانی 2025-07-28 بهوقت ساعت هماهنگ جهانی.
[null,null,["تاریخ آخرین بهروزرسانی 2025-07-28 بهوقت ساعت هماهنگ جهانی."],[[["\u003cp\u003eThis guide demonstrates how to extend Google Assistant with Device Actions to control a device, like an LED, using voice commands.\u003c/p\u003e\n"],["\u003cp\u003eYou will need a breadboard, LED, resistor, and jumper wires to connect to specific GPIO pins on a Raspberry Pi.\u003c/p\u003e\n"],["\u003cp\u003eEven without the physical components, you can still set up the Device Action and observe the output in the terminal.\u003c/p\u003e\n"],["\u003cp\u003eThis is the first step; the next involves registering device traits to define its capabilities.\u003c/p\u003e\n"]]],[],null,["# Install Hardware (Optional)\n\nNow that you have the Assistant running on the device, it is time to extend it\nwith Device Actions. Device Actions allow you to control your device via voice.\nFor this example, you will be using a [Built-in Device Action](/assistant/sdk/device-actions-overview#built-in)\nto turn a light on and off.\n\nFollow these instructions to install an LED on the Raspberry Pi 3 Model B. In a\nlater step, you will modify the sample code to light the LED by voice command.\n| **Note:** Don't worry if you don't have an LED at the moment. You can still set up a Device Action and print some output to the terminal.\n\nHardware requirements\n---------------------\n\nBefore you begin this example, you'll need the following components:\n\n- A breadboard\n- An LED\n- A series resistor\n- Two jumper wires, both with a male and female connector\n\nThe electrical resistance of the resistor should be tied to the specific LED.\nTo find the correct value, you can use an online calculator (or purchase a [kit](https://www.adafruit.com/product/3227)).\n\nConnect the components\n----------------------\n\n| **Note:** You may want to disconnect power to the Raspberry Pi to avoid short circuits.\n\n1. Connect GPIO output pin [BCM25](https://pinout.xyz) to one side of a series resistor. Note that this is physical pin 22 on the Raspberry Pi 3.\n2. Connect the other side of the resistor to the anode side (longer lead) of the LED.\n3. Connect the cathode side (shorter lead) of the LED to ground.\n\nNext step\n---------\n\n[Register Traits](/assistant/sdk/guides/service/python/extend/register-device-traits)"]]