Google uses AI technology to translate content into your preferred language. AI translations can contain errors.
安装硬件(可选)
使用集合让一切井井有条
根据您的偏好保存内容并对其进行分类。
现在,您已经在设备上运行 Google 助理,是时候使用设备操作来扩展 Google 助理了。借助设备操作,您可以通过语音控制设备。
在此示例中,您将使用内置设备操作打开和关闭灯。
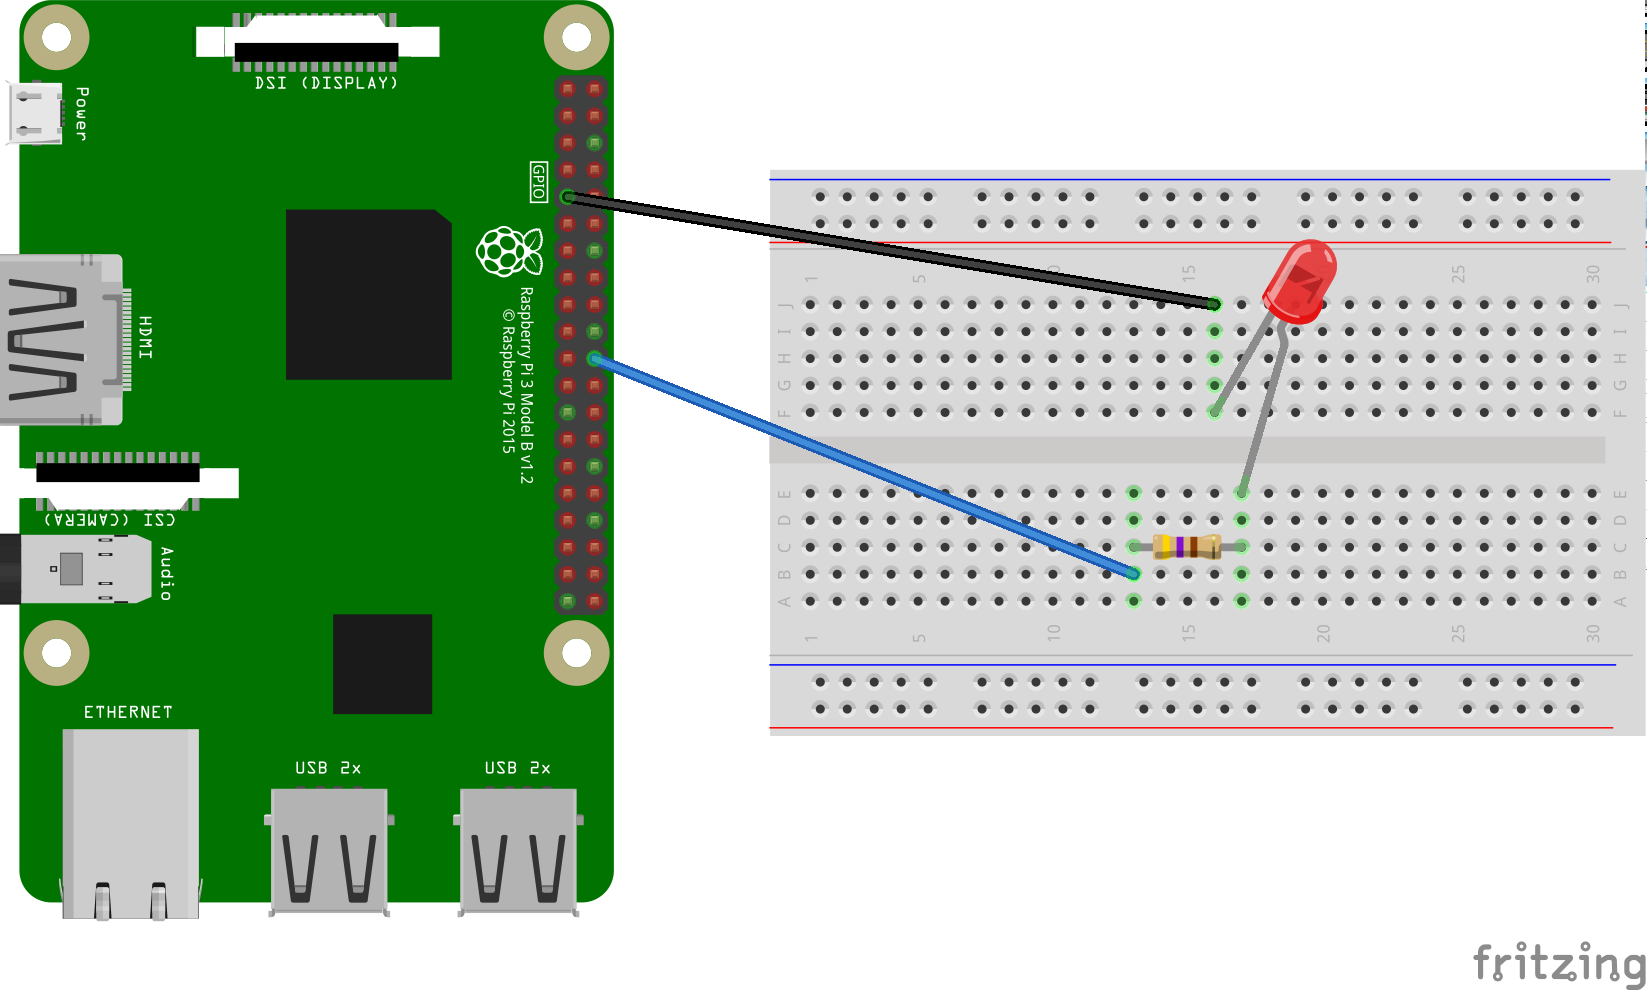
请按照以下说明在 Raspberry Pi 3 型号 B 上安装 LED。在稍后的步骤中,您将修改示例代码,以便通过语音指令点亮 LED。
硬件要求
在开始此示例之前,您需要以下组件:
- 一块面包板
- LED 灯
- 串联电阻器
- 两根跳线,带有公形连接器和母形连接器
该电阻器的电阻应连接到特定的 LED。
如需找到正确的值,您可以使用在线计算器(或购买套件)。
连接组件
- 将 GPIO 输出引脚 BCM25 连接到串联电阻的一侧。请注意,这是 Raspberry Pi 3 上的物理引脚 22。
- 将电阻的另一端连接到 LED 的阳极端(较长的引线)。
- 将 LED 的阴极侧(较短的引线)连接到接地。
后续步骤
注册特征
如未另行说明,那么本页面中的内容已根据知识共享署名 4.0 许可获得了许可,并且代码示例已根据 Apache 2.0 许可获得了许可。有关详情,请参阅 Google 开发者网站政策。Java 是 Oracle 和/或其关联公司的注册商标。
最后更新时间 (UTC):2025-07-25。
[null,null,["最后更新时间 (UTC):2025-07-25。"],[],[]]