Mantieni tutto organizzato con le raccolte
Salva e classifica i contenuti in base alle tue preferenze.
Ora che l'assistente è in esecuzione sul dispositivo, è il momento di estenderlo
con Azioni dispositivo. Le Azioni dispositivo ti consentono di controllare il dispositivo tramite comandi vocali.
In questo esempio, utilizzerai un'azione integrata del dispositivo per accendere e spegnere una luce.
Segui queste istruzioni per installare un LED su Raspberry Pi 3 Modello B. In un passaggio successivo, modificherai il codice campione per illuminare il LED con il comando vocale.
Requisiti hardware
Prima di iniziare questo esempio, avrai bisogno dei seguenti componenti:
Una bacheca
Un LED
Una resistenza in serie
Due cavi di ponticello, entrambi con connettore maschio e femmina
La resistenza elettrica del resistore deve essere legata al LED specifico.
Per trovare il valore corretto, puoi utilizzare un calcolatore online (o acquistare un kit).
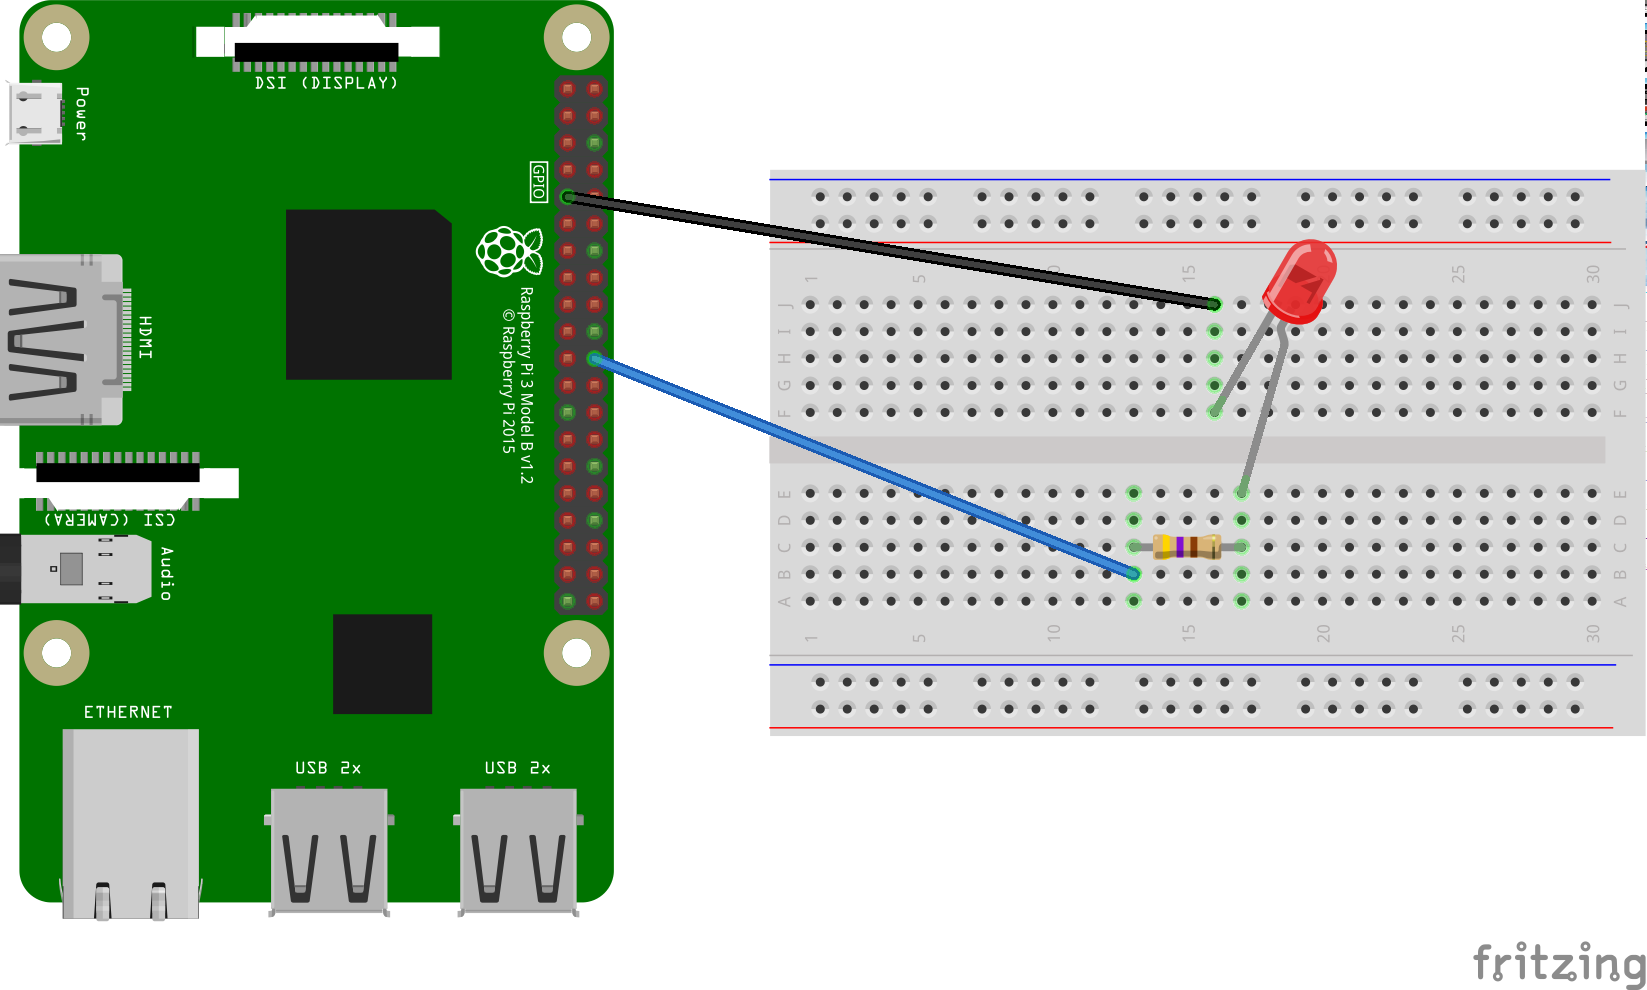
Collega i componenti
Collega il pin di uscita GPIO BCM25 a un lato di un resistore serie. Tieni presente che si tratta del pin fisico 22
sul Raspberry Pi 3.
Collega l'altro lato del resistore al lato anodo (cavo più lungo) del LED.
Collega il lato catodo (cavo più corto) del LED a terra.
[null,null,["Ultimo aggiornamento 2025-07-25 UTC."],[[["\u003cp\u003eThis guide demonstrates how to extend Google Assistant with Device Actions to control a device, like an LED, using voice commands.\u003c/p\u003e\n"],["\u003cp\u003eYou will need a breadboard, LED, resistor, and jumper wires to connect to specific GPIO pins on a Raspberry Pi.\u003c/p\u003e\n"],["\u003cp\u003eEven without the physical components, you can still set up the Device Action and observe the output in the terminal.\u003c/p\u003e\n"],["\u003cp\u003eThis is the first step; the next involves registering device traits to define its capabilities.\u003c/p\u003e\n"]]],[],null,["# Install Hardware (Optional)\n\nNow that you have the Assistant running on the device, it is time to extend it\nwith Device Actions. Device Actions allow you to control your device via voice.\nFor this example, you will be using a [Built-in Device Action](/assistant/sdk/device-actions-overview#built-in)\nto turn a light on and off.\n\nFollow these instructions to install an LED on the Raspberry Pi 3 Model B. In a\nlater step, you will modify the sample code to light the LED by voice command.\n| **Note:** Don't worry if you don't have an LED at the moment. You can still set up a Device Action and print some output to the terminal.\n\nHardware requirements\n---------------------\n\nBefore you begin this example, you'll need the following components:\n\n- A breadboard\n- An LED\n- A series resistor\n- Two jumper wires, both with a male and female connector\n\nThe electrical resistance of the resistor should be tied to the specific LED.\nTo find the correct value, you can use an online calculator (or purchase a [kit](https://www.adafruit.com/product/3227)).\n\nConnect the components\n----------------------\n\n| **Note:** You may want to disconnect power to the Raspberry Pi to avoid short circuits.\n\n1. Connect GPIO output pin [BCM25](https://pinout.xyz) to one side of a series resistor. Note that this is physical pin 22 on the Raspberry Pi 3.\n2. Connect the other side of the resistor to the anode side (longer lead) of the LED.\n3. Connect the cathode side (shorter lead) of the LED to ground.\n\nNext step\n---------\n\n[Register Traits](/assistant/sdk/guides/service/python/extend/register-device-traits)"]]