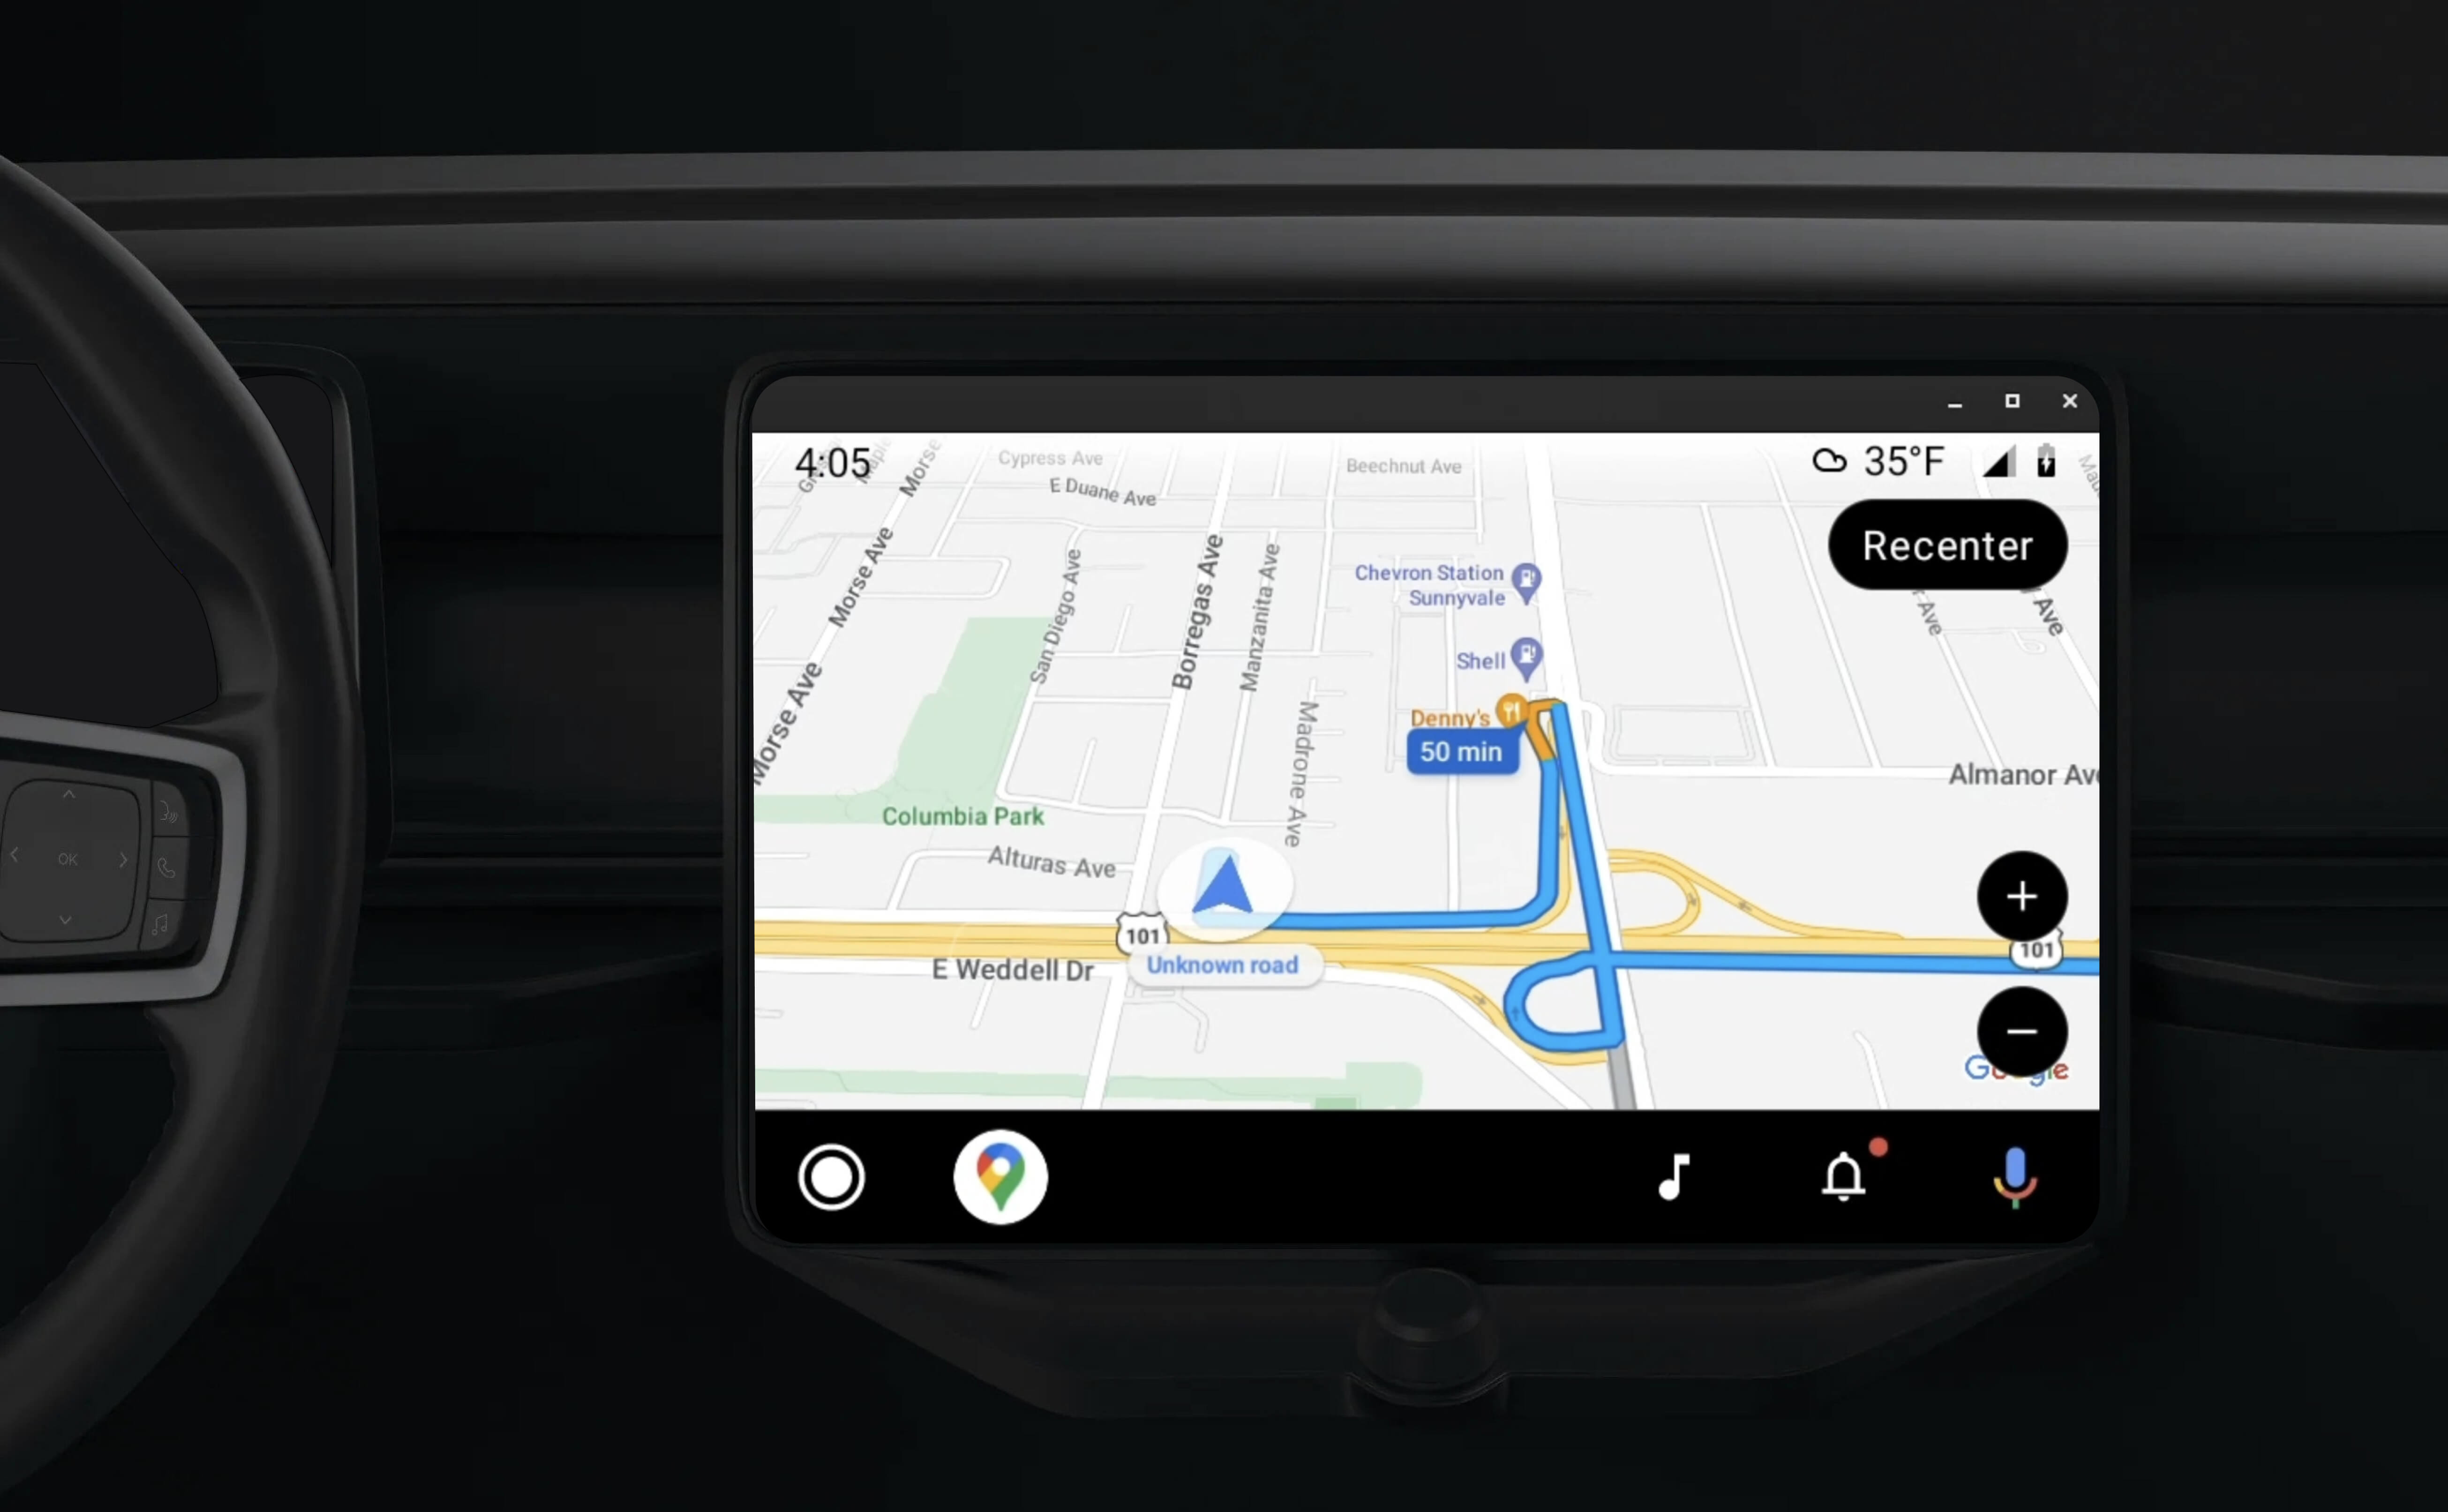
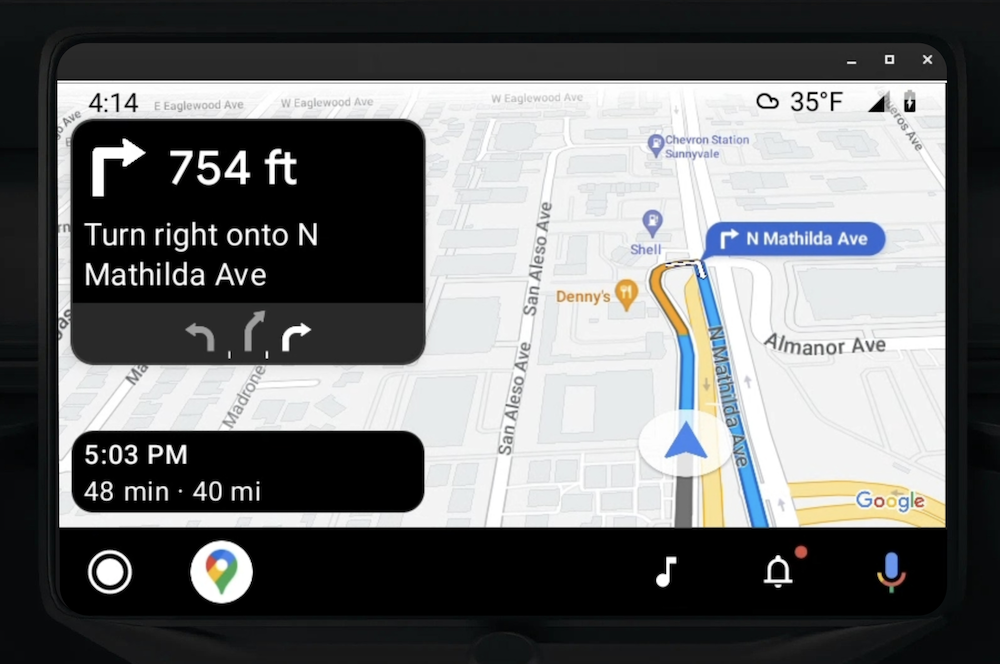
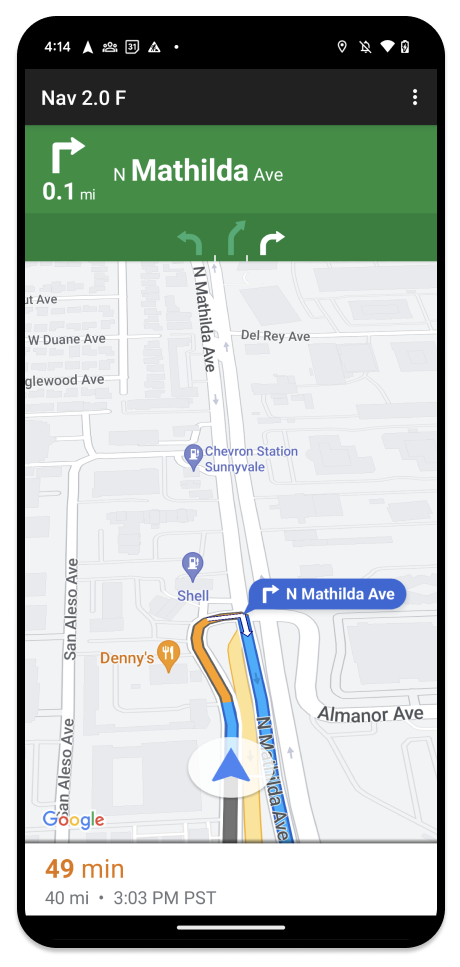
In diesem Abschnitt wird beschrieben, wie Sie das Navigation SDK mit der Android for Cars App Library verwenden können, um die Navigation Ihrer App auf Infotainmentsystemen im Armaturenbrett anzuzeigen. Wenn das Infotainmentsystem eines Nutzers Android Auto unterstützt, kann er Ihre App direkt auf dem Display seines Autos verwenden, indem er sein Smartphone mit dem Infotainmentsystem verbindet. Die Sprachführung erfolgt auch über die Lautsprecher des Autos.

Mit der Android for Cars App Library können Android-Anwendungen auf Android Auto ausgeführt werden. Dazu werden eine Reihe von visuellen Vorlagen bereitgestellt, die für die Fahrsicherheit zugelassen sind. Diese Vorlagen schränken die Bedienelemente der In-Dashboard-Benutzeroberfläche bewusst ein, um die Ablenkung des Fahrers zu verringern.
Wenn Sie Ihre Navigation SDK-basierte App für Android Auto aktivieren, stellen Sie eine zusätzliche Ansicht für die Navigation bereit.
So können zwei Kartenansichten angezeigt werden – eine auf dem Smartphone und eine auf dem Infotainmentsystem. Beide Displays erhalten Anleitungen von Navigator.java, einem Singleton.
Das In-Dashboard-System zeigt die sicherheitsgeprüften interaktiven Elemente an, damit der Nutzer sicher und ohne unnötige Ablenkung an sein Ziel gelangt. Der Nutzer kann auch mit den app-spezifischen Funktionen interagieren, z. B. Bestellungen annehmen oder ablehnen oder den Standort des Kunden auf einer Karte ansehen. Updates zum Bestellstatus können auch auf der In-Dashboard-Einheit angezeigt werden.


Auf dem angehängten Smartphone kann weiterhin das Standard-Navigation SDK oder eine andere Ansicht oder ein anderer Workflow in Ihrer Anwendung angezeigt werden. Mit dieser Funktion können Sie weiterhin benutzerdefinierte Funktionen bereitstellen, die auf einem Autodisplay möglicherweise nicht gut funktionieren.
Einrichten
Damit Ihre App mit Android Auto funktioniert, müssen Sie zuerst einen Autoservice mit Android Auto einrichten und dann die TurnByTurn-Bibliothek in Ihrer Navigation SDK-App aktivieren.
Erste Schritte mit Android Auto
Bevor Sie mit den Funktionen des Navigation SDK arbeiten können, die für Android Auto entwickelt wurden, müssen Sie einen Autoservice für Ihre App einrichten, damit Android Auto ihn erkennen kann.
Führen Sie die folgenden Schritte aus. Sie finden sie alle in der Entwicklerdokumentation für Android for Cars:
- Machen Sie sich mit den grundlegenden Android Auto-Funktionen vertraut.
- Installieren Sie die Android for Cars-App-Bibliothek.
- Konfiguriere das Manifest deiner App so, dass Android Auto enthalten ist.
- Deklariere in deinem Manifest mindestens das Car-App-Level 1.
- Erstellen Sie Ihre
CarAppServiceund Sitzung.
Navigation SDK einrichten
Nachdem Sie Ihren Car App-Dienst eingerichtet haben, können Sie mit dem Navigation SDK arbeiten.
- Richten Sie Ihr Projekt ein, falls Sie das Navigation SDK noch nicht in Ihre App eingebunden haben.
- Aktivieren Sie den Feed für die Turn-by-Turn-Navigation für Ihre App.
- Optional. Generierte Symbole aus dem Navigation SDK verwenden.
- Karte zeichnen: Verwenden Sie dazu die
NavigationViewForAuto-Klasse auf der Android Auto-Oberfläche, die in derScreen-Klasse bereitgestellt wird. - Android Auto-Navigationsvorlage mit den Daten aus der TurnbyTurn-Bibliothek füllen
Nachdem Sie einen Dienst registriert haben, der Ihrer App Navigationsinformationen bereitstellt, und Ihre App eine Verbindung zu Android Auto herstellen kann, können Sie die restlichen Navigationselemente erstellen, die für die ordnungsgemäße Funktion Ihrer App mit Android Auto erforderlich sind:
- Karte und Navigations-UI zeichnen
- Karteninteraktion aktivieren
- Navigationsanweisungen anzeigen
- Richtige Manövertypen verwenden
Karte und Benutzeroberfläche für die Navigation zeichnen
Die Klasse NavigationViewForAuto rendert eine Karte und eine Navigations-Benutzeroberfläche auf Android Auto-Displays. Sie bietet viele der Funktionen von NavigationView für Smartphones, aber mit eingeschränkter Interaktivität. Verwenden Sie NavigationViewForAuto, um auf die von Android Auto bereitgestellte Surface zu zeichnen:
private boolean isSurfaceReady(SurfaceContainer surfaceContainer) {
  return surfaceContainer.getSurface() != null
        && surfaceContainer.getDpi() != 0
        && surfaceContainer.getHeight() != 0
        && surfaceContainer.getWidth() != 0;
}

@Override
public void onSurfaceAvailable(@NonNull SurfaceContainer surfaceContainer) {
  if (!isSurfaceReady(surfaceContainer)) {
    return;
   }
  virtualDisplay =
      getCarContext()
          .getSystemService(DisplayManager.class)
          .createVirtualDisplay(
            VIRTUAL_DISPLAY_NAME,
            surfaceContainer.getWidth(),
            surfaceContainer.getHeight(),
            surfaceContainer.getDpi(),
            surfaceContainer.getSurface(),
            DisplayManager.VIRTUAL_DISPLAY_FLAG_OWN_CONTENT_ONLY);
    presentation = new Presentation(getCarContext(), virtualDisplay.getDisplay());

    navigationView = new NavigationViewForAuto(getCarContext());
    navigationView.onCreate(null);
    navigationView.onStart();
    navigationView.onResume();

    presentation.setContentView(navigationView);
    presentation.show();

    navigationView.getMapAsync(googleMap -> this.googleMap = googleMap);
  }

@Override
public void onSurfaceDestroyed(@NonNull SurfaceContainer surfaceContainer) {
  navigationView.onPause();
  navigationView.onStop();
  navigationView.onDestroy();

  presentation.dismiss();
  virtualDisplay.release();
}
Karteninteraktion aktivieren
Aus Sicherheitsgründen für den Fahrer beschränkt Android Auto die Interaktion mit der Bildschirmoberfläche auf eine Reihe von SurfaceCallback-Methoden. Mit diesen Rückrufen können Sie eine eingeschränkte Fahrerinteraktion mit der Karte auf einem Armaturenbrettdisplay unterstützen. onClick und onScale entsprechen beispielsweise den Tippen- und Auseinander-/Zusammenziehen-Gesten des Nutzers. Für Interaktivitäts-Callbacks muss der map
action
strip wie folgt verwendet werden:
Damit Ihre App Rückrufe für Karteninteraktionen empfangen kann, muss sie eine Action.PAN-Schaltfläche verwenden.
Wenn Sie zusätzliche Nutzeraktionen unterstützen möchten, fügen Sie der Kartenaktionsleiste Schaltflächen hinzu.
Surface-Callbacks aktivieren
@NonNull
@Override
public Template onGetTemplate() {
  return new NavigationTemplate.Builder()
    .setActionStrip(new ActionStrip.Builder().build())
    .setMapActionStrip(new ActionStrip.Builder().addAction(Action.PAN).build())
    .build();
}
Mit zwei Fingern zoomen
@Override
public void onScale(float focusX, float focusY, float scaleFactor) {
  CameraUpdate update =
      CameraUpdateFactory.zoomBy((scaleFactor - 1),
                                  new Point((int) focusX, (int) focusY));
  googleMap.animateCamera(update); // map is set in onSurfaceAvailable.
}
Schwenken
@Override
public void onScroll(float distanceX, float distanceY) {
  googleMap.moveCamera(CameraUpdateFactory.scrollBy(distanceX, distanceY));
}
Routenplaner anzeigen
In diesem Abschnitt wird beschrieben, wie Sie einen Observer für Navigationsbeiträge einrichten und Navigationsanweisungen in die Vorlage für die Abbiegekarte einfügen.

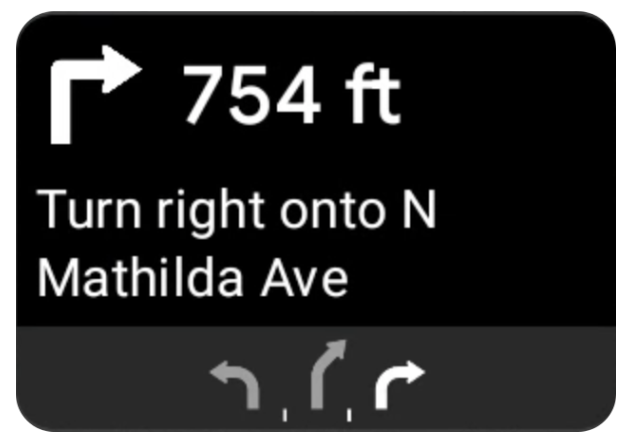
Die Navigationsvorlage für Android Auto enthält eine Abbiegekarte, auf der Navigationsinformationen für die aktuelle Fahrt angezeigt werden. Die TurnByTurn-Bibliothek im Navigation SDK stellt diese Navigationsinformationen bereit, die von Ihrem Code verwendet werden, um die Android Auto-Navigationsvorlage zu füllen.
Beobachter einrichten
Im folgenden Beispiel ist SampleApplication eine benutzerdefinierte Anwendungsklasse, die ein MutableLiveData<NavInfo>-Objekt enthält. Wenn der Observer ein Update vom Navigator-Objekt erhält, wird dieses NavInfo-Objekt an die NavInfoMutableLiveData gesendet, die von der SampleApplication-Klasse verwaltet wird.
Im folgenden Beispiel wird ein Observer für dieses Objekt in der Implementierung des Android Auto-Screen registriert.
public SampleAndroidAutoNavigationScreen(@NonNull CarContext carContext,
                                     SampleApplication application) {
  super(carContext);
  getCarContext().getCarService(AppManager.class).setSurfaceCallback(this);
  application.getNavInfoMutableLiveData().observe(this, this::processNextStep);
}
Navigationsinformationen eingeben
Das folgende Code-Snippet zeigt, wie die Android Auto-Vorlage mit den aktuellen Routinginformationen gefüllt wird, einschließlich Schritten, Entfernungen und Symbolen. Weitere Informationen zu diesen Displayelementen finden Sie unter Feed-Display mit Daten füllen.
Maximieren, um das Codebeispiel anzusehen:
private RoutingInfo currentRoutingInfo;

@NonNull
@Override
public Template onGetTemplate() {
NavigationTemplate.Builder navigationTemplateBuilder =
  new NavigationTemplate.Builder()
    .setActionStrip(...)
    .setMapActionStrip(...)
  if (currentRoutingInfo != null) {
    navigationTemplateBuilder.setNavigationInfo(currentRoutingInfo);
  }
  return navigationTemplateBuilder.build();
}

private void processNextStep(NavInfo navInfo) {
  if (navInfo == null || navinfo.getCurrentStep() == null) {
    return;
  }

/**
*   Converts data received from the Navigation data feed
*   into Android-Auto compatible data structures. For more information
*   see the "Ensure correct maneuver types" below.
*/
  Step currentStep = buildStepFromStepInfo(navInfo.getCurrentStep());
  Distance distanceToStep =
              buildDistanceFromMeters(navInfo.getDistanceToCurrentStepMeters());

  currentRoutingInfo =
     new RoutingInfo.Builder().setCurrentStep(currentStep, distanceToStep).build();

  // Invalidate the current template which leads to another onGetTemplate call.
  invalidate();
}

private Step buildStepFromStepInfo(StepInfo stepInfo) {
  IconCompat maneuverIcon =
               IconCompat.createWithBitmap(stepInfo.getManeuverBitmap());
  Maneuver.Builder
            maneuverBuilder = newManeuver.Builder(
                  ManeuverConverter
                          .getAndroidAutoManeuverType(stepInfo.getManeuver()));
  CarIcon maneuverCarIcon = new CarIcon.Builder(maneuverIcon).build();
  maneuverBuilder.setIcon(maneuverCarIcon);
  Step.Builder stepBuilder =
    new Step.Builder()
       .setRoad(stepInfo.getFullRoadName())
       .setCue(stepInfo.getFullInstructionText())
       .setManeuver(maneuverBuilder.build());

  if (stepInfo.getLanes() != null
           && stepInfo.getLanesBitmap() != null) {
    for (Lane lane : buildAndroidAutoLanesFromStep(stepInfo)) {
      stepBuilder.addLane(lane);
    }
    IconCompat lanesIcon =
               IconCompat.createWithBitmap(stepInfo.getLanesBitmap());
    CarIcon lanesImage = new CarIcon.Builder(lanesIcon).build();
    stepBuilder.setLanesImage(lanesImage);
  }
    return stepBuilder.build();
}

/*
*   Constructs a {@code Distance} object in imperial measurement units.
*   In a real world scenario, units would be based on locale.
*/
private Distance buildDistanceFromMeters(int distanceMeters) {

// Distance can be negative so set the min distance to 0.
  int remainingFeet = (int) max(0, distanceMeters * DistanceConstants.FEET_PER_METER);
  double remainingMiles = ((double) remainingFeet) / DistanceConstants.FEET_PER_MILE;

// Only use the tenths place digit if distance is less than 10 miles and show
// feet if distance is less than 0.25 miles.

  if (remainingMiles >= DistanceConstants.MIN_MILES_TO_SHOW_INTEGER) {
    return Distance.create((int) round(remainingMiles), Distance.UNIT_MILES);
  } else if (remainingMiles >= 0.25) {
    return Distance.create((int) remainingMiles, Distance.UNIT_MILES);
  } else {
    return Distance.create(remainingFeet, Distance.UNIT_FEET);
  }
}
Korrekte Manövertypen überprüfen
Die Arten von Manövern, die in der Android Auto Car-Bibliothek verwendet werden, entsprechen eins zu eins den Manövern, die von der TurnByTurn-Bibliothek bereitgestellt werden. Sie müssen die Navigation SDK-Manöver jedoch in eine gültige Deklaration in der Android Auto Car-Bibliothek umwandeln. In der folgenden Tabelle sehen Sie die Entsprechungen für einige Felder. Danach finden Sie ein Beispiel für ein Konvertierungstool.
| Detaillierte Routenführung – Manöver | Android Auto-Maneuver |
|---|---|
DEPART |
TYPE_DEPART |
DESTINATION |
TYPE_DESTINATION |
DESTINATION_LEFT |
TYPE_DESTINATION_LEFT |
DESTINATION_RIGHT |
TYPE_DESTINATION_RIGHT |
TURN_U_TURN_CLOCKWISE |
TYPE_U_TURN_RIGHT |
ON_RAMP_LEFT |
TYPE_ON_RAMP_NORMAL_LEFT |
ON_RAMP_RIGHT |
TYPE_ON_RAMP_NORMAL_RIGHT |
ON_RAMP_SLIGHT_LEFT |
TYPE_ON_RAMP_SLIGHT_LEFT |
FORK_RIGHT |
TYPE_FORK_RIGHT |
Maximieren, um das Codebeispiel anzusehen:
import com.google.android.libraries.mapsplatform.turnbyturn.model.Maneuver;
import com.google.common.collect.ImmutableMap;
import javax.annotation.Nullable;

/** Converter that converts between turn-by-turn and Android Auto Maneuvers. */
public final class ManeuverConverter {
  private ManeuverConverter() {}

  // Map from turn-by-turn Maneuver to Android Auto Maneuver.Type.
  private static final ImmutableMap<Integer, Integer> MANEUVER_TO_ANDROID_AUTO_MANEUVER_TYPE =
      ImmutableMap.<Integer, Integer>builder()
          .put(Maneuver.DEPART, androidx.car.app.navigation.model.Maneuver.TYPE_DEPART)
          .put(Maneuver.DESTINATION, androidx.car.app.navigation.model.Maneuver.TYPE_DESTINATION)
          .put(
              Maneuver.DESTINATION_LEFT,
              androidx.car.app.navigation.model.Maneuver.TYPE_DESTINATION_LEFT)
          .put(
              Maneuver.DESTINATION_RIGHT,
              androidx.car.app.navigation.model.Maneuver.TYPE_DESTINATION_RIGHT)
          .put(Maneuver.STRAIGHT, androidx.car.app.navigation.model.Maneuver.TYPE_STRAIGHT)
          .put(Maneuver.TURN_LEFT, androidx.car.app.navigation.model.Maneuver.TYPE_TURN_NORMAL_LEFT)
          .put(
              Maneuver.TURN_RIGHT,
              androidx.car.app.navigation.model.Maneuver.TYPE_TURN_NORMAL_RIGHT)
          .put(Maneuver.TURN_KEEP_LEFT, androidx.car.app.navigation.model.Maneuver.TYPE_KEEP_LEFT)
          .put(Maneuver.TURN_KEEP_RIGHT, androidx.car.app.navigation.model.Maneuver.TYPE_KEEP_RIGHT)
          .put(
              Maneuver.TURN_SLIGHT_LEFT,
              androidx.car.app.navigation.model.Maneuver.TYPE_TURN_SLIGHT_LEFT)
          .put(
              Maneuver.TURN_SLIGHT_RIGHT,
              androidx.car.app.navigation.model.Maneuver.TYPE_TURN_SLIGHT_RIGHT)
          .put(
              Maneuver.TURN_SHARP_LEFT,
              androidx.car.app.navigation.model.Maneuver.TYPE_TURN_SHARP_LEFT)
          .put(
              Maneuver.TURN_SHARP_RIGHT,
              androidx.car.app.navigation.model.Maneuver.TYPE_ON_RAMP_SHARP_RIGHT)
          .put(
              Maneuver.TURN_U_TURN_CLOCKWISE,
              androidx.car.app.navigation.model.Maneuver.TYPE_U_TURN_RIGHT)
          .put(
              Maneuver.TURN_U_TURN_COUNTERCLOCKWISE,
              androidx.car.app.navigation.model.Maneuver.TYPE_U_TURN_LEFT)
          .put(
              Maneuver.MERGE_UNSPECIFIED,
              androidx.car.app.navigation.model.Maneuver.TYPE_MERGE_SIDE_UNSPECIFIED)
          .put(Maneuver.MERGE_LEFT, androidx.car.app.navigation.model.Maneuver.TYPE_MERGE_LEFT)
          .put(Maneuver.MERGE_RIGHT, androidx.car.app.navigation.model.Maneuver.TYPE_MERGE_RIGHT)
          .put(Maneuver.FORK_LEFT, androidx.car.app.navigation.model.Maneuver.TYPE_FORK_LEFT)
          .put(Maneuver.FORK_RIGHT, androidx.car.app.navigation.model.Maneuver.TYPE_FORK_RIGHT)
          .put(
              Maneuver.ON_RAMP_UNSPECIFIED,
              androidx.car.app.navigation.model.Maneuver.TYPE_ON_RAMP_NORMAL_RIGHT)
          .put(
              Maneuver.ON_RAMP_LEFT,
              androidx.car.app.navigation.model.Maneuver.TYPE_ON_RAMP_NORMAL_LEFT)
          .put(
              Maneuver.ON_RAMP_RIGHT,
              androidx.car.app.navigation.model.Maneuver.TYPE_ON_RAMP_NORMAL_RIGHT)
          .put(
              Maneuver.ON_RAMP_KEEP_LEFT,
              androidx.car.app.navigation.model.Maneuver.TYPE_ON_RAMP_NORMAL_LEFT)
          .put(
              Maneuver.ON_RAMP_KEEP_RIGHT,
              androidx.car.app.navigation.model.Maneuver.TYPE_ON_RAMP_NORMAL_RIGHT)
          .put(
              Maneuver.ON_RAMP_SLIGHT_LEFT,
              androidx.car.app.navigation.model.Maneuver.TYPE_ON_RAMP_SLIGHT_LEFT)
          .put(
              Maneuver.ON_RAMP_SLIGHT_RIGHT,
              androidx.car.app.navigation.model.Maneuver.TYPE_ON_RAMP_SLIGHT_RIGHT)
          .put(
              Maneuver.ON_RAMP_SHARP_LEFT,
              androidx.car.app.navigation.model.Maneuver.TYPE_ON_RAMP_SHARP_LEFT)
          .put(
              Maneuver.ON_RAMP_SHARP_RIGHT,
              androidx.car.app.navigation.model.Maneuver.TYPE_ON_RAMP_SHARP_RIGHT)
          .put(
              Maneuver.ON_RAMP_U_TURN_CLOCKWISE,
              androidx.car.app.navigation.model.Maneuver.TYPE_ON_RAMP_U_TURN_RIGHT)
          .put(
              Maneuver.ON_RAMP_U_TURN_COUNTERCLOCKWISE,
              androidx.car.app.navigation.model.Maneuver.TYPE_ON_RAMP_U_TURN_LEFT)
          .put(
              Maneuver.OFF_RAMP_LEFT,
              androidx.car.app.navigation.model.Maneuver.TYPE_OFF_RAMP_NORMAL_LEFT)
          .put(
              Maneuver.OFF_RAMP_RIGHT,
              androidx.car.app.navigation.model.Maneuver.TYPE_OFF_RAMP_NORMAL_RIGHT)
          .put(
              Maneuver.OFF_RAMP_KEEP_LEFT,
              androidx.car.app.navigation.model.Maneuver.TYPE_OFF_RAMP_SLIGHT_LEFT)
          .put(
              Maneuver.OFF_RAMP_KEEP_RIGHT,
              androidx.car.app.navigation.model.Maneuver.TYPE_OFF_RAMP_SLIGHT_RIGHT)
          .put(
              Maneuver.OFF_RAMP_SLIGHT_LEFT,
              androidx.car.app.navigation.model.Maneuver.TYPE_OFF_RAMP_SLIGHT_LEFT)
          .put(
              Maneuver.OFF_RAMP_SLIGHT_RIGHT,
              androidx.car.app.navigation.model.Maneuver.TYPE_OFF_RAMP_SLIGHT_RIGHT)
          .put(
              Maneuver.OFF_RAMP_SHARP_LEFT,
              androidx.car.app.navigation.model.Maneuver.TYPE_OFF_RAMP_NORMAL_LEFT)
          .put(
              Maneuver.OFF_RAMP_SHARP_RIGHT,
              androidx.car.app.navigation.model.Maneuver.TYPE_OFF_RAMP_NORMAL_RIGHT)
          .put(
              Maneuver.ROUNDABOUT_CLOCKWISE,
              androidx.car.app.navigation.model.Maneuver.TYPE_ROUNDABOUT_ENTER_AND_EXIT_CW)
          .put(
              Maneuver.ROUNDABOUT_COUNTERCLOCKWISE,
              androidx.car.app.navigation.model.Maneuver.TYPE_ROUNDABOUT_ENTER_AND_EXIT_CCW)
          .put(
              Maneuver.ROUNDABOUT_STRAIGHT_CLOCKWISE,
              androidx.car.app.navigation.model.Maneuver.TYPE_ROUNDABOUT_ENTER_CW)
          .put(
              Maneuver.ROUNDABOUT_STRAIGHT_COUNTERCLOCKWISE,
              androidx.car.app.navigation.model.Maneuver.TYPE_ROUNDABOUT_ENTER_CCW)
          .put(
              Maneuver.ROUNDABOUT_LEFT_CLOCKWISE,
              androidx.car.app.navigation.model.Maneuver
                  .TYPE_ROUNDABOUT_ENTER_AND_EXIT_CW_WITH_ANGLE)
          .put(
              Maneuver.ROUNDABOUT_LEFT_COUNTERCLOCKWISE,
              androidx.car.app.navigation.model.Maneuver
                  .TYPE_ROUNDABOUT_ENTER_AND_EXIT_CCW_WITH_ANGLE)
          .put(
              Maneuver.ROUNDABOUT_RIGHT_CLOCKWISE,
              androidx.car.app.navigation.model.Maneuver
                  .TYPE_ROUNDABOUT_ENTER_AND_EXIT_CW_WITH_ANGLE)
          .put(
              Maneuver.ROUNDABOUT_RIGHT_COUNTERCLOCKWISE,
              androidx.car.app.navigation.model.Maneuver
                  .TYPE_ROUNDABOUT_ENTER_AND_EXIT_CCW_WITH_ANGLE)
          .put(
              Maneuver.ROUNDABOUT_SLIGHT_LEFT_CLOCKWISE,
              androidx.car.app.navigation.model.Maneuver
                  .TYPE_ROUNDABOUT_ENTER_AND_EXIT_CW_WITH_ANGLE)
          .put(
              Maneuver.ROUNDABOUT_SLIGHT_LEFT_COUNTERCLOCKWISE,
              androidx.car.app.navigation.model.Maneuver
                  .TYPE_ROUNDABOUT_ENTER_AND_EXIT_CCW_WITH_ANGLE)
          .put(
              Maneuver.ROUNDABOUT_SLIGHT_RIGHT_CLOCKWISE,
              androidx.car.app.navigation.model.Maneuver
                  .TYPE_ROUNDABOUT_ENTER_AND_EXIT_CW_WITH_ANGLE)
          .put(
              Maneuver.ROUNDABOUT_SLIGHT_RIGHT_COUNTERCLOCKWISE,
              androidx.car.app.navigation.model.Maneuver
                  .TYPE_ROUNDABOUT_ENTER_AND_EXIT_CCW_WITH_ANGLE)
          .put(
              Maneuver.ROUNDABOUT_SHARP_LEFT_CLOCKWISE,
              androidx.car.app.navigation.model.Maneuver
                  .TYPE_ROUNDABOUT_ENTER_AND_EXIT_CW_WITH_ANGLE)
          .put(
              Maneuver.ROUNDABOUT_SHARP_LEFT_COUNTERCLOCKWISE,
              androidx.car.app.navigation.model.Maneuver
                  .TYPE_ROUNDABOUT_ENTER_AND_EXIT_CCW_WITH_ANGLE)
          .put(
              Maneuver.ROUNDABOUT_SHARP_RIGHT_CLOCKWISE,
              androidx.car.app.navigation.model.Maneuver
                  .TYPE_ROUNDABOUT_ENTER_AND_EXIT_CW_WITH_ANGLE)
          .put(
              Maneuver.ROUNDABOUT_SHARP_RIGHT_COUNTERCLOCKWISE,
              androidx.car.app.navigation.model.Maneuver
                  .TYPE_ROUNDABOUT_ENTER_AND_EXIT_CCW_WITH_ANGLE)
          .put(
              Maneuver.ROUNDABOUT_U_TURN_CLOCKWISE,
              androidx.car.app.navigation.model.Maneuver
                  .TYPE_ROUNDABOUT_ENTER_AND_EXIT_CW_WITH_ANGLE)
          .put(
              Maneuver.ROUNDABOUT_U_TURN_COUNTERCLOCKWISE,
              androidx.car.app.navigation.model.Maneuver
                  .TYPE_ROUNDABOUT_ENTER_AND_EXIT_CCW_WITH_ANGLE)
          .put(
              Maneuver.ROUNDABOUT_EXIT_CLOCKWISE,
              androidx.car.app.navigation.model.Maneuver.TYPE_ROUNDABOUT_EXIT_CW)
          .put(
              Maneuver.ROUNDABOUT_EXIT_COUNTERCLOCKWISE,
              androidx.car.app.navigation.model.Maneuver.TYPE_ROUNDABOUT_EXIT_CCW)
          .put(Maneuver.FERRY_BOAT, androidx.car.app.navigation.model.Maneuver.TYPE_FERRY_BOAT)
          .put(Maneuver.FERRY_TRAIN, androidx.car.app.navigation.model.Maneuver.TYPE_FERRY_TRAIN)
          .put(Maneuver.NAME_CHANGE, androidx.car.app.navigation.model.Maneuver.TYPE_NAME_CHANGE)
          .buildOrThrow();

  /** Represents the roundabout turn angle for a slight turn in either right or left directions. */
  private static final int ROUNDABOUT_ANGLE_SLIGHT = 10;

  /** Represents the roundabout turn angle for a normal turn in either right or left directions. */
  private static final int ROUNDABOUT_ANGLE_NORMAL = 45;

  /** Represents the roundabout turn angle for a sharp turn in either right or left directions. */
  private static final int ROUNDABOUT_ANGLE_SHARP = 135;

  /** Represents the roundabout turn angle for a u-turn in either right or left directions. */
  private static final int ROUNDABOUT_ANGLE_U_TURN = 180;

  /**
   * Returns the corresponding {@link androidx.car.app.navigation.model.Maneuver.Type} for the given
   * direction {@link Maneuver}
   *
   * @throws {@link IllegalArgumentException} if the given maneuver does not have a corresponding
   *     Android Auto Maneuver type.
   */
  public static int getAndroidAutoManeuverType(@Maneuver int maneuver) {
    if (MANEUVER_TO_ANDROID_AUTO_MANEUVER_TYPE.containsKey(maneuver)) {
      return MANEUVER_TO_ANDROID_AUTO_MANEUVER_TYPE.get(maneuver);
    }
    throw new IllegalArgumentException(
        String.format(
            "Given turn-by-turn Maneuver %d cannot be converted to an Android Auto equivalent.",
            maneuver));
  }

  /**
   * Returns the corresponding Android Auto roundabout angle for the given turn {@link Maneuver}.
   * Returns {@code null} if given maneuver does not involve a roundabout with a turn.
   */
  @Nullable
  public static Integer getAndroidAutoRoundaboutAngle(@Maneuver int maneuver) {
    if (maneuver == Maneuver.ROUNDABOUT_LEFT_CLOCKWISE
        || maneuver == Maneuver.ROUNDABOUT_RIGHT_CLOCKWISE
        || maneuver == Maneuver.ROUNDABOUT_LEFT_COUNTERCLOCKWISE
        || maneuver == Maneuver.ROUNDABOUT_RIGHT_COUNTERCLOCKWISE) {
      return ROUNDABOUT_ANGLE_NORMAL;
    }
    if (maneuver == Maneuver.ROUNDABOUT_SHARP_LEFT_CLOCKWISE
        || maneuver == Maneuver.ROUNDABOUT_SHARP_RIGHT_CLOCKWISE
        || maneuver == Maneuver.ROUNDABOUT_SHARP_LEFT_COUNTERCLOCKWISE
        || maneuver == Maneuver.ROUNDABOUT_SHARP_RIGHT_COUNTERCLOCKWISE) {
      return ROUNDABOUT_ANGLE_SHARP;
    }
    if (maneuver == Maneuver.ROUNDABOUT_SLIGHT_LEFT_CLOCKWISE
        || maneuver == Maneuver.ROUNDABOUT_SLIGHT_RIGHT_CLOCKWISE
        || maneuver == Maneuver.ROUNDABOUT_SLIGHT_LEFT_COUNTERCLOCKWISE
        || maneuver == Maneuver.ROUNDABOUT_SLIGHT_RIGHT_COUNTERCLOCKWISE) {
      return ROUNDABOUT_ANGLE_SLIGHT;
    }
    if (maneuver == Maneuver.ROUNDABOUT_U_TURN_CLOCKWISE
        || maneuver == Maneuver.ROUNDABOUT_U_TURN_COUNTERCLOCKWISE) {
      return ROUNDABOUT_ANGLE_U_TURN;
    }
    return null;
  }
}
Weitere Dokumentation
- Feed für detaillierte Routenführung aktivieren: Integrieren Sie zuerst die detaillierte Routenführung, damit Ihre App mit Android Auto funktioniert.
- Feedanzeige mit Inhalten füllen: Greifen Sie auf Datenfelder für Routeninformationen zu und verwenden Sie Symbole.
