如需配置新的多户钥匙,用户必须在其设备上完成身份验证和关联流程。这会将外部用户账号与 Google 钱包账号相关联。 本文档将简要介绍不同平台上的这一流程。
从 Android 应用添加到 Google 钱包
在本部分中,我们将介绍从服务提供商的 Android 应用将卡片保存到 Google 钱包的流程。
用户流
以下图示从 Google 钱包的角度展示了用于配置多家庭密钥的用户流程。

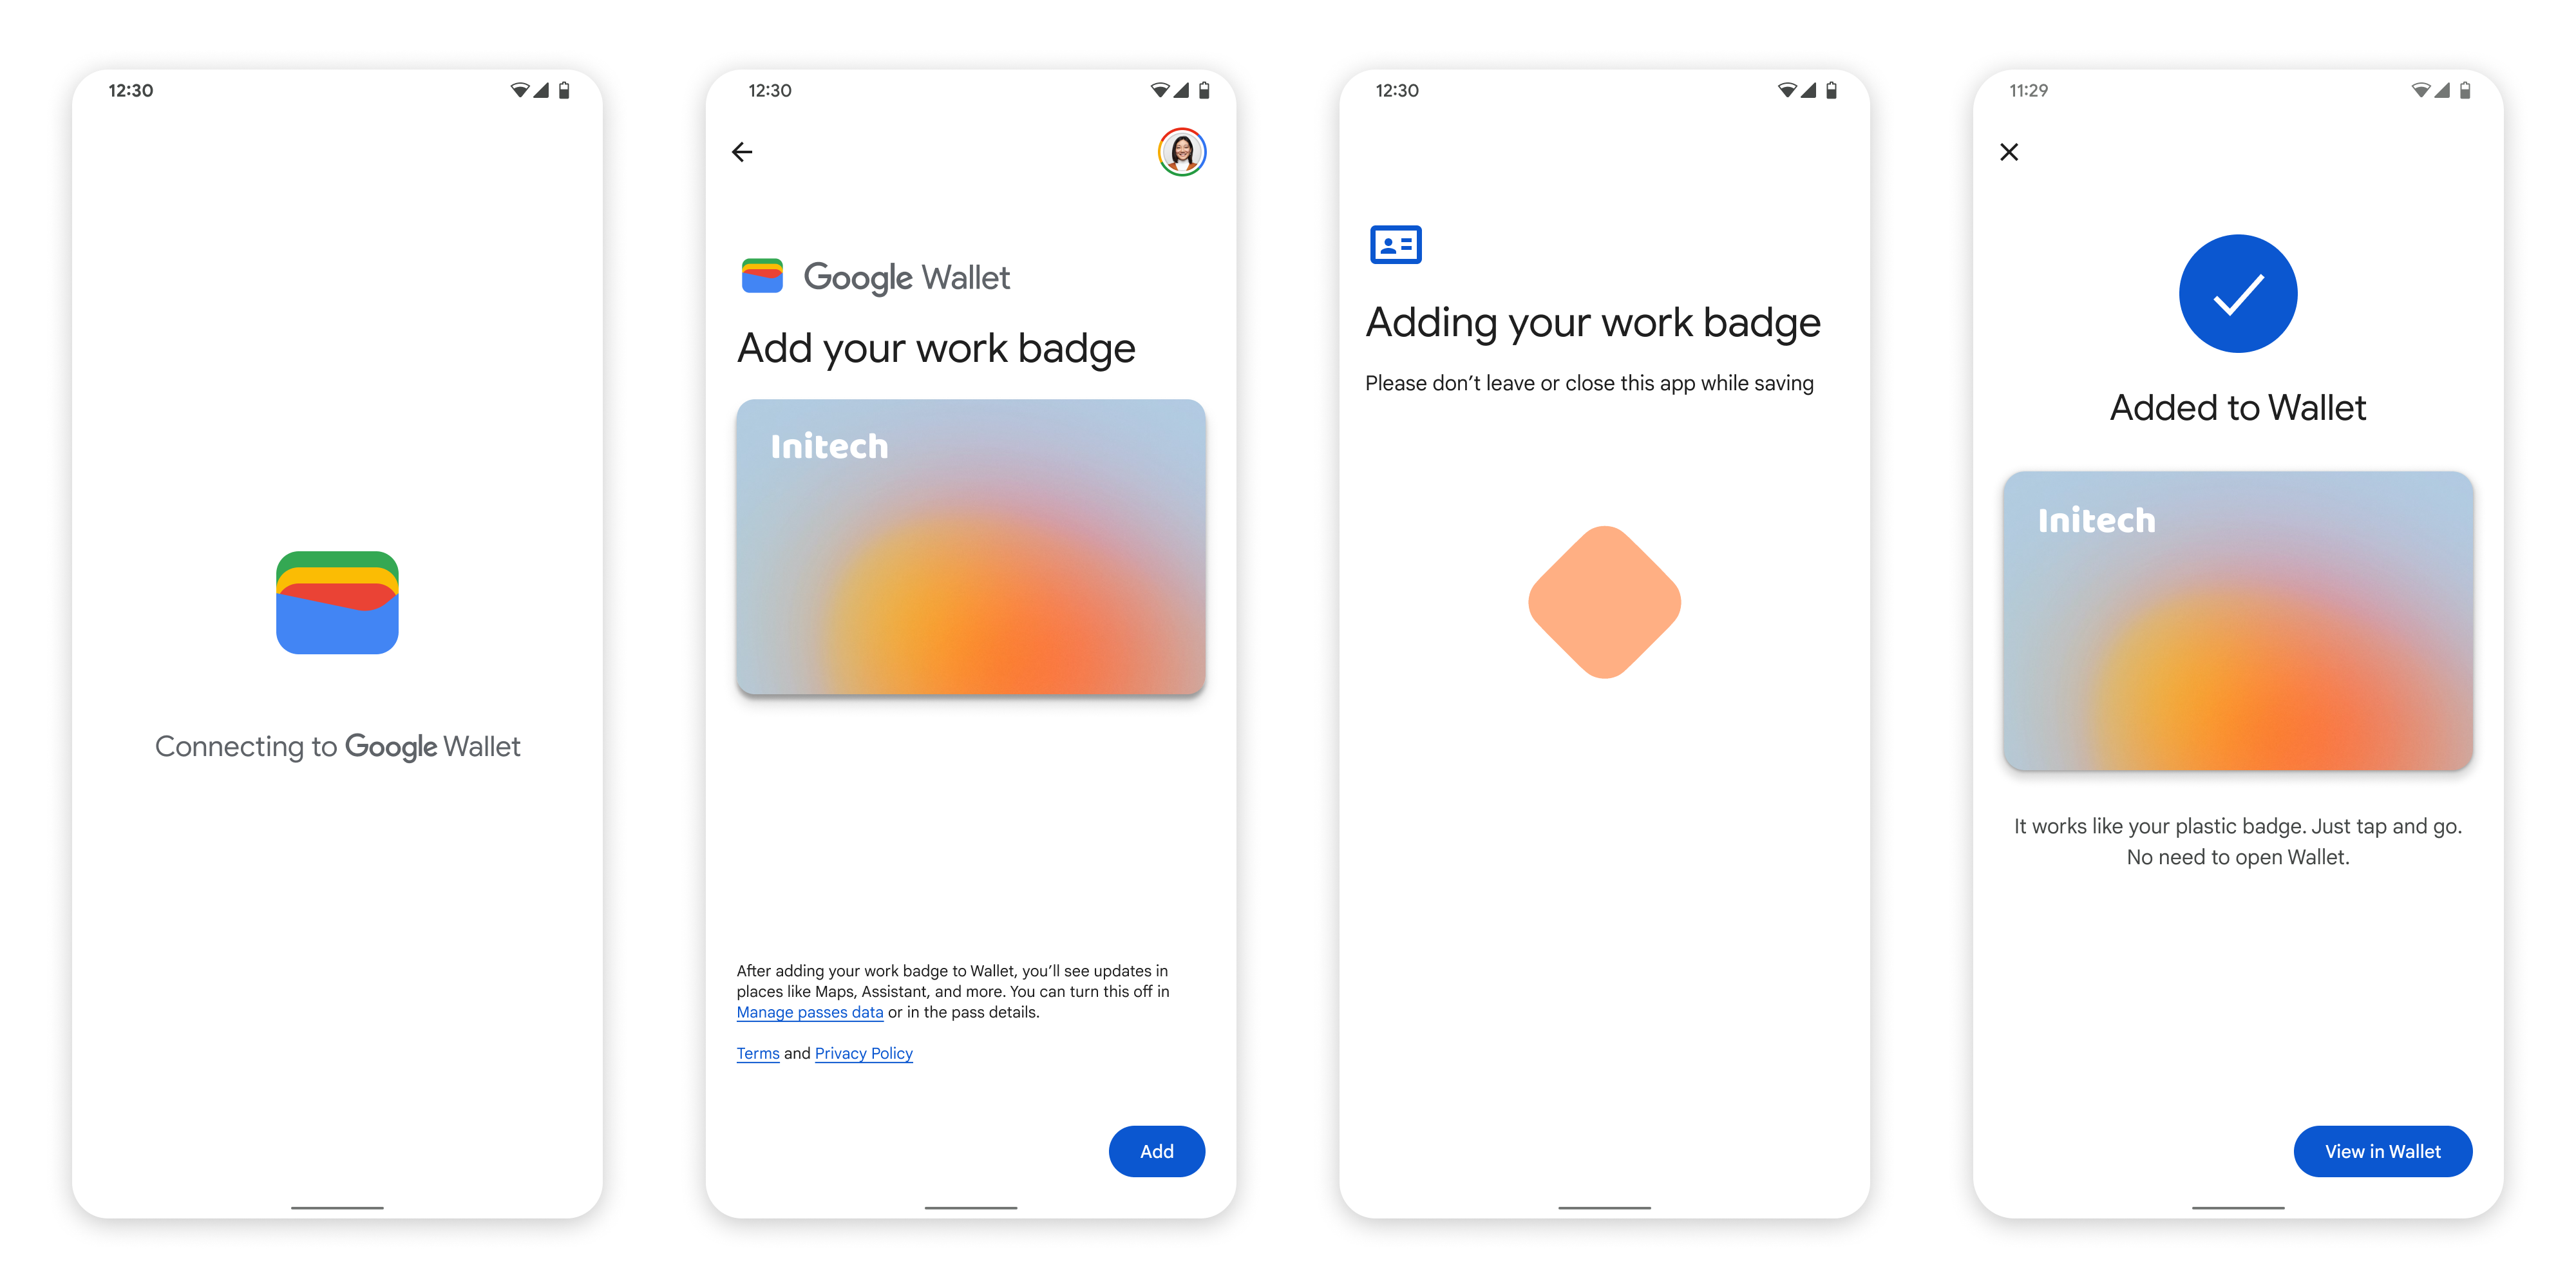
- 在配置网络连接和初始服务时,系统会向用户显示旋转的连接动画。
- 完成此操作后,用户接受《服务条款》并继续执行流程。
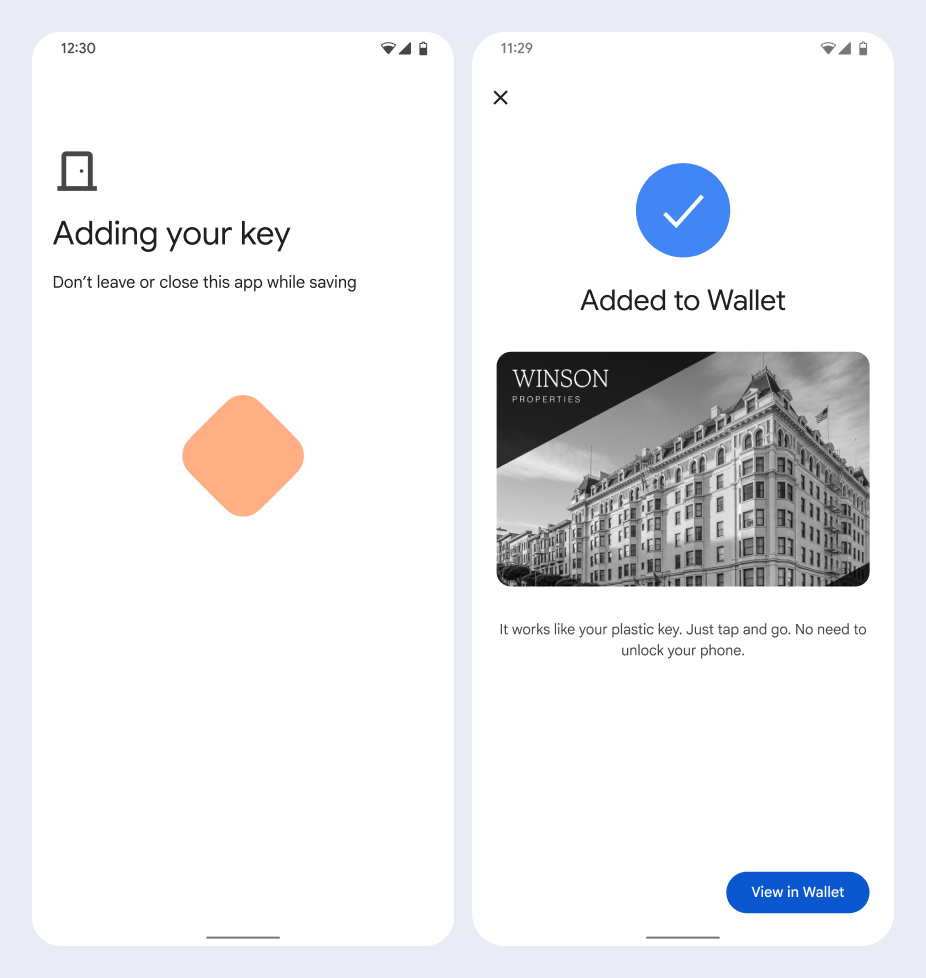
- 当后台服务在设备上预配账号时,系统会向用户显示旋转的保存动画。
- 服务完成后,系统会显示一个成功界面。
- 如果用户的设备上尚无 Google 钱包应用,系统可能会在后续界面中提示用户下载该应用。
要点
- 如果该卡已保存到所选 Google 账号,系统会向用户显示一个链接,用于在 Google 钱包应用中打开该卡,以便用户查看卡详情。
- 如果卡已保存到用户登录的 Google 账号以外的其他 Google 账号中,用户会收到一条消息,指出其他 Google 账号已保存该卡。
- 如果用户尝试添加卡片,但没有 Google 账号,系统会提示用户创建账号。创建 Google 账号后,流程会正常继续。
- 支持多家庭密钥流程的应用需要与 Google Play 服务 API 集成。不过,服务提供商应用对 Google Play 服务的这些方法调用在公开分发的 Google Play 服务版本中不可用。服务提供商应用开发者必须添加并获取对自定义模块的访问权限,才能调用某些方法。如需了解详情,请咨询您的服务提供商。
从 Android 应用添加到 Wear 设备上的 Google 钱包
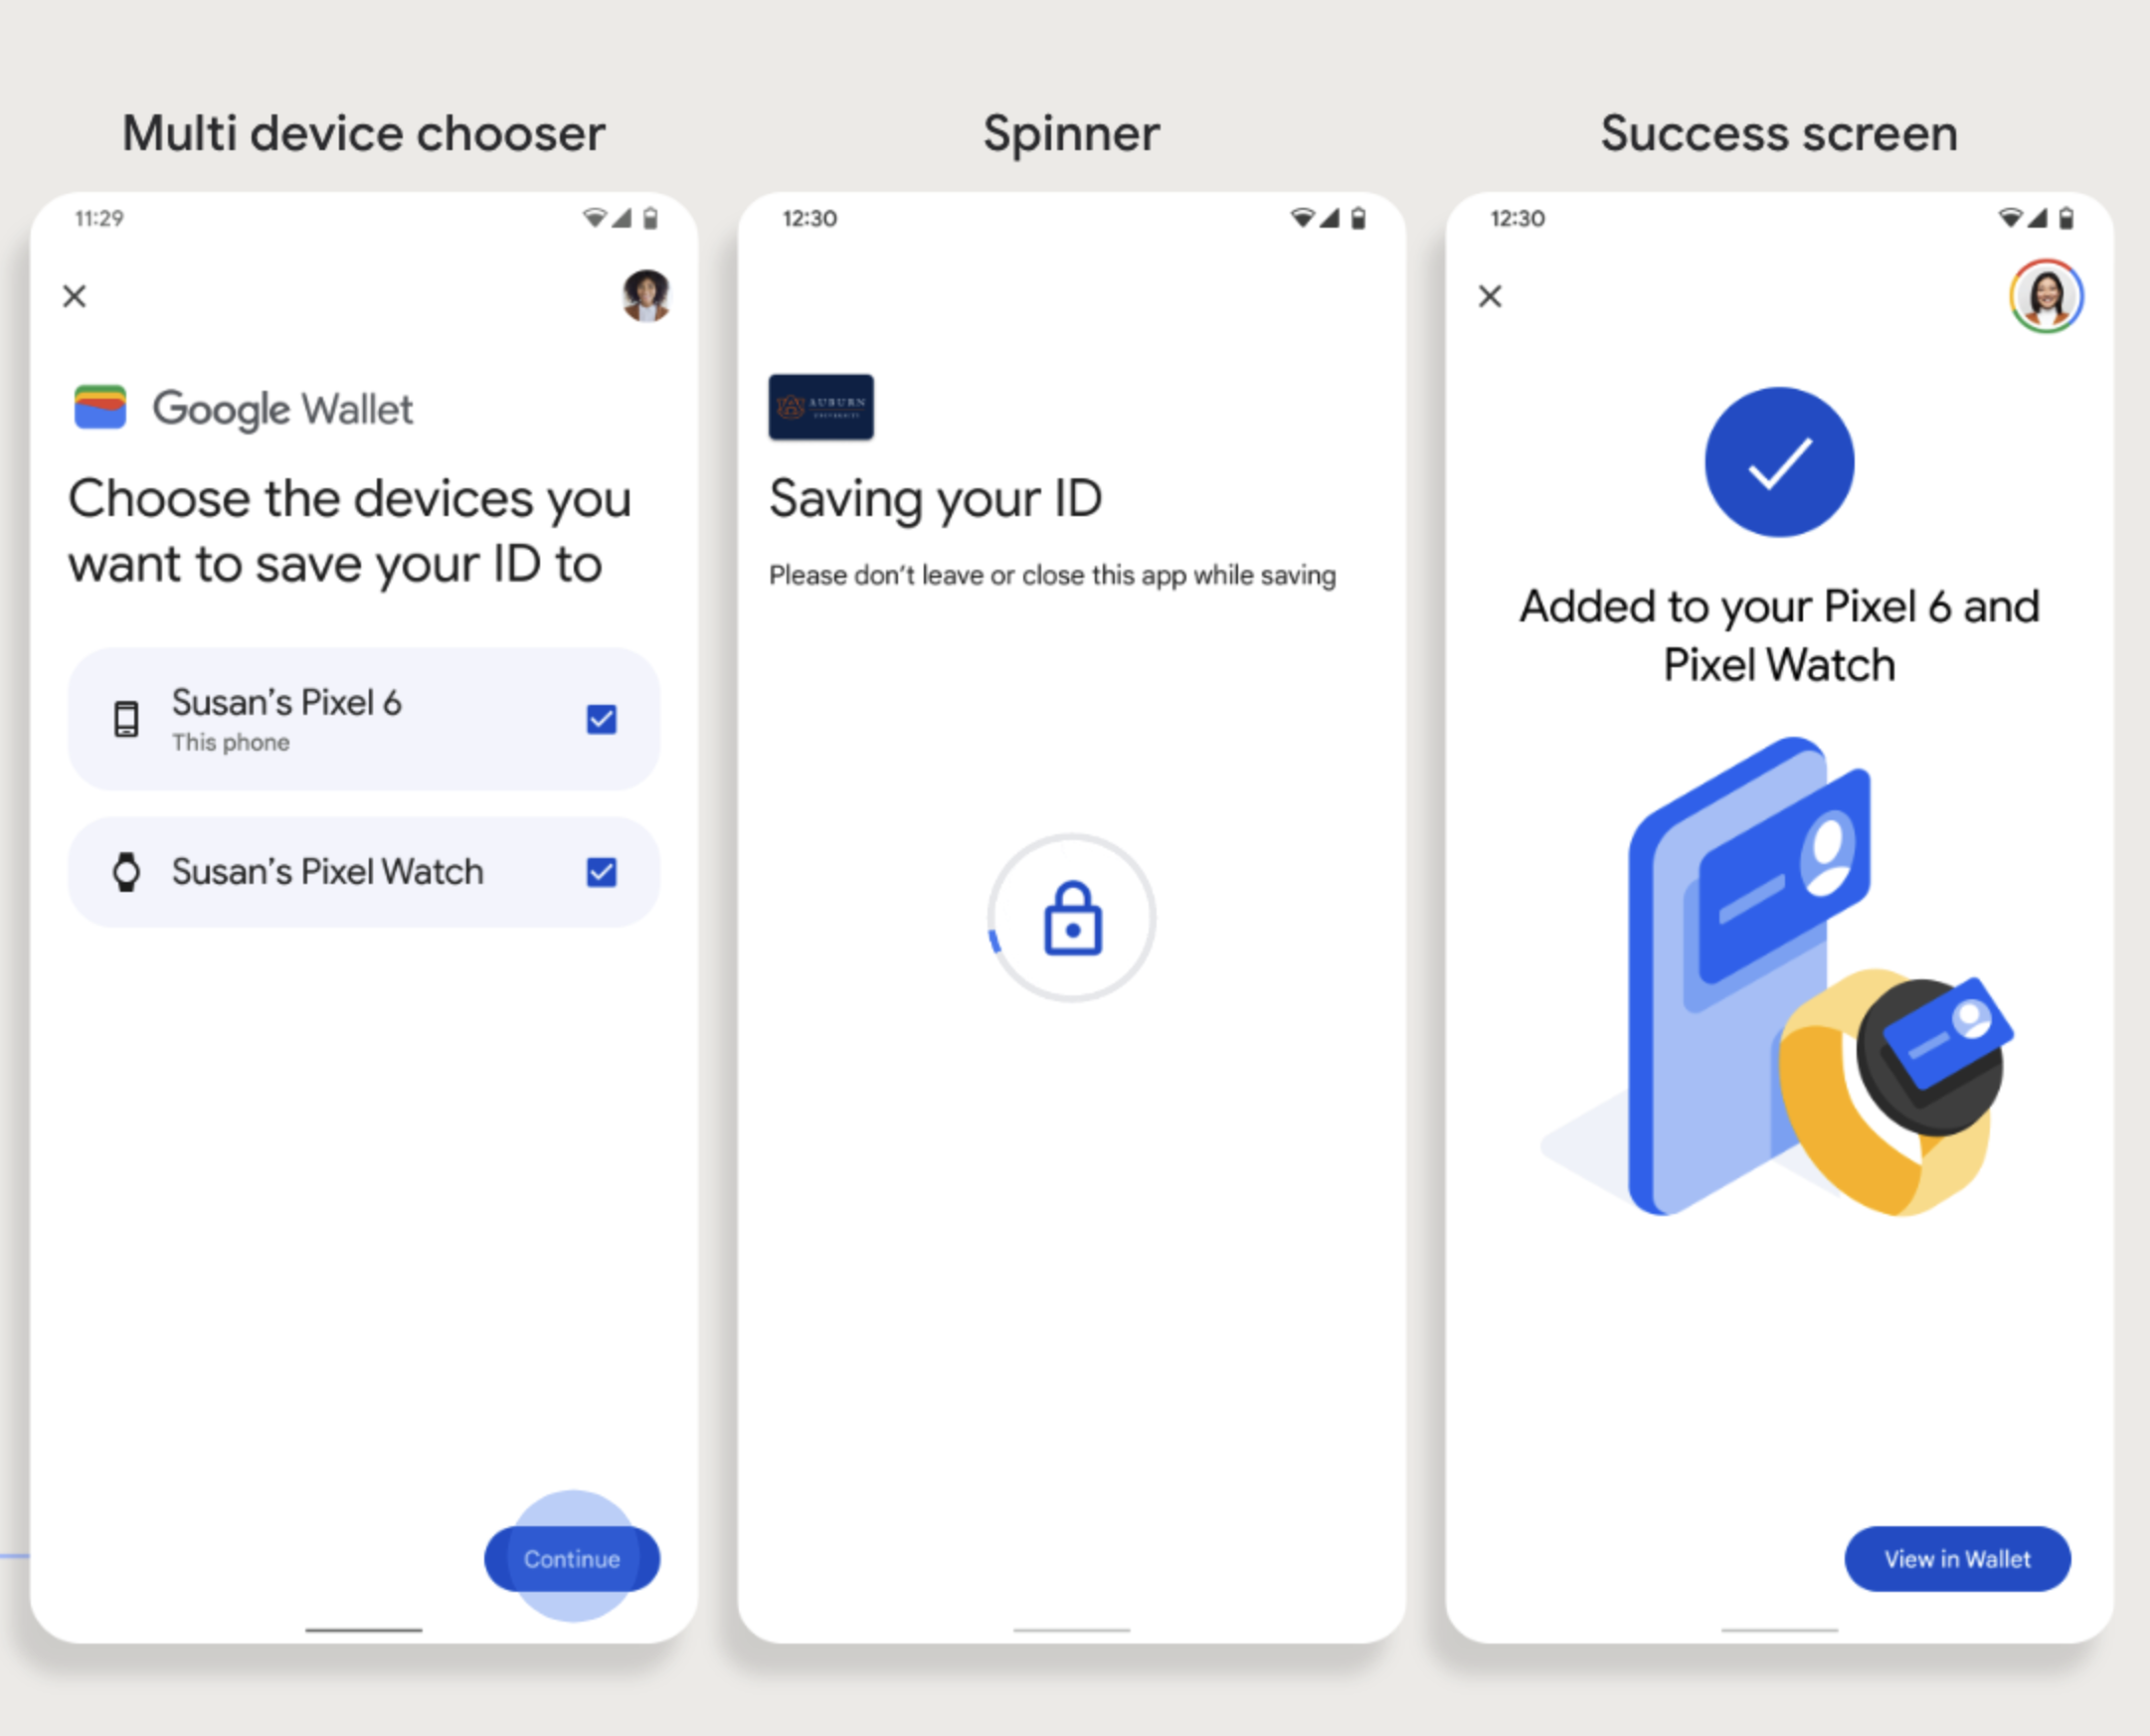
用户可以在手机上启动配置流程并选择单个穿戴式设备,从而为穿戴式设备配置账号,如图所示:
要点
- 向穿戴式设备配置卡需要手机能够配置卡,因此两者都需要配对。
- 用户可以在一个流程中同时为手机和穿戴式设备配置,也可以在首次为手机配置完成后,重新启动流程以将其添加到穿戴式设备。
- 服务提供商应限制用户只能预配单个穿戴式设备。
- 如果穿戴式设备与手机解除配对,数字卡会保留在设备上,但用户无法在第 2 部穿戴式设备上配置卡,除非删除第 1 部穿戴式设备上的卡。
- 向您的服务提供商咨询可穿戴设备配置的可用性。
- 支持多家庭密钥流程的应用需要与 Google Play 服务 API 集成。不过,服务提供商应用对 Google Play 服务的这些方法调用在公开分发的 Google Play 服务版本中不可用。服务提供商应用开发者必须添加并获取对自定义模块的访问权限,才能调用某些方法。如需了解详情,请咨询您的服务提供商。
通过网站添加到 Google 钱包
本部分介绍如何通过发卡机构的网站将卡片保存到 Google 钱包。
第 1 步:登录网站
此流程的第一步是登录发卡机构的网站,然后选择“添加到 Google 钱包”按钮。
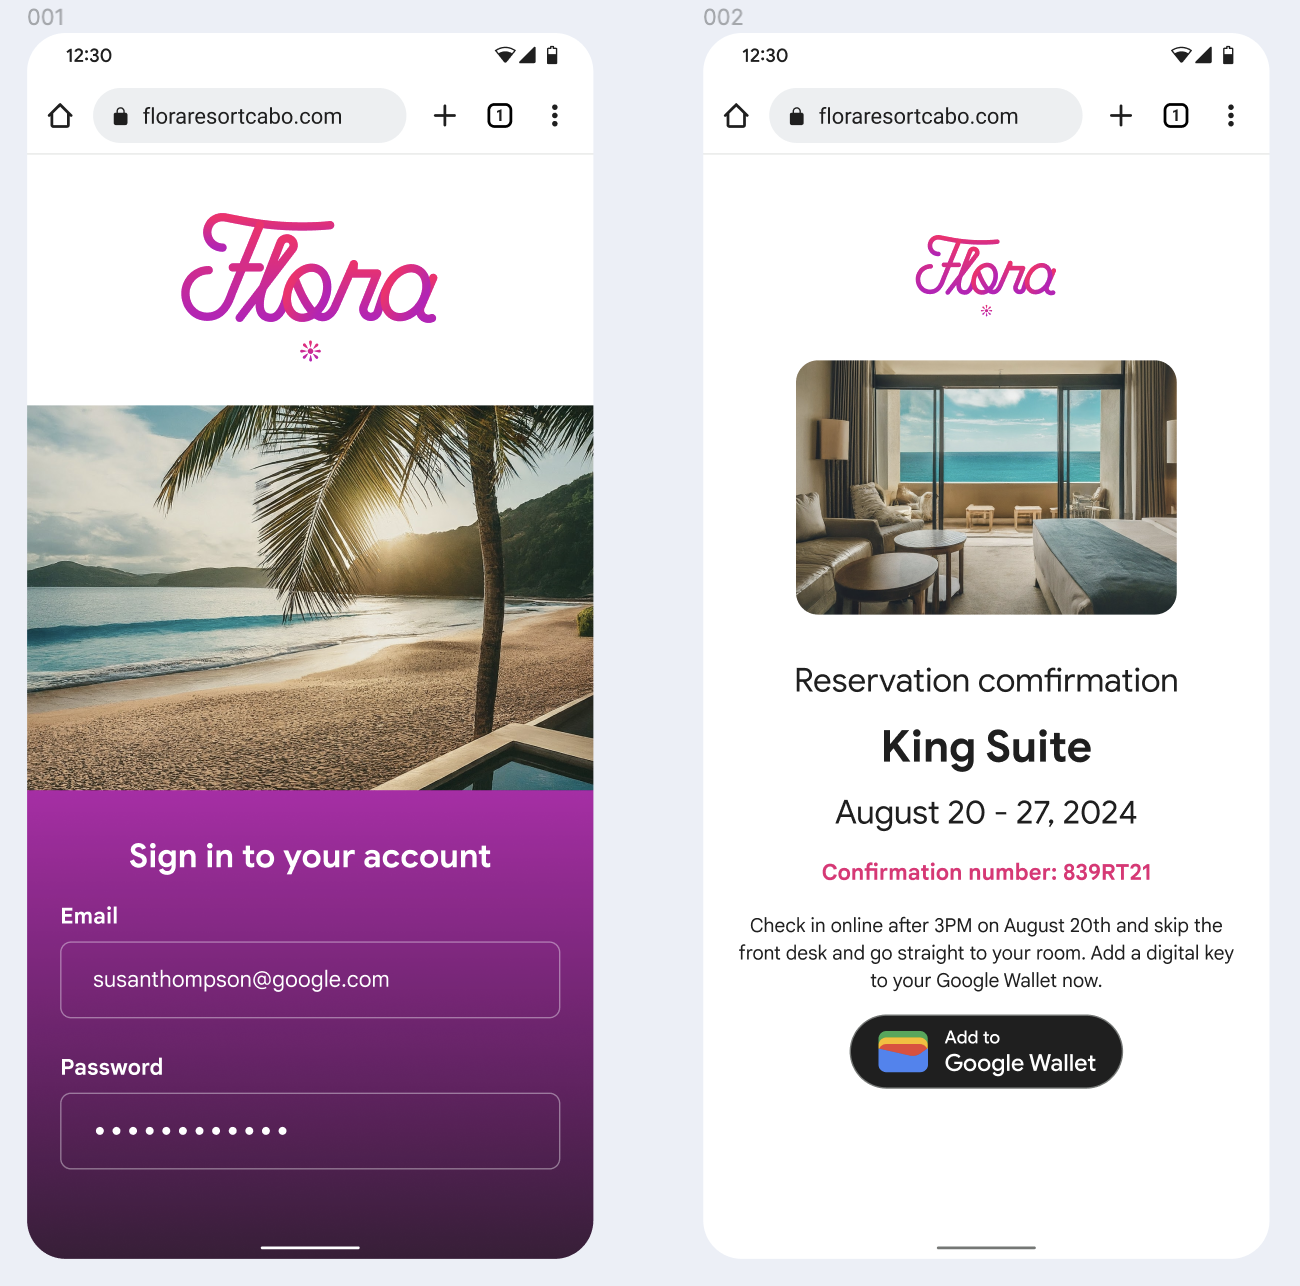
第 2 步:使用 Google 账号登录
用户完成“使用 Google 账号登录”流程后,会在发卡机构的网站上看到加载界面,然后会在下一步中被重定向到 Google 钱包。
第 3 步:完成预配
用户在 Google 钱包中完成配置流程。
从工作资料中的应用添加到 Google 钱包
如果用户在其 Android 工作资料中安装了服务提供商的应用,则仍可将多家庭密钥添加到在个人资料中运行的 Google 钱包中。当用户在工作资料中的应用内点按添加到 Google 钱包按钮时,Google 钱包会将用户引导至个人资料中的 Google 钱包应用,用户可以在其中继续添加卡。 其余卡管理操作与直接从个人资料保存卡时的卡管理操作一致。