새 다가구 키를 프로비저닝하려면 사용자가 기기에서 인증 및 연결 흐름을 완료해야 합니다. 이렇게 하면 외부 사용자 계정이 Google 월렛 계정에 연결됩니다. 이 문서에서는 여러 표면에서 이 프로세스를 개략적으로 설명합니다.
Android 앱에서 Google 월렛에 추가
이 섹션에서는 서비스 제공업체의 Android 앱에서 Google 월렛에 카드를 저장하는 흐름을 설명합니다.
사용자 흐름
이 그림은 Google 월렛 관점에서 다가구 키를 프로비저닝하는 사용자 흐름을 보여줍니다.
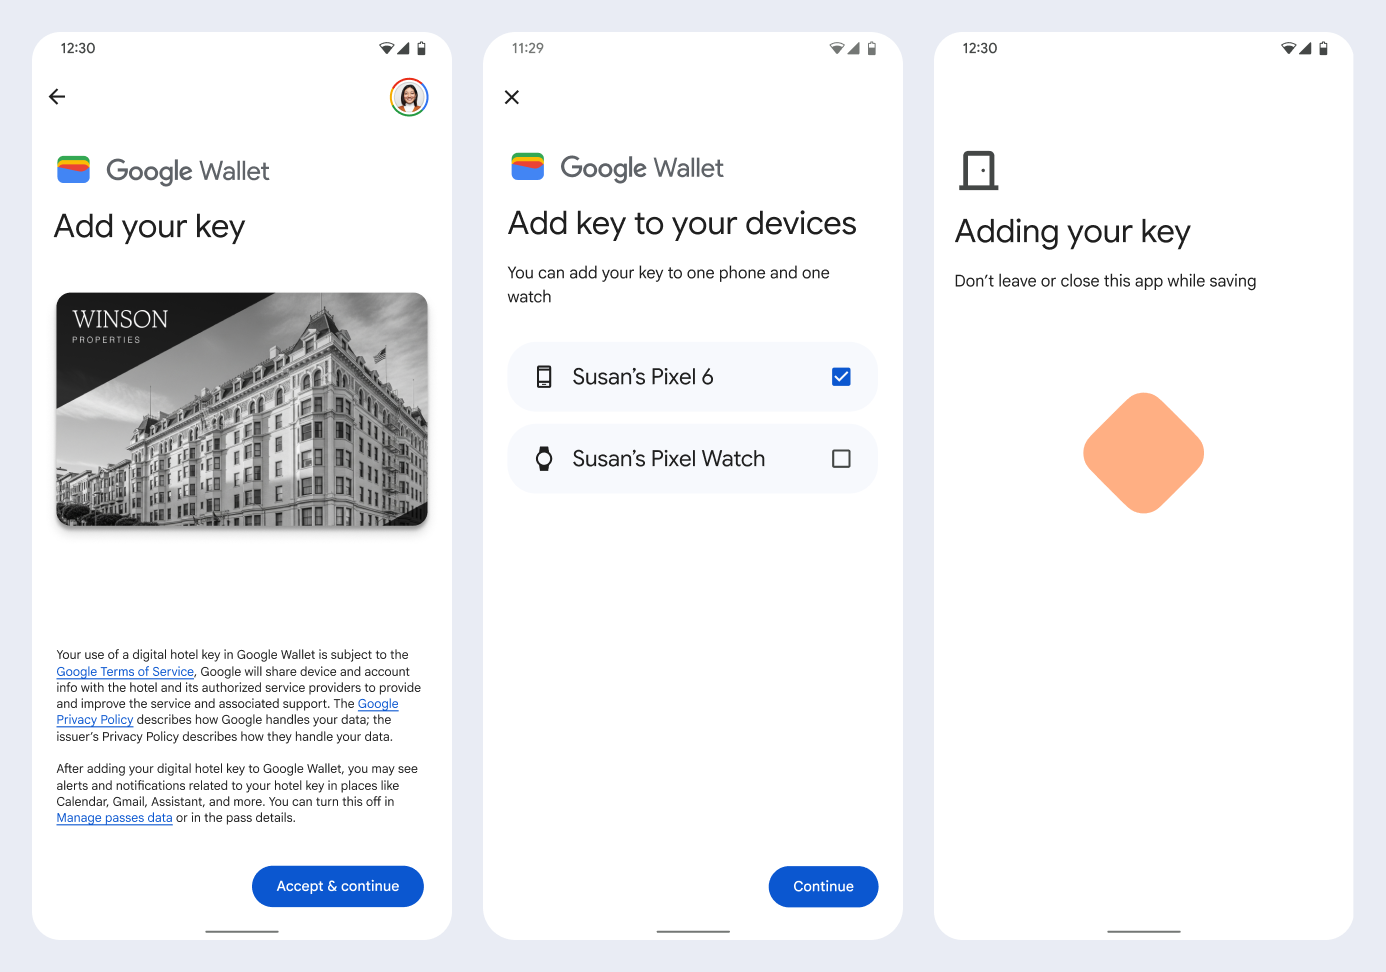
- 네트워크 연결 및 초기 서비스가 구성되는 동안 회전하는 연결 애니메이션이 사용자에게 표시됩니다.
- 이 작업이 완료되면 사용자가 서비스 약관에 동의하고 흐름을 계속 진행합니다.
- 백그라운드 서비스가 기기에서 계정을 프로비저닝하는 동안 회전하는 저장 애니메이션이 사용자에게 표시됩니다.
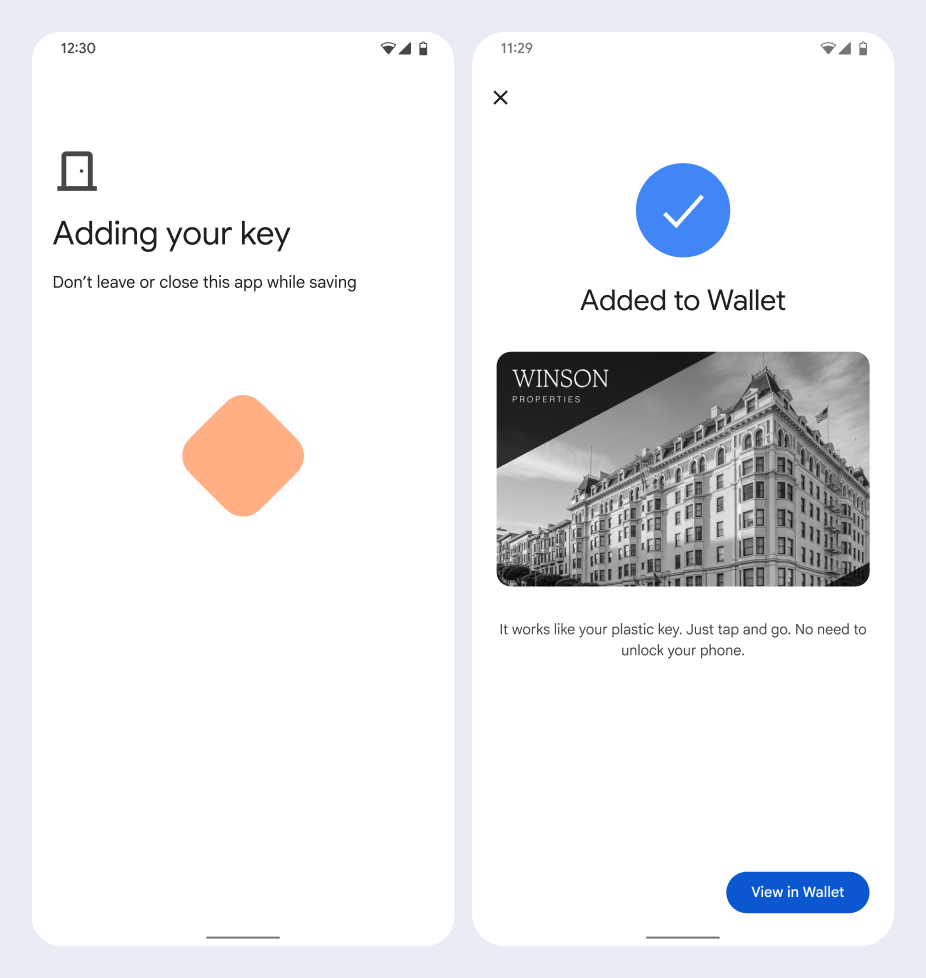
- 서비스가 완료되면 성공 화면이 표시됩니다.
- 사용자 기기에 Google 월렛 앱이 아직 없는 경우 후속 화면에서 Google 월렛 앱을 다운로드하라는 메시지가 표시될 수 있습니다.
핵심 사항
- 카드가 이미 선택한 Google 계정에 저장된 경우 사용자에게는 Google 월렛 앱에서 카드를 열 수 있는 링크가 대신 표시되며, 여기에서 카드 세부정보를 볼 수 있습니다.
- 카드가 사용자가 로그인한 계정이 아닌 다른 Google 계정에 저장된 경우 다른 Google 계정에 이미 해당 카드가 저장되어 있다는 메시지가 표시됩니다.
- 사용자가 카드를 추가하려고 하는데 Google 계정이 없는 경우 계정을 만들라는 메시지가 표시됩니다. Google 계정을 만든 후에는 흐름이 정상적으로 계속됩니다.
- 다중 가족 키 흐름을 지원하는 앱은 Google Play 서비스 API와 통합해야 합니다. 하지만 서비스 제공업체 앱에서 Google Play 서비스로의 메서드 호출은 공개적으로 배포된 Google Play 서비스 버전에서는 사용할 수 없습니다. 서비스 제공업체 앱 개발자는 특정 메서드를 호출하기 위해 맞춤 모듈을 추가하고 액세스해야 합니다. 자세한 내용은 서비스 제공업체에 문의하세요.
Android 앱에서 웨어러블의 Google 월렛에 추가
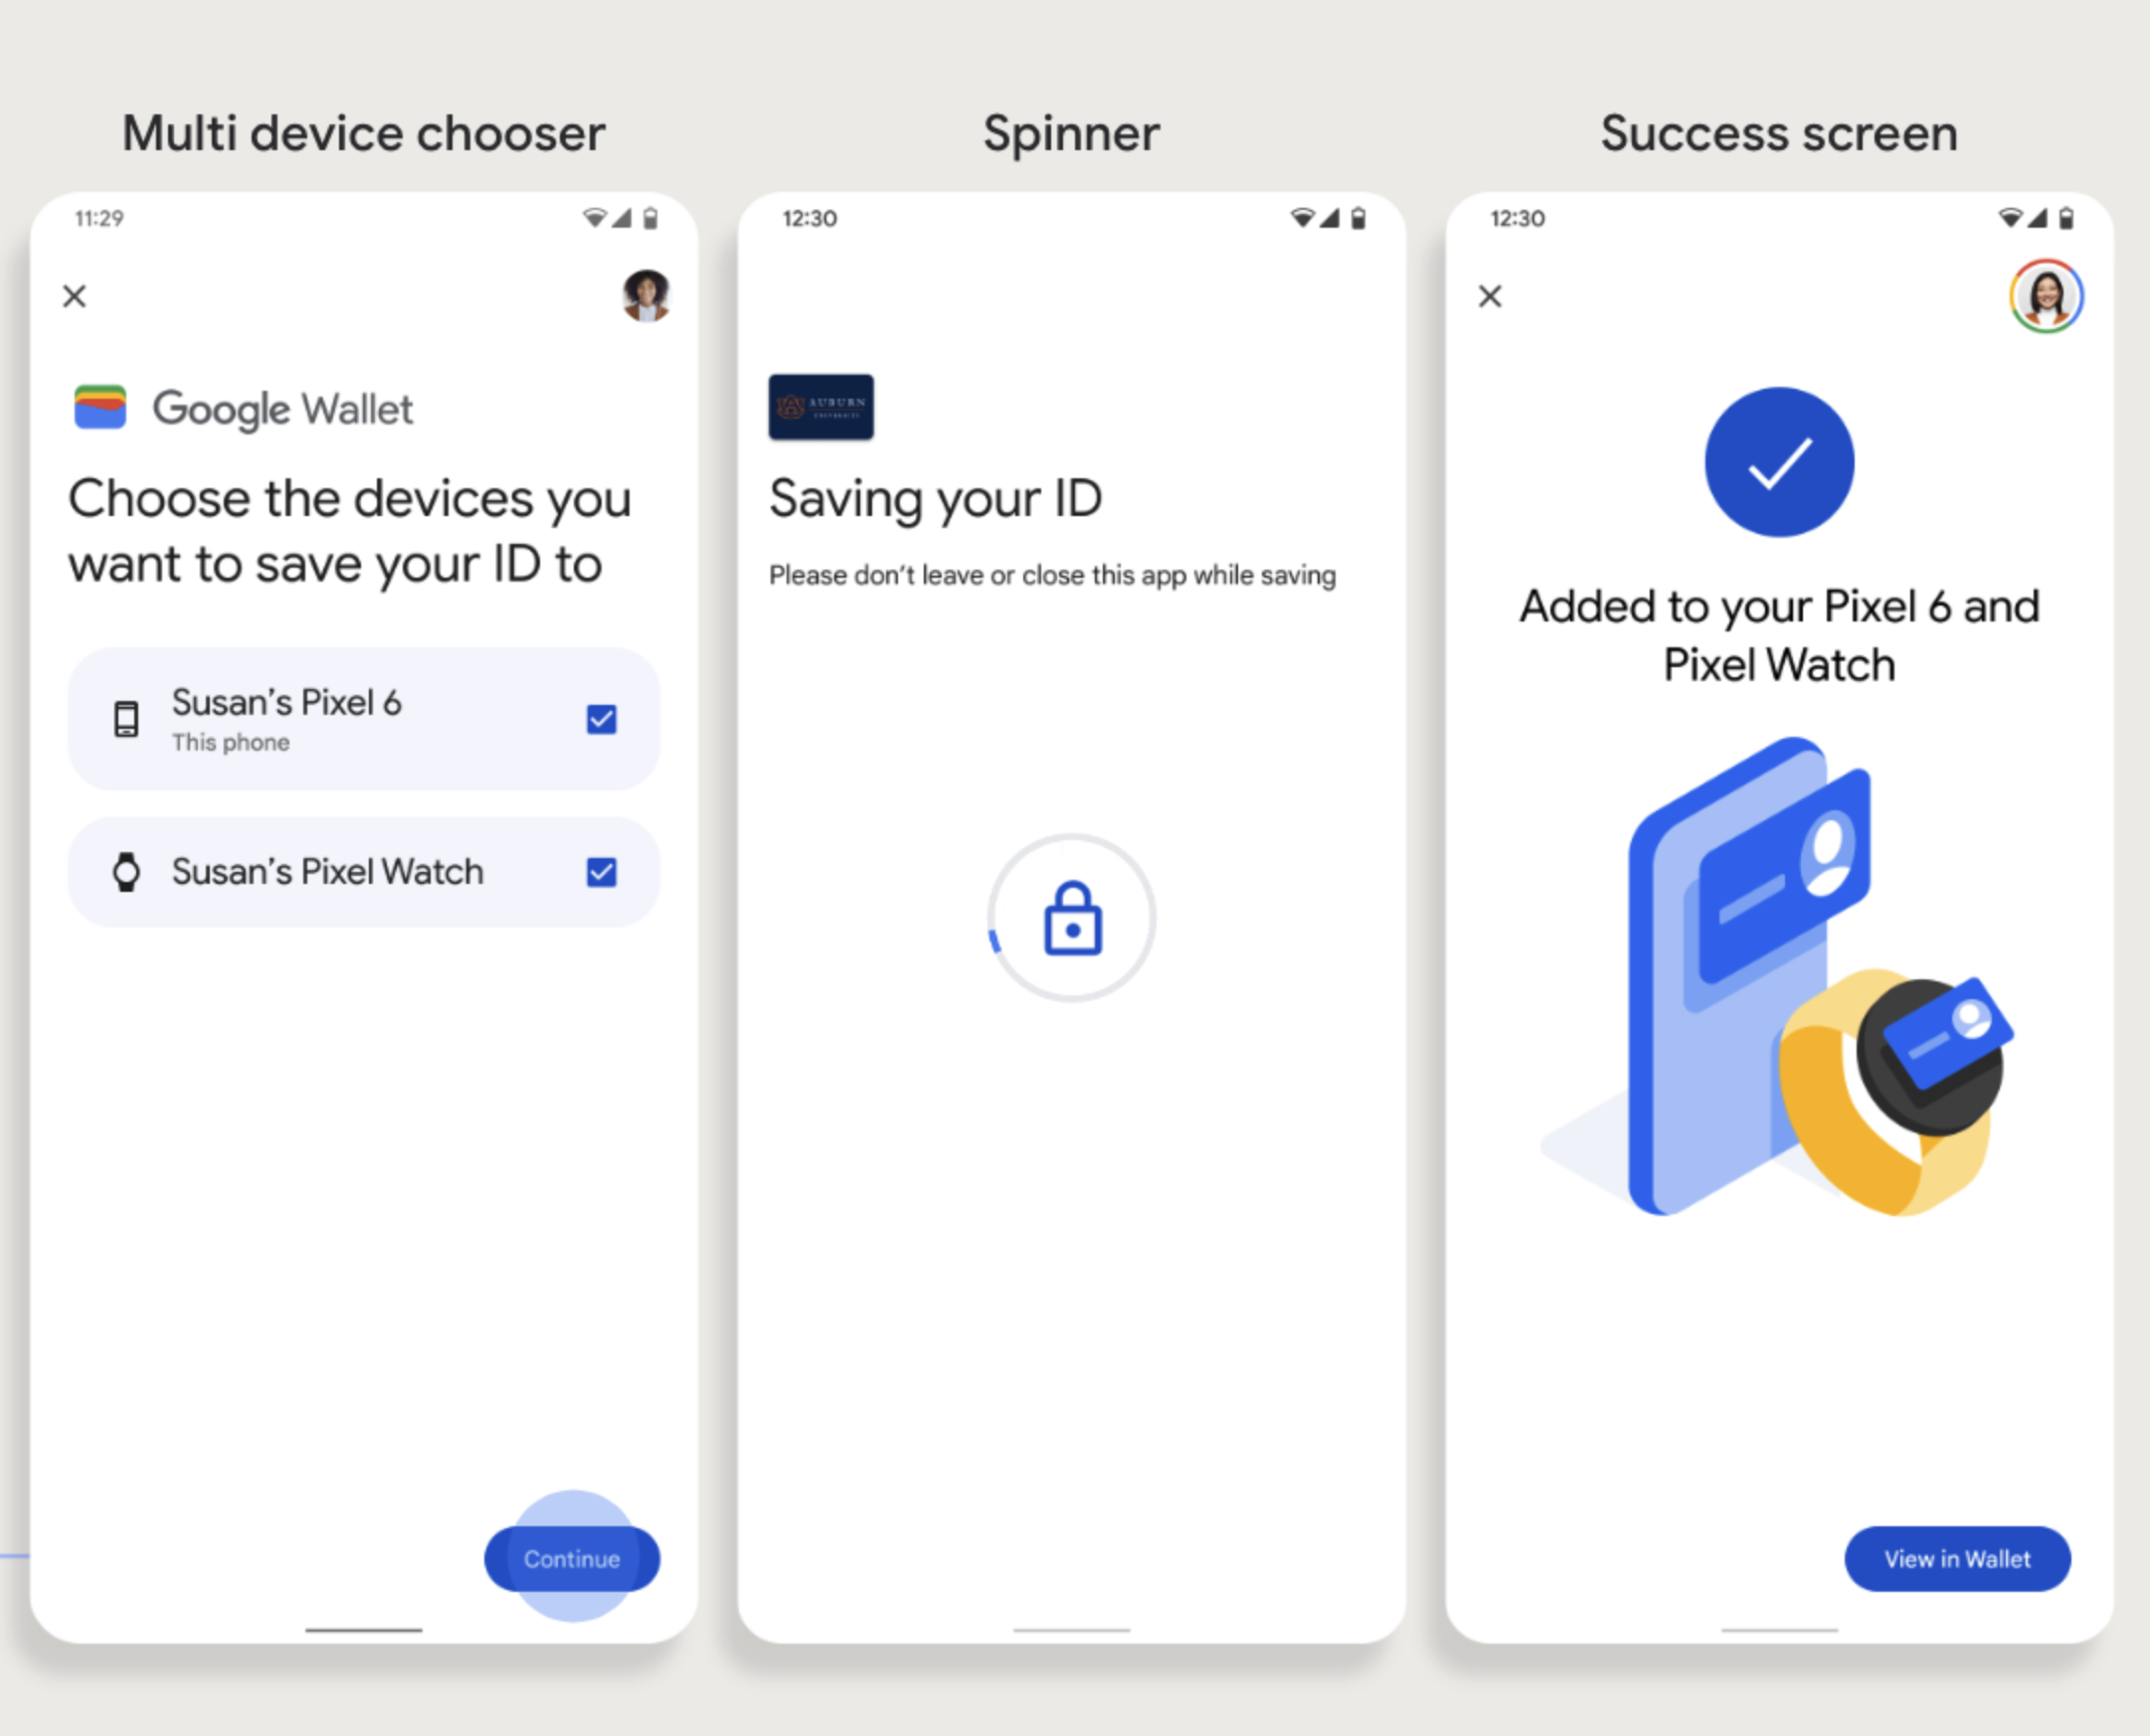
사용자는 휴대전화에서 프로비저닝 흐름을 시작하고 웨어러블 하나를 선택하여 웨어러블에 프로비저닝할 수 있습니다.
핵심 사항
- 웨어러블에 프로비저닝하려면 카드를 프로비저닝할 수 있는 휴대전화가 필요하므로 두 기기를 모두 페어링해야 합니다.
- 사용자는 단일 흐름으로 휴대전화와 웨어러블에 프로비저닝할 수 있으며, 휴대전화에 대한 첫 번째 프로비저닝이 완료된 후 흐름을 다시 시작하여 웨어러블에 추가할 수도 있습니다.
- 사용자는 서비스 제공업체에 의해 하나의 웨어러블만 프로비저닝하도록 제한되어야 합니다.
- 웨어러블이 휴대전화에서 페어링 해제되면 디지털 카드는 기기에 남아 있지만 사용자는 첫 번째 카드를 삭제하지 않고는 두 번째 웨어러블에 카드를 프로비저닝할 수 없습니다.
- 서비스 제공업체에 웨어러블 프로비저닝의 사용 가능 여부를 문의하세요.
- 다중 가족 키 흐름을 지원하는 앱은 Google Play 서비스 API와 통합해야 합니다. 하지만 서비스 제공업체 앱에서 Google Play 서비스로의 메서드 호출은 공개적으로 배포된 Google Play 서비스 버전에서는 사용할 수 없습니다. 서비스 제공업체 앱 개발자는 특정 메서드를 호출하기 위해 맞춤 모듈을 추가하고 액세스해야 합니다. 자세한 내용은 서비스 제공업체에 문의하세요.
웹사이트에서 Google 월렛에 추가하기
이 섹션에서는 발급기관의 웹사이트에서 Google 월렛에 카드를 저장하는 흐름을 설명합니다.
1단계: 웹사이트에 로그인하기
흐름의 첫 번째 단계는 발급 기관의 웹사이트에 로그인하고 Google 월렛에 추가 버튼을 선택하는 것입니다.

2단계: Google 계정으로 로그인하기
사용자가 Google로 로그인을 완료하면 다음 단계에서 Google 월렛으로 리디렉션되기 전에 발급기관의 웹사이트에 로드 화면이 표시됩니다.
3단계: 프로비저닝 완료
사용자가 Google 월렛 내에서 프로비저닝 흐름을 완료합니다.
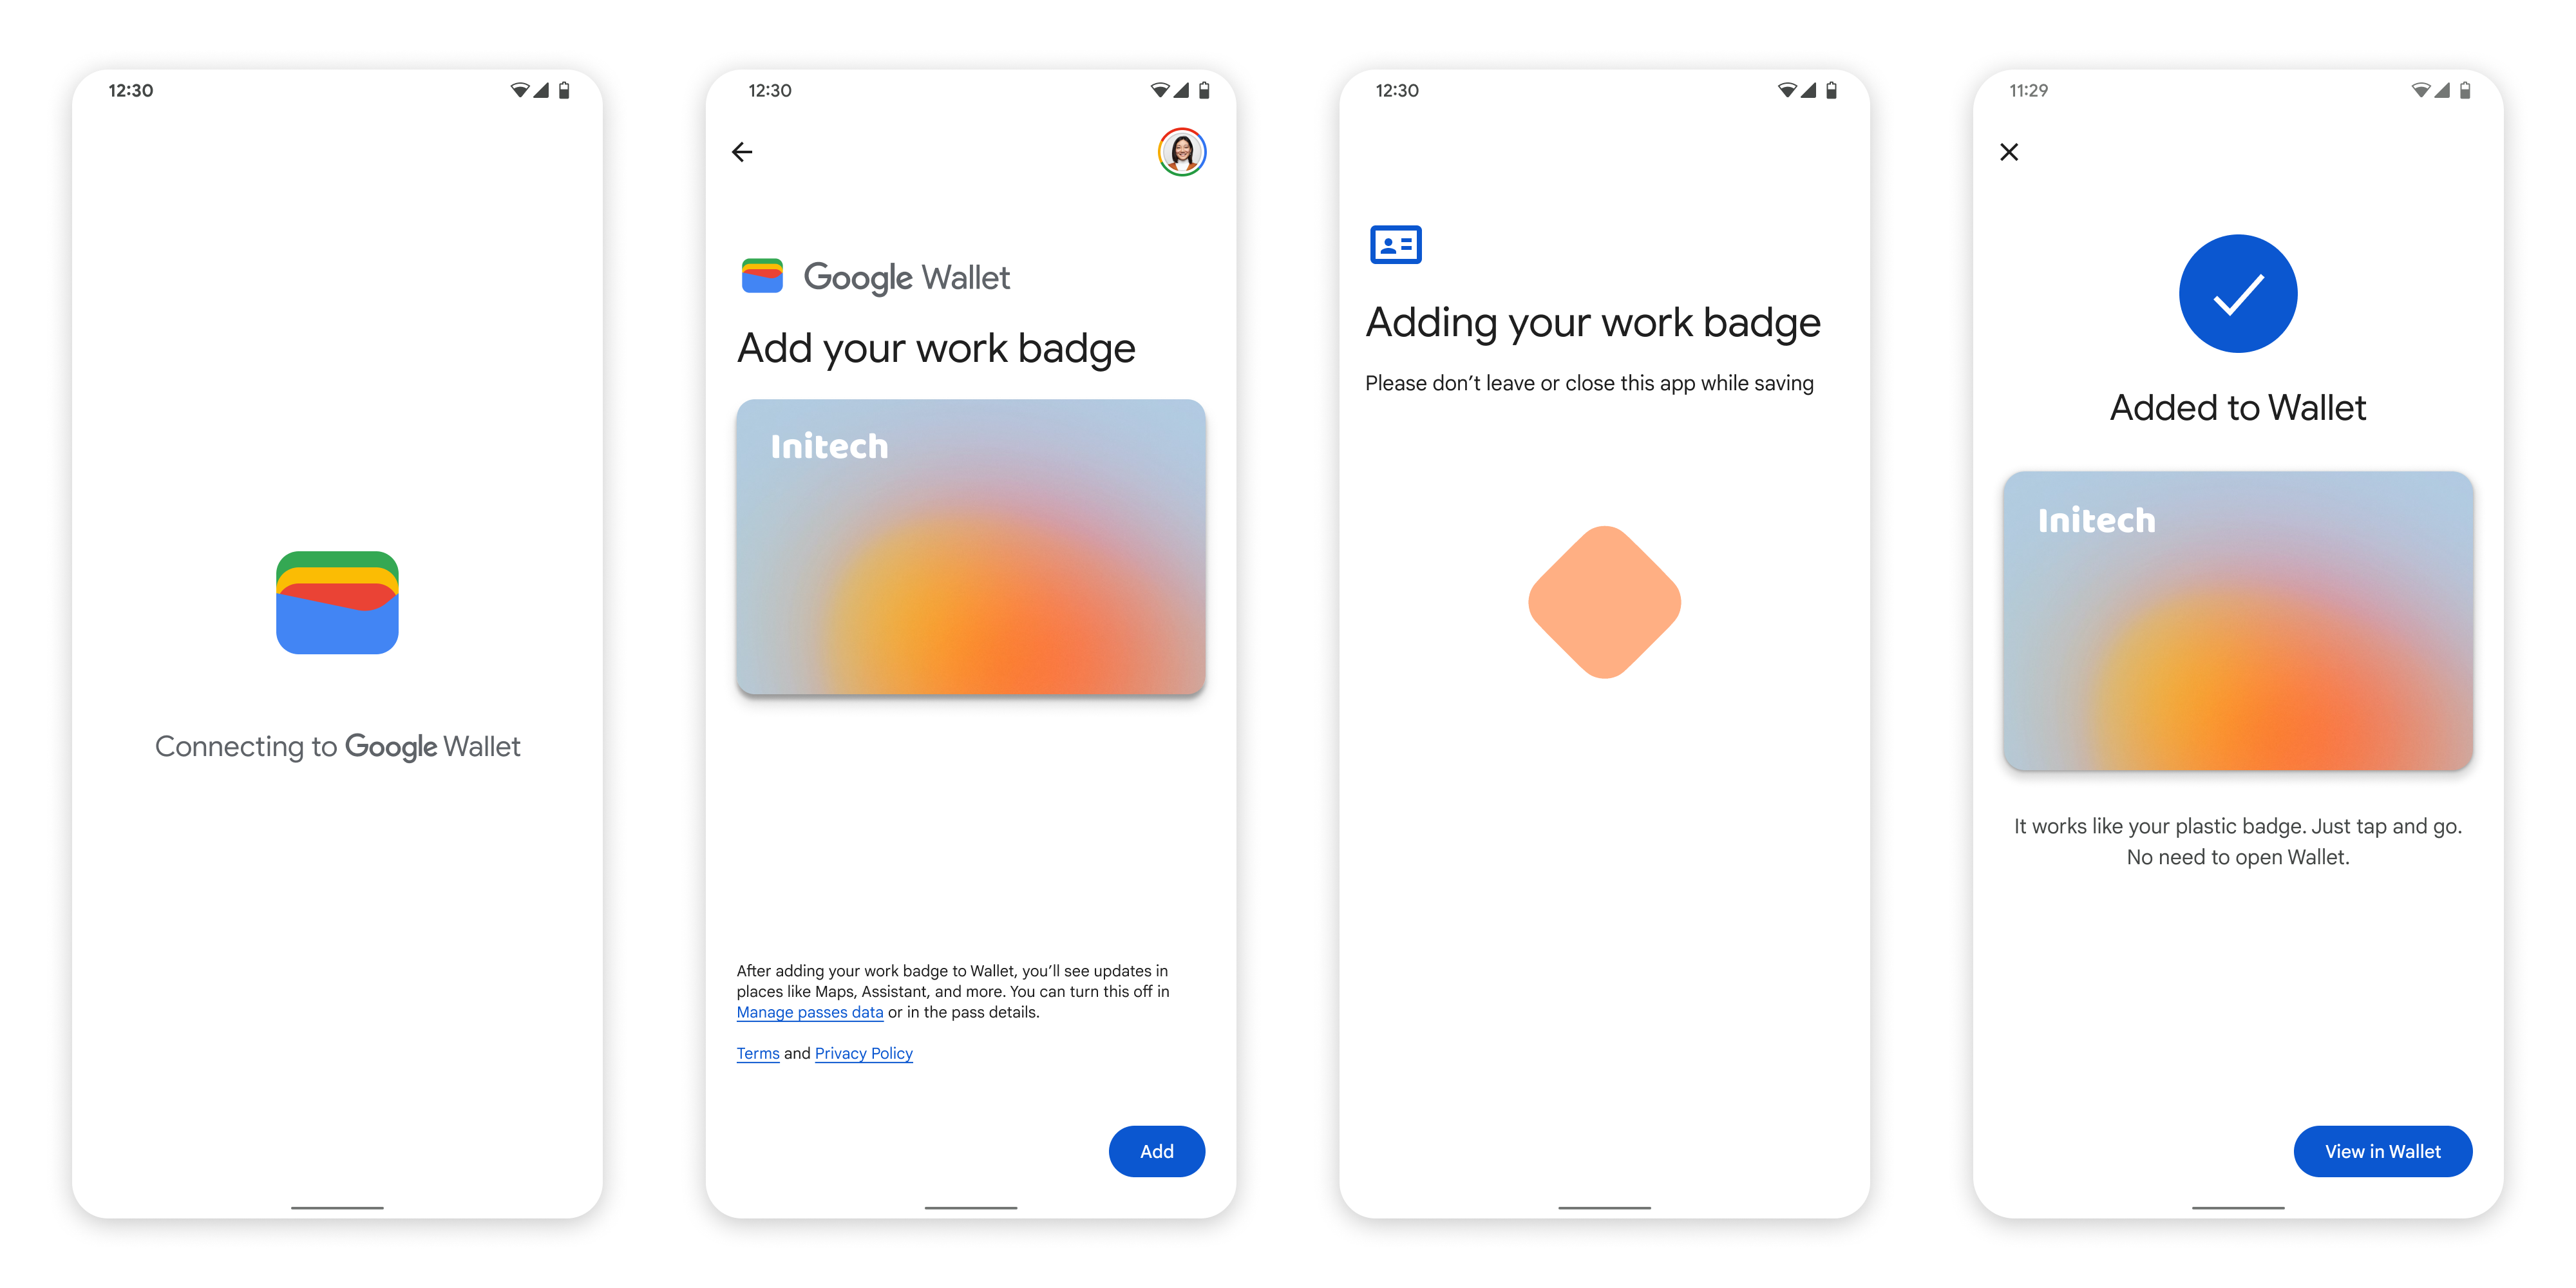
직장 프로필의 앱에서 Google 월렛에 추가
사용자가 Android 직장 프로필에 서비스 제공업체의 앱을 설치한 경우 개인 프로필에서 실행되는 Google 월렛에 다가구 주택 키를 추가할 수 있습니다. 사용자가 직장 프로필의 앱에서 Google 월렛에 추가 버튼을 탭하면 Google 월렛에서 사용자를 개인 프로필의 Google 월렛 앱으로 안내하며, 여기에서 사용자는 카드를 계속 추가할 수 있습니다. 나머지 카드 관리는 개인 프로필에서 직접 카드를 저장할 때의 카드 관리 방식과 동일합니다.