
本页介绍了 Google Chat 应用如何打开对话框以显示界面 (UI) 并响应用户。
对话框是基于卡片的窗口界面,可从 Chat 聊天室或消息中打开。对话框及其内容仅对打开该对话框的用户可见。
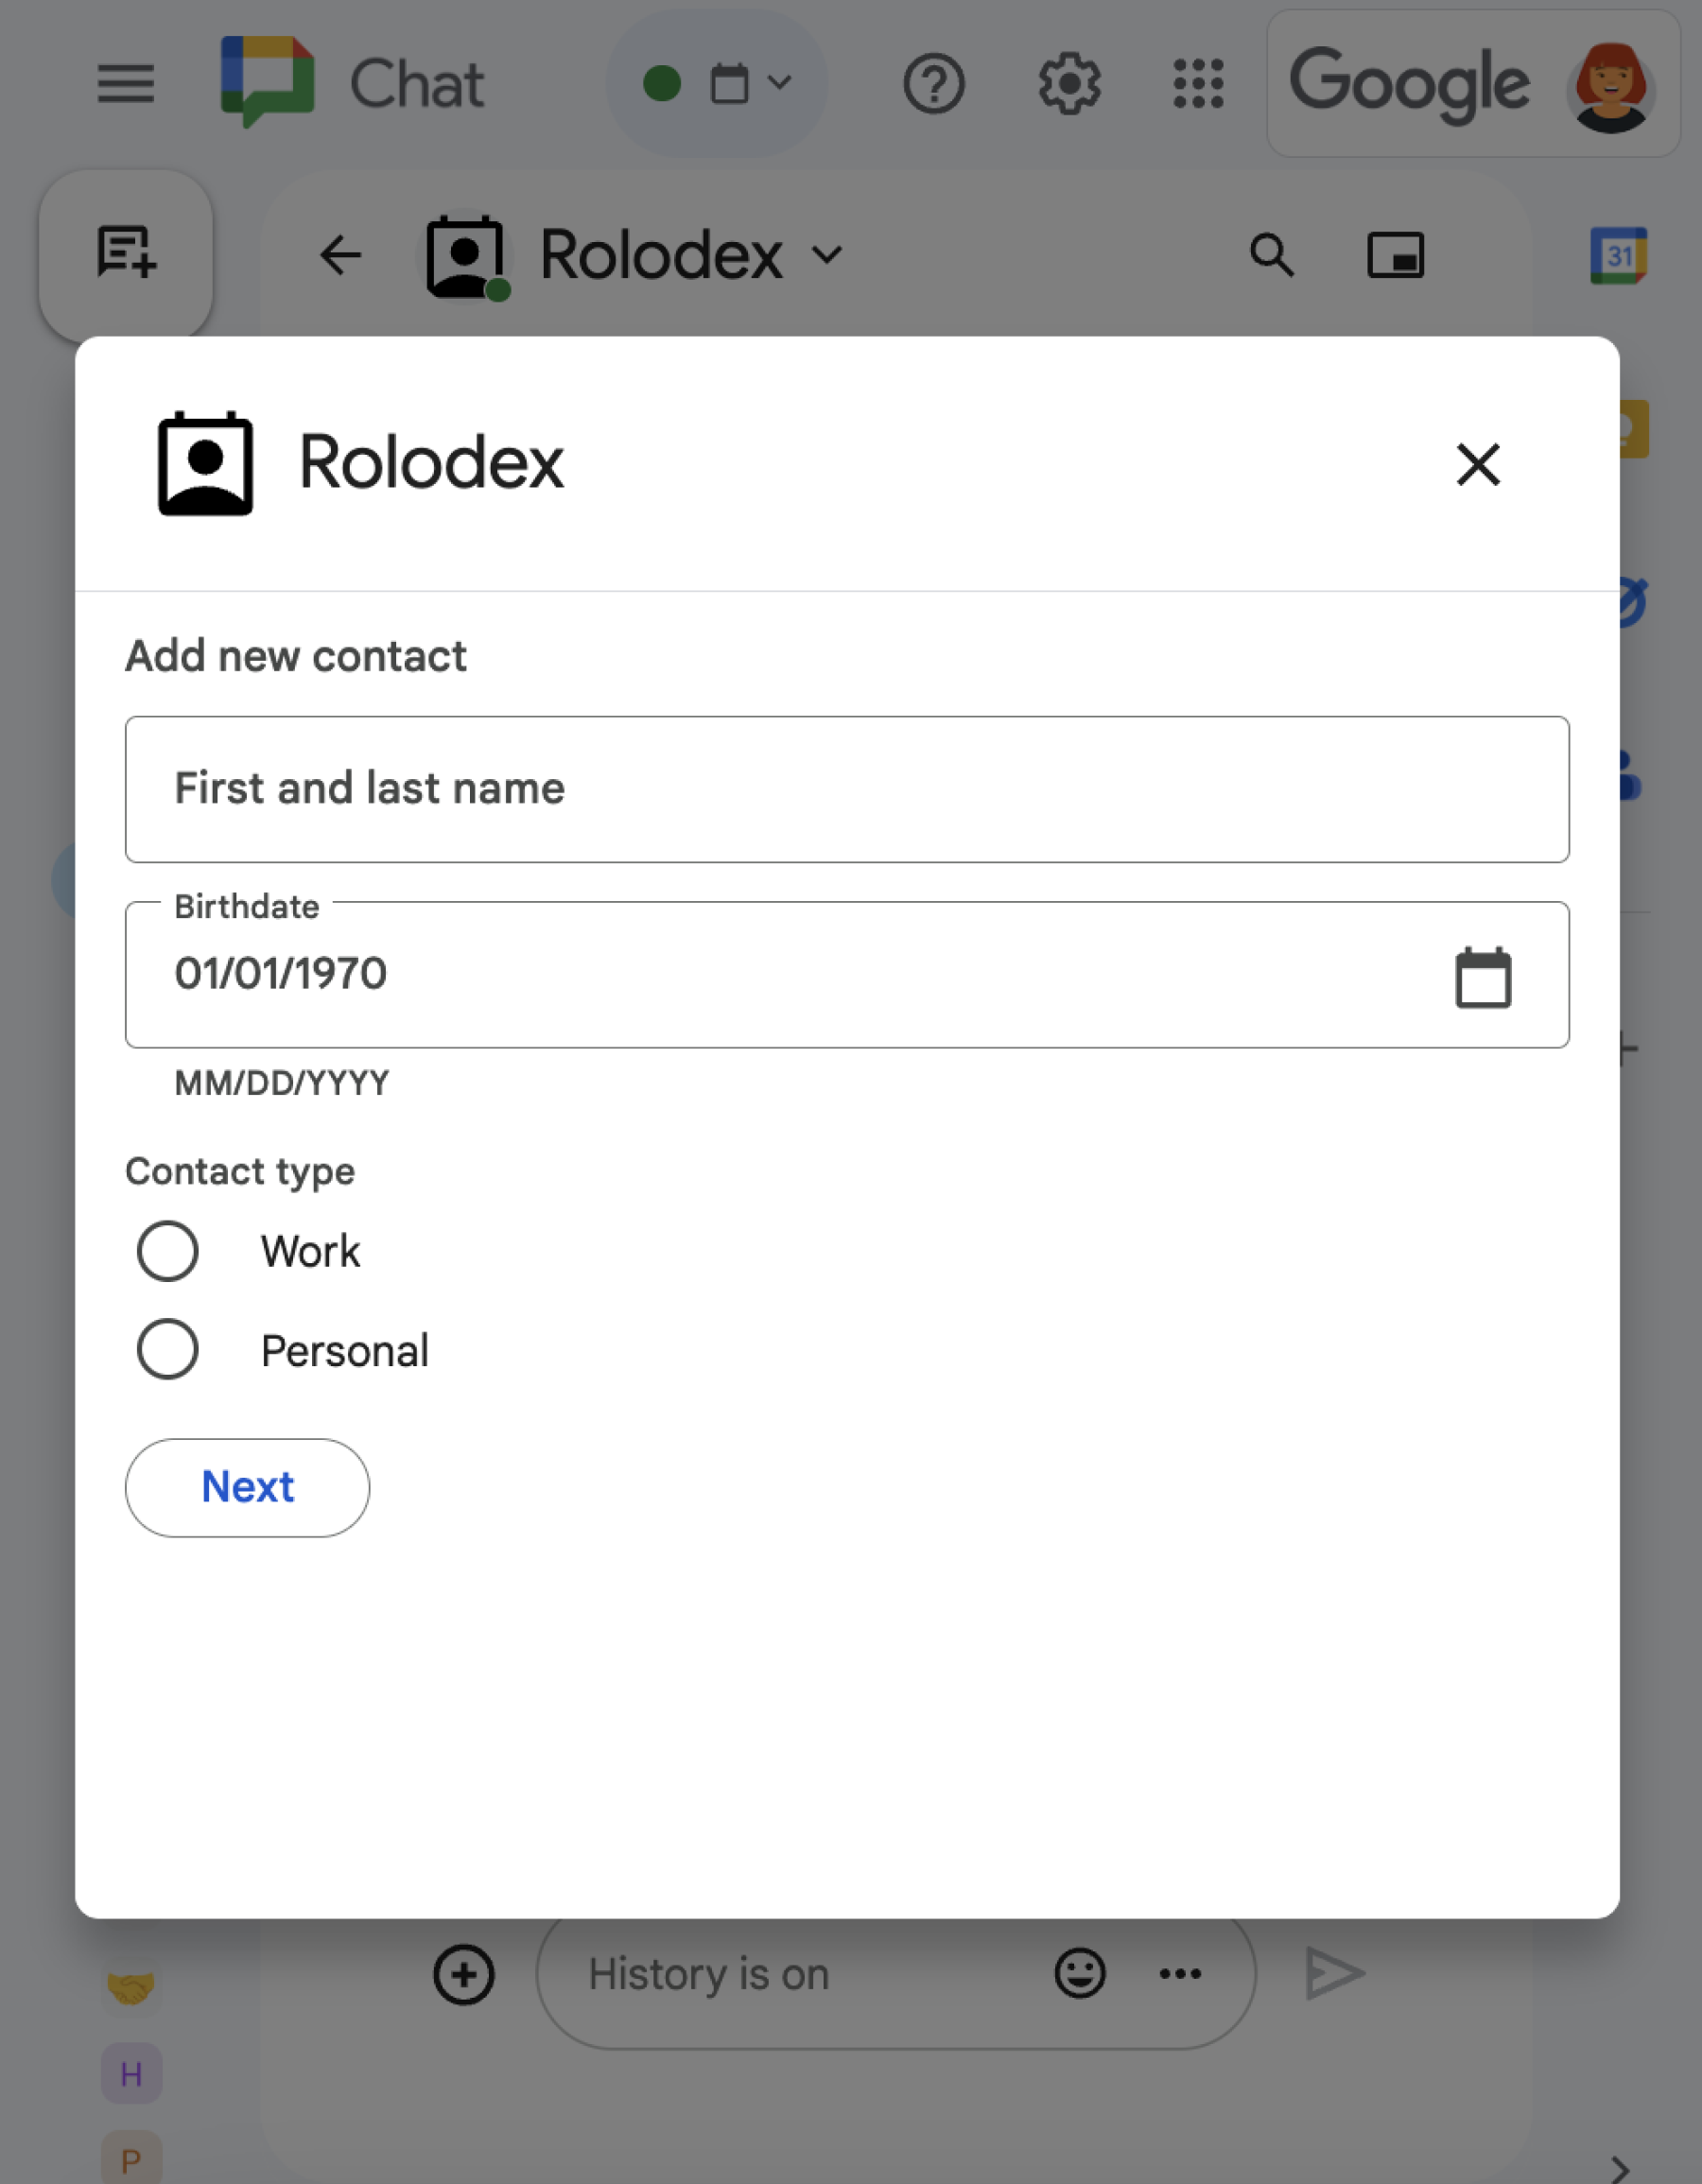
聊天应用可以使用对话框向聊天用户请求和收集信息,包括多步表单。如需详细了解如何构建表单输入,请参阅收集和处理用户提供的信息。
前提条件
HTTP
扩展 Google Chat 的 Google Workspace 加载项。如需构建一个,请完成 HTTP 快速入门。
Apps 脚本
扩展 Google Chat 的 Google Workspace 加载项。如需构建一个,请完成 Apps 脚本快速入门。
打开对话框
本部分介绍如何通过执行以下操作来响应和设置对话:
- 通过用户互动触发对话框请求。
- 通过返回并打开对话框来处理请求。
- 用户提交信息后,通过关闭对话框或返回另一个对话框来处理提交内容。
触发对话请求
Chat 应用只能通过打开对话框来响应用户互动,例如用户在卡片中点击消息中的命令或按钮。
如需通过对话框回复用户,聊天应用必须构建触发对话框请求的互动,例如:
- 响应命令。如需通过命令触发请求,您必须在配置命令时选中打开对话框复选框。
- 响应消息中的按钮点击操作,消息可以是卡片的一部分,也可以位于消息底部。如需通过消息中的按钮触发请求,请将按钮的
onClick操作的interaction设置为OPEN_DIALOG。
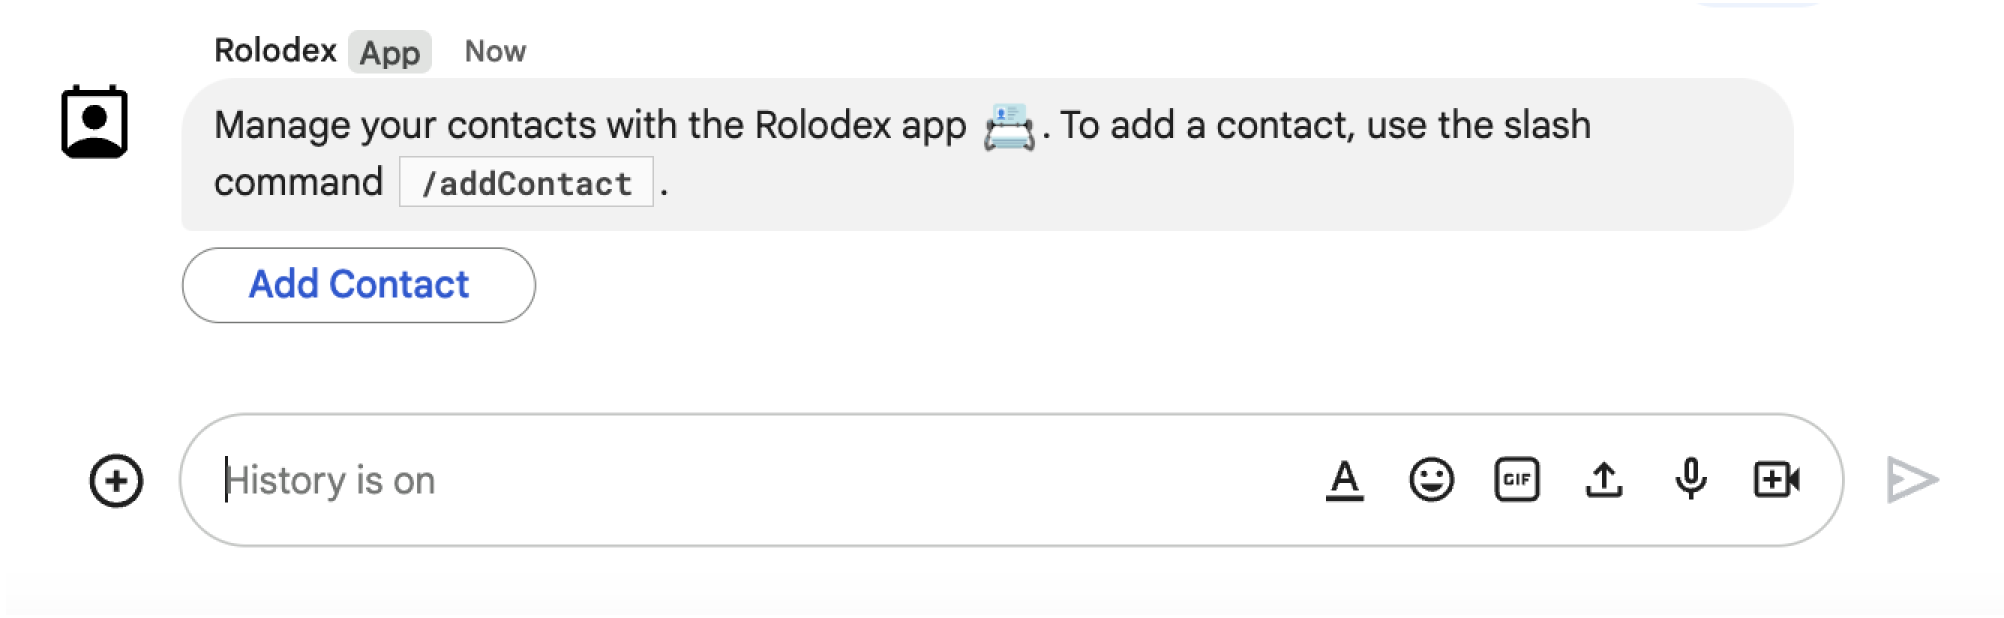
/addContact 斜杠命令。该消息还包含一个按钮,用户可以点击该按钮来触发命令。
以下代码示例展示了如何从卡片消息中的按钮触发对话框请求。如需打开对话框,请将按钮的字段 onClick.action.interaction 设置为 OPEN_DIALOG:
Node.js
将 FUNCTION_URL 替换为处理按钮点击事件的 HTTP 端点。
Python
将 FUNCTION_URL 替换为处理按钮点击事件的 HTTP 端点。
Java
将 FUNCTION_URL 替换为处理按钮点击事件的 HTTP 端点。
Apps 脚本
此示例通过返回 card JSON 来发送卡片消息。您还可以使用 Apps 脚本卡片服务。
打开初始对话框
当用户触发对话请求时,您的 Chat 应用会收到一个事件对象,其载荷将 dialogEventType 对象指定为 REQUEST_DIALOG。
如需打开对话框,Chat 应用可以通过返回包含导航 pushCard 的 RenderActions 对象来响应请求,以显示卡片。卡片应包含任何界面 (UI) 元素,包括一个或多个 sections[] widget。如需从用户处收集信息,您可以指定表单输入微件和按钮微件。如需详细了解如何设计表单输入,请参阅收集和处理用户提供的信息。
以下代码示例展示了聊天应用如何返回用于打开对话框的响应:
Node.js
将 FUNCTION_URL 替换为处理按钮点击事件的 HTTP 端点。
Python
将 FUNCTION_URL 替换为处理按钮点击事件的 HTTP 端点。
Java
将 FUNCTION_URL 替换为处理按钮点击事件的 HTTP 端点。
Apps 脚本
此示例通过返回 card JSON 来发送卡片消息。您还可以使用 Apps 脚本卡片服务。
处理对话框提交
当用户点击提交对话框的按钮时,您的聊天应用会收到一个包含 ButtonClickedPayload 对象的事件对象。在载荷中,dialogEventType 设置为 SUBMIT_DIALOG。如需了解如何收集和处理对话框中的信息,请参阅收集和处理 Google Chat 用户的信息。
您的 Chat 应用必须通过执行以下操作之一来响应事件对象:
可选:返回另一个对话框
用户提交初始对话框后,聊天应用可以返回一个或多个额外的对话框,以帮助用户在提交之前查看信息、完成多步表单或动态填充表单内容。
为了处理用户输入的数据,Chat 应用会在事件的 commonEventObject.formInputs 对象中处理数据。如需详细了解如何从输入 widget 中检索值,请参阅收集和处理用户提供的信息。
如需跟踪用户在初始对话框中输入的任何数据,您必须向打开下一个对话框的按钮添加参数。如需了解详情,请参阅将数据转移到其他卡。
在此示例中,Chat 应用会打开一个初始对话框,该对话框会引导用户进入第二个对话框以进行确认,然后再提交:
Node.js
将 FUNCTION_URL 替换为处理按钮点击事件的 HTTP 端点。
Python
将 FUNCTION_URL 替换为处理按钮点击事件的 HTTP 端点。
Java
将 FUNCTION_URL 替换为处理按钮点击事件的 HTTP 端点。
Apps 脚本
此示例通过返回 card JSON 来发送卡片消息。您还可以使用 Apps 脚本卡片服务。
关闭对话框
当用户点击对话框中的提交按钮时,Chat 应用会执行其关联的操作,并提供将 buttonClickedPayload 设置为以下值的事件对象:
isDialogEvent为true。dialogEventType为SUBMIT_DIALOG。
聊天应用应返回一个 RenderActions 对象,并将 EndNavigation 设置为 CLOSE_DIALOG。
可选:显示临时通知
关闭对话框时,您还可以向与应用互动的用户显示临时文本通知。
如需显示通知,请返回设置了 notification 字段的 RenderActions 对象。
以下示例关闭了对话框并显示一条文本通知:
Node.js
Python
Java
Apps 脚本
此示例通过返回 card JSON 来发送卡片消息。您还可以使用 Apps 脚本卡片服务。
如需详细了解如何在对话框之间传递参数,请参阅将数据转移到另一张卡片。
可选:发送确认聊天消息
关闭对话框后,您还可以发送新的即时通讯消息或更新现有消息。
如需发送新消息,请返回一个 DataActions 对象,并将字段 CreateMessageAction 设置为新消息。例如,如需关闭对话框并发送短信,请返回以下内容:
以下示例通过发送新消息来关闭对话框:
Node.js
Python
Java
Apps 脚本
此示例通过返回 card JSON 来发送卡片消息。您还可以使用 Apps 脚本卡片服务。
如需在用户提交对话框后更新消息,请返回包含以下操作之一的 DataActions 对象:
UpdateMessageAction: 更新 Chat 应用发送的消息,例如用户请求对话框时所依据的消息。UpdateInlinePreviewAction:根据链接预览更新卡片。
问题排查
当 Google Chat 应用或卡片返回错误时,Chat 界面会显示一条消息,提示“出了点问题”。 或“无法处理您的请求”。有时,Chat 界面不会显示任何错误消息,但 Chat 应用或卡片会产生意外结果;例如,卡片消息可能不会显示。
虽然聊天界面中可能不会显示错误消息,但当您为聊天应用启用错误日志记录功能后,系统会提供描述性错误消息和日志数据,帮助您修复错误。如需查看、调试和修复错误方面的帮助,请参阅排查和修复 Google Chat 错误。