 ネイティブ広告を使用すると、広告をカスタマイズして、質の高いユーザー エクスペリエンスを提供することができます。ユーザー エクスペリエンスが向上すると、エンゲージメントが促進され、全体的な収益の拡大にもつながります。
ネイティブ広告を最大限に活かすには、広告レイアウトがアプリの他の部分に自然に馴染むようなスタイルにすることが重要です。初めての方向けに、ネイティブ テンプレートが用意されています。
ネイティブ テンプレートとは、ネイティブ広告として使用できるビューであり、コーディングが完成された状態で提供されるため、実装と変更を簡単に行えます。初めてのネイティブ広告を数分で実装でき、大量のコードに煩わされることなく短時間でデザインをカスタマイズできます。このテンプレートは、ニュース フィード内で使用するリサイクラー ビューや、ダイアログ、アプリ内の他の場所など、どこでも好きな場所に配置できます。
ネイティブ テンプレートは、Android Studio のモジュールとして提供されているので、プロジェクトに簡単に組み込んで自由に使用できます。
テンプレートのサイズ
テンプレートのサイズには、小と中の 2 種類があります。どちらも TemplateView クラスを使用し、アスペクト比は固定されています。テンプレートは親ビューの幅いっぱいになるように調整されます。
小サイズのテンプレート
@layout/gnt_small_template_view
小サイズのテンプレートは、リサイクラー ビューや帯状の広告ビューなどに最適です。たとえば、インフィード広告に使用できます。

中サイズのテンプレート
@layout/gnt_medium_template_view
中サイズのテンプレートは、ページビューの 1/2~3/4 のサイズでの使用を想定されていますが、フィードでも使用できます。ランディング ページやスプラッシュ ページに適しています。
プレースメントは、さまざまな場所をお試しいただけます。必要に応じて、ソースコードや XML ファイルを変更することもできます。

ネイティブ広告テンプレートのインストール
ネイティブ テンプレートをインストールするには、ZIP ファイルをダウンロード(GitHub のクローンまたはダウンロード オプションを使用して)して、既存の Android Studio プロジェクトにモジュールをインポートしてください。
[File] > [New] > [Import Module] を選択します。
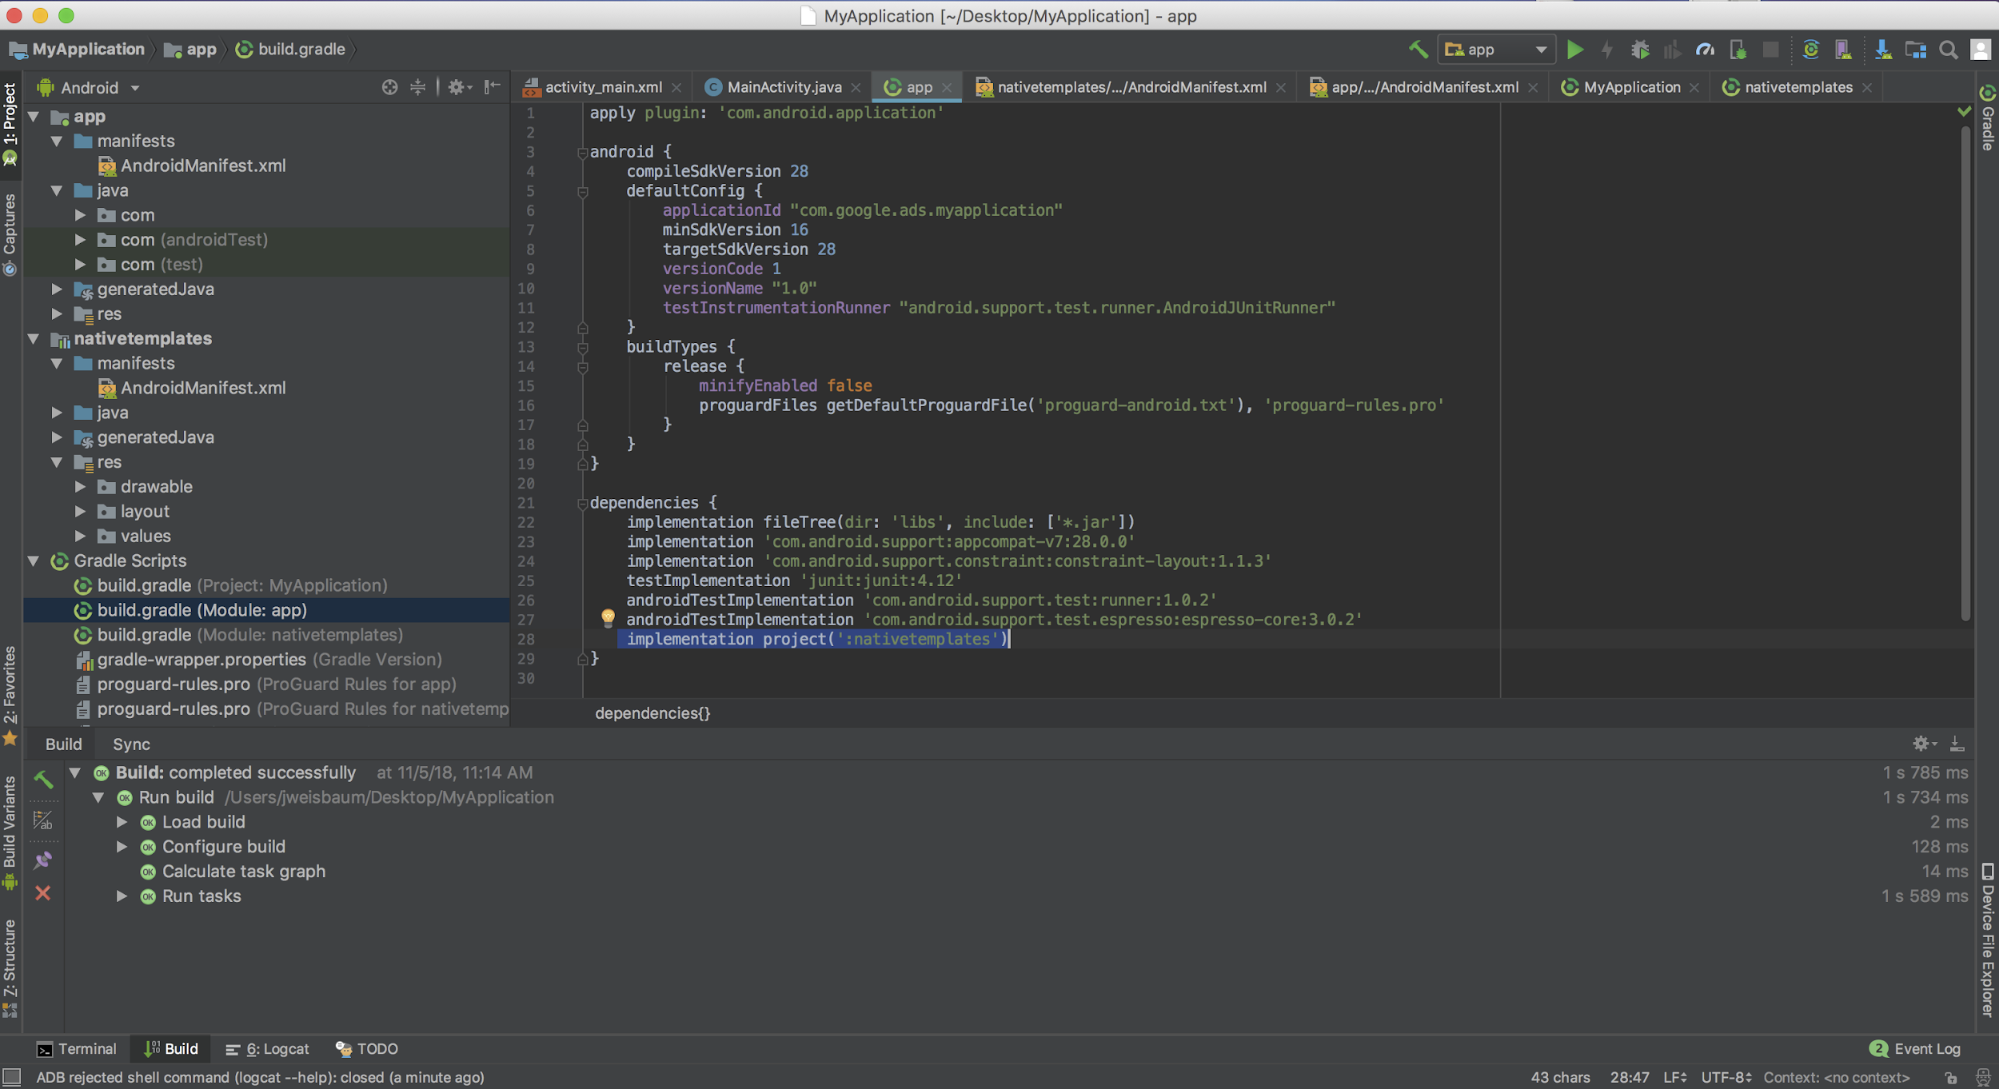
nativetemplatesフォルダを選択します。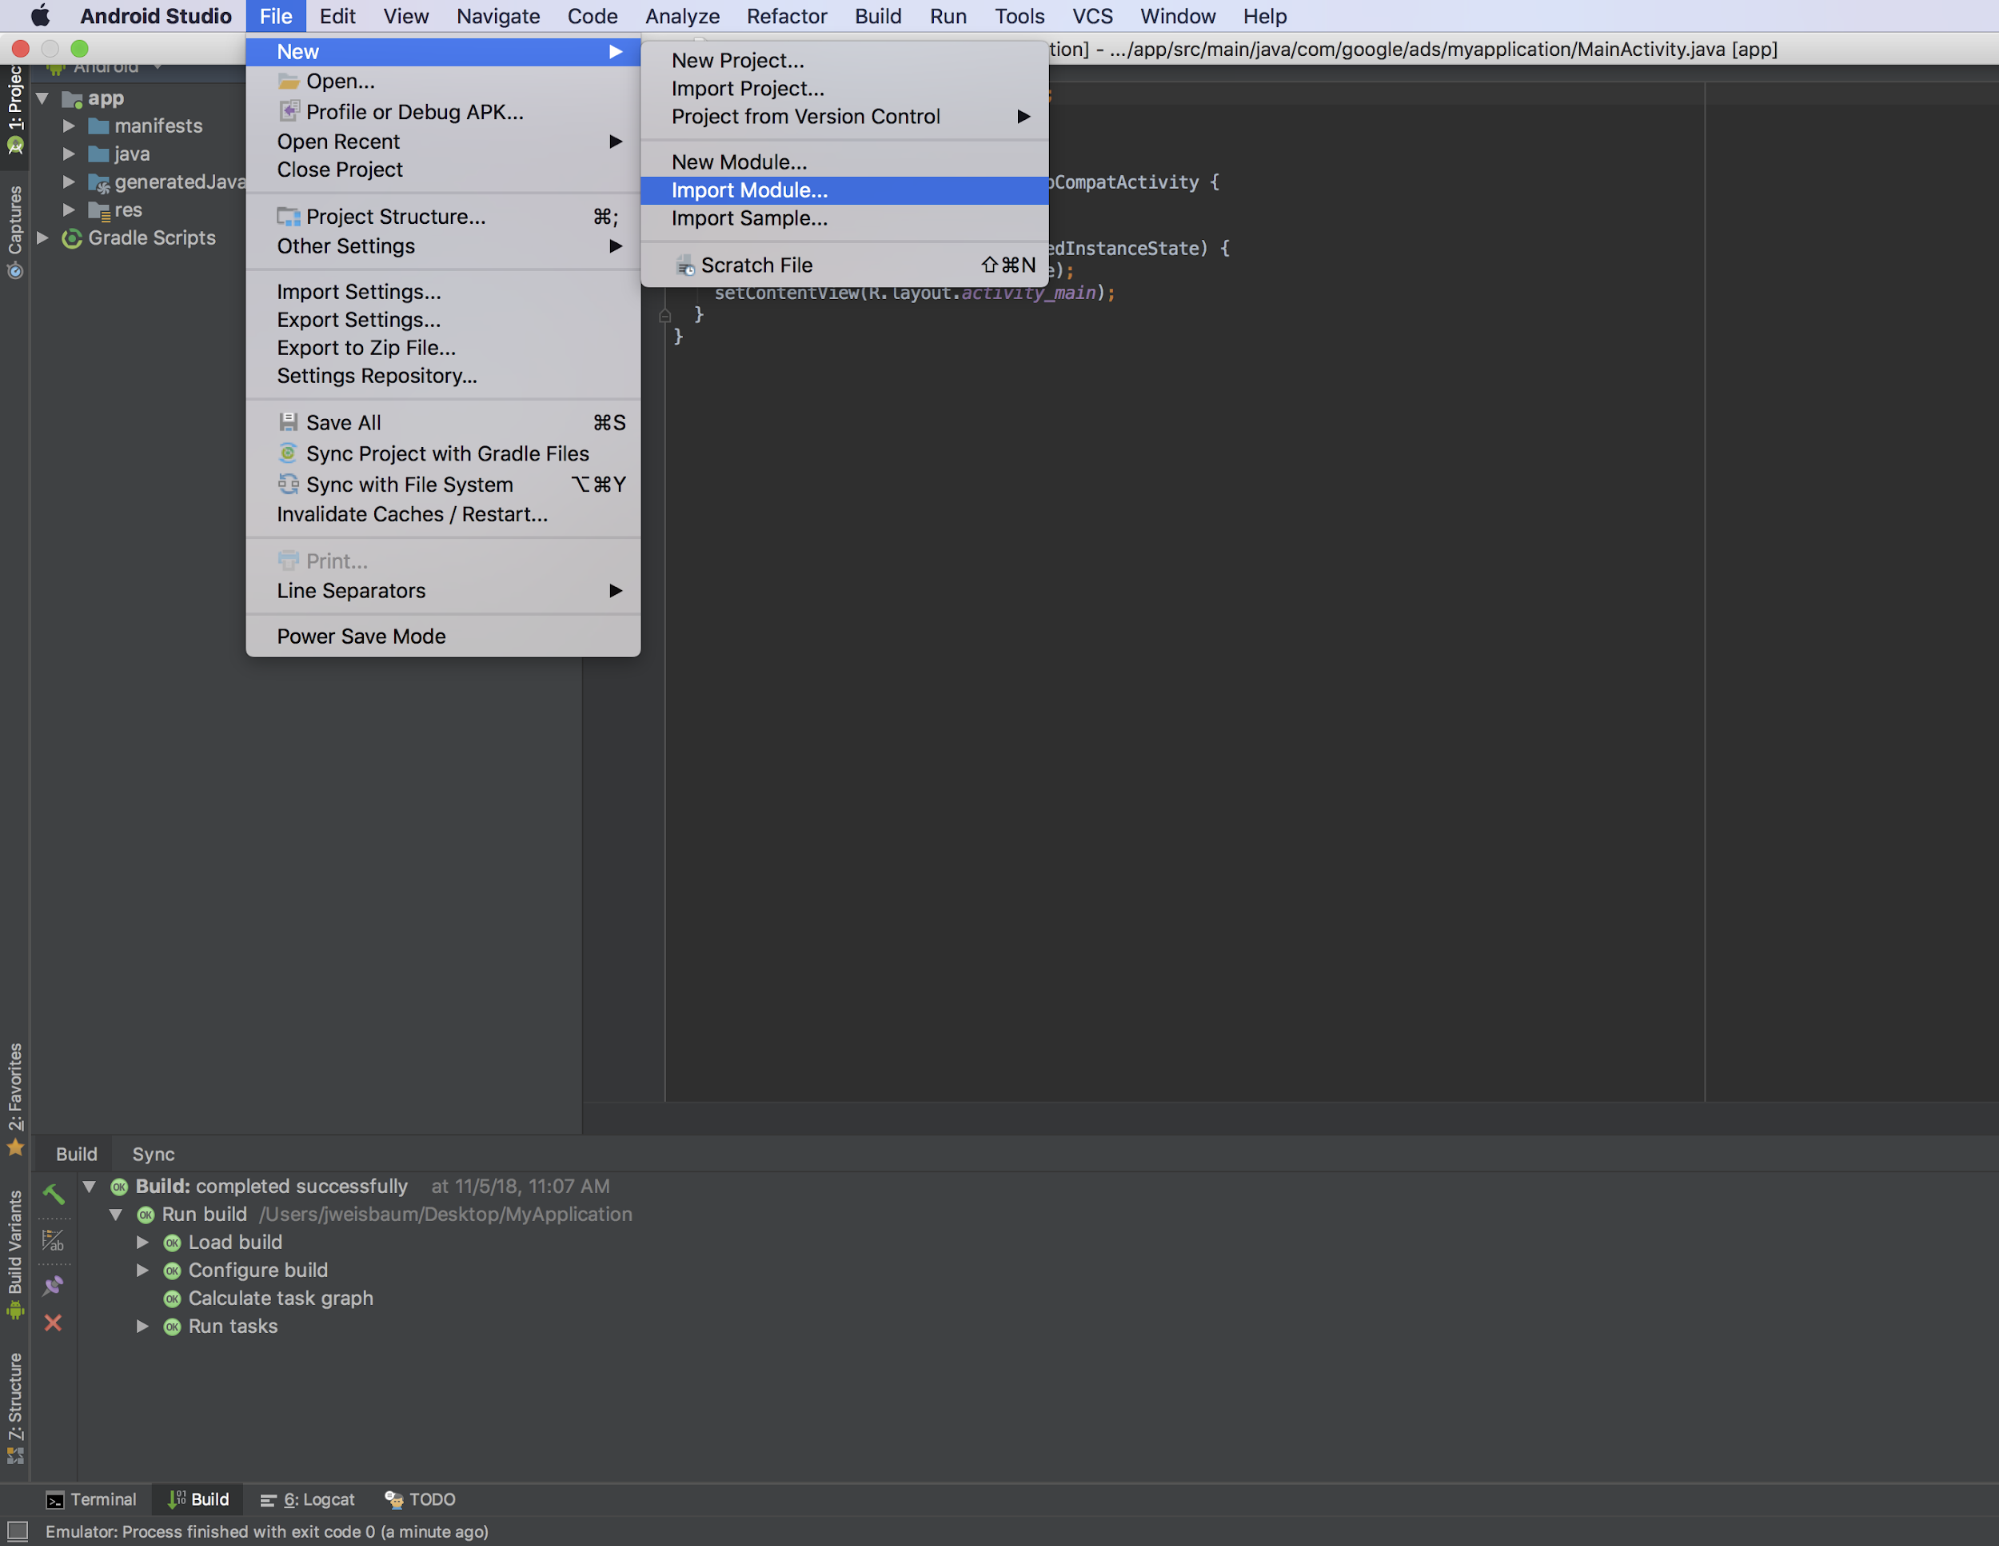
アプリレベルの
build.gradleファイルに次の行を追加します。dependencies { ... implementation project(':nativetemplates') ... }
ネイティブ広告テンプレートの使用
テンプレートは、通常のビューグループと同様に、任意のレイアウト XML ファイルで使用できます。
テンプレートを使用するには、次の 2 つの手順を行います。
まずは、レイアウトの一部としてテンプレートを含めます。
<LinearLayout
   xmlns:android="http://schemas.android.com/apk/res/android"
   xmlns:app="http://schemas.android.com/apk/res-auto"
   xmlns:tools="http://schemas.android.com/tools"
   android:layout_width="match_parent"
   android:layout_height="match_parent"
   tools:context=".MainActivity"
   tools:showIn="@layout/activity_main" >

<!--  This is your template view -->
<com.google.android.ads.nativetemplates.TemplateView
   android:id="@+id/my_template"
   <!-- this attribute determines which template is used. The other option is
    @layout/gnt_medium_template_view -->
   app:gnt_template_type="@layout/gnt_small_template_view"
   android:layout_width="match_parent"
   android:layout_height="match_parent" />

...
</LinearLayout>
次に、読み込んだネイティブ広告をテンプレートに表示します。
MobileAds.initialize(this);
AdLoader adLoader = new AdLoader.Builder(this, "ca-app-pub-3940256099942544/2247696110")
    .forNativeAd(new NativeAd.OnNativeAdLoadedListener() {
        @Override
        public void onNativeAdLoaded(NativeAd nativeAd) {
            NativeTemplateStyle styles = new
              NativeTemplateStyle.Builder().withMainBackgroundColor(background).build();
            TemplateView template = findViewById(R.id.my_template);
            template.setStyles(styles);
            template.setNativeAd(nativeAd);
        }
     })
     .build();

adLoader.loadAd(new AdRequest.Builder().build());
スタイル ディクショナリ キー
テンプレートのスタイルを設定するには、従来のレイアウト XML を使用する方法と、NativeTemplateStyle.Builder オブジェクトを使用する方法の 2 つあります。上記のコードサンプルでは、NativeTemplateStyle.Builder オブジェクトを使用して主な背景色を設定していますが、他にもさまざまなオプションが用意されています。利用できるビルダー メソッドについては、以下の表をご覧ください。ビルダーは、XML レイアウトのスタイルをオーバーライドする NativeTemplateStyle オブジェクトを返します。XML レイアウトの gnt_small_template.xml と gnt_medium_template.xml では、一般的な Android スタイリング パラメータが使用されます。
| ネイティブ テンプレートのスタイルに使用するビルダーのメソッド | |
|---|---|
withCallToActionTextTypeface
|
Typeface callToActionTextTypeface
行動を促すフレーズの書体。 |
withCallToActionTextSize
|
float callToActionTextSize
行動を促すフレーズのテキストのサイズ。 |
withCallToActionTypefaceColor
|
int callToActionTypefaceColor
行動を促すフレーズのテキストの色。 |
withCallToActionBackgroundColor
|
ColorDrawable callToActionBackgroundColor
行動を促すフレーズの背景色。 |
withPrimaryTextTypeface
|
Typeface primaryTextTypeface
1 行目のテキストの書体。 |
withPrimaryTextSize
|
float primaryTextSize
1 行目のテキストのサイズ。 |
withPrimaryTextTypefaceColor
|
int primaryTextTypefaceColor
1 行目のテキストの色。 |
withPrimaryTextBackgroundColor
|
ColorDrawable primaryTextBackgroundColor
1 行目のテキストの背景色。 |
withSecondaryTextTypeface
|
Typeface secondaryTextTypeface
2 行目のテキストの書体。 |
withSecondaryTextSize
|
float secondaryTextSize
2 行目のテキストのサイズ。 |
withSecondaryTextTypefaceColor
|
int secondaryTextTypefaceColor
2 行目のテキストの色。 |
withSecondaryTextBackgroundColor
|
ColorDrawable secondaryTextBackgroundColor
2 行目のテキストの背景色。 |
withTertiaryTextTypeface
|
Typeface tertiaryTextTypeface
3 行目のテキストの書体。 |
withTertiaryTextSize
|
float tertiaryTextSize
3 行目のテキストのサイズ。 |
withTertiaryTextTypefaceColor
|
int tertiaryTextTypefaceColor
3 行目のテキストの色。 |
withTertiaryTextBackgroundColor
|
ColorDrawable tertiaryTextBackgroundColor
3 行目のテキストの背景色。 |
withMainBackgroundColor
|
ColorDrawable mainBackgroundColor
主な背景色。 |
投稿
ネイティブ広告を簡単に開発できるようにネイティブ テンプレートを作成しました。 ぜひ皆様も新しいテンプレートや機能を GitHub レポジトリに投稿してください。プルリクエストを送っていただければ確認いたします。