
Проекты Google Apps Script, привязанные к Google Docs, Google Sheets или Google Forms, могут отображать элементы пользовательского интерфейса, такие как предварительно созданные оповещения, подсказки, всплывающие уведомления, диалоги и боковые панели. Эти элементы обычно содержат пользовательский HTML- контент и часто открываются из пунктов меню . В Forms элементы пользовательского интерфейса видны только редактору, который открывает форму для ее изменения, а не пользователю, отвечающему на вопросы.
Диалоги оповещений
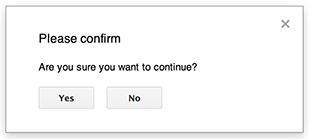
«Alert» — это предварительно созданное диалоговое окно, которое открывается в редакторе документов, таблиц, презентаций или форм. Оно отображает сообщение и кнопку «ОК» ; заголовок и альтернативные кнопки являются необязательными. Это похоже на вызов метода window.alert в клиентском JavaScript в веб-браузере.
Уведомления приостанавливают выполнение серверного скрипта на время открытия диалогового окна. Скрипт возобновляет работу после закрытия пользователем диалогового окна, но JDBC- соединения не сохраняются после приостановки.
Как показано в следующем примере, в документах (Docs), формах (Forms), слайдах (Slides) и таблицах (Sheets) используется метод Ui.alert , который доступен в трех вариантах. Чтобы переопределить кнопку «ОК» по умолчанию, передайте значение из перечисления Ui.ButtonSet в качестве аргумента buttons . Чтобы определить, на какую кнопку нажал пользователь, сравните возвращаемое значение метода alert с значением из перечисления Ui.Button .
function onOpen() {
  SpreadsheetApp.getUi() // Or DocumentApp or SlidesApp or FormApp.
    .createMenu("Custom Menu")
    .addItem("Show alert", "showAlert")
    .addToUi();
}

function showAlert() {
  const ui = SpreadsheetApp.getUi(); // Same variations.

  const result = ui.alert(
    "Please confirm",
    "Are you sure you want to continue?",
    ui.ButtonSet.YES_NO,
  );

  // Process the user's response.
  if (result === ui.Button.YES) {
    // User clicked "Yes".
    ui.alert("Confirmation received.");
  } else {
    // User clicked "No" or X in the title bar.
    ui.alert("Permission denied.");
  }
}
Диалоги подсказок
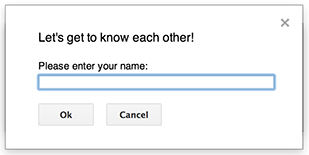
Диалоговое окно «Подсказка» — это предварительно созданное диалоговое окно, которое открывается в редакторе документов, таблиц, презентаций или форм. Оно отображает сообщение, текстовое поле ввода и кнопку «ОК» ; заголовок и дополнительные кнопки являются необязательными. Это похоже на вызов метода window.prompt в клиентском JavaScript в веб-браузере.
При появлении подсказок выполнение серверного скрипта приостанавливается на время работы диалогового окна. Скрипт возобновляется после закрытия пользователем диалогового окна, но JDBC- соединения не сохраняются после приостановки.
Как показано в следующем примере, в документах (Docs), формах (Forms), слайдах (Slides) и таблицах (Sheets) используется метод Ui.prompt , который доступен в трех вариантах. Чтобы переопределить кнопку «ОК» по умолчанию, передайте значение из перечисления Ui.ButtonSet в качестве аргумента buttons . Для оценки ответа пользователя получите возвращаемое значение метода prompt , затем вызовите метод PromptResponse.getResponseText , чтобы получить ввод пользователя, и сравните возвращаемое значение метода PromptResponse.getSelectedButton с значением из перечисления Ui.Button .
function onOpen() {
  SpreadsheetApp.getUi() // Or DocumentApp or SlidesApp or FormApp.
    .createMenu("Custom Menu")
    .addItem("Show prompt", "showPrompt")
    .addToUi();
}

function showPrompt() {
  const ui = SpreadsheetApp.getUi(); // Same variations.

  const result = ui.prompt(
    "Let's get to know each other!",
    "Please enter your name:",
    ui.ButtonSet.OK_CANCEL,
  );

  // Process the user's response.
  const button = result.getSelectedButton();
  const text = result.getResponseText();
  if (button === ui.Button.OK) {
    // User clicked "OK".
    ui.alert("Your name is " + text + ".");
  } else if (button === ui.Button.CANCEL) {
    // User clicked "Cancel".
    ui.alert("I didn't get your name.");
  } else if (button === ui.Button.CLOSE) {
    // User clicked X in the title bar.
    ui.alert("You closed the dialog.");
  }
}
Подсказки в виде электронных таблиц
«Всплывающее сообщение» — это небольшое диалоговое окно в правом нижнем углу редактора таблиц, которое отображает сообщение, но не приостанавливает выполнение скрипта. Это хороший способ показать сообщения о состоянии или обновления, не требующие взаимодействия с пользователем.
Как показано в следующем примере, в Sheets используется метод Spreadsheet.toast . Всплывающие уведомления (toast) доступны только в Sheets.
function showToast() {
  SpreadsheetApp.getActiveSpreadsheet().toast("Task completed successfully.");
}
Пользовательские диалоги
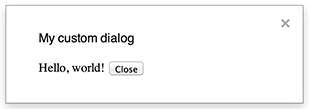
Пользовательское диалоговое окно может отображать HTML-интерфейс службы внутри редактора документов, таблиц, презентаций или форм.
Пользовательские диалоги не приостанавливают выполнение серверного скрипта во время открытия диалога. Поскольку они асинхронны, серверная функция, открывающая диалог, завершается немедленно. Для передачи данных из пользовательского диалога обратно на сервер используйте API google.script в клиентском коде.
Диалоговое окно может закрыться само собой, вызвав метод google.script.host.close на стороне клиента в интерфейсе HTML-сервиса. Диалоговое окно не может быть закрыто другими интерфейсами, только пользователем или самим собой.
Как показано в следующем примере, для открытия диалогового окна в окнах Docs, Forms, Slides и Sheets используется метод Ui.showModalDialog .
Code.gs
function onOpen() {
  SpreadsheetApp.getUi() // Or DocumentApp or SlidesApp or FormApp.
      .createMenu('Custom Menu')
      .addItem('Show dialog', 'showDialog')
      .addToUi();
}

function showDialog() {
  const html = HtmlService.createHtmlOutputFromFile('Page')
      .setWidth(400)
      .setHeight(300);
  SpreadsheetApp.getUi() // Or DocumentApp or SlidesApp or FormApp.
      .showModalDialog(html, 'My custom dialog');
}
Страница.html
Hello, world! <input type="button" value="Close" onclick="google.script.host.close()" />
Настраиваемые боковые панели

Боковая панель может отображать пользовательский интерфейс HTML-сервиса внутри редакторов документов, форм, презентаций и таблиц.
Боковые панели не приостанавливают выполнение серверного скрипта, пока диалоговое окно открыто. Клиентский компонент может выполнять асинхронные вызовы к серверному скрипту, используя API google.script для интерфейсов HTML-сервисов.
Боковая панель может закрыться сама собой, вызвав метод google.script.host.close на стороне клиента в интерфейсе HTML-сервиса. Боковая панель не может быть закрыта другими интерфейсами, только пользователем или самой собой.
Как показано в следующем примере, в документах, формах, слайдах и таблицах для открытия боковой панели используется метод Ui.showSidebar .
Code.gs
function onOpen() {
  SpreadsheetApp.getUi() // Or DocumentApp or SlidesApp or FormApp.
      .createMenu('Custom Menu')
      .addItem('Show sidebar', 'showSidebar')
      .addToUi();
}

function showSidebar() {
  const html = HtmlService.createHtmlOutputFromFile('Page')
      .setTitle('My custom sidebar');
  SpreadsheetApp.getUi() // Or DocumentApp or SlidesApp or FormApp.
      .showSidebar(html);
}
Страница.html
Hello, world! <input type="button" value="Close" onclick="google.script.host.close()" />
Диалоги открытия файлов
Google Picker — это JavaScript API, позволяющий пользователям выбирать или загружать файлы из Google Диска. Используйте библиотеку Google Picker в HTML-сервисе для создания пользовательского диалогового окна, позволяющего пользователям выбирать существующие файлы или загружать новые, а затем передавать выбранные файлы обратно в ваш скрипт.
Требования
Использование Google Picker с Google Apps Script требует соблюдения ряда условий:
Настройте среду для работы с Google Picker.
В вашем проекте скрипта должен использоваться стандартный проект Google Cloud .
Если используется область
drive.file, передайте тот же номер проекта Cloud в методPickerBuilder.setAppId.В манифесте проекта Apps Script необходимо указать области авторизации, требуемые API Google Picker, чтобы
ScriptApp.getOAuthTokenвозвращал правильный токен дляPickerBuilder.setOauthtoken.Ограничьте использование ключа API, заданного в
PickerBuilder.setDeveloperKey, только для Apps Script. В разделе «Ограничения приложения» выполните следующие действия:- Выберите HTTP-источники переходов (веб-сайты) .
- В разделе «Ограничения веб-сайта» нажмите «Добавить элемент» .
- Нажмите «Реферер» и введите
*.google.com. - Добавьте еще один элемент и укажите
*.googleusercontent.comв качестве источника перехода. - Нажмите «Готово» .
Вызовите метод
PickerBuilder.setOrigin.
Пример
В следующем примере показан инструмент Google Picker в Apps Script.