
本快速入门将介绍如何使用 Google Apps 脚本为 Workspace Studio 创建自定义步骤。该自定义步骤以两个数字和一个算术运算作为输入,执行计算,然后输出结果。
目标
- 使用 Google Apps 脚本为 Workspace Studio 创建自定义步骤。
- 将自定义步骤部署到您自己的 Google Workspace 组织。
- 在 Workspace Studio 中测试自定义步骤。
前提条件
- 有权访问 Workspace Studio 的 Google 账号。
设置脚本
如需设置脚本,请创建一个新的 Apps 脚本项目,然后将其连接到您的 Cloud 项目。
点击以下按钮,打开计算器快速入门 Apps 脚本项目。
点击 概览。
在概览页面上,点击
 复制。
复制。为您的 Apps 脚本项目副本命名:
点击计算器快速入门的副本。
在项目标题中,输入
Calculator quickstart。点击重命名。
可选:查看快速入门代码
在上一部分中,您复制了一个完整的 Apps 脚本项目,其中包含流程自定义步骤所需的所有应用代码,因此无需复制并粘贴每个文件。
您还可以选择在此处查看上一部分中复制的每个文件:
appsscript.json清单文件。一种特殊的 JSON 文件,用于指定 Apps 脚本运行脚本所需的基本项目信息。
查看
appsscript.json个代码{ "timeZone": "America/Los_Angeles", "exceptionLogging": "STACKDRIVER", "runtimeVersion": "V8", "addOns": { "common": { "name": "Calculator", "logoUrl": "https://www.gstatic.com/images/branding/productlogos/calculator_search/v1/web-24dp/logo_calculator_search_color_1x_web_24dp.png", "useLocaleFromApp": true }, "flows": { "workflowElements": [ { "id": "actionElement", "state": "ACTIVE", "name": "Calculate", "description": "Asks the user for two values and a math operation, then performs the math operation on the values and outputs the result.", "workflowAction": { "inputs": [ { "id": "value1", "description": "value1", "cardinality": "SINGLE", "dataType": { "basicType": "INTEGER" } }, { "id": "value2", "description": "value2", "cardinality": "SINGLE", "dataType": { "basicType": "INTEGER" } }, { "id": "operation", "description": "operation", "cardinality": "SINGLE", "dataType": { "basicType": "STRING" } } ], "outputs": [ { "id": "result", "description": "Calculated result", "cardinality": "SINGLE", "dataType": { "basicType": "INTEGER" } } ], "onConfigFunction": "onConfigCalculateFunction", "onExecuteFunction": "onExecuteCalculateFunction" } } ] } } }
Calculator.gs为 Google Workspace Studio 定义自定义步骤。名为“Calculate”的步骤接受两个数字和一个运算作为输入,并返回计算结果。
查看
Calculator.gs个代码/** * This script defines a custom step for Google Workspace Studio. * The step, named "Calculate", takes two numbers and an operation as input * and returns the result of the calculation. * * The script includes functions to: * * 1. Define the configuration UI for the step using Card objects: * * - `onConfigCalculateFunction()`: Generates the main configuration card. * - Helper functions like `pushCard()`, `saveButton()` to build card components. * * 2. Handle the execution of the step. * * - `onExecuteCalculateFunction()`: Retrieves inputs, performs the calculation, * and returns outputs. * * To learn more, see the following quickstart guide: * https://developers.google.com/workspace/add-ons/studio/quickstart */ /** * Creates an action response to push a new card onto the card stack. * * This function generates an action object that, when returned, causes the * provided card to be pushed onto the card stack, making it the currently * displayed card in the configuration UI. * @param {Object} card The Card object to push. * @return {Object} The action response object. */ function pushCard(card) { return { "action": { "navigations": [{ "push_card": card } ] } }; } /** * Creates an action response to update the currently displayed card. * * This function generates an action object that, when returned, causes the * currently displayed card to be replaced with the provided card in the * configuration UI. * @param {Object} card The Card object to update. * @return {Object} The render actions object. */ function updateCard(card) { return { "render_actions": { "action": { "navigations": [{ "update_card": card } ] } } }; } /** * Creates a button configuration object for saving the step. * * This function generates a button definition that, when clicked, triggers * a save action for the current step configuration. * @return {Object} The button widget object. */ function saveButton() { return { "text": "Save", "onClick": { "hostAppAction" : { "workflowAction" : { "saveWorkflowAction" : {} } } }, }; } /** * Creates a button configuration object for a refresh action. * * This function generates a button definition that, when clicked, triggers * a function to refresh the current card. * @param {string} functionName The name of the Apps Script function to call on click. * @return {Object} The button widget object. */ function refreshButton(functionName) { return { "text": "Refresh", "onClick": { "action" : { "function" : functionName } }, }; } /** * Generates and displays a configuration card for the sample calculation action. * * This function creates a card with input fields for two values and a dropdown * for selecting an arithmetic operation. The card also includes a "Save" * button to save the action configuration for the step. * * The input fields are configured to let the user select outputs from previous * steps as input values using the `hostAppDataSource` property. * This function is called when the user adds or edits the "Calculate" step in the UI. * @return {Object} The action response object containing the card to display. */ function onConfigCalculateFunction() { var card = { "sections": [ { "header": "Action sample: Calculate", "widgets": [ { "textInput": { "name": "value1", "label": "First value", "hostAppDataSource" : { "workflowDataSource" : { "includeVariables" : true } } } }, { "selectionInput": { "name": "operation", "label": "Operation", "type": "DROPDOWN", "items": [ { "text": "+", "value": "+", }, { "text": "-", "value": "-", }, { "text": "x", "value": "x", }, { "text": "/", "value": "/", } ] } }, { "textInput": { "name": "value2", "label": "Second value", "hostAppDataSource" : { "workflowDataSource" : { "includeVariables" : true } } } } ] } ] }; return pushCard(card); } /** * Gets an integer value from variable data, handling both string and integer formats. * * This function attempts to extract an integer value from the provided variable data. * It checks if the data contains string values and, if so, parses the first string * as an integer. If integer values are present, it returns the first integer. * @param {Object} variableData The variable data object from the event. * @return {number} The extracted integer value. */ function getIntValue(variableData) { if (variableData.stringValues) { return parseInt(variableData.stringValues[0]); } return variableData.integerValues[0]; } /** * Returns output variables from a step. * * This function constructs an object that, when returned, sends the * provided variable values as output from the current step. * The variable values are logged to the console for debugging purposes. */ function outputVariables(variableDataMap) { const workflowAction = AddOnsResponseService.newReturnOutputVariablesAction() .setVariableDataMap(variableDataMap); const hostAppAction = AddOnsResponseService.newHostAppAction() .setWorkflowAction(workflowAction); const renderAction = AddOnsResponseService.newRenderActionBuilder() .setHostAppAction(hostAppAction) .build(); return renderAction; } /** * Executes the calculation action based on the inputs from an event. * * This function retrieves input values ("value1", "value2") and the "operation" * from the event, performs the calculation, and returns the "result" and * "log" as output variables. * This function is called when the flow reaches this custom step. * @param {Object} event The event object passed by the runtime. * @return {Object} The output variables object. */ function onExecuteCalculateFunction(event) { console.log("output: " + JSON.stringify(event)); var calculatedValue = 0; var value1 = event.workflow.actionInvocation.inputs["value1"].integerValues[0]; var value2 = event.workflow.actionInvocation.inputs["value2"].integerValues[0]; var operation = event.workflow.actionInvocation.inputs["operation"].stringValues[0]; if (operation == "+") { calculatedValue = value1 + value2; } else if (operation == "-") { calculatedValue = value1 - value2; } else if (operation == "x") { calculatedValue = value1 * value2; } else if (operation == "/") { calculatedValue = value1 / value2; } const variableDataMap = { "result": AddOnsResponseService.newVariableData().addIntegerValue(calculatedValue) }; return outputVariables(variableDataMap); }
部署并测试您的步骤
如需测试相应步骤,请为插件设置测试部署,将该步骤添加到流程中,然后运行该流程。
为插件设置测试部署:
- 在 Apps 脚本编辑器中打开脚本项目。
- 依次点击部署 > 测试部署。
- 点击安装。
- 点击底部的完成。
您可以与其他用户共享 Apps 脚本项目(需要具有修改权限),以便他们测试该插件。然后提示用户按照之前的步骤操作。
安装完毕后,该插件会立即在 Flows 中提供。您可能需要刷新 Flows,然后该插件才会显示。您还必须先授权该插件,然后才能使用它。
如需详细了解测试部署,请参阅安装未发布的插件。
打开 Flow。
创建包含您的步骤的流:
- 点击 New flow。
- 选择流程的启动方式。如果您的步骤需要输入变量,请将输入变量配置为启动器的输出的一部分。
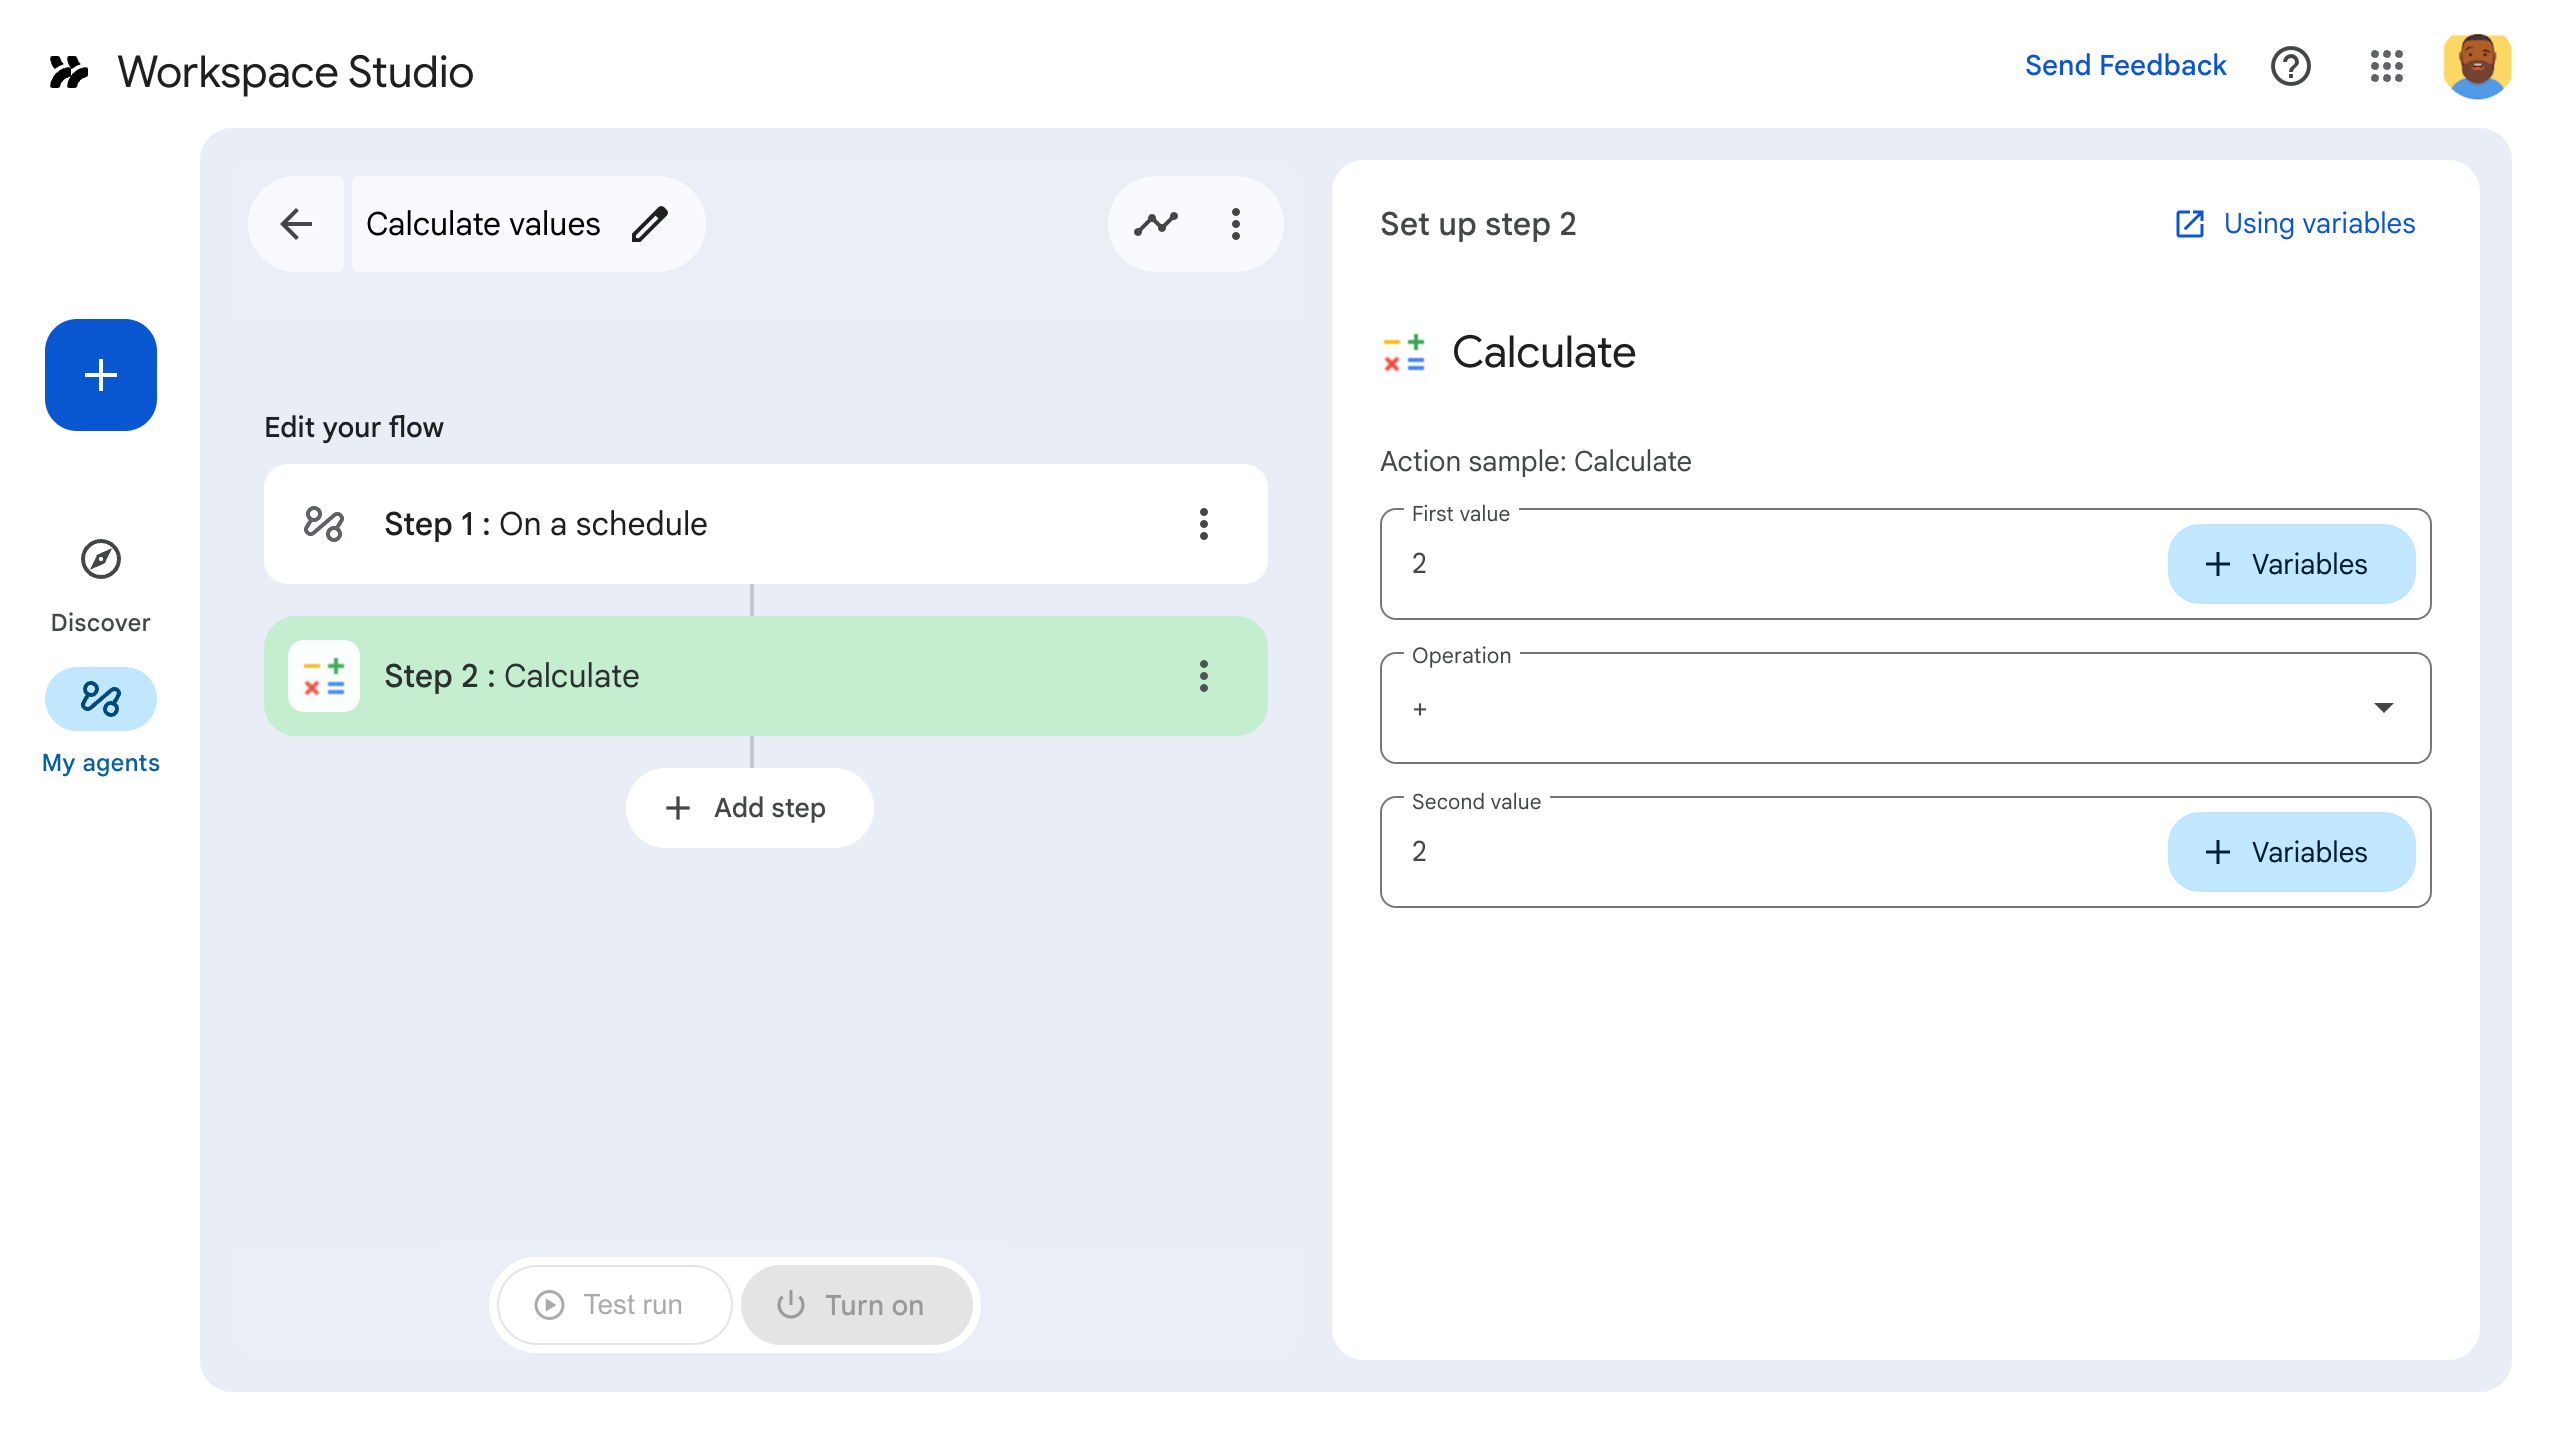
- 点击 添加步骤。选择您构建或更新的步骤,即“计算”步骤。
- 配置相应步骤。在计算步骤中,选择两个值和一个数学运算。系统会自动保存相应步骤。
- 如需测试步骤的输出,请添加另一个步骤。例如,如需向 Google Chat 消息添加输出,请添加 Chat 的在 Chat 中通知我这一步。在消息中,依次点击 变量,然后选择相应步骤的输出。对于计算步骤,请依次选择变量 > 第 2 步:计算 > 计算结果。该变量会以条状标签的形式显示在消息字段中。
- 点击开启。 您的流可以运行了。
通过触发流程的启动器来运行流程。例如,如果您的流按时间表启动,则会在指定日期和时间运行。
验证流程是否按预期运行。如需查看日志,请访问流程构建器的活动标签页。 如需了解如何在“活动”标签页中创建自定义日志,请参阅活动日志。
后续步骤
您已成功创建并测试了 Workspace Studio 的自定义步骤。现在,您可以:
继续自定义该步骤,提示 Gemini 帮助您实现更复杂的逻辑。
构建配置卡片以自定义步骤配置。
记录活动和错误,以便记录和排查跑步时的错误。
查看事件对象,以查看流程在运行步骤时发送和接收的 JSON 载荷。