
通过 Actions 控制台,你可以针对以下内容自定义 Action 发布设置: 不同语言、语言区域和地区。其中包括 是否提供、是否有任何本地化的 Action 说明,以及自定义设置 三种不同的文字转语音模式。
特定于语言和语言区域的目录信息
你可以使用相应语言或 语言区域级别:
- 语言精细度:您的 Action 信息适用于以下语言的所有语言区域: 该语言。
- 语言区域精细度:每个语言区域都有自己的 Action 信息。本次 相应信息随后会相应地显示在 Google 助理目录中 具体取决于用户的语言区域。
详细了解语言和语言区域。
添加其他语言的详细信息
如果你向 Action 添加了对更多语言的支持,则可以添加元数据 为项目中的每种语言指定以下值:
- 转到部署 >目录信息。
从信息左上角的标签页中选择语言 页面。
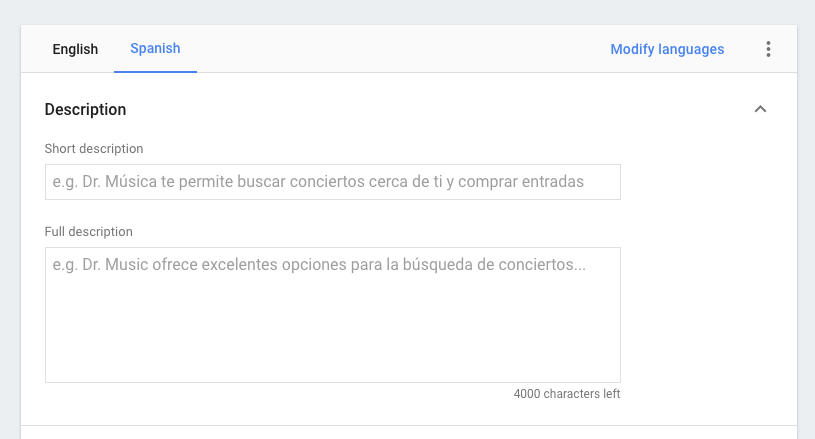
图 3. 为语言添加目录信息。 填写名录信息 。
点击保存。
导出元数据以进行翻译
如果您需要针对不同语言区域翻译项目的元数据, 向翻译人员授予控制台访问权限,则可以将项目的 元数据作为资源字符串。这些字符串随后可由外部翻译 并将其导入回您的项目中。
如需导出项目的元数据以进行翻译,请按以下步骤操作:
- 点击顶部菜单中的部署。
- 点击左侧菜单中的目录信息。
点击右侧的更多 more_vert 图标 ,然后选择导出以供翻译以下载 ZIP 文件。

图 4. 导出目录信息。 ZIP 文件包含每个语言区域的 XLF 文件。每个文件在此 Action 的说明中的每个字段都包含
<source>和<target>转换:<trans-unit id="tu3" resname="shortDescription"> <source xml:lang="en">short description</source> <target xml:lang="it">short description</target> <note>The default short description for the Action (if there is not a translation available). This is limited to 80 characters.</note> </trans-unit>将
<target>字符串替换为文件语言区域的已翻译字符串:<trans-unit id="tu3" resname="shortDescription"> <source xml:lang="en">short description</source> <target xml:lang="it">Breve descrizione</target> <note>The default short description for the Action (if there is not a translation available). This is limited to 80 characters.</note> </trans-unit>重新压缩包含所有现在翻译的 XLF 文件的文件夹。
返回目录信息。
点击语言选择器右侧的 ⋮。
点击导入翻译以上传您的归档文件。
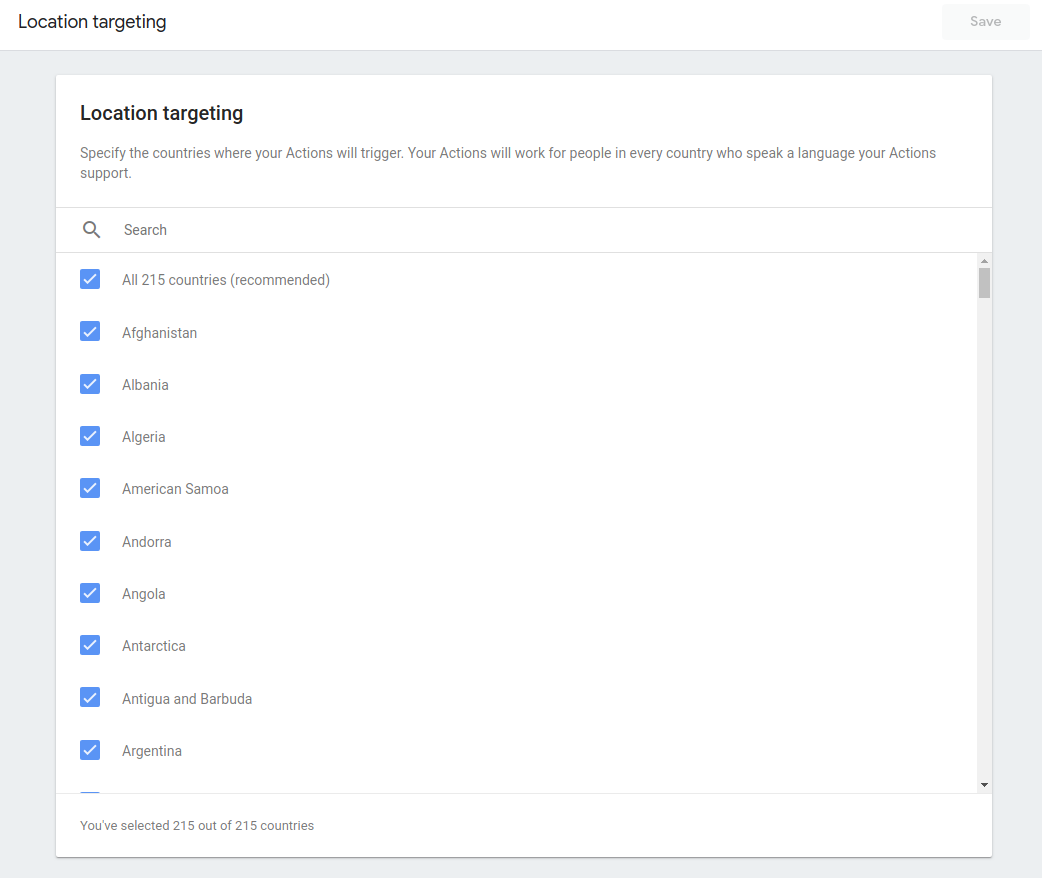
目标地理位置
在 Actions 控制台中,你可以使用 地理位置定位设置,用于指定您的 Action 支持的区域。 设备所在的区域取决于设备的实际位置,而不是其语言区域。 区域目前是在国家/地区一级设置的。
如果您的 Action 只允许 或你的 Action 依赖于用户实际购买 位于特定国家/地区才能使用此服务。
但是,您应该向尽可能多的地区推出您的 Action。 例如,如果您创建了一个 Action,用于向用户介绍美国 则应向所有区域提供该操作, 使用和暴露。
要设置地理位置定位,请按以下步骤操作:
- 在 Actions 控制台。
- 导航到部署 >地理位置定位。
- 指定您的 Action 支持的区域。默认情况下,所有区域 支持。
自定义 TTS 语音
默认情况下,您的 Action 会使用与用户的 Google 助理相关联的 TTS 语音 语言区域设置。此设置通常与设备的语言区域设置相同, 但如果用户明确更改 Google 助理的语言区域 。
如果需要,您可以强制为操作使用特定的 TTS 语音,而不考虑 Google 助理语言区域设置。例如,您的 Action 可能有一个角色, 必须具有美式或英式口音。
如需为 Action 设置特定的 TTS 语音,请执行以下操作:
- 转到 Actions 控制台,然后点击 自己的项目系统会显示概览页面。
- 导航至设置 >确定您的 Action 的调用方式。或者 转到开发 >调用 >设置。
- 在 Google 助理语音字段中,默认设置为 匹配用户的语言设置默认处于选中状态。
- 要覆盖默认设置,请取消选中匹配用户的语言设置 复选框,并从下拉菜单中选择所需的 TTS 语音。
现在,你可以按照准备发布 Action 中的步骤进行操作了 提交你的 Action 以供审核。