Mit Sammlungen den Überblick behalten
Sie können Inhalte basierend auf Ihren Einstellungen speichern und kategorisieren.
In diesem Leitfaden erfahren Sie, wie Sie Ihre Umgebung zum Erstellen von Aktionen mit
Actions SDK und Actions Builder. Sie führen die folgenden Aufgaben aus:
Node.js installieren:Sie benötigen diese Laufzeitumgebung, um unser Node.js-Script zu verwenden.
Fulfillment-Bibliothek.
Firebase CLI installieren:Mit diesem Befehlszeilentool können Sie
Firebase-Abhängigkeiten wie Web-Apps für Interactive Canvas bereitstellen,
Firebase Hosting.
gactions-Befehlszeilentool installieren:Bei der Entwicklung mit dem Actions-Tool
SDK verwenden Sie dieses Tool zum Erstellen, Verwalten und Bereitstellen des Aktionspakets für
deine Aktion.
Actions-Projekt erstellen:Ein Actions-Projekt ist der logische Container
für Ihre Konversationsaktionen. Sie müssen ein Konto in der Actions Console erstellen, bevor Sie
mit der Entwicklung beginnen können.
Beispiel initialisieren und bereitstellen:In diesem einfachen Beispiel wird gezeigt, wie Sie
mit der Entwicklung von Aktionen auf Basis von Interactive Canvas begonnen.
Nachdem Sie diesen Schnellstart abgeschlossen haben, können Sie Ihr Actions-Projekt zwischen
Ihre lokale Entwicklungsumgebung
und die Weboberfläche von Actions Builder.
Node.js und Firebase CLI installieren
Laden Sie Node.js herunter und installieren Sie es gemäß Node.js.
Dokumentation zur Verwendung
unserer Fulfillment-Bibliothek. Ihre Installation von Node.js
ermöglicht es Ihnen, die Firebase CLI mit npm zu installieren und später Ihre
Implementierung der konversationellen Fulfillment-Lösung lokal.
Installieren und richten Sie die Firebase CLI gemäß
zur Firebase-Dokumentation. Mit der Firebase CLI können Sie ein interaktives
Canvas-Webanwendung in Firebase Hosting und bei Bedarf manuell bereitstellen
Auftragsausführung in Cloud Functions for Firebase.
gactions-Befehlszeilentool installieren
Installieren Sie das gactions-Befehlszeilentool. Laden Sie dazu eine
Installationspaket erstellen, es entpacken und den Ausführungspfad konfigurieren.
So installieren und konfigurieren Sie Gactions:
Laden Sie das entsprechende Paket für Ihr Betriebssystem herunter:
Extrahieren Sie das Paket an einen Speicherort Ihrer Wahl und fügen Sie das Binärprogramm zu Ihrem
die Variable PATH der Umgebung. Sie können das Paket auch
Standort, der bereits in der Variablen PATH enthalten ist (z. B. /usr/local/bin).
Aktivieren Sie unter Linux und Mac bei Bedarf Ausführungsberechtigungen:
chmod +x PATH_TO/gactions
Führen Sie den folgenden Befehl aus, um die Befehlszeile zu authentifizieren. Dieser Befehl
startet einen Authentifizierungsvorgang und erfordert einen Webbrowser:
gactions login
Wenn der Vorgang abgeschlossen ist, authentifiziert sich die Befehlszeile automatisch.
Projekt erstellen und einrichten
Bevor Sie das gactions-Befehlszeilentool verwenden können, müssen Sie ein Projekt erstellen in
die Actions Console aufrufen
und gactions Zugriff auf das Projekt gewähren. So erstellen und legen Sie
ein Projekt einrichten, gehen Sie so vor:
Klicken Sie auf Neues Projekt, geben Sie einen Projektnamen ein und klicken Sie auf Projekt erstellen.
Wählen Sie eine Kategorie aus und klicken Sie auf Weiter.
Wählen Sie Leeres Projekt aus und klicken Sie auf Jetzt erstellen.
Aktivieren Sie die Actions API in der Google Cloud Console, indem Sie
die Anweisungen unter Aktivieren und Deaktivieren
APIs
Dies ermöglicht es Gactions, mit Ihrem Projekt zu interagieren.
Hello World-Beispiel abrufen
Das interaktive Beispiel „Hello World“ zeigt, wie eine einfache Aktion erstellt wird
mit einer einzigen Aktion von Interactive Canvas.
Erstellen Sie ein leeres Verzeichnis und initialisieren Sie das interaktive Canvas-Beispiel in
dieses Verzeichnis. Mit dem folgenden Code wird beispielsweise das Beispiel in einem
Verzeichnis interactive-canvas-sample/, das als Beispiel verwendet wird
in diesem Dokument:
Öffnen Sie die Datei interactive-canvas-sample/sdk/settings/settings.yaml und
Ändern Sie den Wert des Felds projectId in die ID Ihres Projekts.
Beispiel bereitstellen und testen
Nachdem Sie das Beispiel eingerichtet haben, können Sie die Interactive Canvas Web-App bereitstellen und
Ihr Actions-Projekt. Durch diesen Prozess wird ein Entwurf deiner Aktionen erstellt
das Sie im Actions-Simulator zur Vorschau und zum Testen bereitstellen können:
Führen Sie im Verzeichnis interactive-canvas-sample/ den folgenden Befehl aus:
zur Bereitstellung der Interactive Canvas Web-App (Inhalt der public/
-Verzeichnis).
Eine gerenderte Version der Web-App sehen Sie unter der URL, die vom
Firebase CLI in einem Browser:
https://PROJECT_ID.web.app
Öffnen Sie die Datei interactive-canvas-sample/sdk/webhooks/ActionsOnGoogleFulfillment/index.js und
Ändern Sie den Wert der Variablen CANVAS_URL in die Web-App-URL Ihres Projekts.
const CANVAS_URL = 'https://PROJECT_ID.web.app';
Führen Sie im Verzeichnis interactive-canvas-sample/sdk/ folgenden Befehl aus:
, um die lokale Version Ihres Actions-Projekts per Push-Befehl an die Konsole zu übertragen,
Entwurf:
gactions push
Führen Sie im Verzeichnis interactive-canvas-sample/sdk/ folgenden Befehl aus:
verwenden, um Ihr Actions-Projekt im Simulator zu testen:
gactions deploy preview
Öffnen Sie den Link, den das Befehlszeilentool zurückgibt, um zum Simulator zu gelangen.
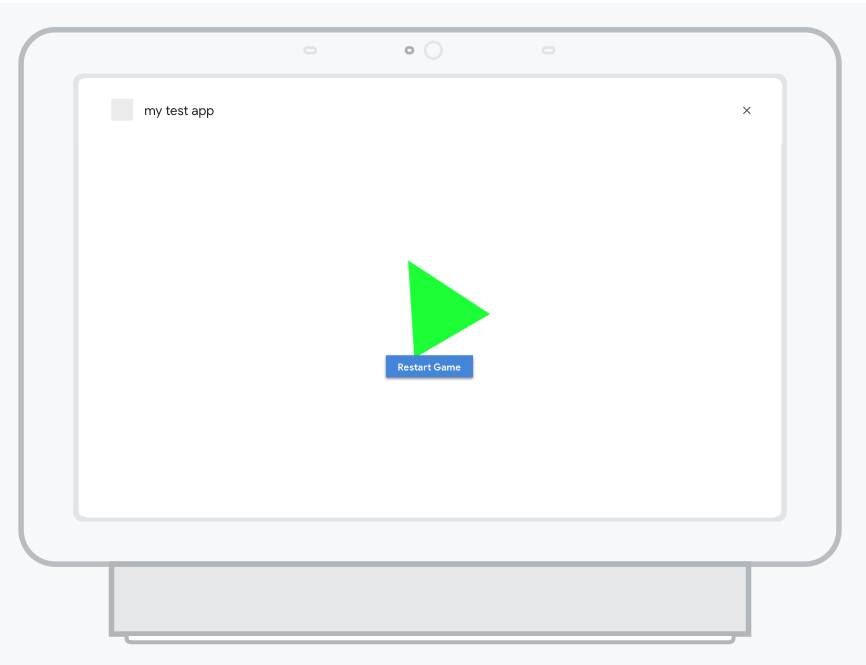
Geben Sie im Simulator "Talk to Interactive canvas sample" ein, um die Aktion zu starten. Ich
sollte ein sich drehendes Dreieck von der Web-App zu sehen sein, die unter
https://PROJECT_ID.web.app
<ph type="x-smartling-placeholder"></ph>
Abbildung 1: Der Simulator mit der Vorschau des Actions-Projekts
[null,null,["Zuletzt aktualisiert: 2025-07-26 (UTC)."],[[["\u003cp\u003eThis guide helps you set up your environment for building Google Actions using the Actions SDK and Actions Builder.\u003c/p\u003e\n"],["\u003cp\u003eYou'll install necessary tools like Node.js, Firebase CLI, and the \u003ccode\u003egactions\u003c/code\u003e command-line tool.\u003c/p\u003e\n"],["\u003cp\u003eThe guide includes steps to create an Actions project, initialize a sample, and deploy it for testing in the Actions simulator.\u003c/p\u003e\n"],["\u003cp\u003eYou'll learn to deploy the Interactive Canvas web app to Firebase Hosting and push your local Actions project to the console.\u003c/p\u003e\n"],["\u003cp\u003eAfter completing the setup, you can preview and test your Action in the Actions simulator by invoking it with a specific phrase.\u003c/p\u003e\n"]]],["To set up for building Actions, install Node.js and the Firebase CLI for fulfillment and web app deployment. Install the `gactions` CLI by downloading and configuring the appropriate package, then authenticate using `gactions login`. In the Actions console, create a new project, enable the Actions API, and use `gactions init` to set up the Interactive Canvas sample. Deploy the web app with `firebase deploy`, update the `CANVAS_URL` and push the Action using `gactions push`. Finally, preview and test the action in the simulator using `gactions deploy preview`.\n"],null,["# Actions SDK and Builder quick start guide\n\nThis guide walks you through setting up your environment to build Actions using\nboth the Actions SDK and Actions Builder. You'll carry out the following tasks:\n\n- **Install Node.js:** You need this runtime environment to use our Node.js fulfillment library.\n- **Install the Firebase CLI:** This command-line tool lets you develop and deploy Firebase dependencies, such as web apps for [Interactive Canvas](/assistant/interactivecanvas), to Firebase Hosting.\n- **Install the gactions command-line tool:** When developing with the Actions SDK, you use this tool to create, manage, and deploy the Action package for your Action.\n- **Create an Actions project:** An [Actions project](/assistant/conversational/build/projects) is the logical container for your Conversational Actions. You have to create one in the Actions console before you can start building.\n- **Initialize and deploy a sample:** This simple sample shows you how to get started building Actions powered by Interactive Canvas.\n\nOnce you complete this quick start, you can sync your Actions project between\nyour local development environment and the web experience of Actions Builder.\n\nInstall Node.js and the Firebase CLI\n------------------------------------\n\nDownload and install [Node.js](https://nodejs.org/) according to the Node.js\ndocumentation to use our fulfillment library. Your installation of Node.js also\nallows you to install the Firebase CLI with [npm](https://www.npmjs.com/), and later, to run your\nconversational fulfillment implementation locally.\n\nInstall and set up the [Firebase CLI](https://firebase.google.com/docs/cli#setup_update_cli) according\nto the Firebase documentation. The Firebase CLI lets you deploy an Interactive\nCanvas web app to Firebase Hosting and, if necessary, manually deploy\nfulfillment to Cloud Functions for Firebase.\n\nInstall the gactions command-line tool\n--------------------------------------\n\nInstall the gactions command line interface (CLI) tool by downloading an\ninstallation package, unpacking it, and configuring your execution path.\n\nTo install and configure gactions, follow these steps:\n\n1. Download the appropriate package for your operating system:\n\n | Platform | Package | Checksum |\n |----------|----------------------------------------------------------------------------------|---------------------------------------------------------------------------------------|\n | Windows | [Download](https://dl.google.com/gactions/v3/release/gactions-sdk_windows.zip) | [SHA256](https://dl.google.com/gactions/v3/release/gactions-sdk_windows.zip.sha256) |\n | Linux | [Download](https://dl.google.com/gactions/v3/release/gactions-sdk_linux.tar.gz) | [SHA256](https://dl.google.com/gactions/v3/release/gactions-sdk_linux.tar.gz.sha256) |\n | Mac OS | [Download](https://dl.google.com/gactions/v3/release/gactions-sdk_darwin.tar.gz) | [SHA256](https://dl.google.com/gactions/v3/release/gactions-sdk_darwin.tar.gz.sha256) |\n\n2. Extract the package to a location of your choice and add the binary to your\n environment's `PATH` variable. Alternatively, extract the package to a\n location that's already in your `PATH` variable (for example, `/usr/local/bin`).\n\n3. On Linux and Mac, enable execute permissions if necessary:\n\n ```scdoc\n chmod +x PATH_TO/gactions\n ```\n4. Run the following command to authenticate the CLI. This command\n starts an authentication flow and requires a web browser:\n\n ```text\n gactions login\n ```\n\n When the flow is complete, the CLI automatically authenticates.\n\nCreate and set up a project\n---------------------------\n\n| **Note:** Actions project creation is not supported in the gactions CLI.\n\nBefore you can use the gactions command-line tool, you must create a project in\nthe Actions console and give gactions access to the project. To create and set\nup a project, do the following:\n\n1. Go to the [Actions console](https://console.actions.google.com).\n2. Click **New project** , enter a project name, and click **Create project**.\n3. Select a category and click **Next**.\n4. Select **Blank project** and click **Start building**.\n5. Enable the **Actions API** in the Google Cloud console by following the instructions in [Enable and disable\n APIs](https://support.google.com/googleapi/answer/6158841). This allows gactions to interact with your project.\n\nGet the hello world sample\n--------------------------\n\nThe hello world interactive sample shows you how to build a simple Actions\nproject with a single Action powered by Interactive Canvas.\n\n1. Create an empty directory and initialize the Interactive Canvas sample in\n that directory. For example, the following code initializes the sample in an\n `interactive-canvas-sample/` directory, which is used as an example\n throughout this document:\n\n gactions init interactive-canvas --dest interactive-canvas-sample\n cd interactive-canvas-sample\n\n2. Open the `interactive-canvas-sample/sdk/settings/settings.yaml` file and\n change the value of the `projectId` field to your project's ID.\n\n | **Note:** To get your project's ID, first open your project in the Actions console and click the more *more_vert* icon. Then, select **Project settings** and copy the string in the **Project ID** field.\n\nDeploy and test the sample\n--------------------------\n\nAfter you set up the sample, you can deploy the Interactive Canvas web app and\nyour Actions project. This process creates a draft version of your Actions\nproject that you can deploy to the Actions simulator for previewing and testing:\n\n1. From the `interactive-canvas-sample/` directory, run the following command\n to deploy the Interactive Canvas web app (the contents of the `public/`\n directory).\n\n firebase deploy --project \u003cvar translate=\"no\"\u003ePROJECT_ID\u003c/var\u003e --only hosting\n\n You can see a rendered version of the web app at the URL returned by the\n Firebase CLI in a browser:\n `https://`\u003cvar translate=\"no\"\u003ePROJECT_ID\u003c/var\u003e`.web.app`.\n2. Open the `interactive-canvas-sample/sdk/webhooks/ActionsOnGoogleFulfillment/index.js` file and\n change the value of the `CANVAS_URL` variable to your project's web app URL.\n\n const CANVAS_URL = 'https://\u003cvar translate=\"no\"\u003ePROJECT_ID\u003c/var\u003e.web.app';\n\n3. From the `interactive-canvas-sample/sdk/` directory, run the following\n command to push the local version of your Actions project to the console as a\n draft version:\n\n gactions push\n\n | **Note:** You'll see some warnings related to not having some project settings and resources defined. You can safely ignore them or now.\n4. From the `interactive-canvas-sample/sdk/` directory, run the following\n command to test your Actions project in the simulator:\n\n gactions deploy preview\n\n | **Note:** If you are using a new project, you need to enable the [Cloud Functions\n | API](https://console.cloud.google.com/apis/library/cloudfunctions.googleapis.com) and associate a billing account with your project in Google Cloud. You can enable the Cloud Functions API by visiting the [Cloud Console](https://console.cloud.google.com/billing).\n5. Open the link that the command-line tool returns to go to the simulator.\n\n6. In the simulator, enter *\"Talk to Interactive canvas sample\"* to start the Action. You\n should see a spinning triangle powered by the web app deployed at\n `https://`\u003cvar translate=\"no\"\u003ePROJECT_ID\u003c/var\u003e`.web.app`\n\n **Figure 1**. The simulator previewing the Actions project"]]