设置 (Dialogflow)
使用集合让一切井井有条
根据您的偏好保存内容并对其进行分类。
本页面介绍了如何创建 Actions 项目和配置 Dialogflow 代理。
设置 Firebase
您可以使用 Firebase CLI 这一个工具为 Interactive Canvas Action 托管 webhook 逻辑和 Web 应用。在创建 Actions 项目和 Dialogflow 代理之前,请按照 Firebase 托管使用入门中的说明安装和设置 Firebase。
创建项目
- 转到 Actions 控制台。
- 点击 New project。
- 为您的项目输入名称,然后点击 Create project。
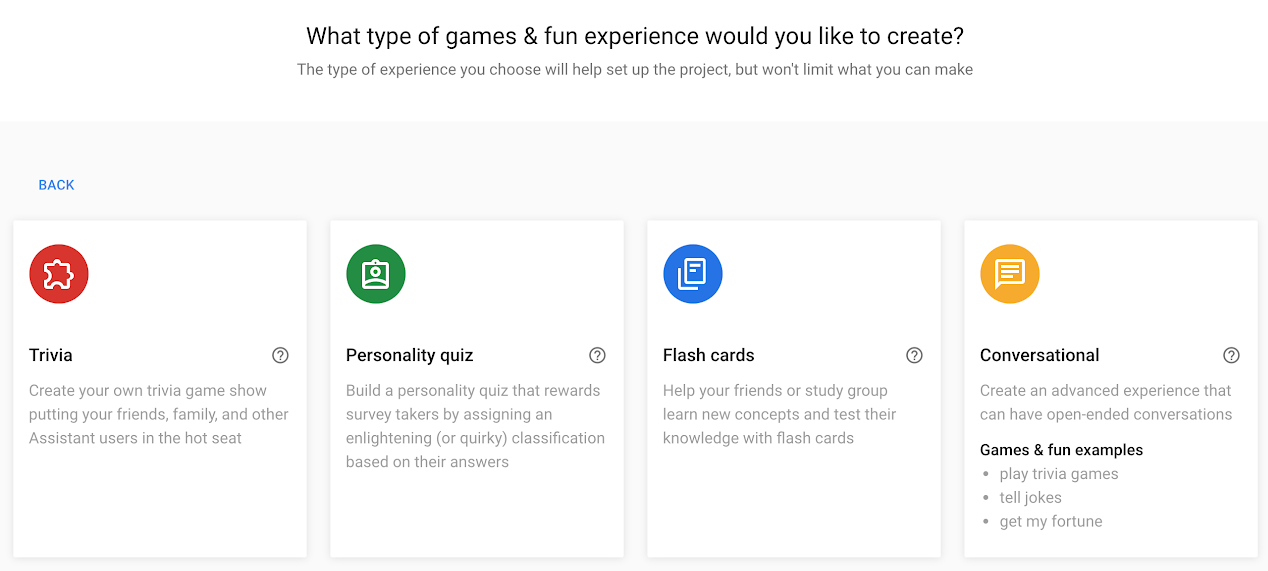
- 点击游戏与娱乐卡片。
点击对话卡片。

点击顶部菜单中的部署。然后,点击目录信息。
在页面底部,勾选 Interactive Canvas 下的选项。

点击顶部菜单中的概览。
点击 Build your Action,然后点击 Add Action(s)。
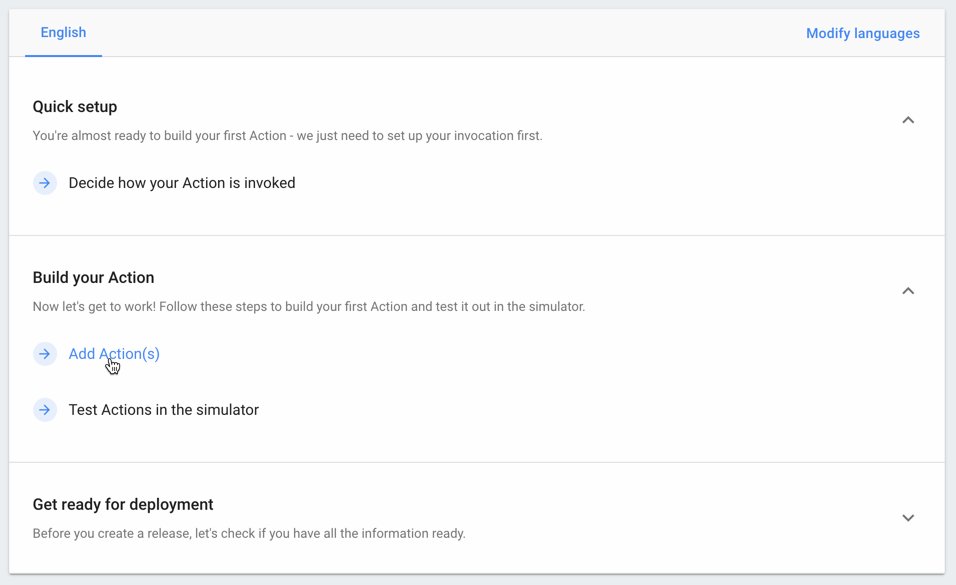
点击添加首个操作。
在内置意图下,选择玩游戏,然后点击开始使用 Dialogflow。
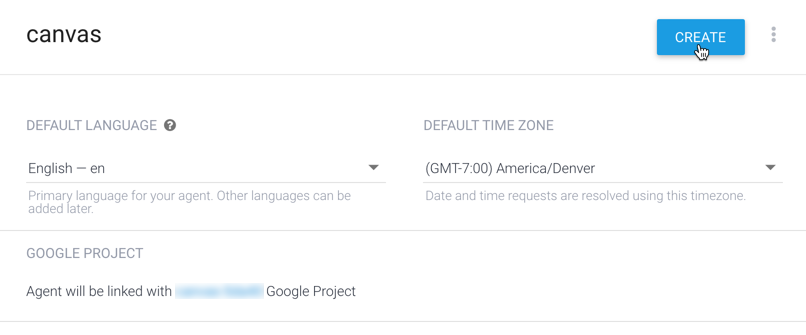
在代理创建页面上,确认代理的默认语言、时区和名称,然后点击创建。
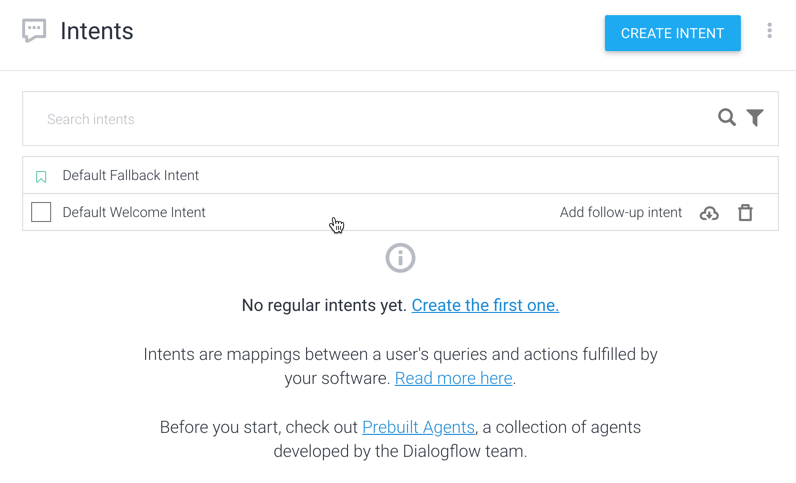
在意图页面上,点击默认欢迎意图。

在页面底部,点击 Fulfillment 以展开该部分。
点击为此意图启用 webhook 调用。

点击保存。
如未另行说明,那么本页面中的内容已根据知识共享署名 4.0 许可获得了许可,并且代码示例已根据 Apache 2.0 许可获得了许可。有关详情,请参阅 Google 开发者网站政策。Java 是 Oracle 和/或其关联公司的注册商标。
最后更新时间 (UTC):2025-07-26。
[null,null,["最后更新时间 (UTC):2025-07-26。"],[[["\u003cp\u003eThis guide details setting up an Actions project and configuring its corresponding Dialogflow agent for Interactive Canvas integration.\u003c/p\u003e\n"],["\u003cp\u003eFirebase CLI is recommended for hosting both the webhook logic and web app for your Action, requiring prior setup following Firebase's guidelines.\u003c/p\u003e\n"],["\u003cp\u003eProject creation involves steps within the Actions console, guiding you through selecting project type and enabling Interactive Canvas features.\u003c/p\u003e\n"],["\u003cp\u003eDialogflow agent configuration focuses on enabling webhook calls for the Default Welcome Intent to facilitate communication with your Action's backend.\u003c/p\u003e\n"],["\u003cp\u003eUsers should familiarize themselves with Firebase hosting setup and the Actions console workflow to successfully create and configure their projects.\u003c/p\u003e\n"]]],[],null,["# Setup (Dialogflow)\n\nThis page goes over creating your Actions project and configuring a Dialogflow\nagent.\n\nSet up Firebase\n---------------\n\nYou can host both your webhook logic and web app for your Interactive Canvas\nAction with one tool: the Firebase CLI. Before creating your Actions project\nand Dialogflow agent, follow the instructions on [Get started with Firebase\nhosting](https://firebase.google.com/docs/hosting/quickstart)\nto install and set up Firebase.\n\nCreate a project\n----------------\n\n1. Go to the [Actions console](//console.actions.google.com).\n2. Click **New project**.\n3. Enter a name for your project and click **Create project**.\n4. Click the **Games \\& fun** card.\n5. Click the **Conversational** card.\n\n6. Click **Deploy** in the top menu. Then, click **Directory information**.\n\n7. At the bottom of the page, check the option under **Interactive Canvas**.\n\n8. Click **Overview** in the top menu.\n\n9. Click **Build your Action** then **Add Action(s)**.\n\n10. Click **Add your first action**.\n\n11. Under **Built-in intents** , select **Play game** and click\n **Get started in Dialogflow**.\n\nConfigure the Dialogflow agent\n------------------------------\n\n1. On the agent creation page, confirm the default language, time zone, and\n name for the agent and click **CREATE**.\n\n2. On the **Intents** page, click on **Default Welcome Intent**.\n\n3. At the bottom of the page, click **Fulfillment** to expand the section.\n\n4. Click **Enable webhook call for this intent**.\n\n5. Click **SAVE**."]]