Na tej stronie dowiesz się, jak utworzyć problem w Google Issue Tracker.
Aby utworzyć zgłoszenie, musisz zalogować się na konto Google. Musisz też mieć uprawnienia Tworzenie zgłoszeń lub Administrowanie komponentami w przypadku komponentu, w którym zostanie utworzone zgłoszenie. Jeśli masz uprawnienia Komentowanie problemów, możesz ustawić tylko tytuł i opis problemu. Jeśli masz uprawnienia Edytowanie problemów, możesz ustawić inne pola.
Szablony
Szablony w Google Issue Tracker określają wartości domyślne pól w nowych zgłoszeniach w komponencie. Każdy komponent ma domyślny szablon, ale może mieć dodatkowe szablony skonfigurowane przez pracownika Google, który jest odpowiedzialny za zarządzanie nim. Użytkownicy publiczni i partnerzy nie mogą tworzyć ani modyfikować szablonów powiązanych z komponentem.
Wybierz szablon
Gdy utworzysz problem w narzędziu Issue Tracker, automatycznie zostanie wybrany domyślny szablon komponentu. Jeśli dostępne są dodatkowe szablony, możesz je wybrać z listy Szablon na stronie Utwórz zgłoszenie.

Gdy wybierzesz szablon, pola na stronie zostaną automatycznie wypełnione zdefiniowanymi wartościami domyślnymi.
Tworzenie problemu
Aby utworzyć zgłoszenie:
Otwórz narzędzie Issue Tracker w przeglądarce.
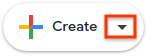
Kliknij Utwórz problem.
Issue Tracker otworzy stronę Utwórz problem z wybranym polem Komponent. To pole zawiera listę komponentów.
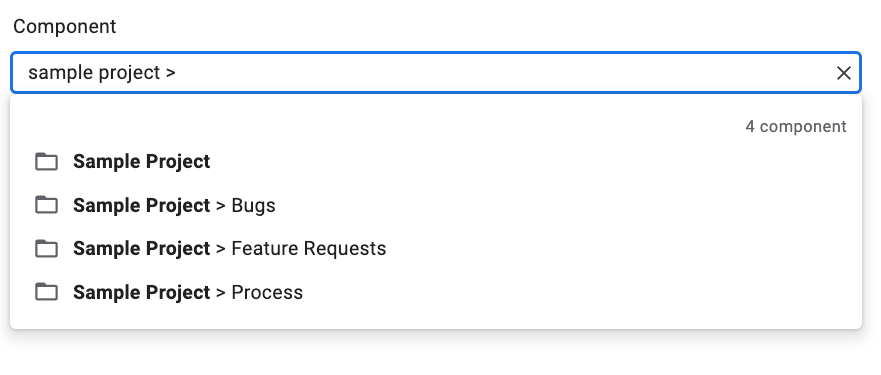
Użyj menu, aby znaleźć komponent, w którym chcesz zgłosić problem. Możesz wyszukiwać tylko komponenty, w przypadku których masz uprawnienia Tworzenie zgłoszeń lub Administrowanie komponentami.
(Opcjonalnie) Wybierz szablon, który najlepiej pasuje do zgłaszanego problemu. Niektóre komponenty mają tylko szablon domyślny.
Wpisz tytuł w polu Tytuł. Tytuł jest wyświetlany, gdy przeglądasz szczegóły problemu, a także w wynikach wyszukiwania, na listach najpopularniejszych problemów i w innych miejscach, w których wyświetlane są listy problemów.
Wybierz priorytet z menu Priorytet. Pole Priorytet jest widoczne tylko wtedy, gdy masz uprawnienia Edytowanie zgłoszeń.
Na liście Typ wybierz typ problemu. Pole Typ jest widoczne tylko wtedy, gdy masz uprawnienia Edytowanie problemów.

(Opcjonalnie) Wyznacz osobę odpowiedzialną lub dodaj adresy e-mail (w tym adresy list adresowych) do list Współpracownicy i CC. Te pola są widoczne tylko wtedy, gdy masz uprawnienia Edytowanie zgłoszeń.
(Zalecane) W polu Opis wpisz opis problemu. To pole może być już częściowo wypełnione, jeśli wybrany szablon zawiera tekst opisu. Możesz też zaznaczyć opcję Markdown, aby napisać opis jako tekst markdown.
(Opcjonalnie) Dodaj załączniki z komputera lub z Dysku.

(Opcjonalnie) Wypełnij zaawansowane pola dotyczące problemu.
Możesz je wyświetlić, przełączając panel Pola zaawansowane. Panel Pola zaawansowane jest widoczny tylko wtedy, gdy masz uprawnienia Edytowanie zgłoszeń. W większości przypadków podczas tworzenia zgłoszenia możesz pominąć pola zaawansowane. W przypadku niektórych komponentów musisz jednak wpisać wartości. W takim przypadku automatycznie pojawi się sekcja Pola zaawansowane, a pola wymagane zostaną oznaczone gwiazdką (*).

Aby przesłać problem, kliknij przycisk Utwórz. Możesz też kliknąć Utwórz i rozpocznij kolejny, aby przesłać problem i otworzyć nową stronę Utwórz problem, która będzie wstępnie wypełniona wartościami używanymi w przypadku utworzonego właśnie problemu.

Tworzenie problemu na podstawie istniejącego
Możesz też utworzyć problem na podstawie istniejącego. Ta metoda może zaoszczędzić Ci czas, ponieważ wykorzystuje istniejący problem do wstępnego wypełniania niektórych pól.
Aby utworzyć problem na podstawie istniejącego:
Otwórz istniejący problem.
Kliknij przycisk obok opcji Utwórz.
Z listy wybierz sposób utworzenia nowego problemu. Opcje na liście rozwijanej różnią się w zależności od wyświetlanej strony. Przycisk staje się widoczny tylko wtedy, gdy jest dostępna co najmniej 1 opcja.
Dostępnych jest 7 opcji.
| Opcja | Opis | Wyświetla się, gdy |
|---|---|---|
| W tym samym komponencie | Rozpoczyna nowy problem z komponentem ustawionym na bieżący komponent. | (1) Zarządzanie komponentem, (2) wyświetlanie problemów w komponencie, (3) wyświetlanie problemu |
| Podobne do bieżącego problemu | Rozpoczyna nowy problem z polami bieżącego problemu skopiowanymi do nowego problemu. | Wyświetlanie problemu |
| Zablokowane z powodu bieżącego problemu | Rozpoczyna nowy problem, w którym bieżący problem jest problemem blokującym. | Wyświetlanie problemu |
| Blokowanie bieżącego problemu | Rozpoczyna nowy problem, w którym bieżący problem jest problemem blokującym. | Wyświetlanie problemu |
| Parent Of Current Issue | Rozpoczyna nowy problem, w którym bieżący problem jest podrzędny. | Wyświetlanie problemu |
| Child Of Current Issue | Rozpoczyna nowy problem, w którym bieżący problem jest problemem nadrzędnym. | Wyświetlanie problemu |
| Na tej samej hotliście | Rozpoczyna nowy problem z dodaną do niego bieżącą listą najpopularniejszych problemów. | (1) Zarządzanie listą produktów do wycofania, (2) Wyświetlanie problemów na liście produktów do wycofania |